
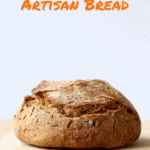
Using just four basic ingredients and minimal hands-on time, you can make freshly baked, Whole Wheat Artisan Bread right in the comfort of your own home! Your friends and family will wonder which bakery you bought it from!

My whole family LOVES homemade whole wheat bread! Who doesn't? It's hearty, fresh and smells amazing! I especially love making Homemade Whole Wheat Bagels and now that I'm a sourdough mom, my Easy Vegan Sourdough Loaf is often on hand. But I know a lot of us don't have tons of time to spend making bread every week. That's why I'm obsessed with this 4 ingredient Whole Wheat Artisan Bread that takes one-bowl and only 10 minutes of hands-on-time to prepare!
Jump To
Why You'll Love This Recipe!
- If you're new to yeasted bread baking, this is the perfect recipe for you as it only requires 4 basic ingredients and a few minutes to prepare.
- It takes about 12-18 hours for this bread to rise, which most of the magic is happening while you sleep!
- I've made with bread with white flour, whole wheat flour and a mix of both and it always tastes amazing.
- Your friends will think you're a professional baker when you serve a loaf of this crusty whole wheat artisan bread!
Ingredients
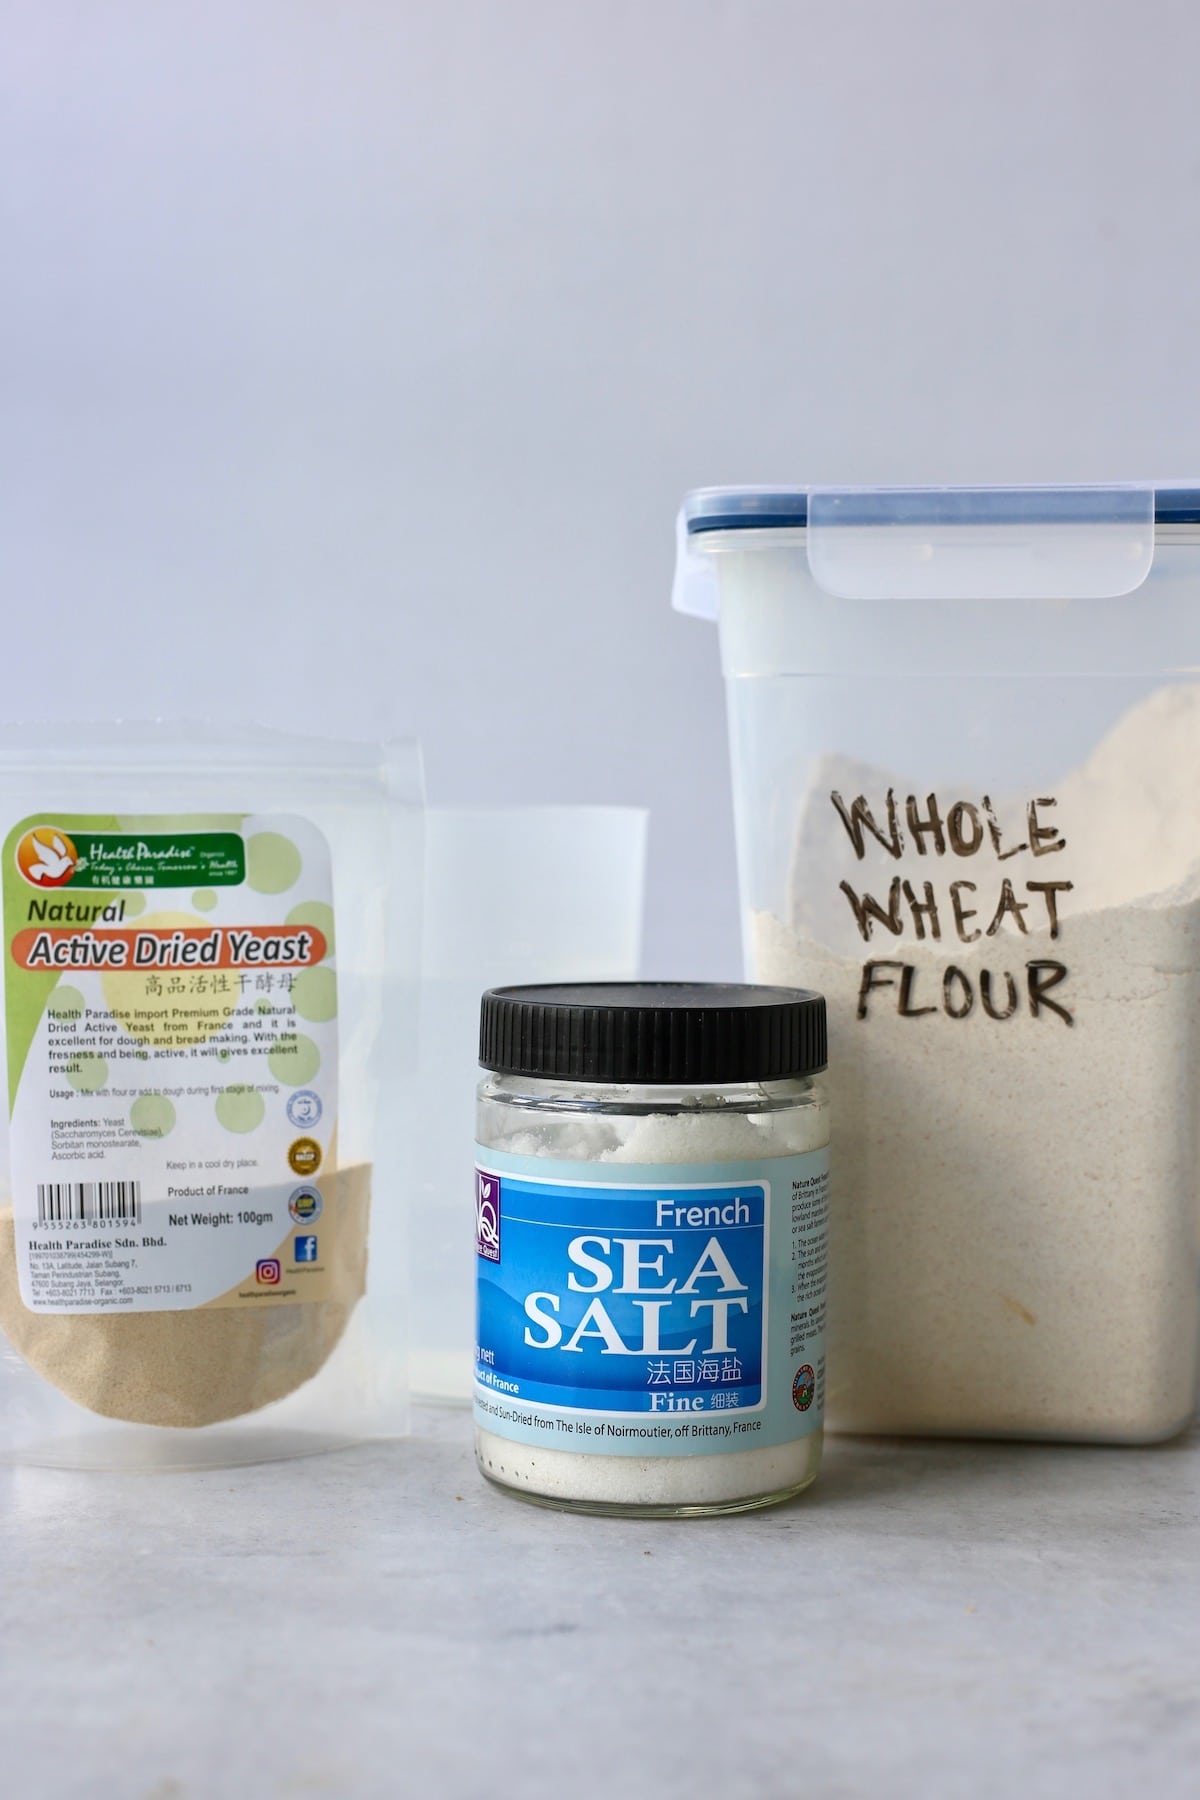
Baking bread used to intimidate me so much, but it honestly couldn't be easier. To make this whole wheat artisan bread, all you'll need are the following 4 ingredients:
- Whole wheat flour - If you don't want to use all whole wheat flour, you can also do a mix of both white and whole wheat flour. However, if you do use some or all white flour, start with adding less water.
- Salt - I recommend using a fine sea salt.
- Active dry yeast - Active dry yeast and instant dry yeast are very similar and, in most cases, interchangeable. Active dry yeast just works more slowly than instant dry yeast and is therefore perfect for the long rise that this recipe requires.
- Water - Don't worry about having your water at the perfect 110F temperature for this recipe. Basic room temperature water is just what you need!
Substitutions & Variations
- Flour - I've made this bread with all white flour, all whole wheat and a mix of both, so it's pretty fool-proof! I personally love the taste of whole wheat bread and love how hearty and dense this loaf is when you make it entirely out of whole wheat flour. But if you want your bread to be a little lighter and softer, try substituting some of the whole wheat flour for white flour. Keep in mind, however, that if you use white flour for part or all of this recipe, you'll probably need less water.
- Yeast - I've never made this bread with anything other than active dry yeast and I think active dry yeast is the best yeast to use when letting your dough rise for a long period of time.
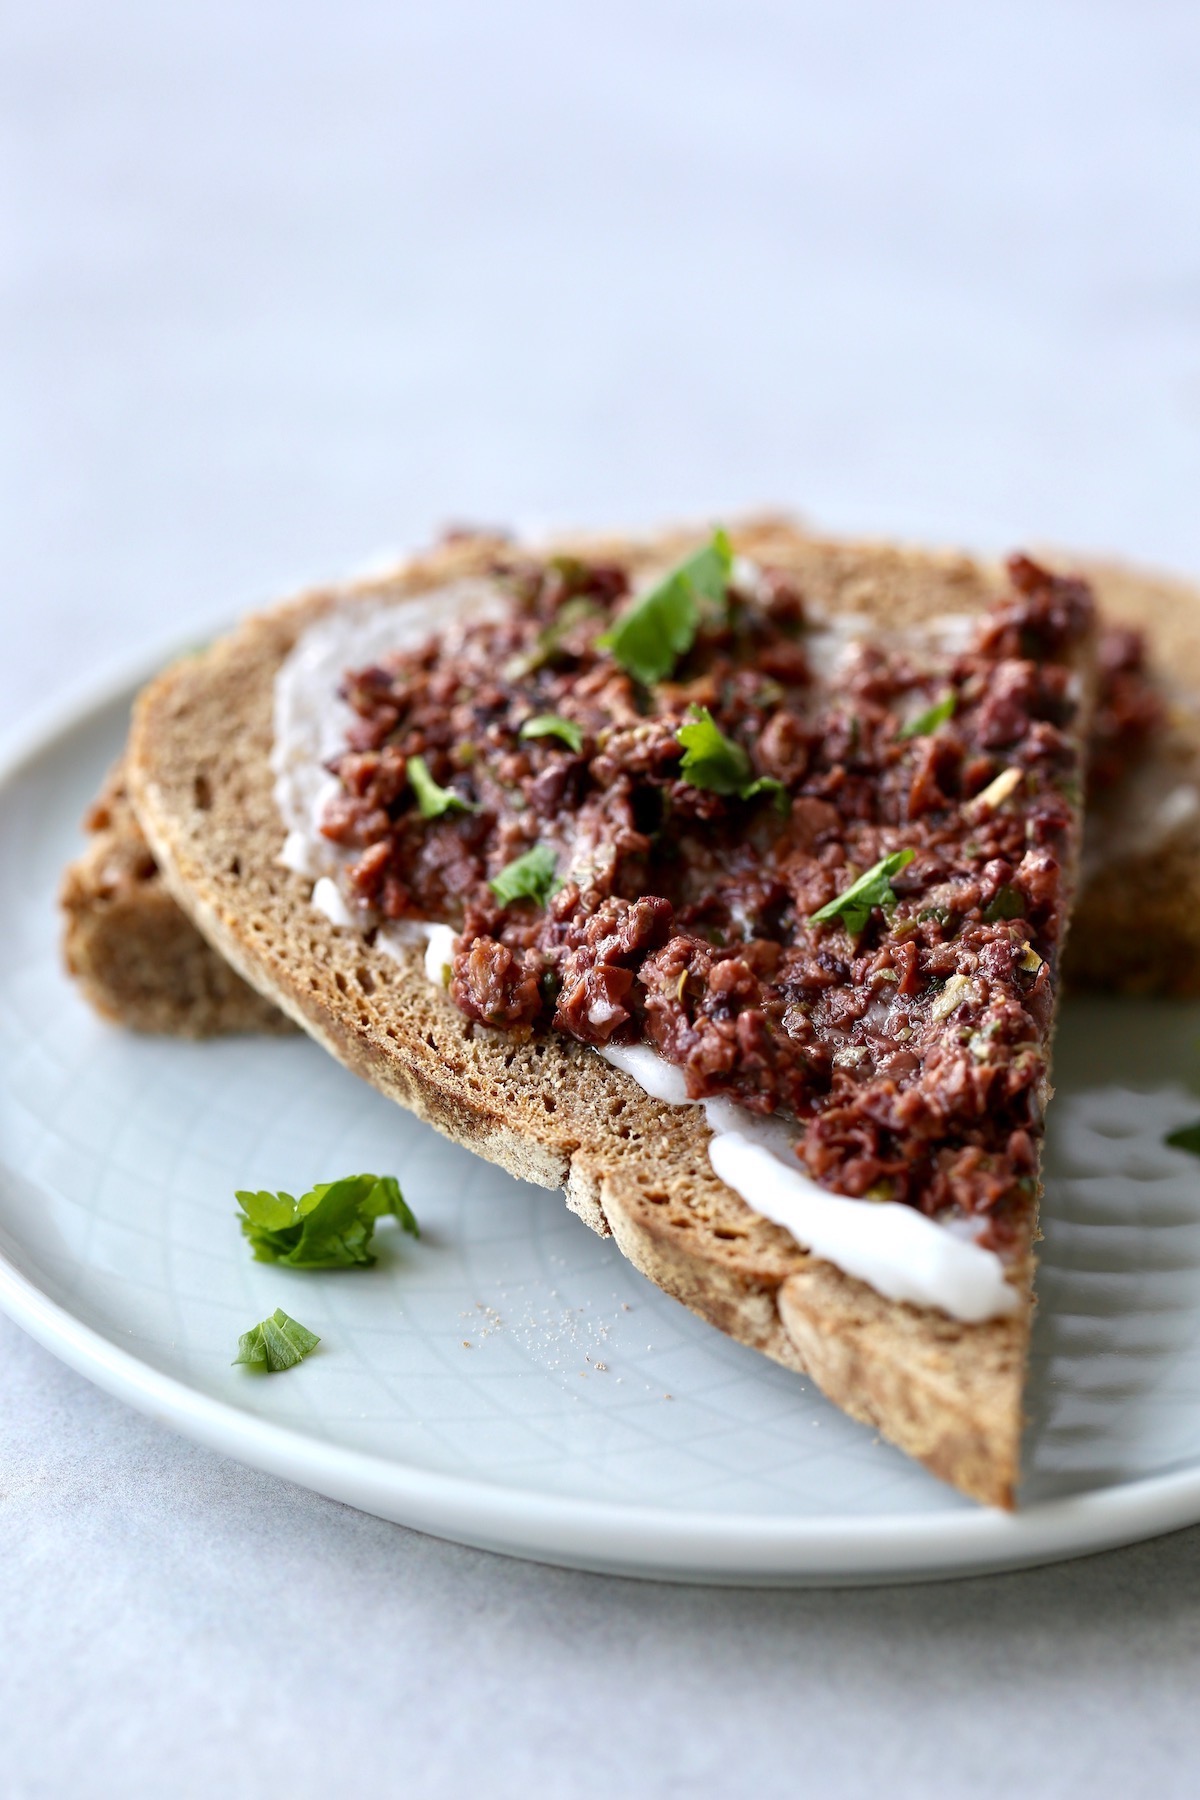
- Flavor - Get creative with different flavors! Try adding in some fresh or dry herbs to the dough before stirring in the water. Maybe even fold some olives into the dough after it has risen over night. Add some flaky sea salt to the top of your dough right after you form it into a ball before baking. The possibilities are endless!
Equipment
You don't need much to make this artisan bread. I personally don't even have everything that you're technically supposed to use to make artisan bread! To make the dough you'll need the following:
- a large mixing bowl
- measuring cups and spoons
- a wooden spoon
Once you've made the dough, you'll need to cover it with some plastic wrap. Then to bake the dough you'll need a dutch oven.
Good news! If you don't have a dutch oven like me, you can also use an oven-safe pot with a lid (one that can withstand 475°F / 250°C degrees) or even two taller round cake pans stacked on each other.
That's the method I use and it works great!
How to Make Whole Wheat Artisan Bread
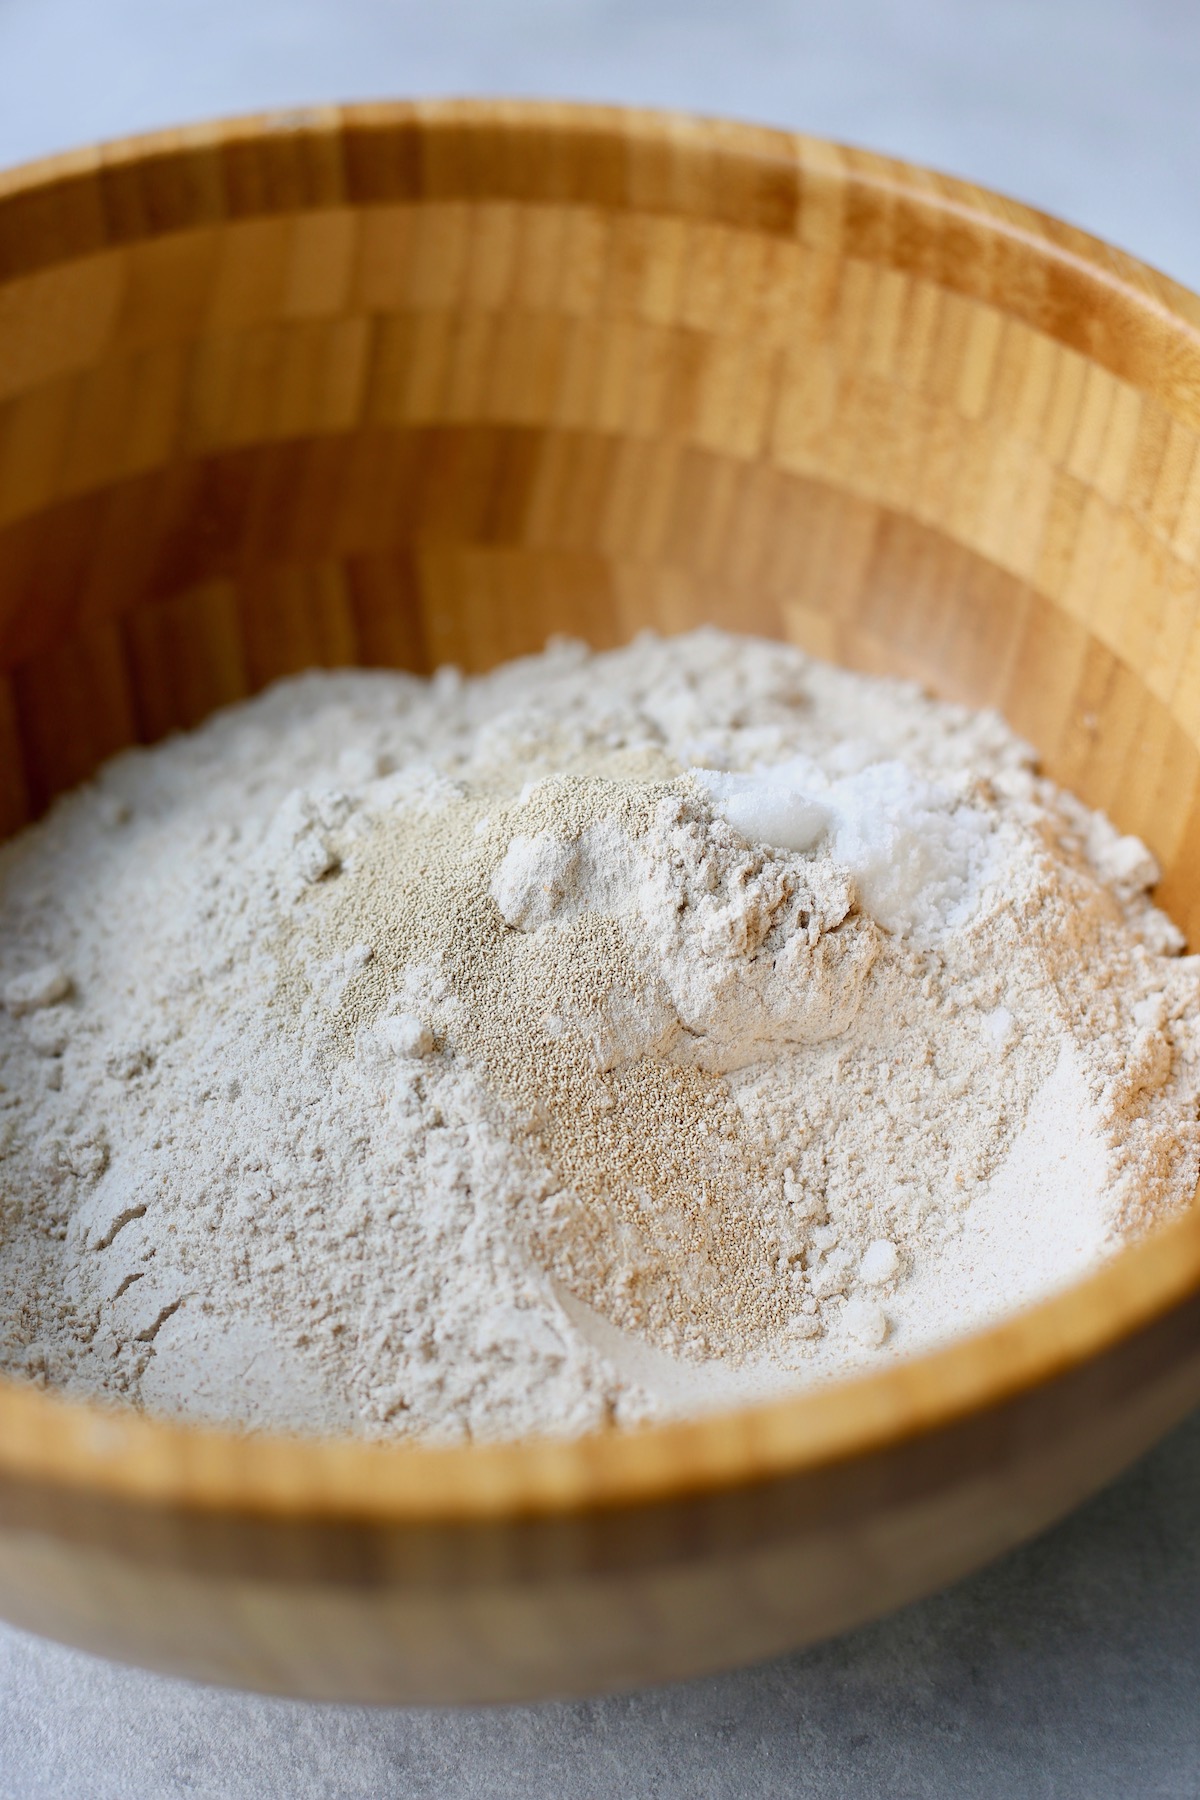
Step 1: In a large bowl whisk together the flour, salt and yeast until combined.
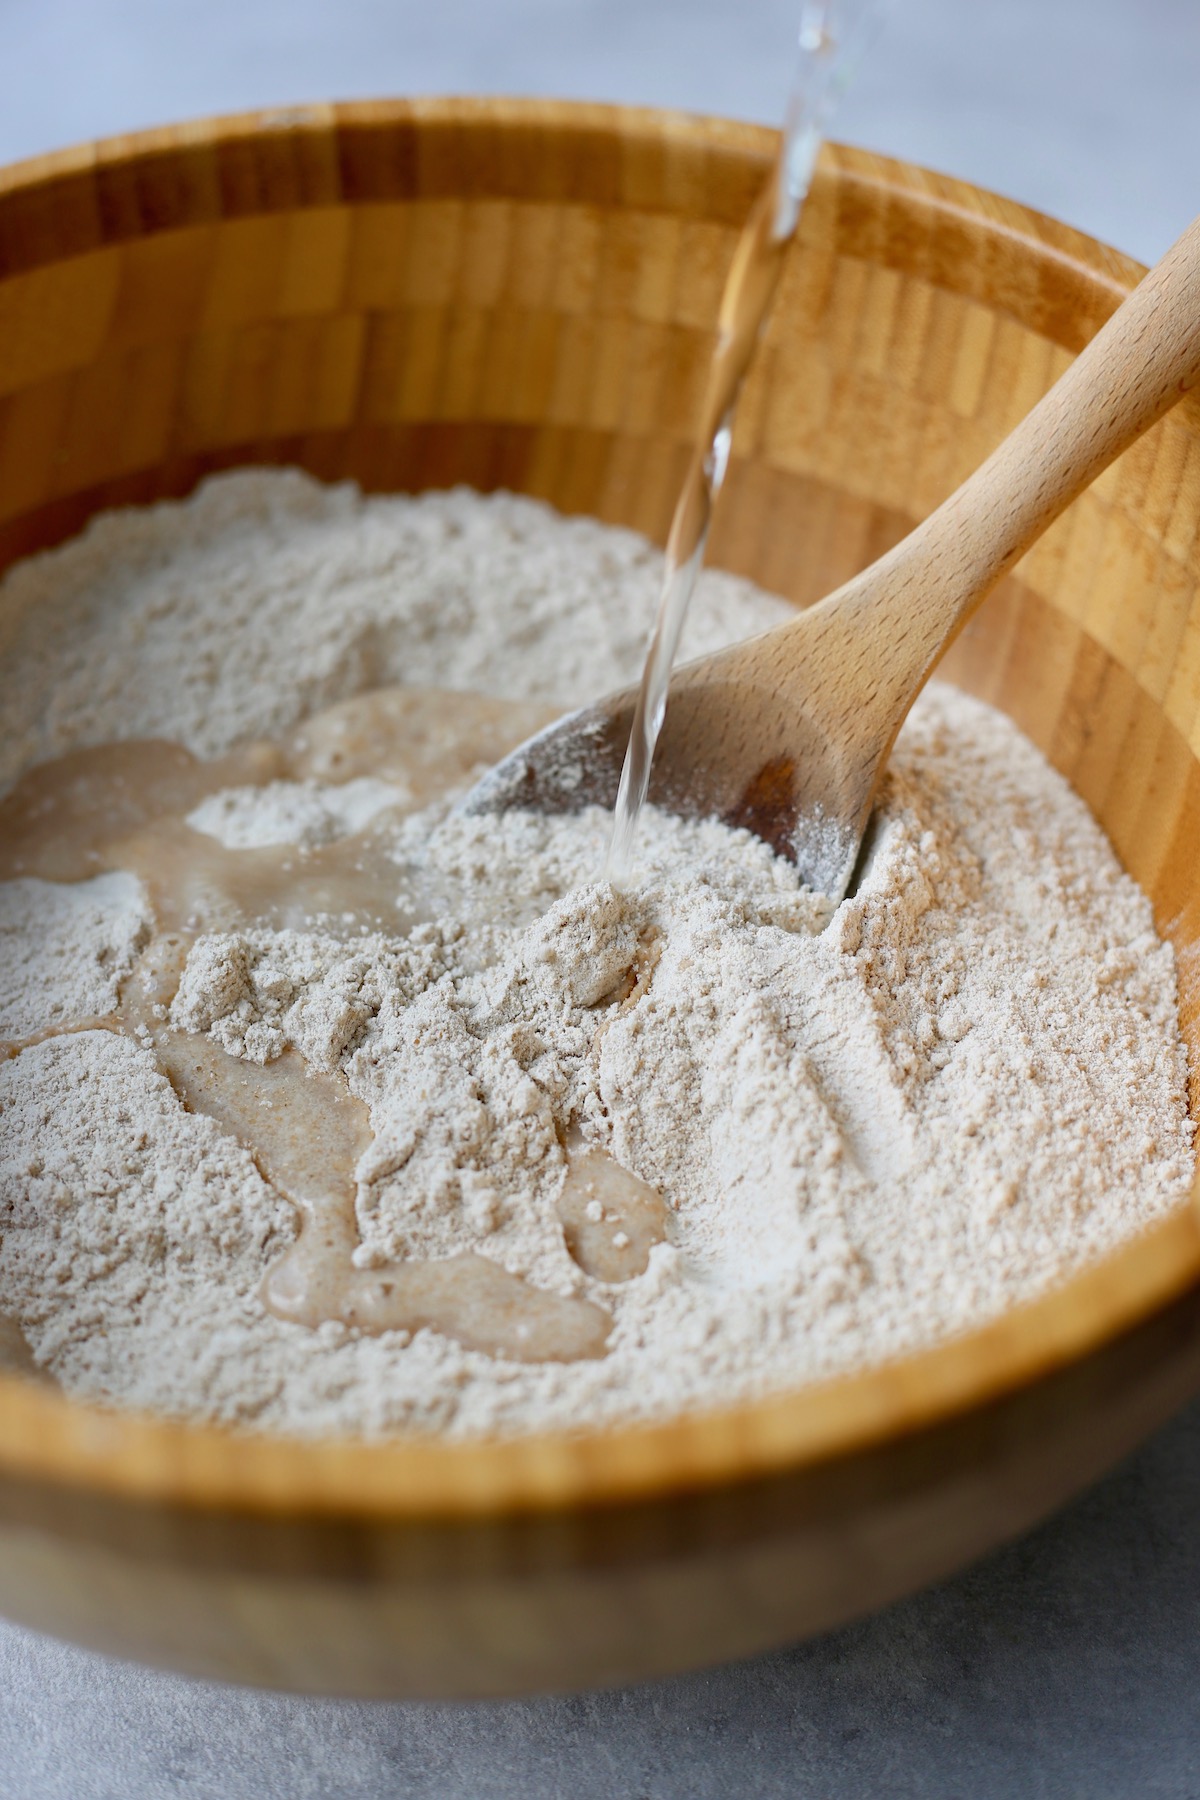
Step 2: Pour in the room temperature water.
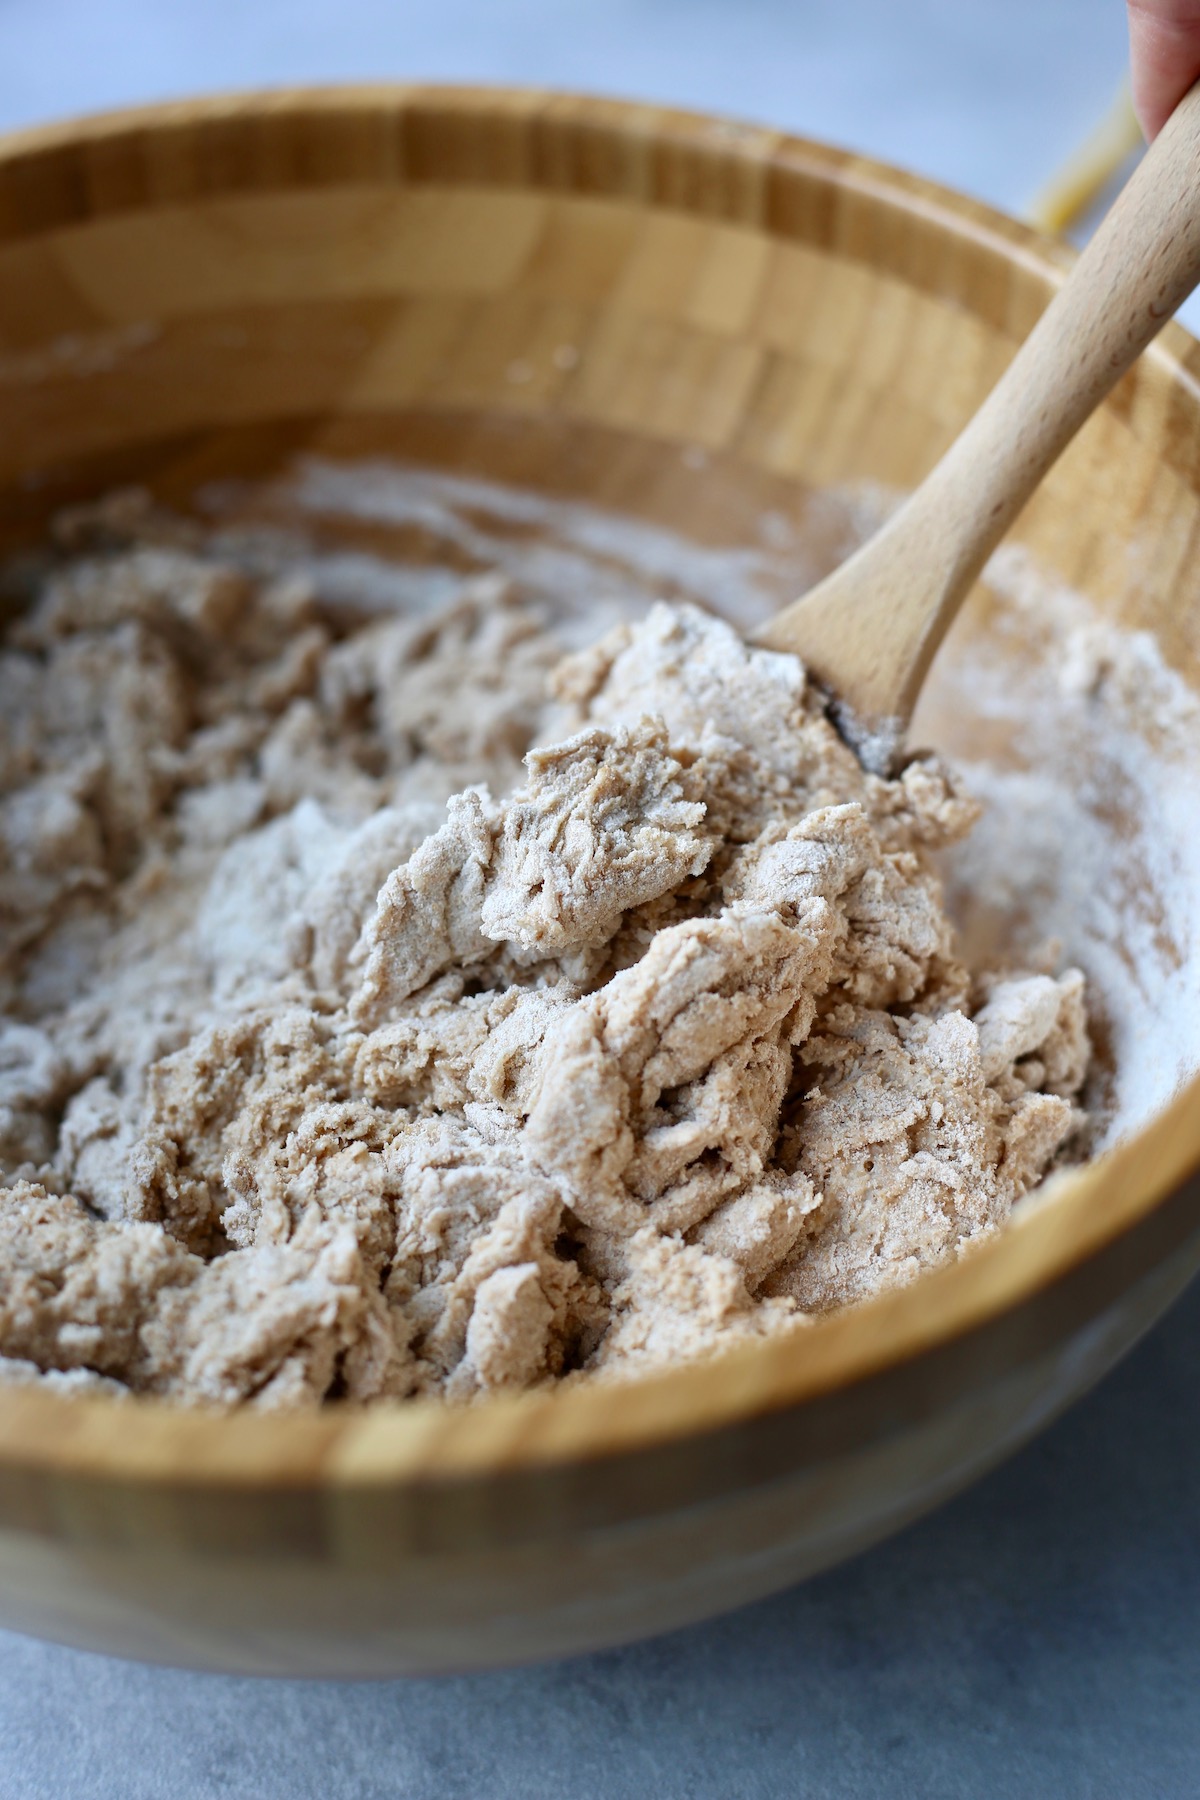
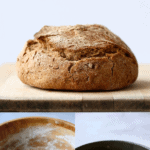
Step 3: Use a wooden spoon to stir the mixture until a dough forms. I usually switch to using my hands to make sure all of the flour has been incorporated into the dough.
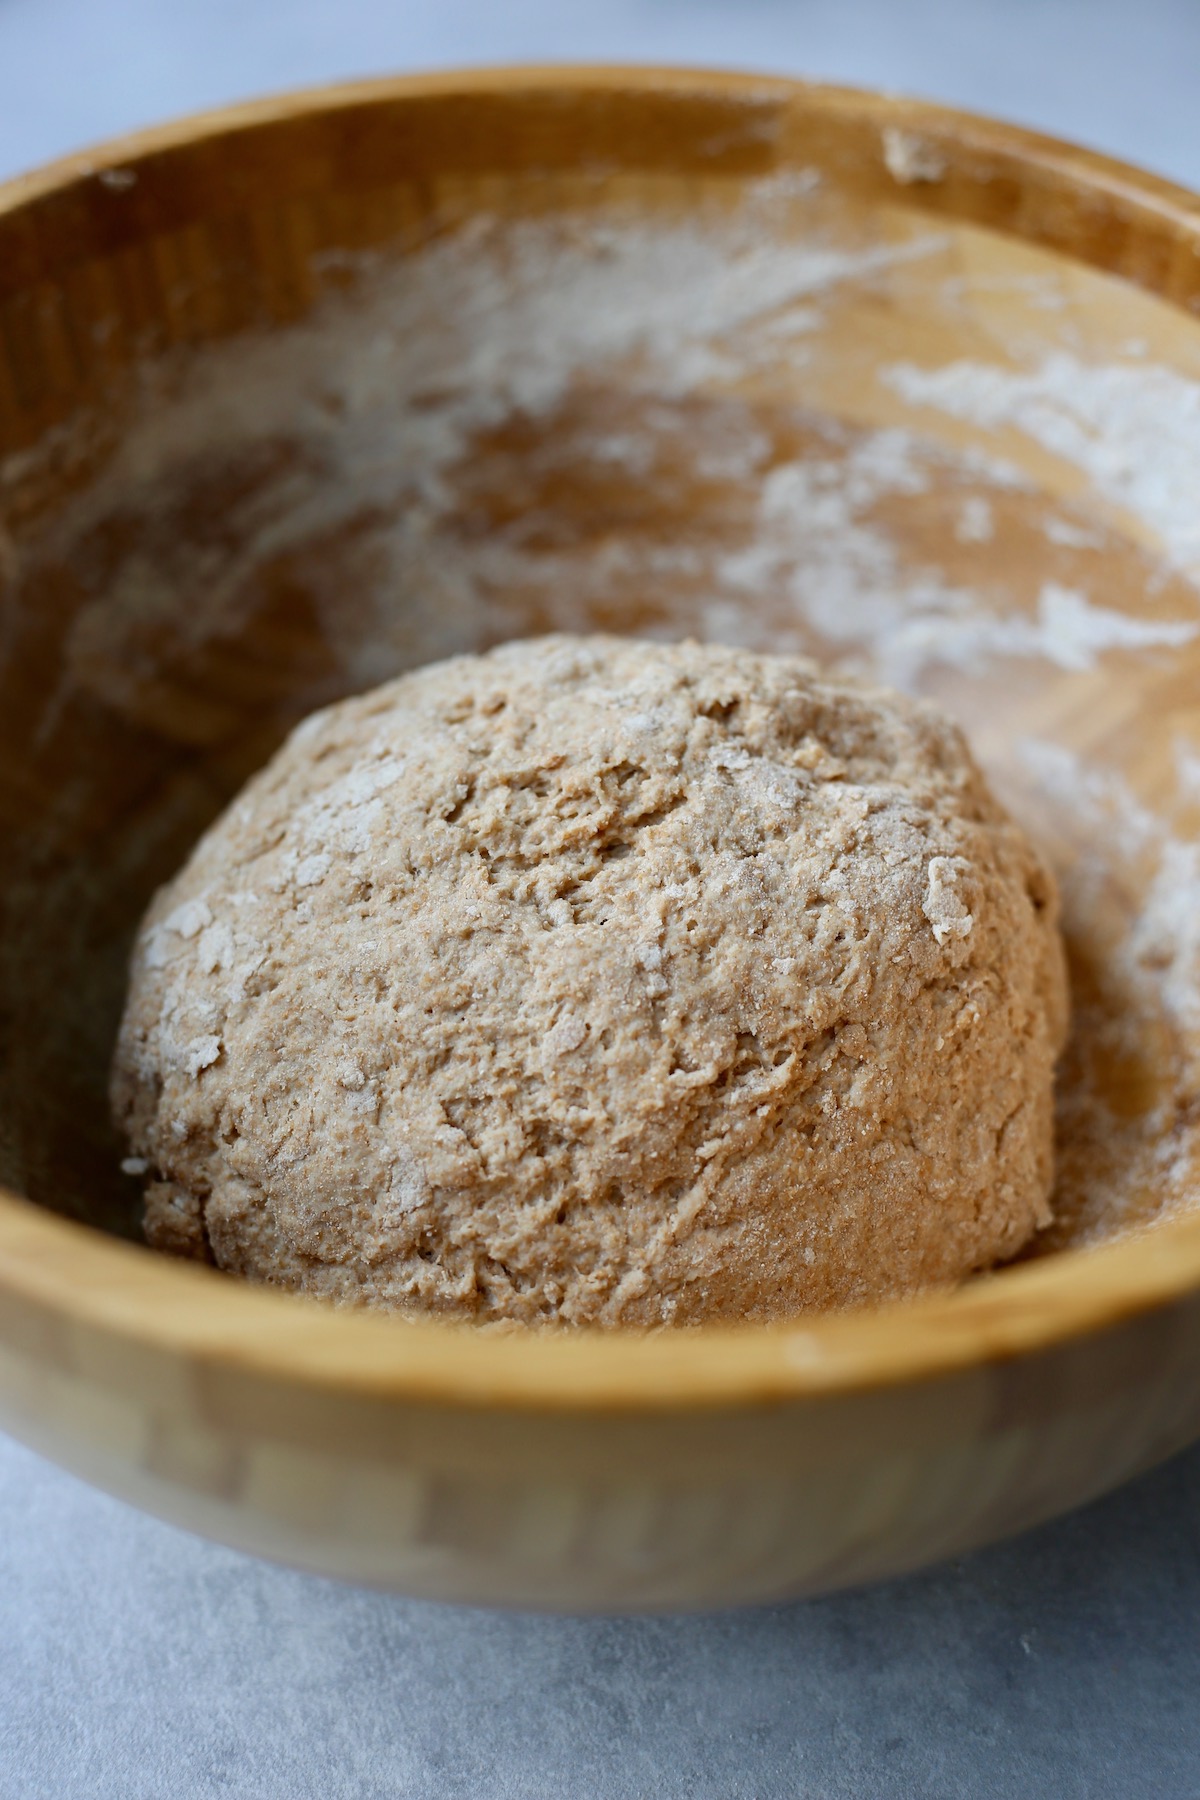
Step 4: Form the dough into a rough ball and leave it in the bowl you mix the dough in.
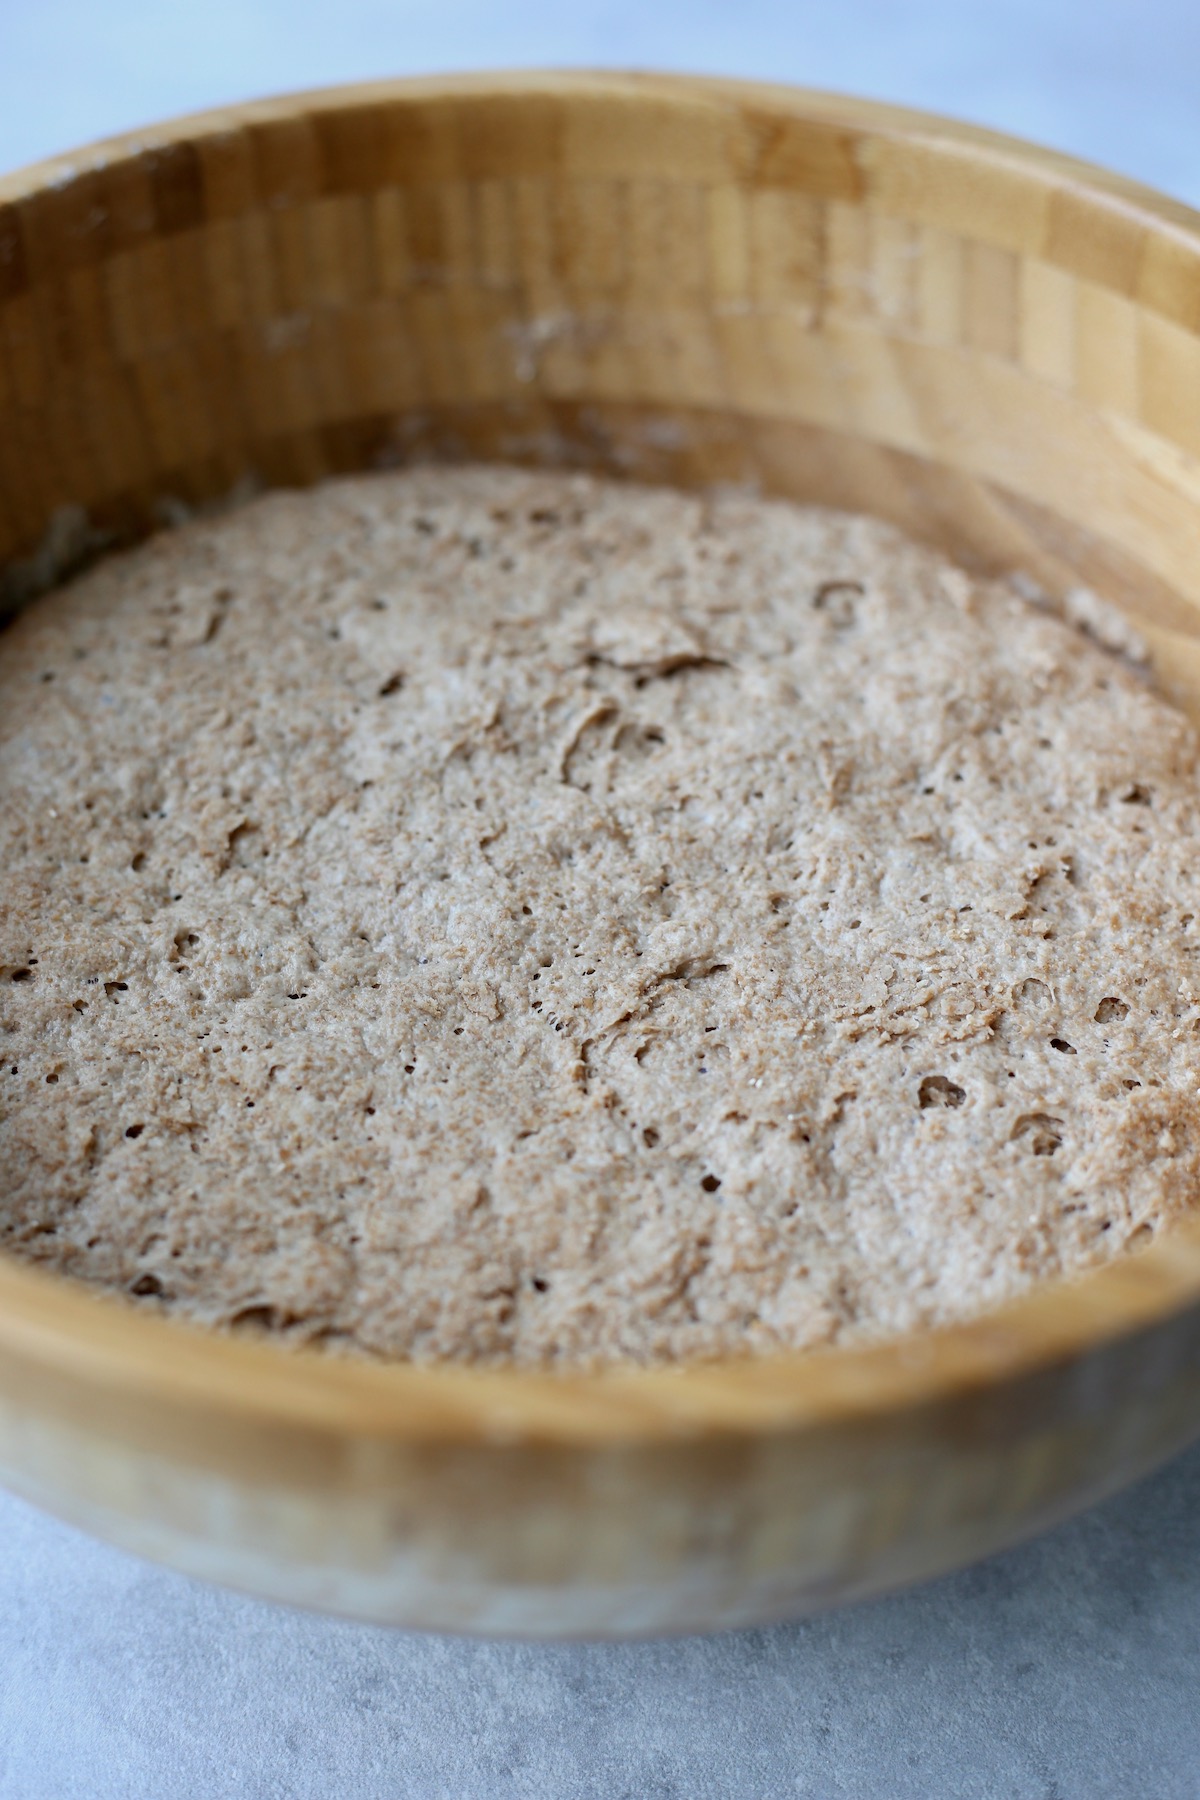
Step 5: Cover the bowl with plastic wrap and let it sit at room temperature for at least 12 hours, even up to 18 hours, until it has risen.
Towards the end of the rising time, preheat your oven to 475°F / 250°C and place a dutch oven with the lid on inside the oven to preheat as well. Once the oven is hot, carefully remove the dutch oven and remove the lid.
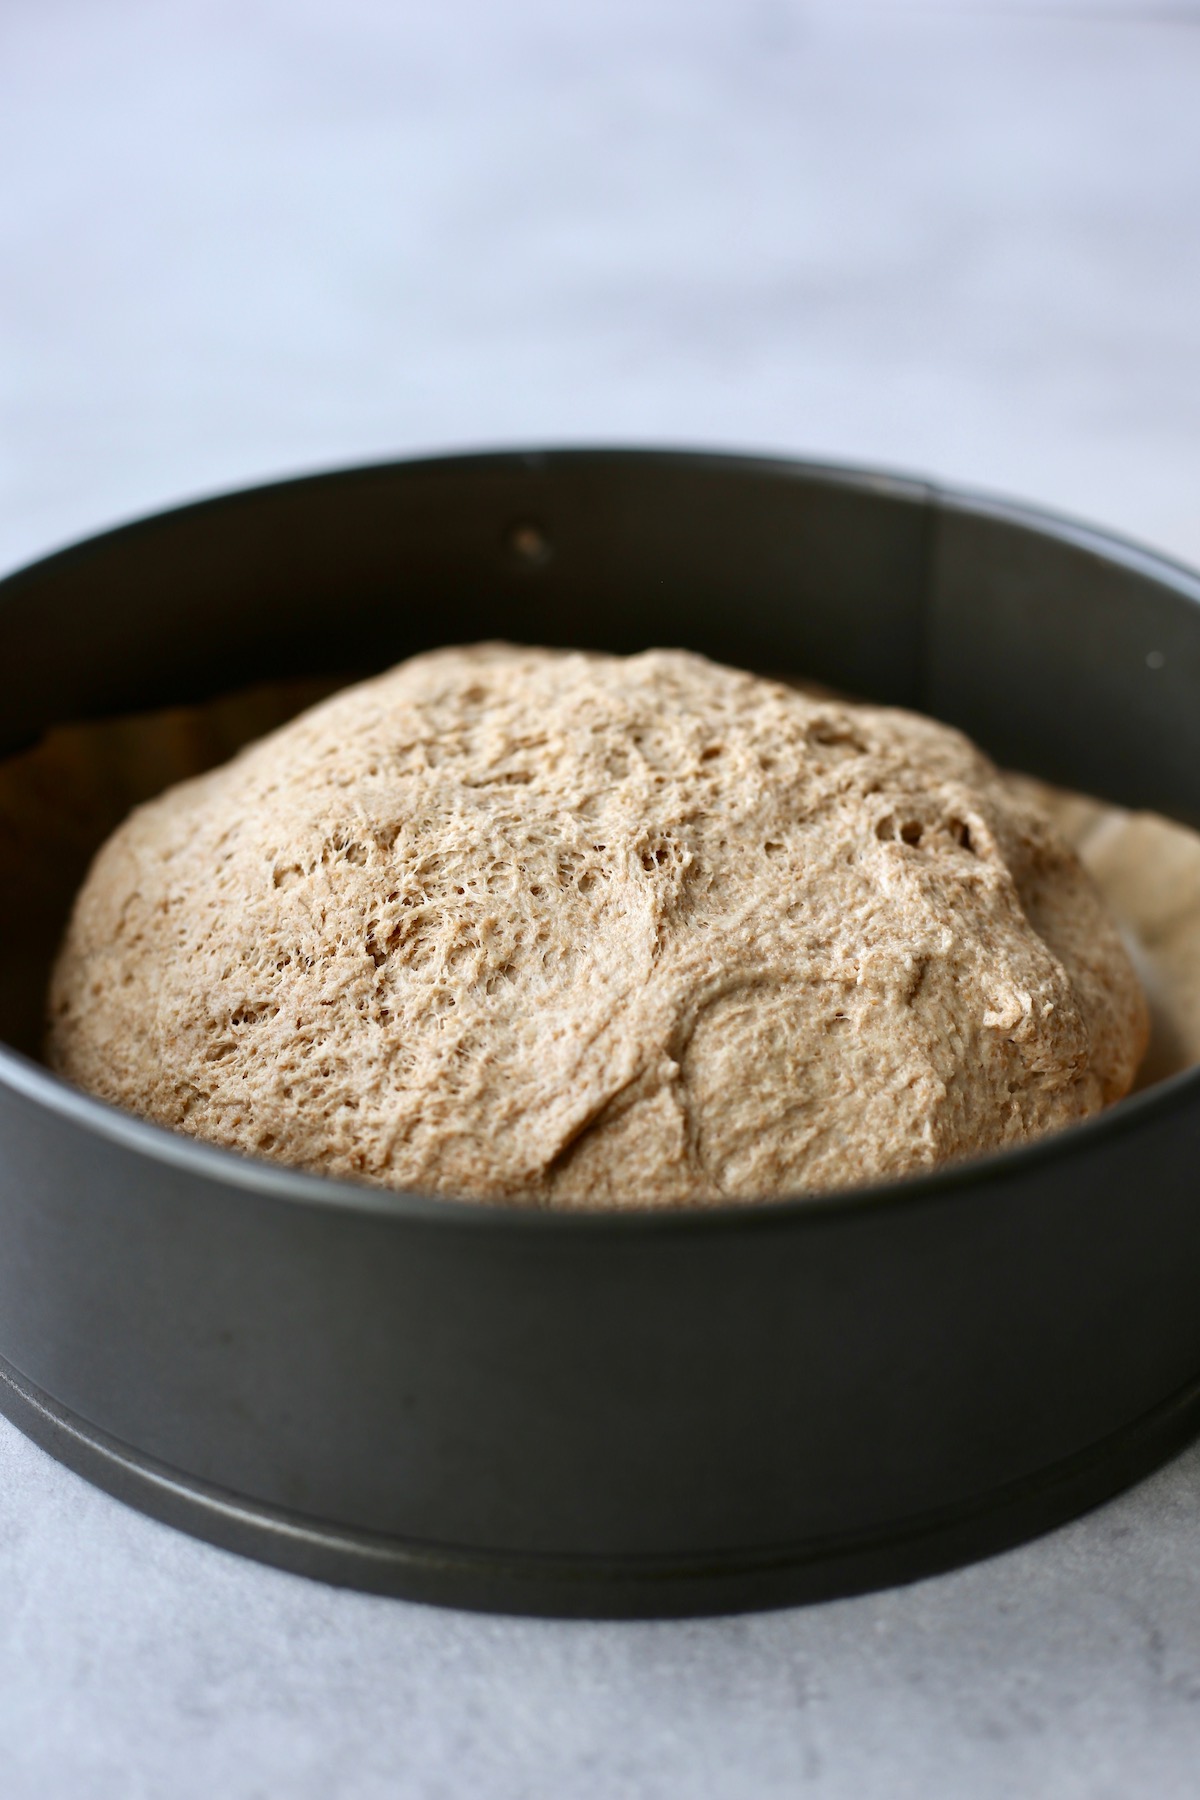
Step 6: Using floured hands, remove the risen dough from the bowl and shape it into a rough ball. Place it on a piece of parchment paper and carefully set it inside of the hot dutch oven. Cover the pot and place it in the oven.
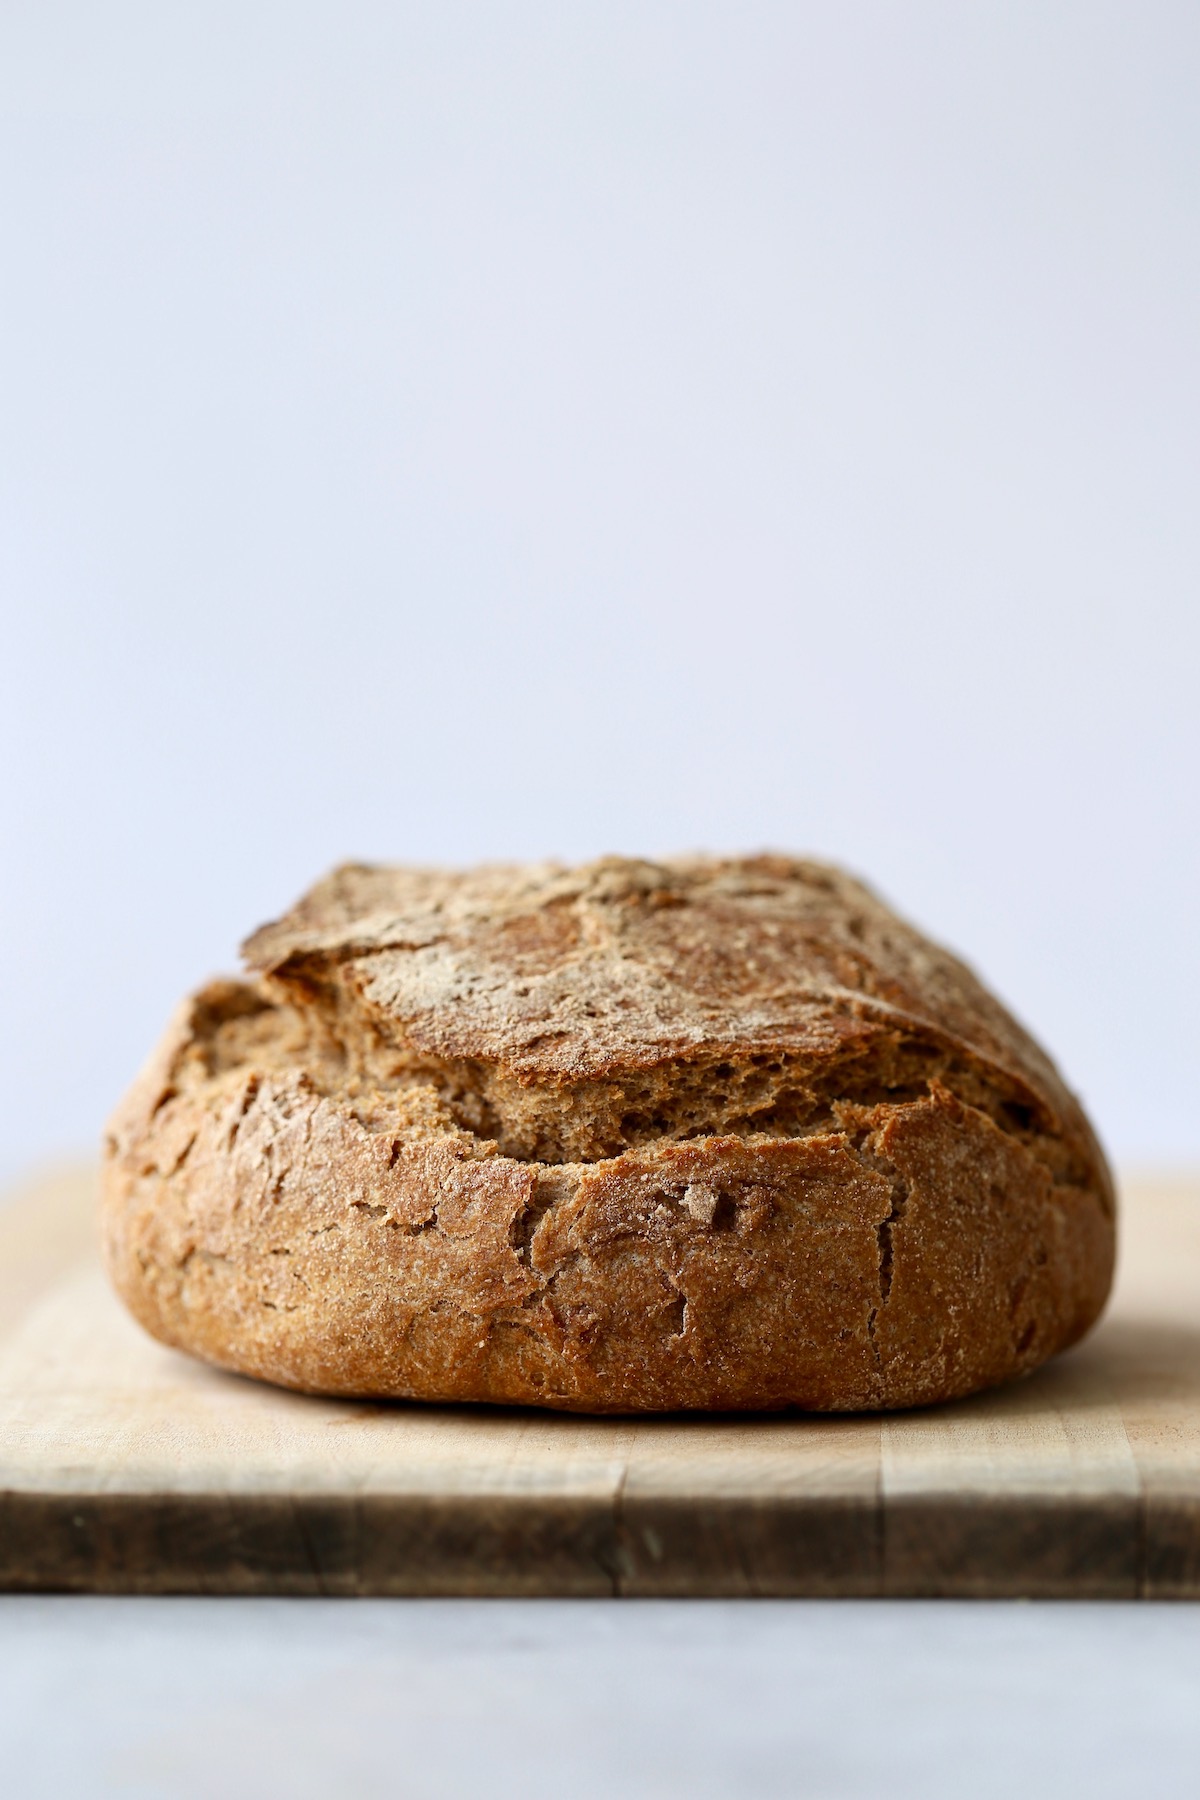
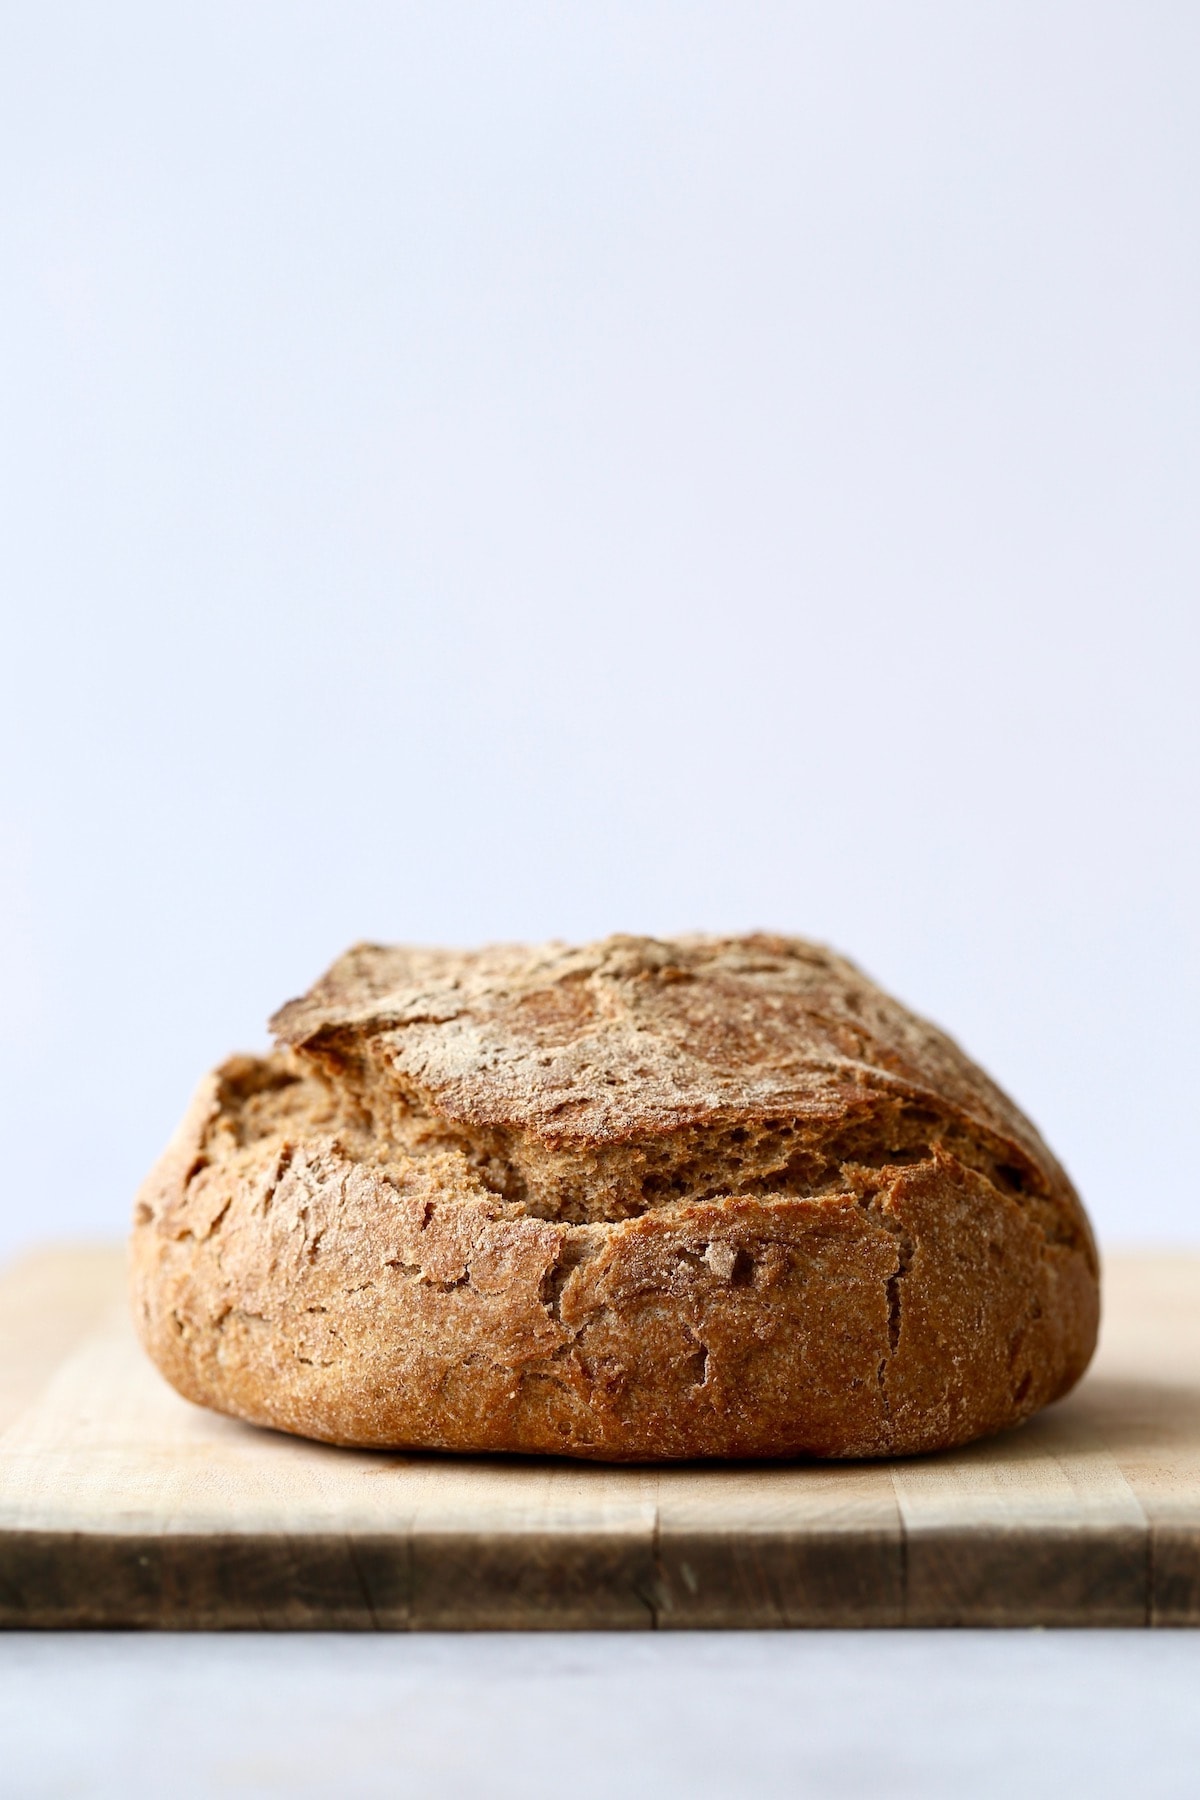
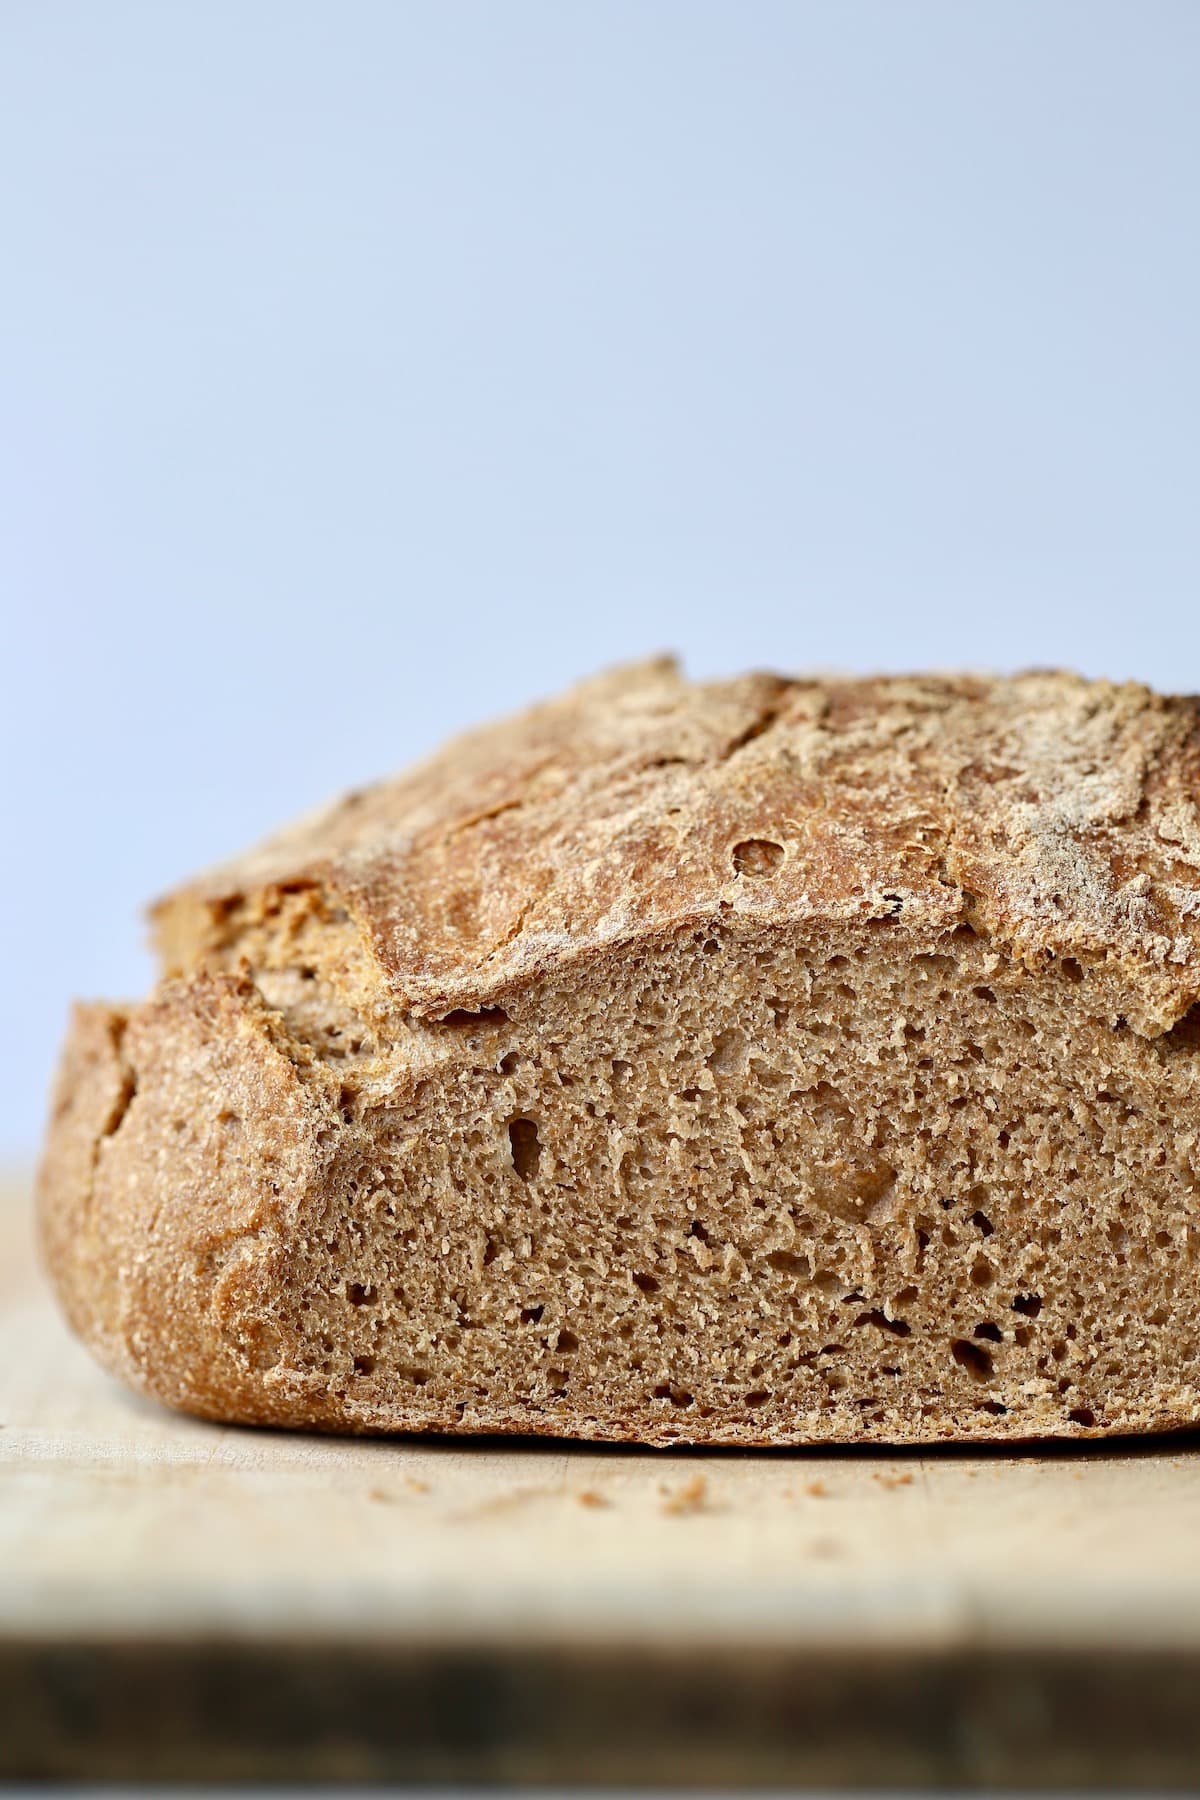
Step 7: Bake the bread covered for 30 minutes. Remove the lid and let the bread bake another 15 minutes or until crusty and golden on top.
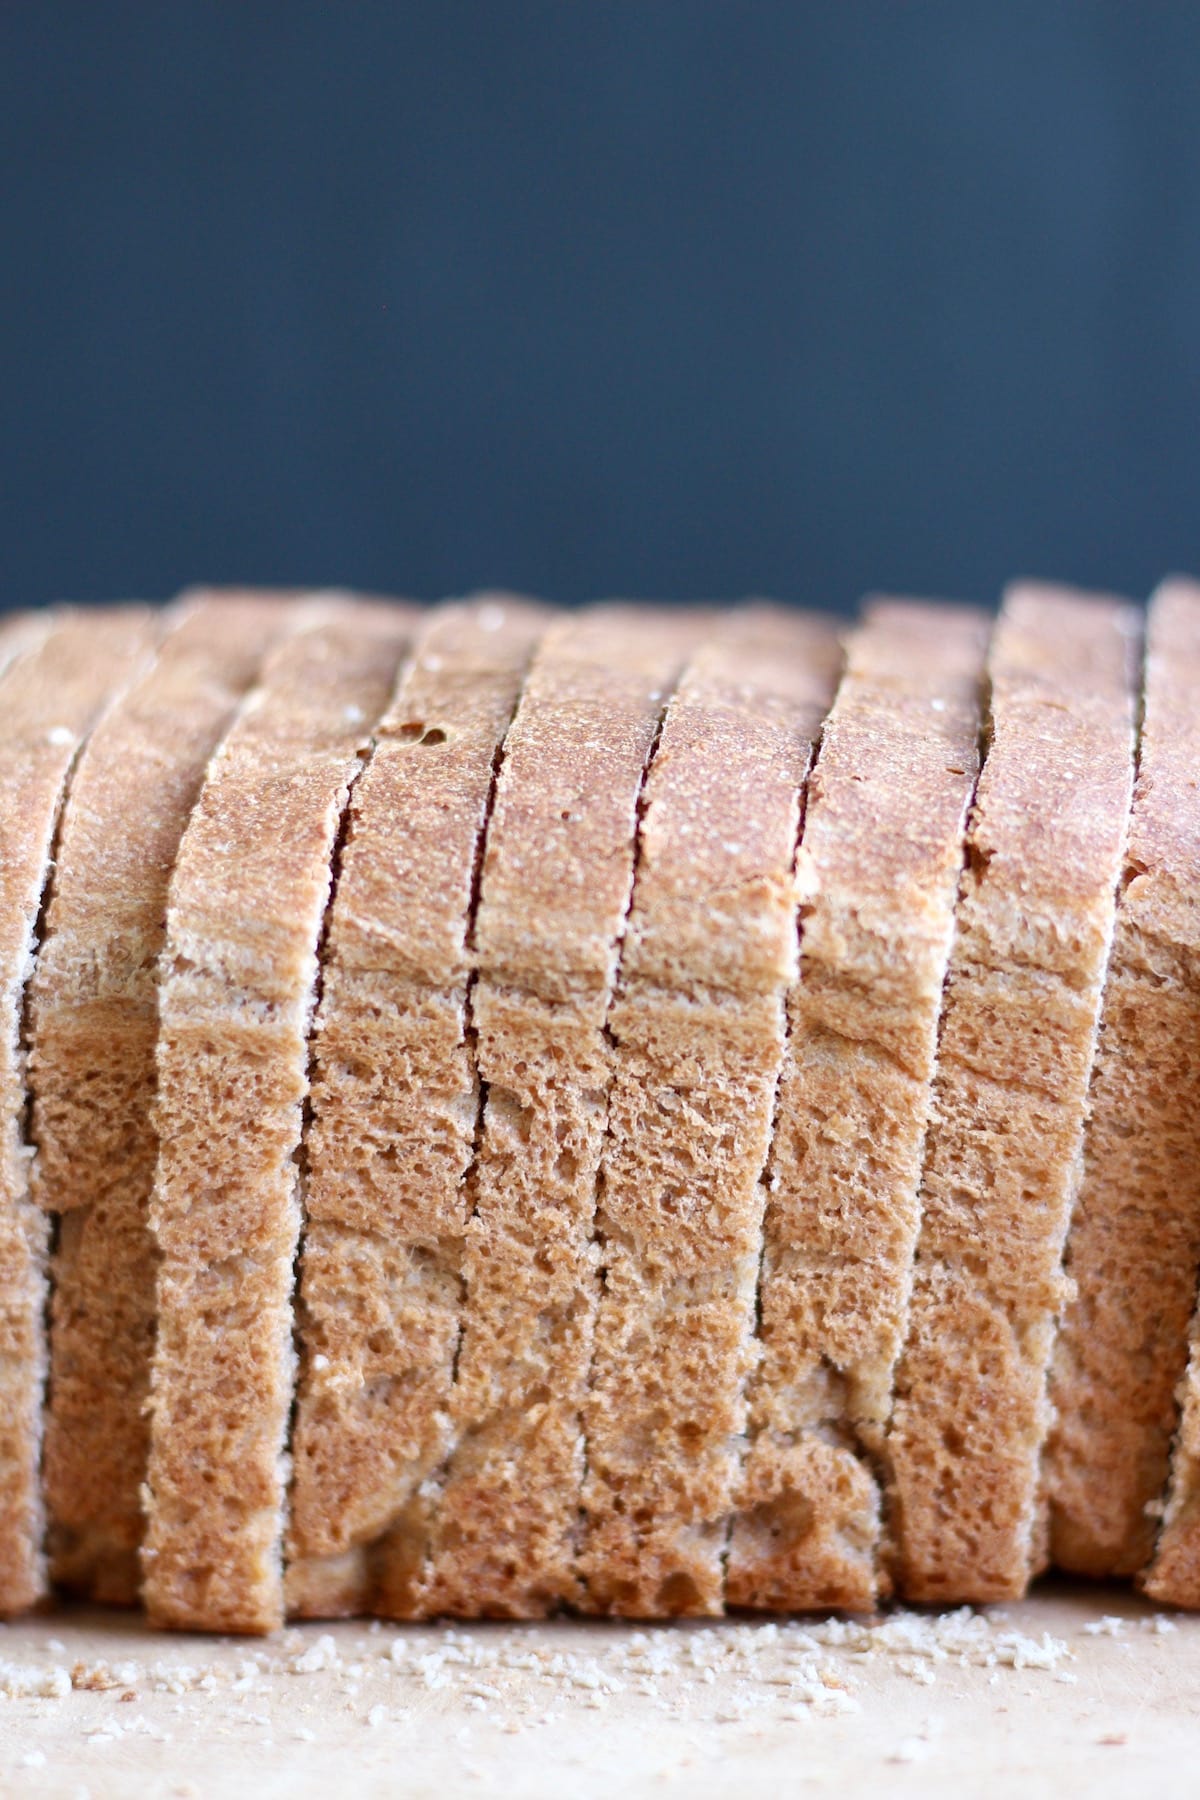
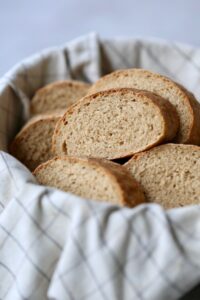
Step 8: After removing the bread from the oven, carefully remove it from the pot and allow it to cool on a wire rack. Slice and Enjoy!
Expert Tips
- I usually make my dough in the evening, let it rise overnight and bake it the next morning.
- Know your environment! I live in hot and humid Malaysia, so my bread is usually ready to bake after only 12 hours of rising. Sometimes it only needs 10 hours to rise. If you live in a colder, cooler climate, your bread may need closer to 18 hours to rise.
- If you use all whole wheat flour to make this artisan bread, it can quickly get hard and stale when left out on the counter. I love to let my loaf cool completely, cut it into slices and then freeze it. This allows my bread to stay fresh for months!
- Once you start making homemade bread, you'll never want to go back to store-bought, so I highly recommend investing in a dutch oven! It makes baking bread so much easier. However, if you don't have a dutch oven, I list out some other ways you can make artisan bread in the FAQs below.
Recipe FAQs
Artisan bread is a loaf of bread that has a crusty exterior and a short shelf life. It also typically requires a longer fermentation/rising time compared to other breads that are baked in a loaf pan.
Artisan bread tastes the best the day you bake it. However, if you have any leftovers, you can store them in a sealed container or bag in the fridge for a couple days or you can slice the loaf, wrap it and freeze it for later use.
If you don't have a dutch oven you can also use two cake pans carefully stacked on each other. Or if you have an oven-safe saucepan or stock-pot with a lid, that works too!
I love to slice and freeze this homemade artisan bread. Then whenever I want to enjoy a slice, I simply place a slice of frozen bread straight into my toaster and toast it until my desired doneness.
This whole wheat artisan bread is heartier and denser than your traditional sandwich loaf. For that reason, we love to pair a slice or two with soup. It also makes for great open face toasts or as a base for bruschetta. I usually don't use this bread for sandwiches as using two slices may overpower your sandwich fillings and make the sandwich hard to eat.
More Easy Whole Wheat Bread Recipes


Love this recipe? Please leave a 5-star 🌟🌟🌟🌟🌟 rating in the recipe card below & a review in the comments section further down the page.
📖 Recipe

4 Ingredient Whole Wheat Artisan Bread Recipe
Ingredients
- 4 cups whole wheat flour*
- 2 teaspoons salt
- ¾ teaspoon active dry yeast
- 1-2 cups room temperature water see notes
Instructions
- Pour in the room temperature water (starting with just 1 cup if using some white flour) and stir until a uniform dough comes together. You may need to use your hands. Form the dough into a rough ball and place it in the bottom of the same bowl you made the dough in. Cover the bowl with plastic wrap and let it sit on the counter for 12-18 hours. I usually make the dough in the evening and let it rise overnight while I sleep.
- A little bit before you are ready to bake the dough, preheat your oven to 475 °F and place a dutch oven** inside the oven to preheat as well. Once the oven has preheated and the dutch oven is hot, carefully remove the pot from the oven and take the lid off.
- Using floured hands, remove the risen dough from the bowl and form it back into a rough ball. Place it on some baking paper and drop it into your hot dutch oven. Cover the dutch oven with the lid and place it into the oven.
- Bake the bread for 30 minutes with the lid on. Then remove the lid and allow the bread to bake another 15 minutes or until golden and crusty on the outside.
- Remove the pot from the oven and carefully remove the bread from the dutch oven. Place it on a wire rack to cool.
- Slice and enjoy!


Helga Friedland says
I gave away my bread machine because of this recipe. I use unbleached flour but am going to try the whole wheat flour as well. I put the yeast into the 2 cups of water at room temperature and let it sit for a little bit. If I forget the night before it usually only takes 3-4 hours for the dough to rise. I have gotten so many compliments on this bread and it couldn't be easier to make. Thanks for this great recipe!
Mike Wolfson says
The first time I made it was perfectly. Second time I used 1/2 whole wheat flour and half Lupin Flour. I also added 1/2 cup of vital wheat gluten which usually gives a higher rise, but it came out dense.
How do I get a higher rise?
Faith VanderMolen says
I haven't tested this recipe with other flours except whole wheat and a mix of whole wheat and white, so I'm not positive which flour combinations worked best. If it worked perfectly the first time, I'd stick with that method!
Kathy says
I've tried this recipe twice, but it doesn't seem quite right. The bottom crust is too hard to cut, and the middle is heavy and doughty. I used a cast iron pan as suggested. Now what?
Faith VanderMolen says
Sorry it ended up tough on the bottom! I've found certain recipes work differently depending on climate and elevation. Some of my favorite recipes from the blog don't work as well here in Malaysia as when I'm in America. Not sure how to help you trouble shoot! I hope you can find a great bread recipe for you though!
Kathy Wright says
I used a metal pan, and the bottom of the loaf is very hard, too hard to cut! My personal preference would be a little more salt. I may have to invest in a cast iron pot because I live making bread this way! I used all whole wheat, but 1/2 white wheat berries and 1/2 red, which I ground myself.
Faith VanderMolen says
Sorry it ended up tough on the bottom! I've found certain recipes work differently depending on climate and elevation. Some of my favorite recipes from the blog don't work as well here in Malaysia as when I'm in America. Not sure how to help you trouble shoot! I hope you can find a great bread recipe for you though!
Sheila Mendia says
It is necessary to use a dutch if I don't have any?
Faith VanderMolen says
It is a fairly important part of this recipe, but I know people create "dutch ovens" using other kitchen items. You can see some options here: https://www.getsetvegan.com/no-knead-artisan-bread/
Rita says
I made your recipe using 1/2 whole wheat, 1/2 all purpose white flour. At the end I actually needed the 2 cups of water, warm. Waited about 17 h (maybe a bit too long...).
Added some flax and sesame seeds. Used the Lodge cast iron (not enameled) Dutch oven. At 425 F (was afraid of burning the parchment paper). Followed your times.
The bread was excellent.
Thank you for your recipe!
Faith VanderMolen says
So happy to hear that! Thanks for sharing Rita!
Christine says
I don’t have a Dutch oven. Other options for baking? Instant pot?
Thank you
Faith VanderMolen says
I don't think an instant pot would work, but I'm not very familiar with baking bread in an instant pot. My best suggestion would be to use a large oven safe pot/baking dish and cover it with an oven safe lid/top/baking sheet that can handle that heat. I hope you can make it work!
Freddy says
I've made it twice now in less than 1 week. It comes out great. This was exactly what I was looking for. Minimal ingredients, no fuss, and tastes great. The only minor adjustment was adding some water beyond 2 cups until it became sticky enough to form a ball. I used all whole wheat flour. Thanks!
Faith VanderMolen says
I'm so glad that you're enjoying this recipe! Thanks so much for sharing!
Terry Brown says
I baked this in my solar oven and it worked great!
Faith VanderMolen says
Awesome to hear! Thanks for sharing!
Rebecca King says
Hi, the Dutch ovens I see for sale have a temperature rating of 425 max. Can you share a time adjustment recommendation for that temperature, please?
Faith VanderMolen says
The Lodge enamel cast iron dutch oven is good up to 500F. I'm not sure how long you would need to bake the bread at 425!
Kris says
Never made bread before, learned a couple things.
1) Parchment paper burns. Never used it before. Had no clue. Box says it can withstand temperatures up to 420°F. So 475°f is too hot for it.
2) I have many kitchen thermometers, only one works. The bread looked done about 5 minutes after I took the lid off. Wasn't sure since, as I said, I've never made bread before. Google says an internal temp of 190°f means it's done. Took me a while to find a working thermometer. Overcooked it a little while trying to find one. My bad.
Recipe is pretty good, though. Think my dough was a bit overproofed, could be my house being warm.
Faith VanderMolen says
Glad you were able to learn some things in the process! Hopefully the next time will go more smoothly!
John Murphy says
This is a great and simple recipe. I haven't bought bread since I started baking this. One quick question, if I increase the ingredients, do I need to increase the baking time? (I have no baking experience)
Faith VanderMolen says
Glad you like the recipe John! And I haven't experimented with a larger recipe, but I would assume you'd have to increase the baking time. You could also try doubling the recipe, cutting it in half and then baking two loaves back to back. I like doing that with sourdough bread and then I just slice and freeze one loaf for later. Let us know if you try something out and how it goes!