

Made with just 6 ingredients and minimal hands-on-time, these salty and flavorful Vegan Taco Tofu Crumbles make for the perfect filling for plant-based tacos, burritos and buddha bowls!
...Most Recent Posts
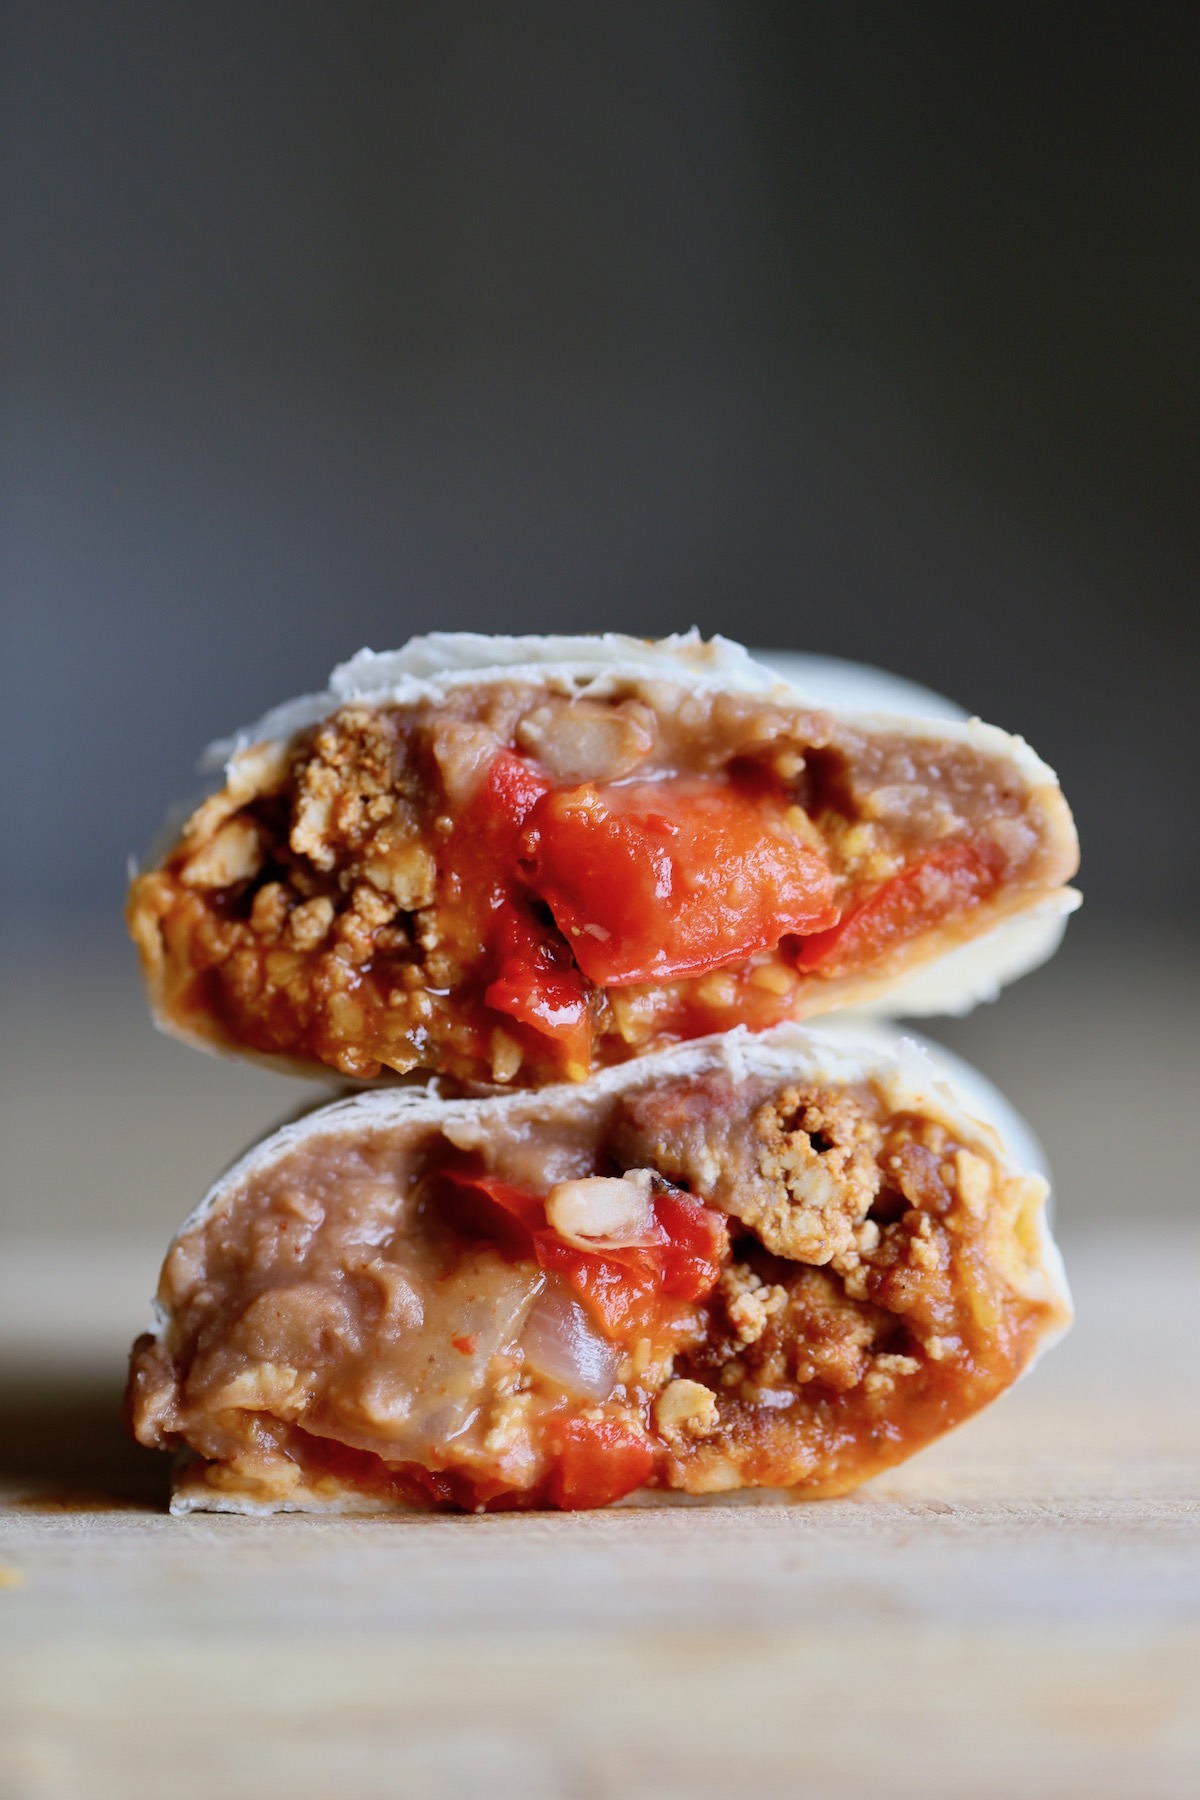
Vegan Breakfast Burritos (Freezer-Friendly!)
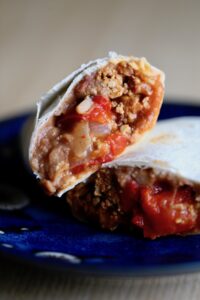
Full of plant-based protein, melty vegan cheese and homemade taco tofu crumbles, these Vegan Breakfast Burritos are great anytime of day. Plus they are perfect for meal prep!

Also Featured In
This recipe is also featured in the following vegan recipe roundups:
I'm not usually a savory breakfast person, but these Vegan Breakfast Burritos have my heart!
Oh, and my husband is obsessed with them too, which makes them an instant winner in my book.
If you're on the look-out for a savory, high-protein plant-based breakfast option, then you need to try this recipe out.
These Vegan Breakfast Burritos are full of creamy refried beans, crispy taco tofu crumbles and melty vegan cheese.
Oh and did I mention they have roasted fajita veggies in them as well?!
Let me show you how to make them!
Ingredients
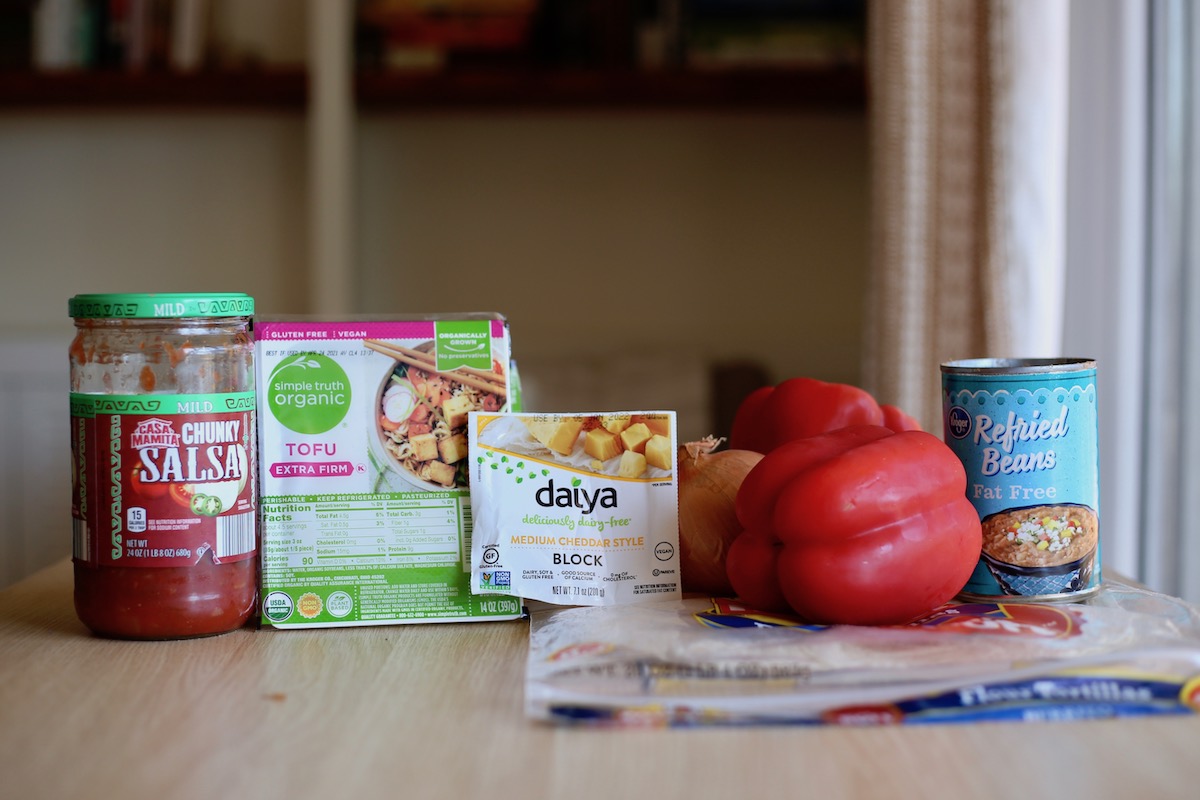
Thanks to some store-bought and pre-made ingredients, these breakfast burritos are super easy to make. I'll list out all of the ingredients you'll need below!
- 10" burrito-sized tortillas
- Refried beans
- Bell peppers
- Onion
- Vegan cheddar cheese
- Salsa
- Taco Tofu Crumbles
The above ingredients are what you'll need to make these freezer-friendly vegan breakfast burritos. However, if you're not freezing these burritos, but instead enjoying them right away, you can also add on some fresh avocado and cilantro to your burritos as well!
How to Make Vegan Breakfast Burritos
You're in luck, because your oven is going to do most of the cooking for these vegan breakfast burritos! Below I'll walk you through each step you'll need to take to make these breakfast burritos.
Feel free to double/triple/quadruple this recipe and freeze these burritos for easy breakfast and/or lunches on the go!
Step 1: Start by preheating your oven to 400°F / 200°C and greasing two baking sheets with cooking spray. Set the baking sheets aside.
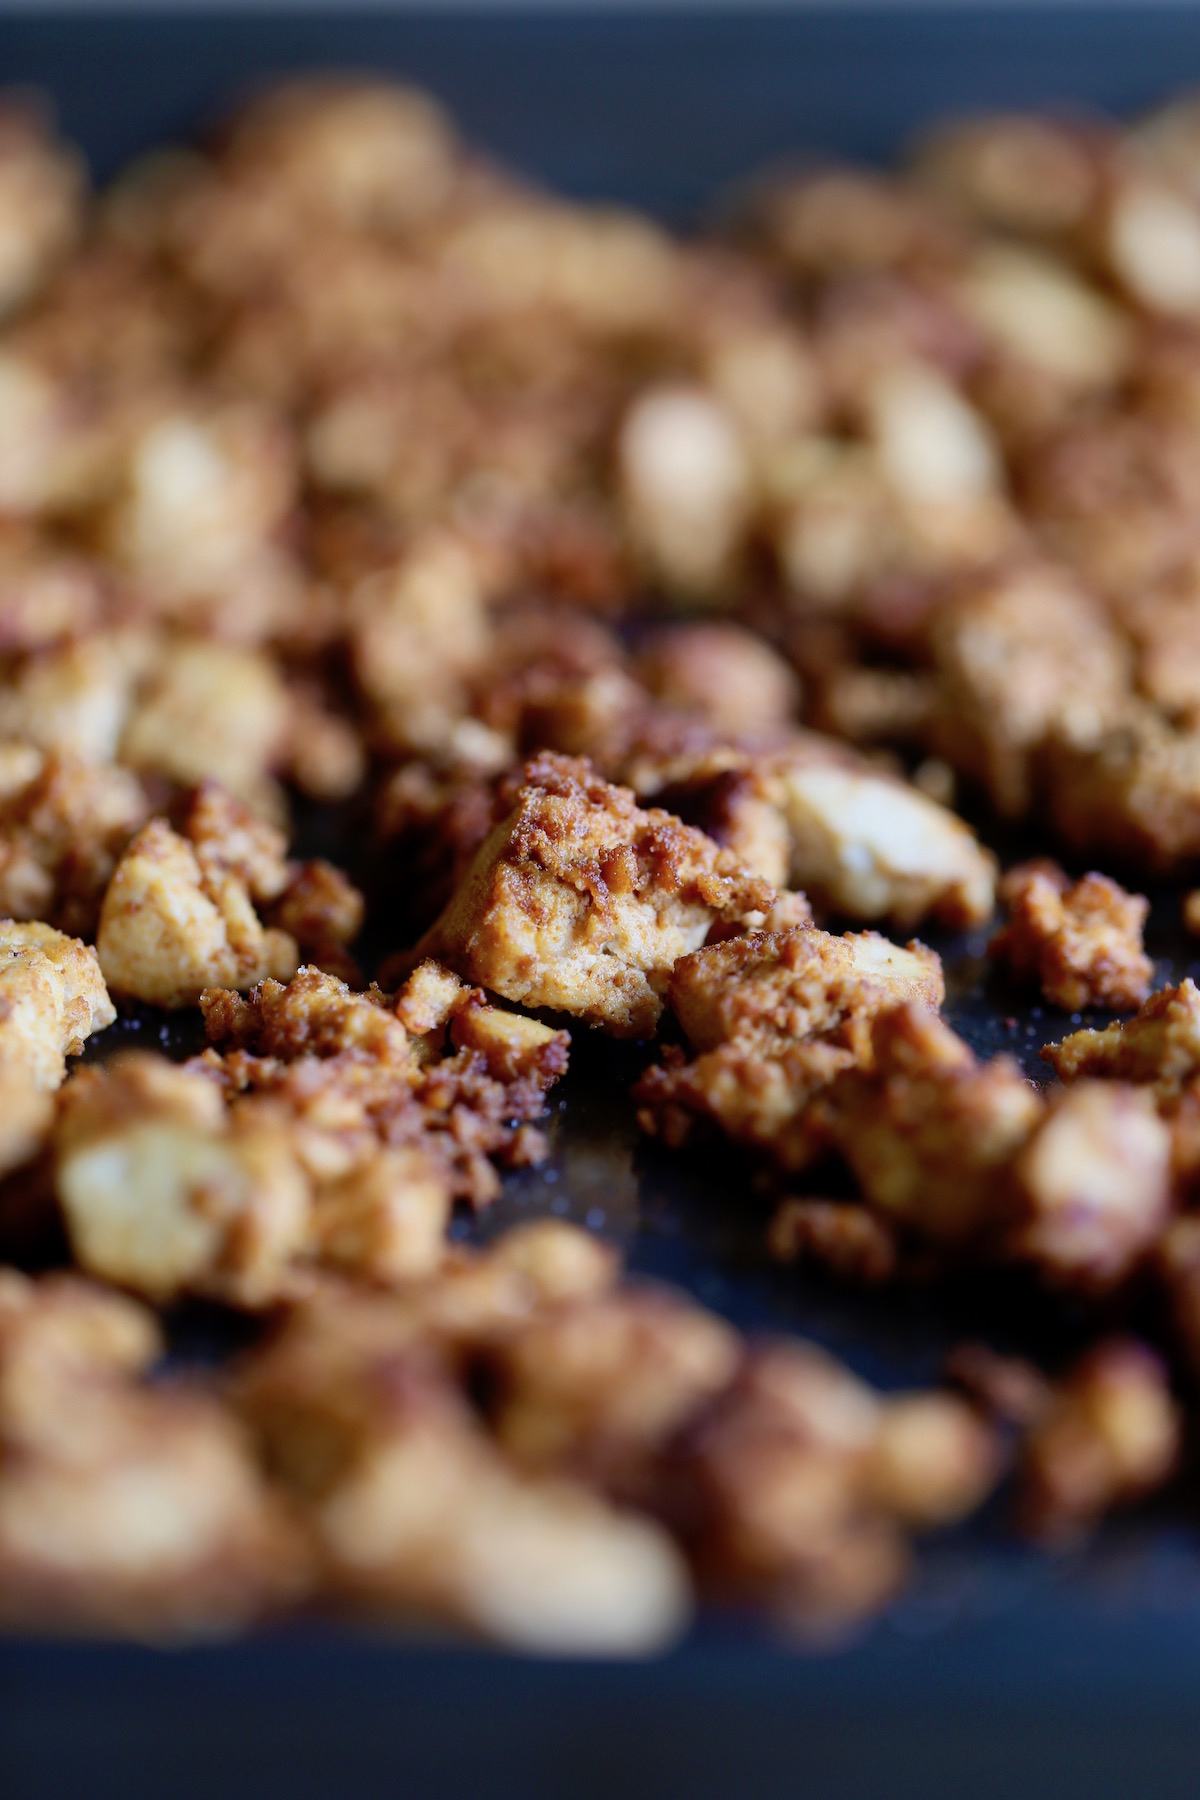
Step 2: Make your vegan taco tofu crumbles. Press two blocks of extra firm tofu for about 15 minutes. While the tofu is being pressed, whisk together the marinade. Next, crumble the pressed tofu into the marinade and stir everything well so that all the tofu is coated in the marinade. Pour the tofu out onto your greased baking sheet and spread it out into a single layer. Place the tofu into the oven to bake for about 40 minutes, stirring after 20 minutes, until browned and slightly crispy.
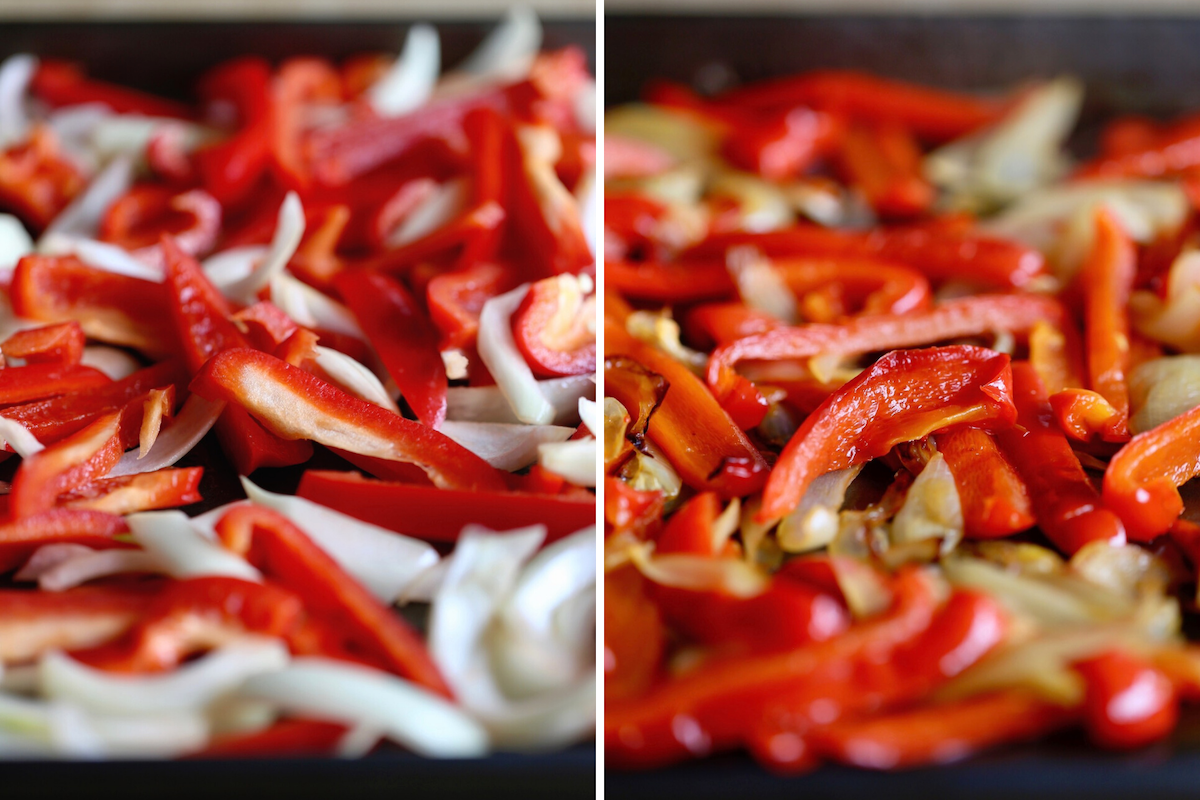
Step 3: Once you have your tofu in the oven, slice your bell peppers and onions. Place them on the second greased baking sheet and drizzle them with some olive oil and sprinkle them with salt. Use your hands to stir everything together, ensuring that the veggies have all been coated in the olive oil and salt. Place the veggies in the oven for about 35 minutes, stirring after 20 minutes, until they are soft and slightly charred.
Step 4: Once the tofu and veggies have finished cooking, you can assemble your breakfast burritos. Place a large tortilla on a flat surface. Spread a layer of refried beans down the middle of the tortilla. Then add on some of the taco tofu crumbles, roasted veggies, vegan shredded cheddar cheese and salsa. Roll up the burrito and continue this process until you have about 8 breakfast burritos. If desired, you can cook each burrito on a hot skillet coated in a little oil until browned on the outside.
How to Freeze Homemade Burritos
Liked I've mentioned, these vegan breakfast burritos freeze beautifully. You could make a batch or two at the start of the month, freeze them and then reheat them whenever a burrito-craving hits!
To freeze homemade burritos, place your completed burrito onto a large square of aluminum foil. Wrap the burrito tightly in the aluminum foil and place it inside of a freezer-safe zip-lock bag or reusable silicone freezer bag.
How to Reheat Frozen Burritos
Then, when you want to enjoy one of your homemade vegan breakfast burritos, you simply remove it from the freezer and remove the aluminum foil.
Microwave: Place the burrito on a microwave safe plate, cover it with a paper towel and microwave it for about 4-6 minutes or until heated through. Every microwave is different, so you can always start with less time and add more as needed!
Oven: If you don't own or like using a microwave, you can also reheat your burrito in the oven. Once you've unwrapped the burrito, place it on a baking sheet and bake it in the oven at 400F for about 30-40 minutes.
More Meal Prep Ideas
Meal prep is a game-changer and life-saver for busy people! If you like to start your week off prepared for meals, check out the following articles:
Also, I've done a TON of meal prep videos on my Youtube channel.
📖 Recipe

Vegan Breakfast Burritos Recipe
Full of plant-based protein, melty vegan cheese and homemade taco tofu crumbles, these Vegan Breakfast Burritos are great anytime of day!
Ingredients
VEGAN TACO TOFU CRUMBLES
- 2 blocks extra firm tofu
- ¼ cup less-sodium soy sauce
- 2 tablespoons olive oil
- 1 tablespoon ground cumin
- 2 teaspoons smoked paprika
- Optional: ¼ - ½ teaspoon sea salt or to taste
BURRITOS
- 3 bell peppers sliced
- 1 onion sliced
- 8 10" tortillas
- 2 cans refried beans
- 1 block vegan cheddar cheese about 7 oz, shredded
- 1 cup store-bought or homemade salsa
Instructions
- Start by preheating your oven to 400 °F and greasing two baking sheets with cooking spray. Set the baking sheets aside.
- Make your vegan taco tofu crumbles. Press two blocks of extra firm tofu for about 15 minutes. While the tofu is being pressed, whisk together the marinade. Next, crumble the pressed tofu into the marinade and stir everything well so that all the tofu is coated in the marinade. Pour the tofu out onto your greased baking sheet and spread it out into a single layer. Place the tofu into the oven to bake for about 40 minutes, stirring after 20 minutes, until browned and slightly crispy.
- Place the sliced peppers and onions on the second greased baking sheet and drizzle them with some olive oil and sprinkle them with salt. Stir everything well before placing the veggies in the oven for about 35 minutes, stirring after 20 minutes, until they are soft and slightly charred.
- Once the tofu and veggies have finished cooking, you can assemble your breakfast burritos. Place a large tortilla on a flat surface. Spread a layer of refried beans down the middle of the tortilla. Then add on some of the taco tofu crumbles, roasted veggies, vegan shredded cheddar cheese and salsa. Roll up the burrito and continue this process until you have about 8 breakfast burritos. If desired, you can cook each burrito on a hot skillet coated in a little oil until browned on the outside. Or you can freeze them for later!
Nutrition
Calories: 252kcalCarbohydrates: 37gProtein: 8gFat: 8gSaturated Fat: 2gPolyunsaturated Fat: 2gMonounsaturated Fat: 4gSodium: 1211mgPotassium: 310mgFiber: 6gSugar: 7gVitamin A: 1861IUVitamin C: 59mgCalcium: 115mgIron: 3mg
Tried this recipe?Let me know how it was!
Vegan Baked Oatmeal Cups (2 Flavors!)
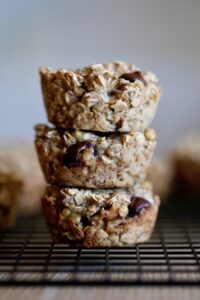
Full of whole grains and sweetened naturally with fruit, these two different flavors of Vegan Baked Oatmeal Cups are a healthy and fun way to start your morning!

It's no surprise that we love oatmeal in our house.
I rarely go a day without eating oatmeal in some form and I still am not sick of it!
That's probably because there are so many different ways to cook and flavor oatmeal so that it never gets boring.
We love my Everyday Stovetop Oatmeal.
We love any flavor of vegan overnight oats.
And when it comes to making oatmeal for a crowd, we especially love baking our oatmeal!
My two personal favorite vegan baked oatmeal recipes are this Vegan Brownie Batter Baked Oatmeal and this Zucchini Bread Baked Oatmeal.
However, these Vegan Baked Oatmeal Cups are such a great recipe to make at the start of your week so that you can have quick and healthy grab-n-go breakfasts and snacks on hand whenever hunger hits.
They also freeze beautifully if you're the meal-prepping type!
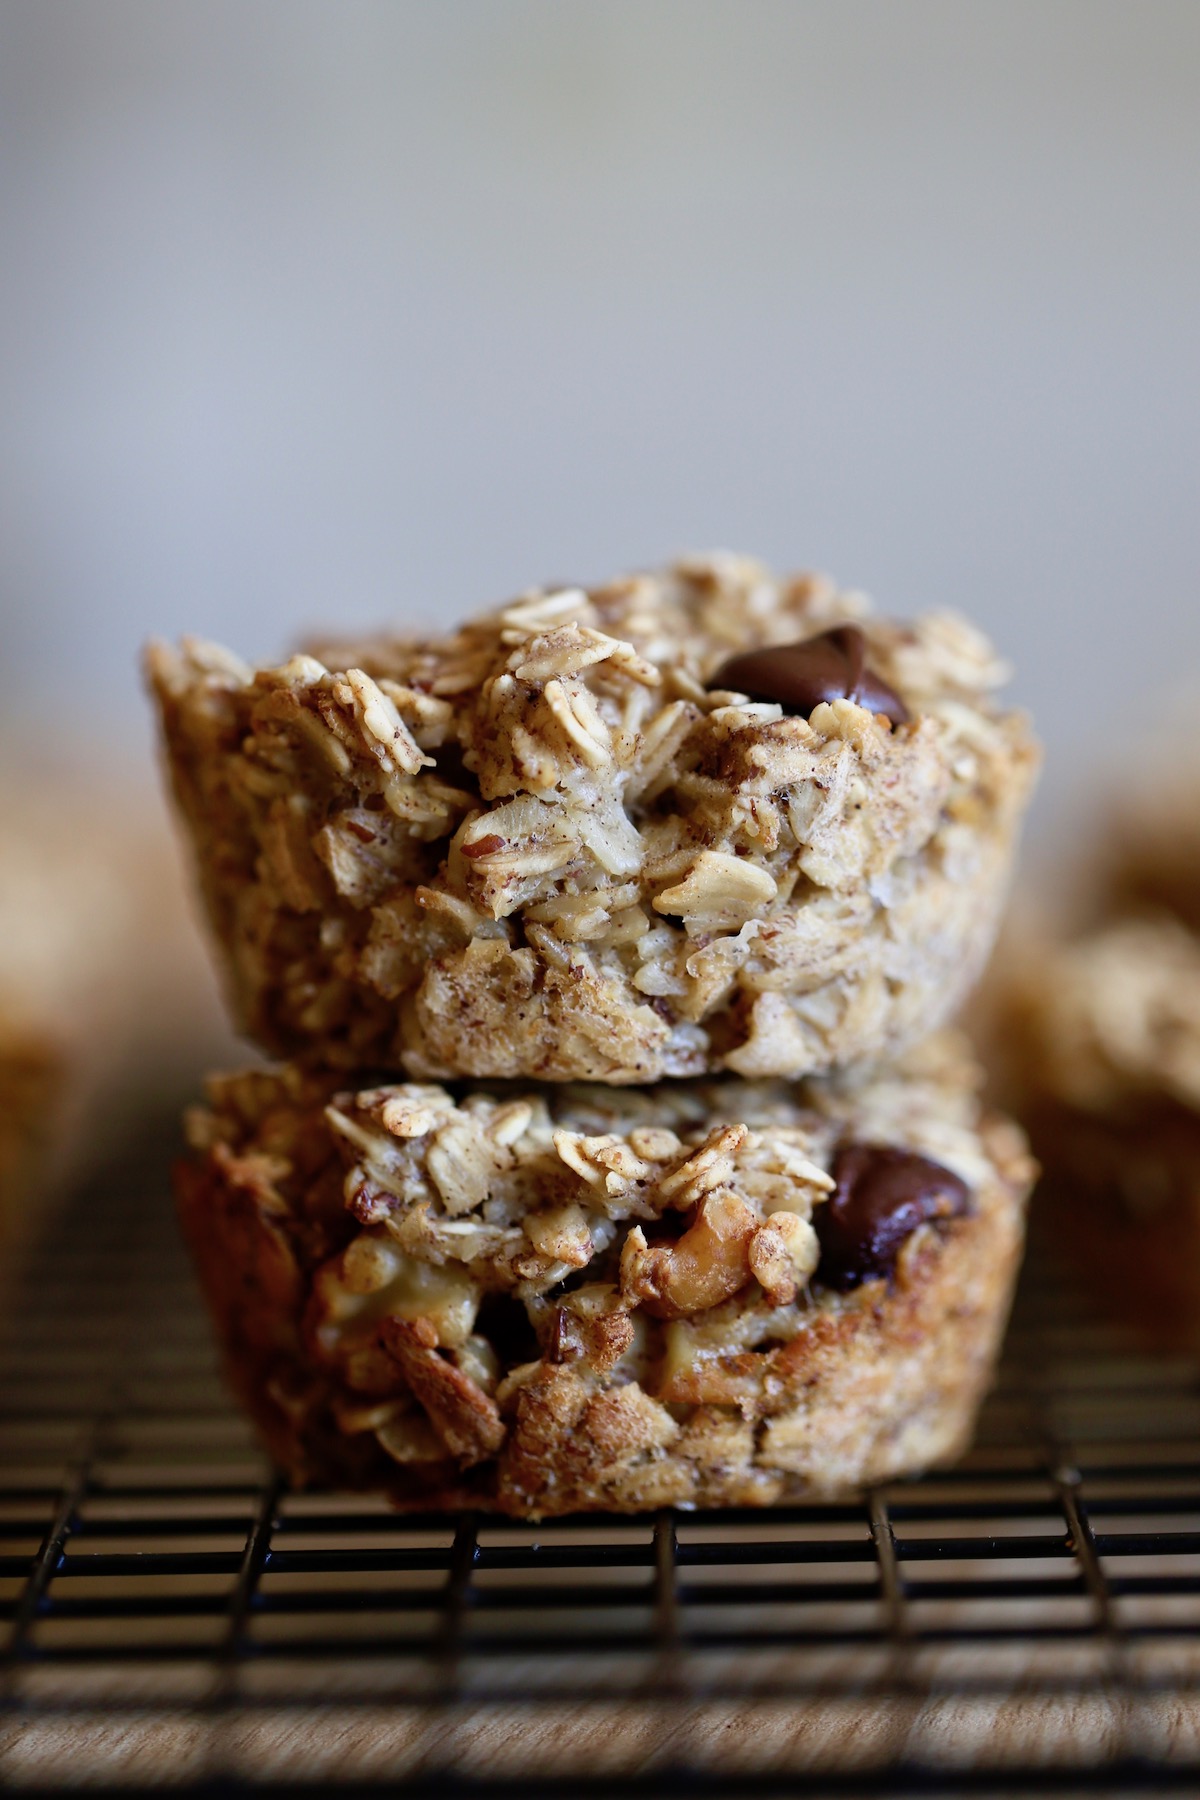
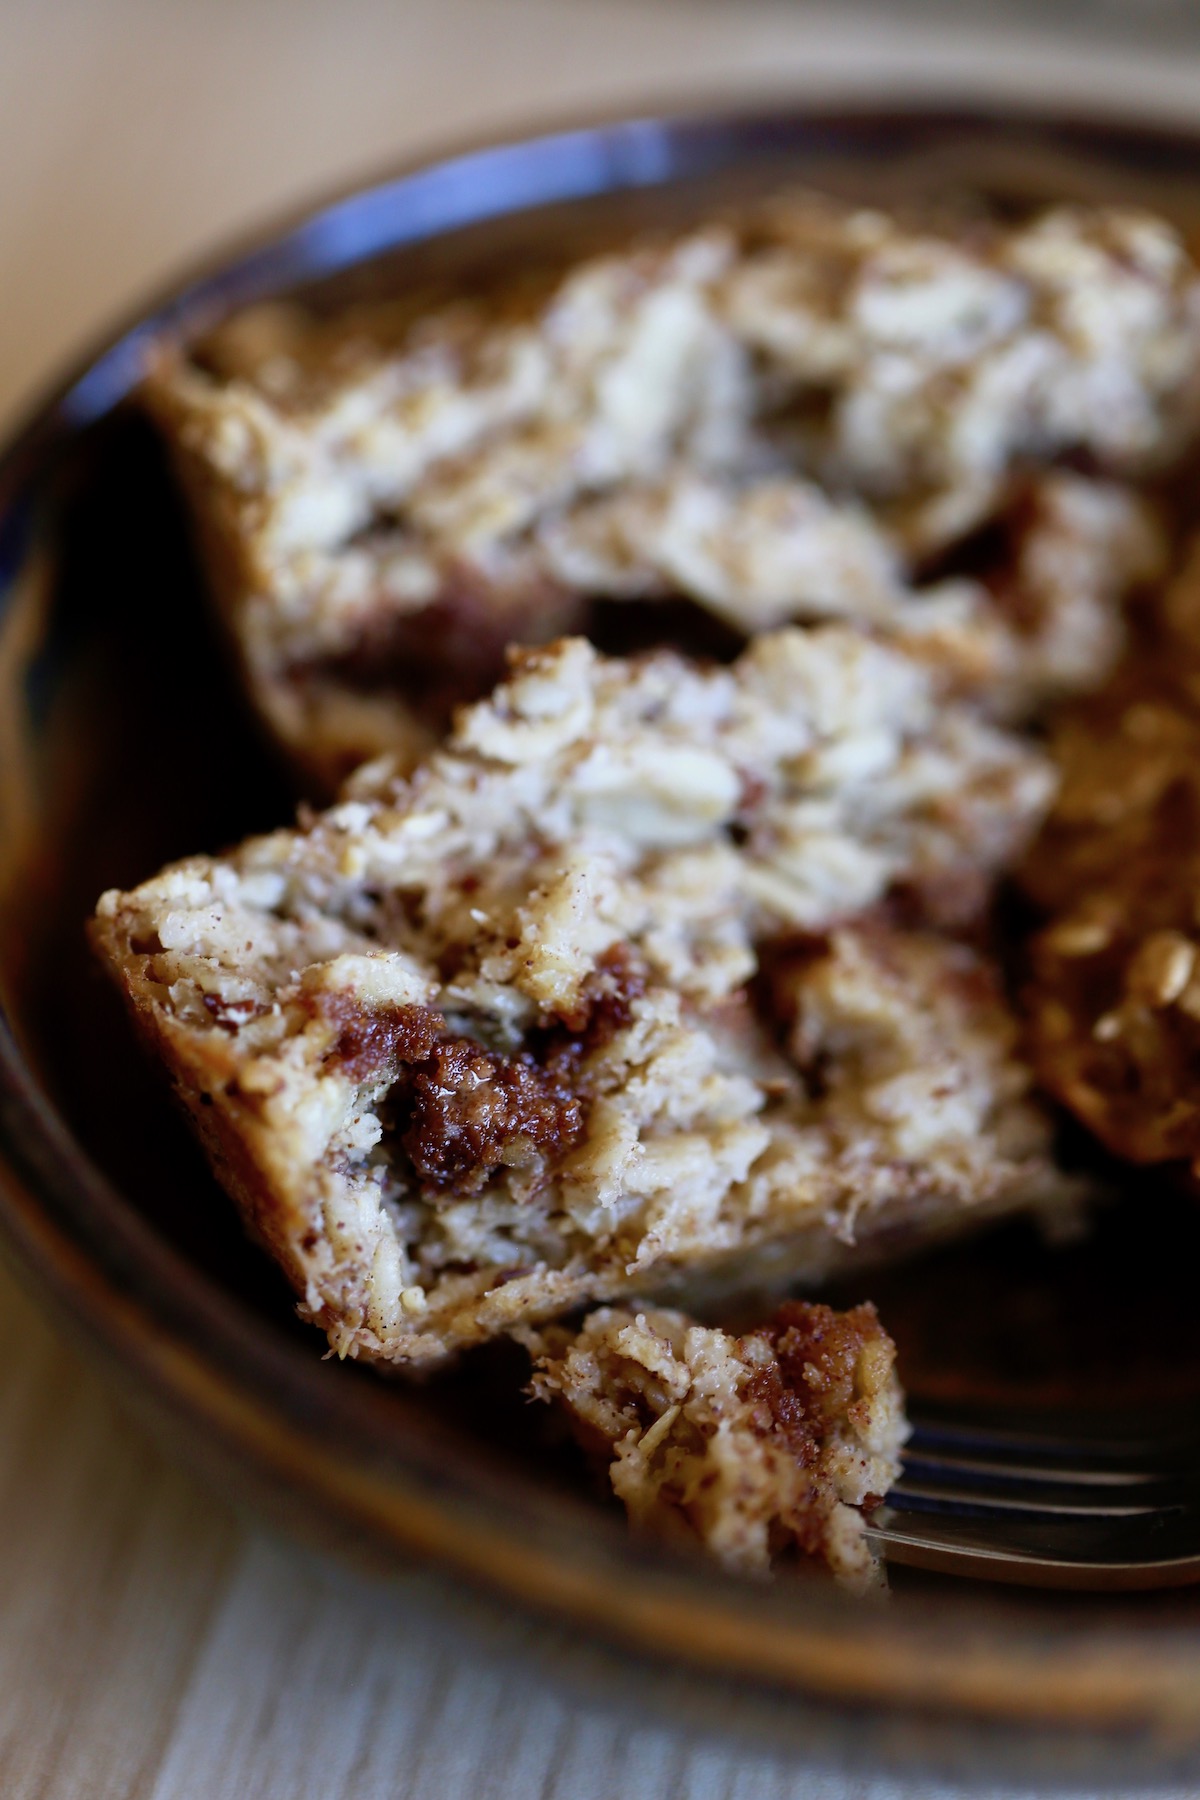
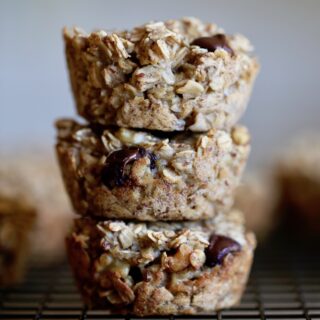
Today I'll be showing you two different flavors of baked oatmeal cups, including chunky monkey baked oatmeal cups and cinnamon roll baked oatmeal cups.
Let me show you how to make them!
How to Make Baked Oatmeal
Making baked oatmeal couldn't be easier. Instead of slowly cooking your oats in a pot on the stovetop, you combine all of your ingredients together in a mixing bowl, pour them into a baking dish and let your oven do the work.
The result is a warm, cake-y, hearty baked oatmeal that you'll love!
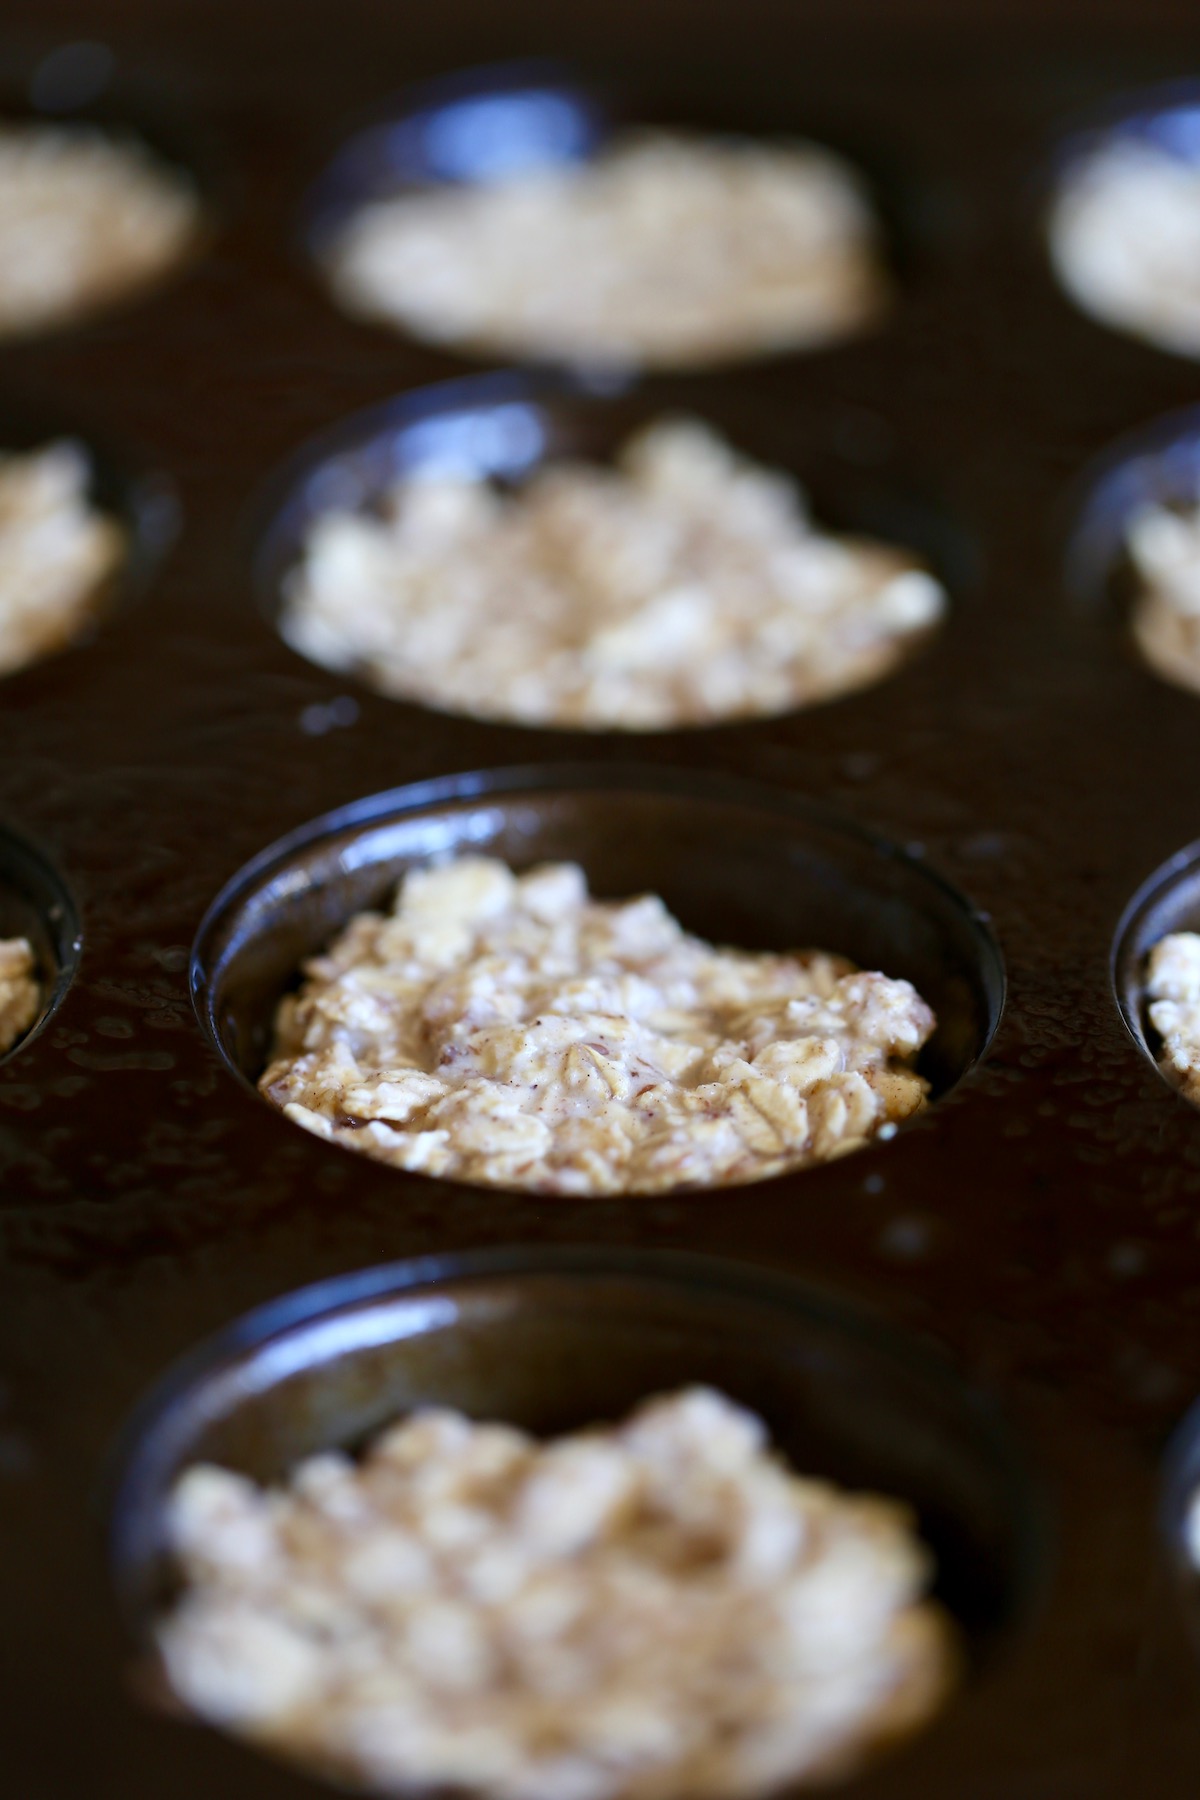
Today, I'm going to be showing you how to make baked oatmeal using a muffin pan. So instead of one large sheet of baked oatmeal, you'll be baking your batter in muffin cups to create little, personal-sized baked oatmeal cups.
Eat one for a snack or have a few for a hearty meal!
Ingredients You'll Need for Baked Oatmeal Cups
Today I'm sharing with you two baked oatmeal cup recipes, the base of which is almost exactly the same. Then, it's just the mix-ins and/or filling that you change to give each oatmeal cup its unique flavor.
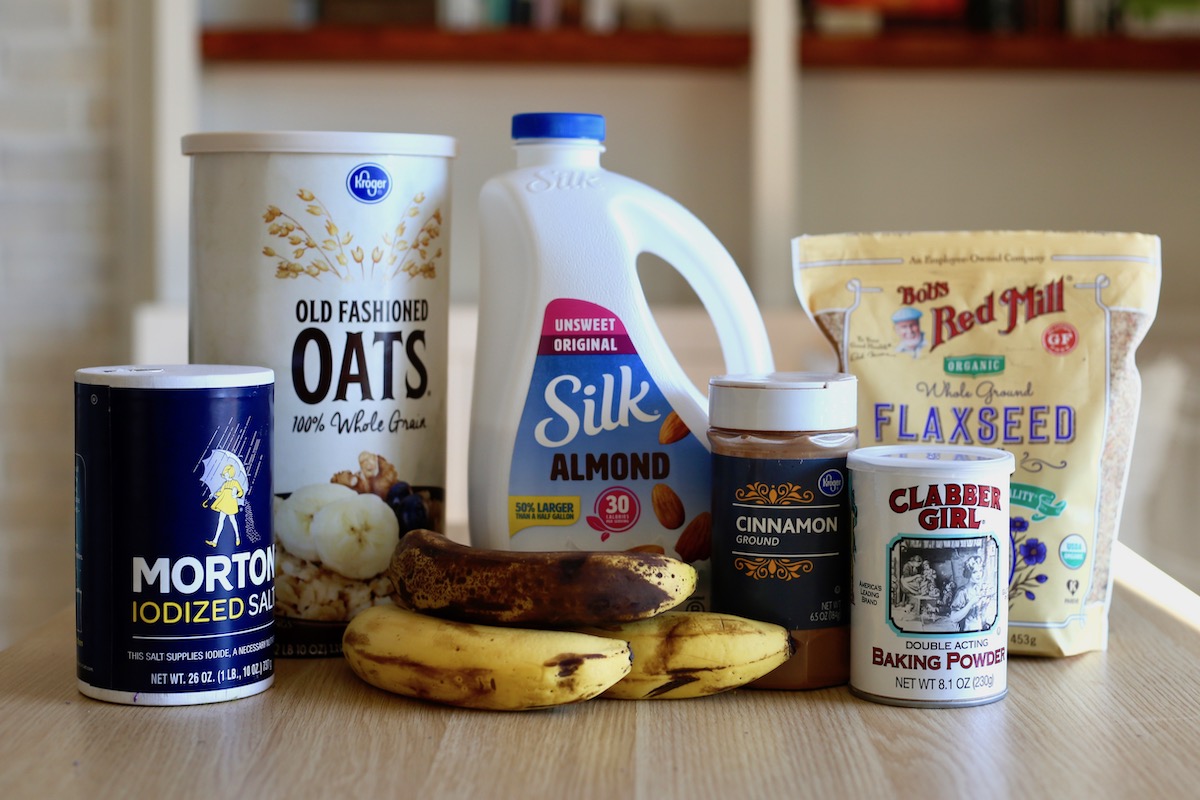
Basic Baked Oatmeal Cup Ingredients
For the base of these bake oatmeal cups you'll need the following, pantry-friendly ingredients:
To this base recipe you'll be adding in a few more ingredients to create different flavors of baked oatmeal cups.
Chunky Monkey Baked Oatmeal Cup Ingredients
If you don't know what I mean when I say "chunky monkey" you're in for a real treat! Chunky Monkey is a flavor combination that involves bananas, walnuts and chocolate. Yum! So for these chunky monkey baked oatmeal cups you'll need to add the following ingredients to the basic baked oatmeal cup recipe:
- Mashed banana
- Chocolate chips
- Walnuts
Cinnamon Roll Baked Oatmeal Cup Ingredients

For the cinnamon roll baked oatmeal cups, you need the following ingredients:
- Unsweetened applesauce
- Almond butter
- Coconut sugar
- Cinnamon
The almond butter, coconut sugar and cinnamon will be combined to create the cinnamon swirl part of these oatmeal cups!
How to Make Vegan Baked Oatmeal Cups
These baked oatmeal cups couldn't be easier to make. Just follow the step-by-step instructions below and you'll be enjoying baked oatmeal in no time!
- Step 1: Preheat your oven to 350F/180C and grease a standard size muffin pan with cooking spray. Set it aside.
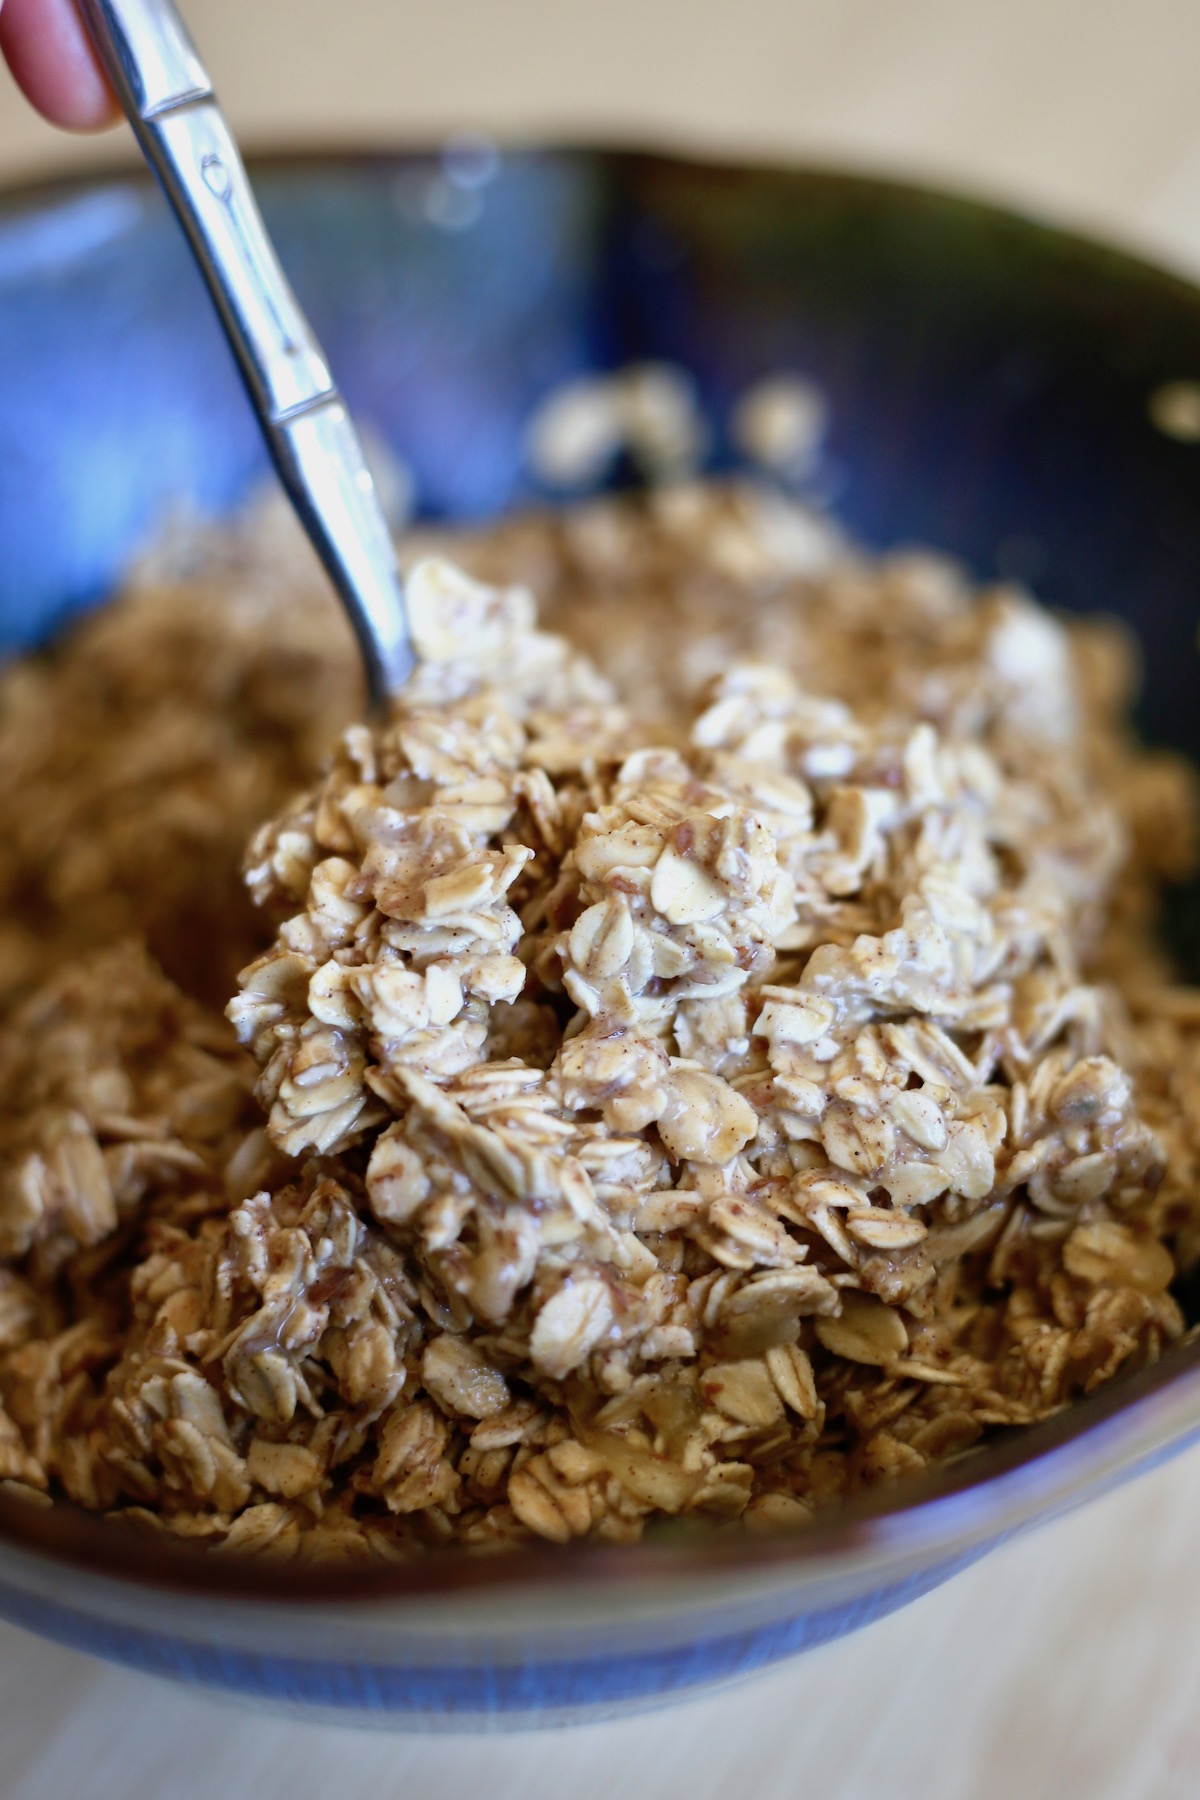
- Step 2: In a large mixing bowl, whisk together the almond milk, ground flaxseed, baking powder, cinnamon and salt until combined. For the chunky monkey cups you'll also whisk in the mashed banana. For the cinnamon roll cups you'll whisk in the unsweetened applesauce.
- Step 3: Next, stir in the old-fashioned rolled oats. For the chunky monkey cups you'll also fold in the chocolate chips and walnuts.
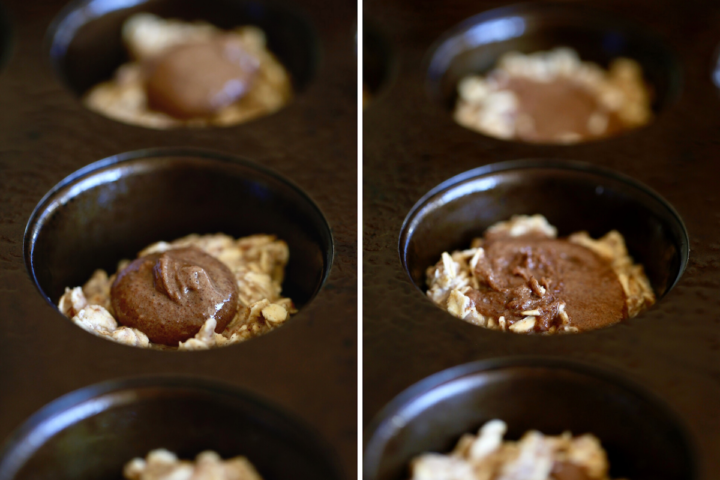
- Step 4: If you're making the cinnamon roll baked oatmeal cups, prepare the cinnamon swirl in a separate bowl by stirring together the almond butter, coconut sugar and cinnamon until smooth.
- Step 5: Divide the batter equally among the muffin cups. For the cinnamon roll oatmeal cups, fill each muffin cup half way up with the batter before adding a teaspoon of the cinnamon swirl "paste." Use damp hands to spread the paste out into an even layer before topping each cup with the remaining oatmeal batter.
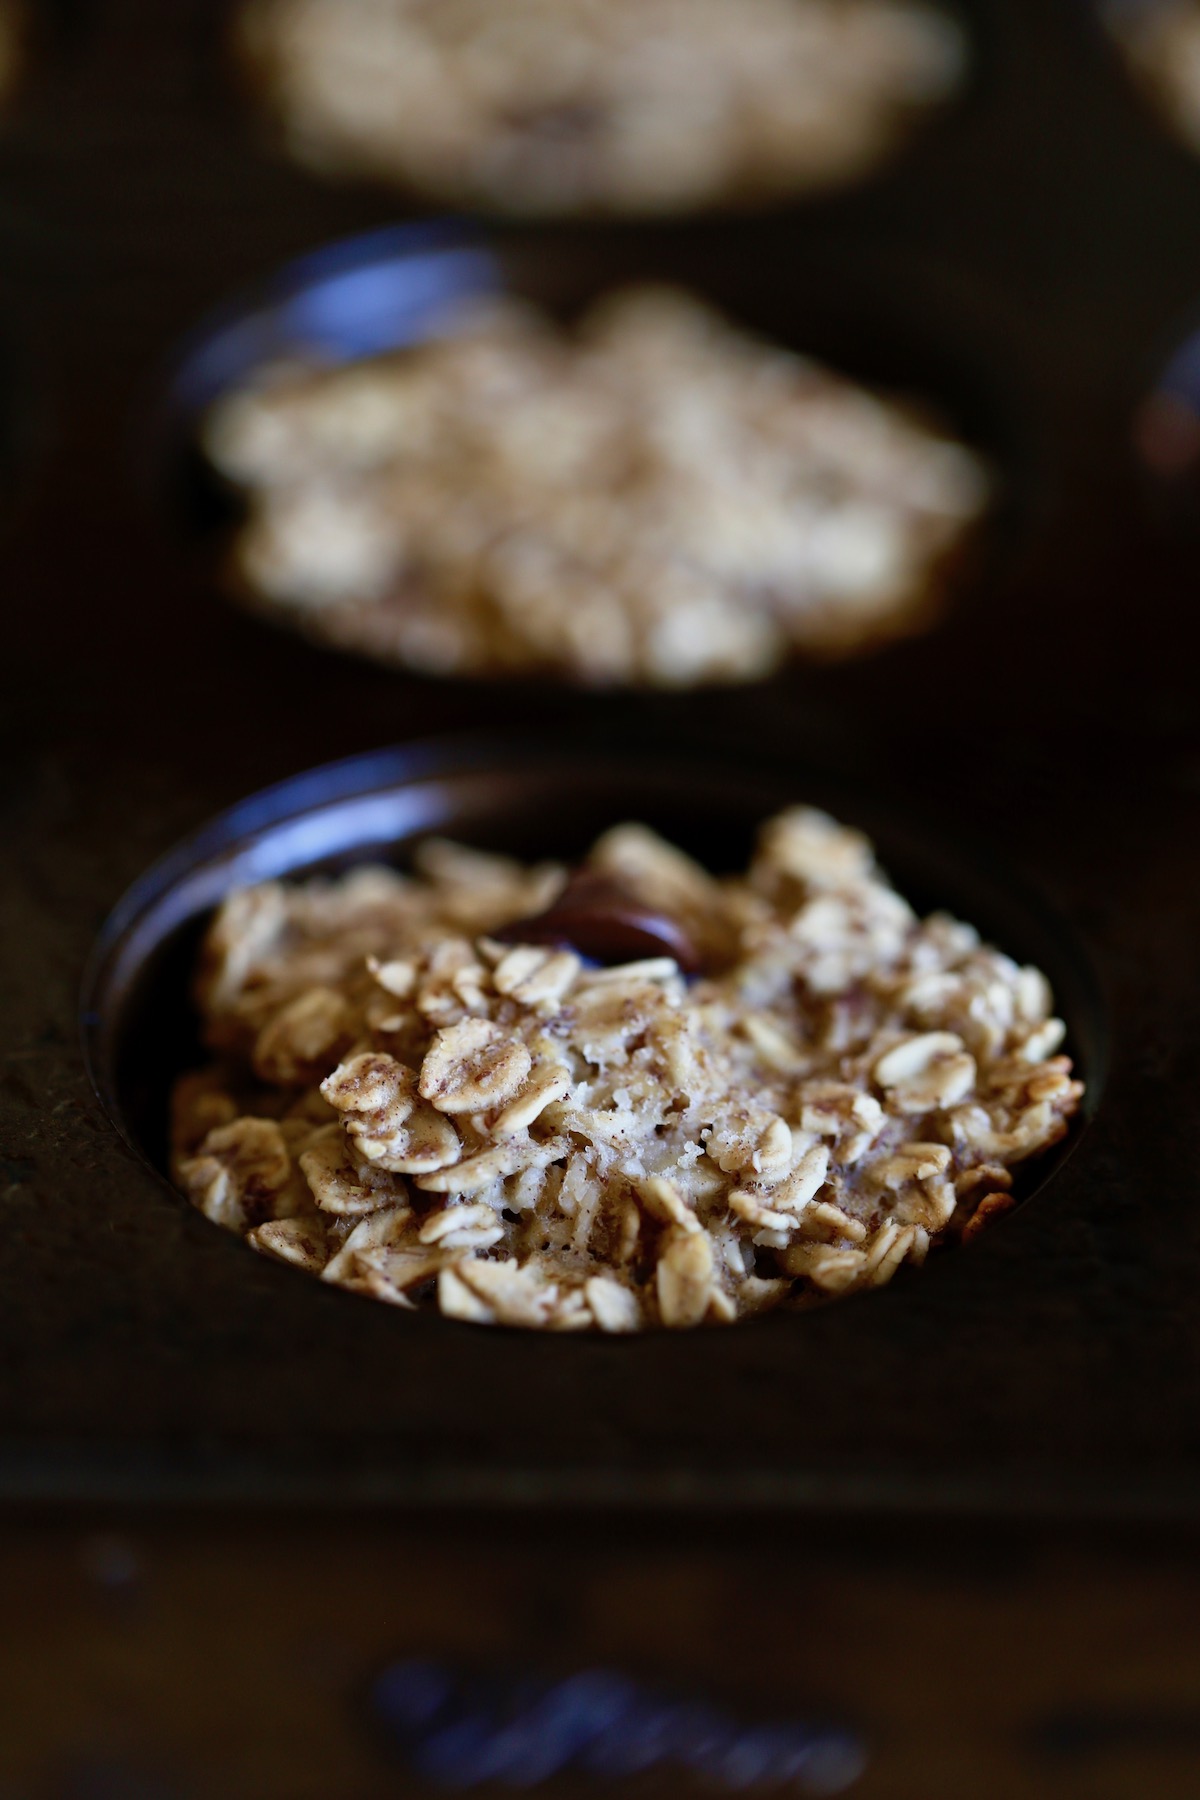
- Step 6: Bake the oatmeal cups for about 25 minutes or until set. Allow the cups to cool for 10 minutes in the pan before removing them to a wire rack to cool completely.
How to Store Baked Oatmeal
Baked oatmeal is a great food to meal prep at the start of your week or month because it stores beautifully in both the fridge or freezer.
- Fridge: Store these baked oatmeal cups in an airtight container or zip-lock bag in the fridge for 4-5 days.
- Freezer: Make a bunch of these baked oatmeal cups and store them in the freezer for an easy breakfast or snack meal prep. Once the cups have cooled completely, place them in a freezer-friendly zip-lock bag in the freezer. To reheat, simply microwave one for about 1 minute or until heated through. Alternatively, you can remove a few from the freezer the night before and place them in the fridge to thaw.
My Favorite Baked Oatmeal Toppings
Baked oatmeal is amazing just on its own, but adding a few toppings will take it to the next level. I'll list out some of my favorite baked oatmeal toppings below:
- Fresh fruit
- Nut/seed butter (any and every kind...peanut butter, almond butter, tahini, etc.)
- Berry Compote
- Cacao nibs
- Chocolate Chips
- Chopped nuts/seeds
- Maple syrup, agave, honey (if not vegan), etc.
- Coconut flakes
- Homemade Granola
The more toppings the better in my opinion!
📖 Recipe
Vegan Baked Oatmeal Cups (2 Flavors!)
Full of whole grains and sweetened naturally with fruit, these two different flavors of Vegan Baked Oatmeal Cups are a healthy and fun way to start your morning!
Ingredients
CHUNKY MONKEY CUPS
- 1 ½ cups non-dairy milk
- 1 cup mashed banana
- 2 tablespoons ground flaxseed
- 2 teaspoons baking powder
- 1 teaspoon cinnamon
- ½ teaspoon sea salt
- 3 cups old-fashioned rolled oats
MIX-INS
- ¼ cup chopped walnuts
- ¼ cup mini chocolate chips
CINNAMON ROLLED CUPS
- 1 ½ cups non-dairy milk
- 1 cup unsweetened applesauce
- 2 tablespoons ground flaxseed
- 2 teaspoons baking powder
- 1 teaspoon cinnamon
- ½ teaspoon sea salt
- 3 cups old-fashioned rolled oats
- ¼ cup almond butter
- 2 tablespoon coconut sugar
- 1 teaspoon cinnamon
Instructions
- Preheat your oven to 350 °F and grease a standard size muffin pan with cooking spray. Set it aside.
- In a large mixing bowl, whisk together the almond milk, fruit puree, ground flaxseed, baking powder, cinnamon and salt until combined.
- Next, stir in the old-fashioned rolled oats. For the chunky monkey cups you’ll also fold in the chocolate chips and walnuts.
- If you’re making the cinnamon roll baked oatmeal cups, prepare the cinnamon swirl in a separate bowl by stirring together the almond butter, coconut sugar and cinnamon until smooth.
- Divide the batter equally among the muffin cups. For the cinnamon roll oatmeal cups, fill each muffin cup half way up with the batter before adding a teaspoon of the cinnamon swirl “paste.” Use damp fingers to spread the paste out into an even layer before topping each cup with the remaining oatmeal batter.
- Bake the oatmeal cups for about 25 minutes or until set. Allow the cups to cool for 10 minutes in the pan before removing them to a wire rack to cool completely.
Notes
Nutrition is for Chunky Monkey version.
Nutrition
Calories: 148kcalCarbohydrates: 23gProtein: 5gFat: 5gSaturated Fat: 1gPolyunsaturated Fat: 2gMonounsaturated Fat: 1gTrans Fat: 0.01gCholesterol: 1mgSodium: 187mgPotassium: 203mgFiber: 3gSugar: 6gVitamin A: 137IUVitamin C: 4mgCalcium: 103mgIron: 1mg
Tried this recipe?Let me know how it was!
Vegan Frozen Yogurt Protein Cups

These three ingredient Vegan Frozen Yogurt Protein Cups are a fun, refreshing and sweet way to sneak in some extra plant-based protein throughout your day.
...Easy No-Bake Granola Bars
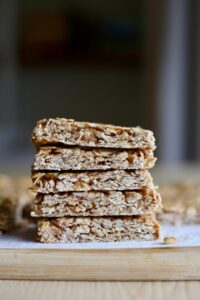
Made with just 5 ingredients, these Easy No-Bake Granola Bars are the perfect recipe to prepare at the beginning of the week for quick and healthy snacks on the go.
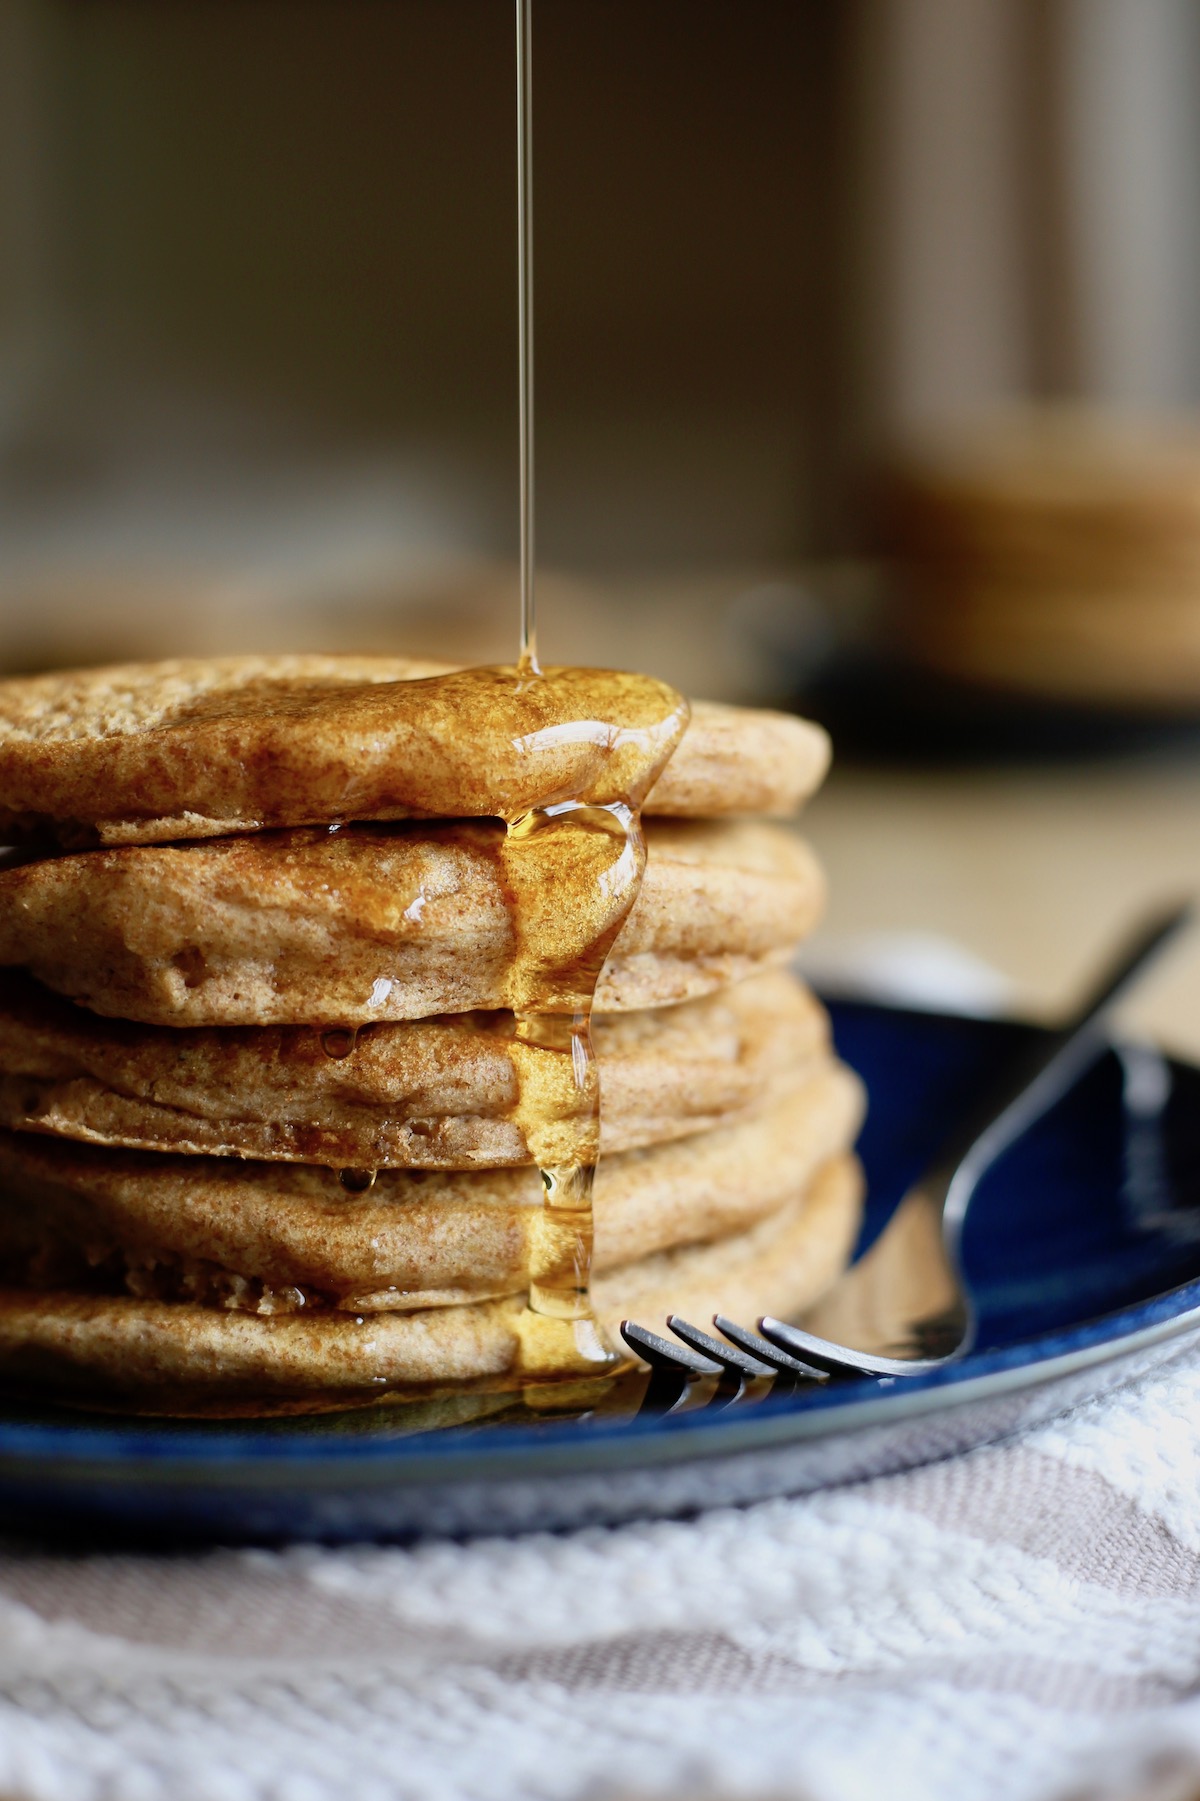
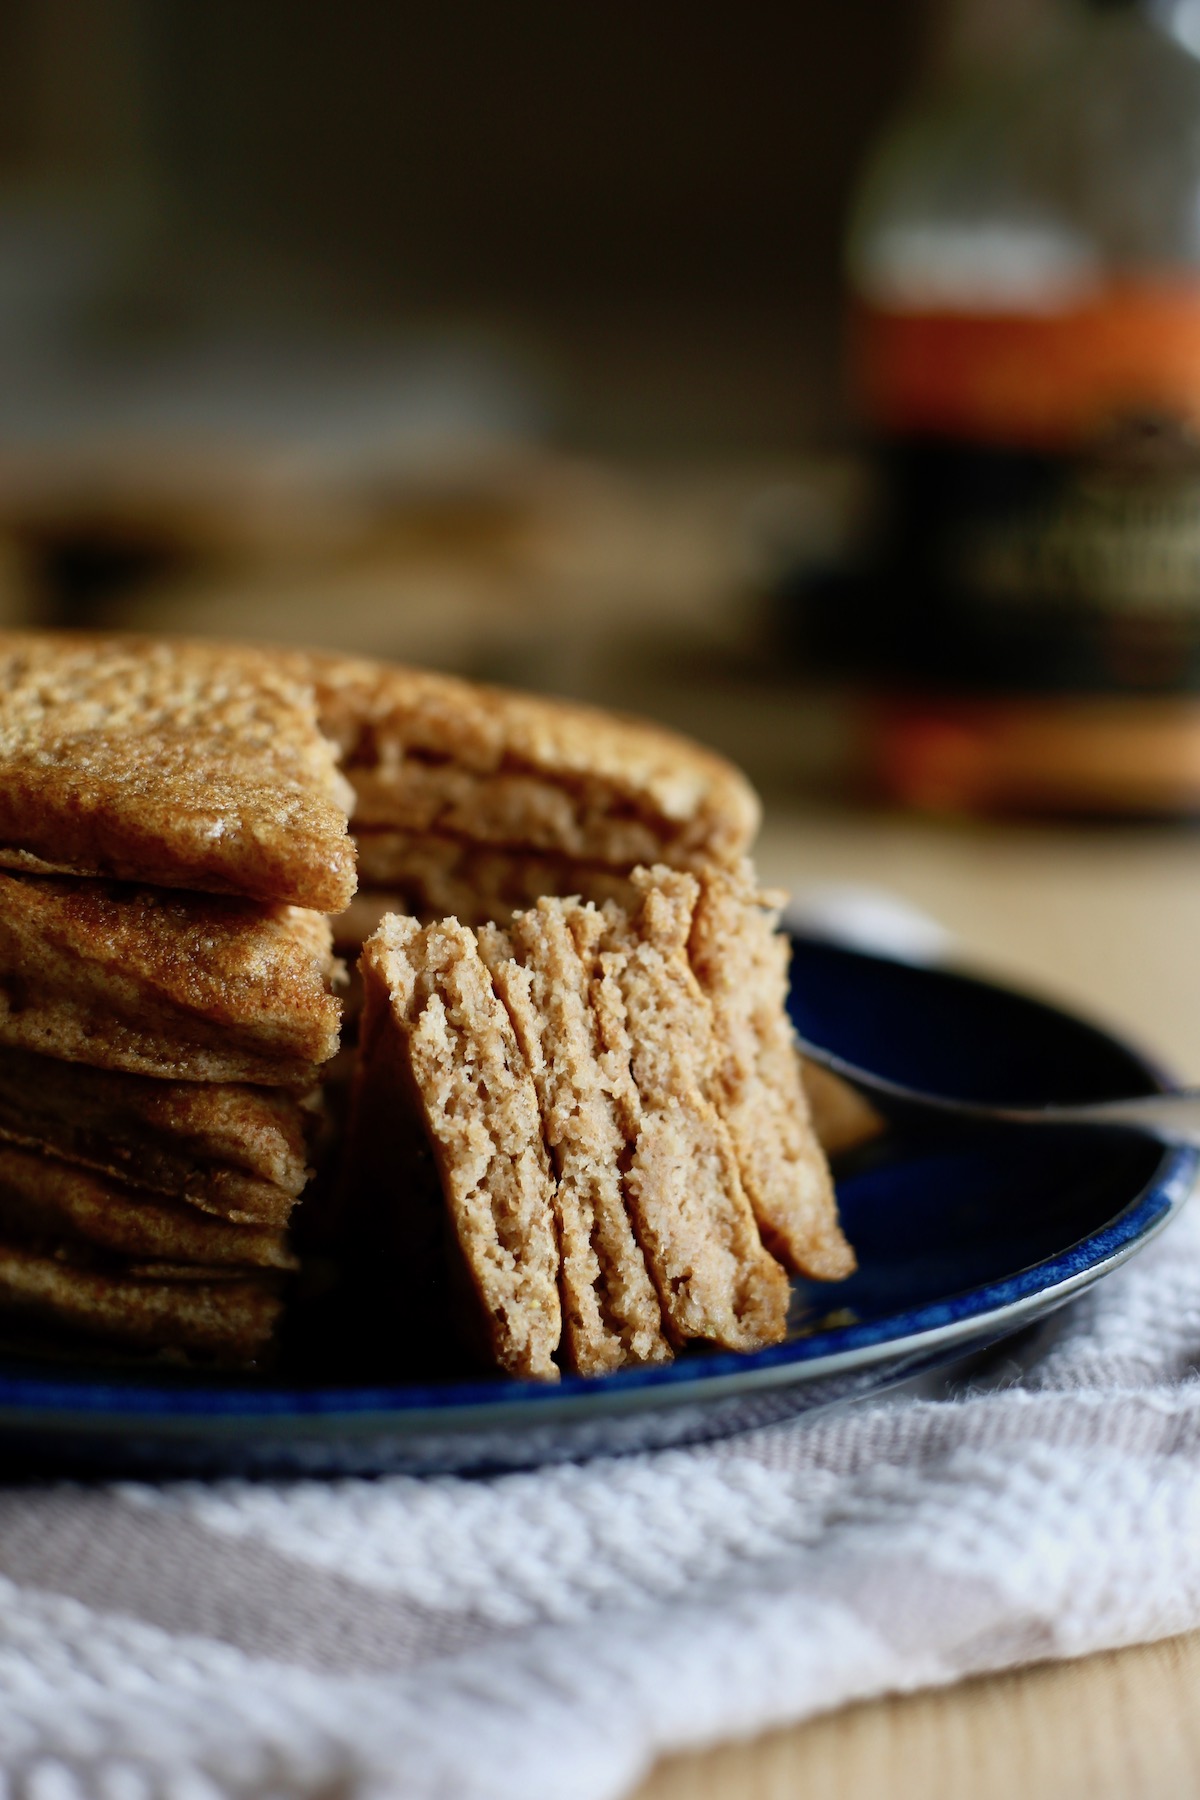
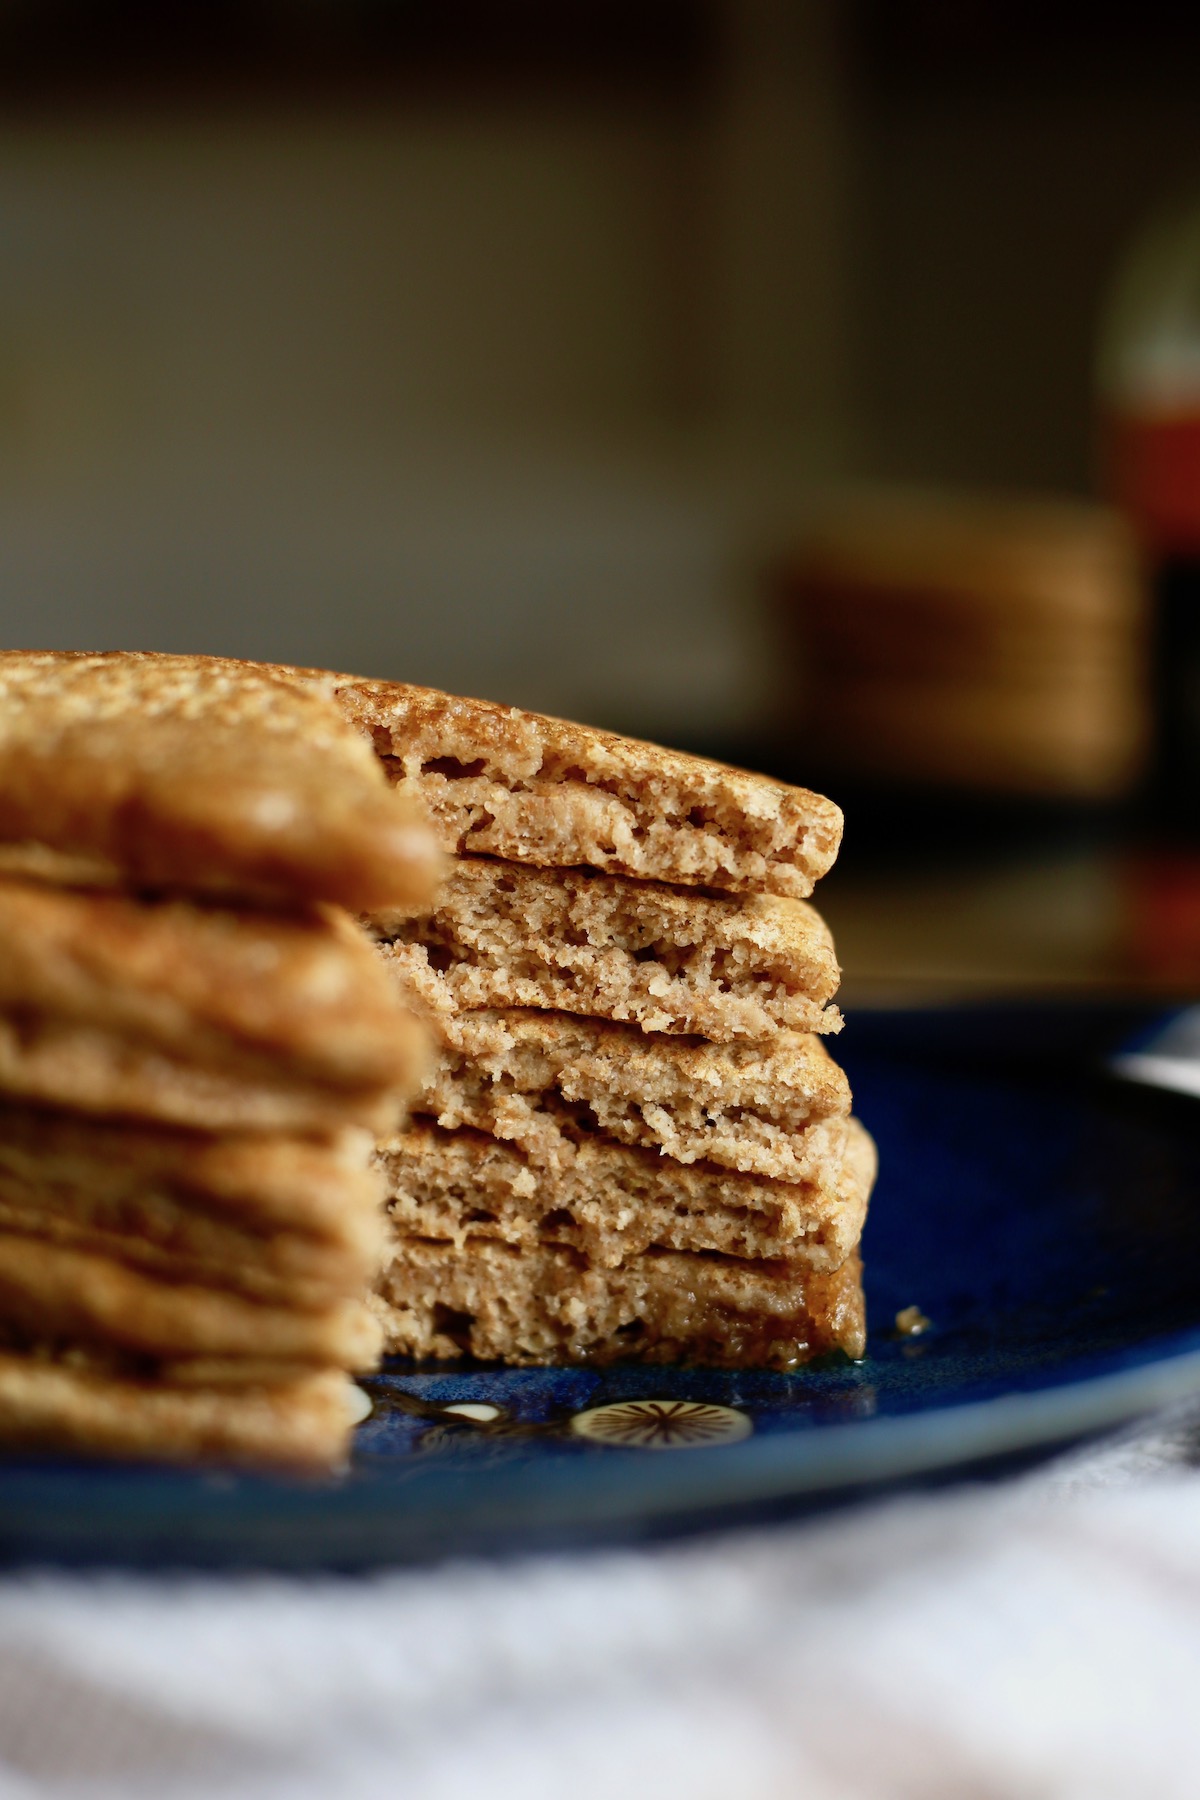
...Whole Wheat Vegan Buttermilk Pancakes

Made with whole grains and homemade vegan buttermilk, these fluffy, hearty Whole Wheat Vegan Buttermilk Pancakes will be your go-to pancake recipe from here on out!
We love our vegan pancakes over here. Usually I'm making classic flavors of pancakes like these Whole Wheat Vegan Banana Pancakes, easy vegan sourdough pancakes or these insanely fluffy Pumpkin Sheet Pan Pancakes. Other times we love more unique flavors like these Healthy Chocolate Chickpea Flour Pancakes or these Savory Falafel Pancakes.
But more often than not, I resort back to the most classic pancake flavor of all: Buttermilk Pancakes! These pancakes are so easy to make, incredibly fluffy and made with a base of whole wheat flour so you're left feeling energized and satisfied. Yes please! Let me show you how to make them.

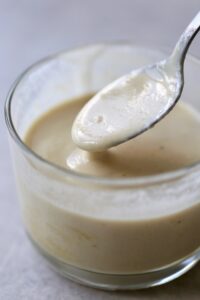
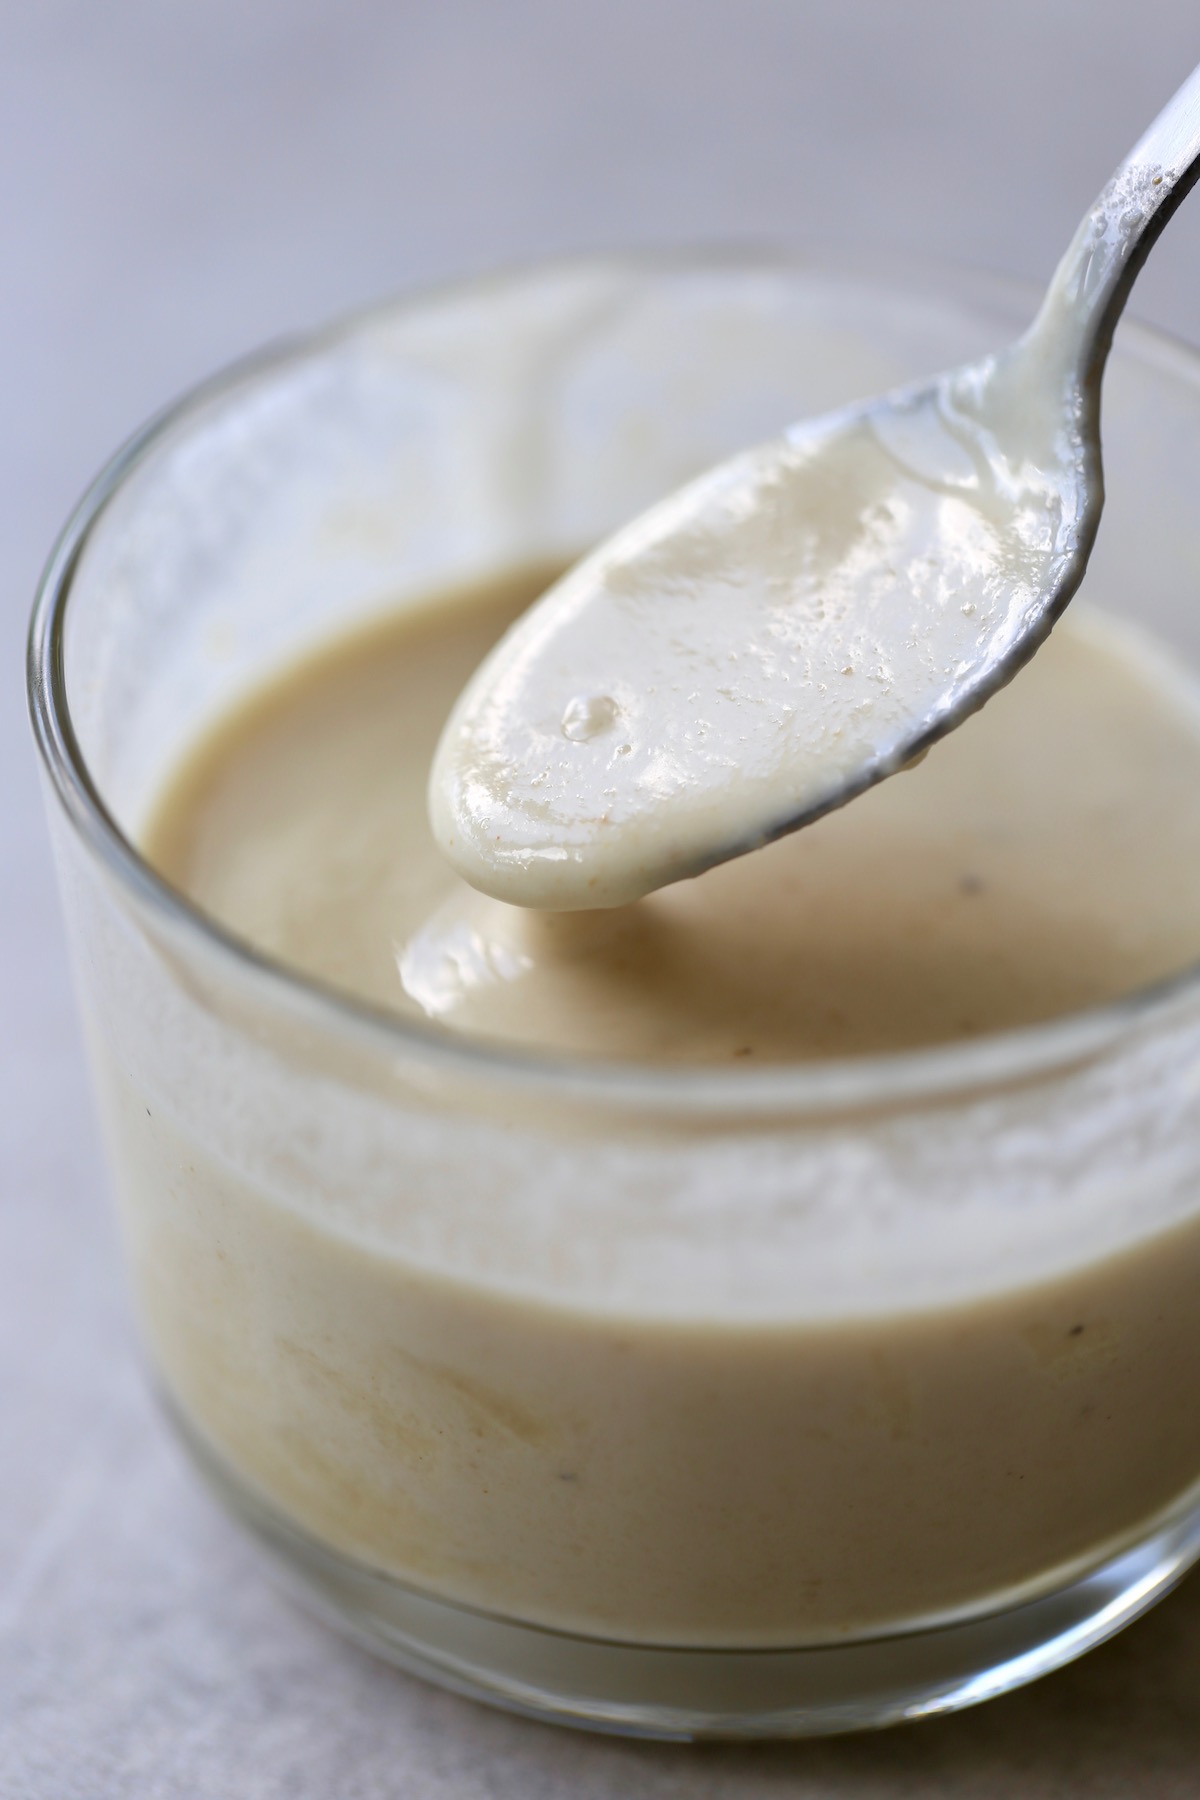
How to Make Vegan Buttermilk
Before we can make vegan buttermilk pancakes we need to talk about how to make vegan buttermilk.
But first, what even is buttermilk?
In the past, buttermilk was the liquid leftover from churning butter. It was thin and essentially fat-free, yet still tasted rich.
Nowadays, buttermilk is pasteurized milk that contains cultures. It can be purchased at the grocery store and ranges from skim to full-fat.
If you can't find vegan buttermilk at the store, don't worry! It's so easy to make at home. Plus, you can make just the amount you need for a recipe instead of buying an entire carton and trying to use it all up before it goes bad.
To make vegan butter milk you'll need the following two ingredients:
- An acid: such as apple cider vinegar, white vinegar or lemon juice.
- Non-dairy milk: such as soy, almond or even oat.
In general you'll need:
1 tablespoon of an acid for every 1 cup of non-dairy milk.
Stir the acid into the non-dairy milk and allow the mixture to sit for 5 minutes in order for the milk to "curdle". Then continue on with your recipe!
Ingredients You'll Need for Vegan Buttermilk Pancakes
Other than your homemade non-dairy buttermilk, these vegan buttermilk pancakes require minimal ingredients, most of which you probably already have in your pantry.
I'll list out all of the ingredients you'll need below:
- Non-dairy milk
- Apple cider vinegar
- Whole wheat flour
- Coconut sugar
- Baking powder
- Baking soda
- Salt
- Aquafaba (the liquid from a can of chickpeas)
- Oil (any neutral flavored oil)
You can see that the first two ingredients are non-dairy milk and vinegar. As I explained above, these two ingredients will be combined to make non-dairy buttermilk. This buttermilk will react with the baking soda to create super fluffy pancakes!
How to Cook Pancakes on the Stovetop
To make pancakes on the stovetop, you first need to make the pancake batter.
- To make the pancake batter, start by whisking together all of the dry ingredients, including the flour, sugar, baking powder, baking soda and salt.
- Next, whisk in the wet ingredients, including your homemade non-dairy buttermilk, aquafaba and oil. Allow the batter to sit for a few minutes while you heat a non-stick skillet over medium heat.
- To cook pancakes on the stovetop, grease your heated skillet with some cooking spray or a little bit of oil. Then take about ¼ cup of batter and pour it onto the hot pan, spreading it into the shape of a circle. Allow the batter to cook for a couple minutes until bubbles begin to form around the outside. Then carefully flip the pancake over to cook the other side. Continue this process until all of the batter has been used.
How to Store Pancakes
After each pancake has finished cooking, transfer it to a wire rack to cool completely. Once you've cooked all your pancakes, store them using one of the following methods below:
- Fridge: You can store your cooled pancakes in an airtight container in the fridge for 4-5 days.
- Freezer: If you want your pancakes to last longer, you can freeze them. Start by flash freezing them by placing them on a baking sheet in a single layer in the freezer until hard. Once mostly frozen, place them in a freezer zip-lock bag in the freezer until ready to use.
How to Reheat Pancakes
To reheat pancakes that have been in the fridge, we usually just place them on a plate and zap them in the microwave for a few seconds until warmed through.
If you are reheating frozen pancakes, you can remove the amount you need the night before and place them in the fridge to thaw. Then microwave them when you're ready to eat.
📖 Recipe

Whole Wheat Vegan Buttermilk Pancakes
Made with whole grains and homemade non-dairy buttermilk, these Whole Wheat Vegan Buttermilk Pancakes are a great way to start your morning!
Equipment
Ingredients
- 1 cup non-dairy milk
- 1 tablespoon apple cider vinegar
- 1 cup whole wheat flour
- 1 tablespoon coconut sugar
- 1 teaspoon baking powder
- ¼ teaspoon baking soda
- ¼ teaspoon salt
- 3 tablespoon aquafaba
- 1 tablespoon neutral oil
Instructions
- In a liquid measuring cup, start by combining the non-dairy milk and apple cider vinegar. Stir and allow the mixture to sit for a couple minutes to turn into buttermilk.
- While the buttermilk forms, in a large mixing bowl whisk together all of the dry ingredients, from the whole wheat flour to the salt.
- Add the buttermilk, aquafaba and oil to the dry mixture and whisk until smooth. Allow the batter to sit for about 5 minutes while you heat a skillet over medium heat.
- Once your skillet is heated through, cook the batter in ¼ cup increments. When you see bubbles around the edges of the pancake, flip it over to cook on the other side. Continue this process until all of the batter has been used.
- Enjoy the pancakes warm or allow them to cool on a wire rack completely before storing them in an airtight container in the fridge or freezing them for longer. (see the section above titled, "How to Store Pancakes.")
Notes
After each pancake has finished cooking, transfer it to a wire rack to cool completely. Once you've cooked all your pancakes, store them using one of the following methods below:
- Fridge: You can store your cooled pancakes in an airtight container in the fridge for 4-5 days.
- Freezer: If you want your pancakes to last longer, you can freeze them. Start by flash freezing them by placing them on a baking sheet in a single layer in the freezer until hard. Once mostly frozen, place them in a freezer zip-lock bag in the freezer until ready to use.
Nutrition
Calories: 230kcalCarbohydrates: 36gProtein: 8gFat: 7gSaturated Fat: 1gPolyunsaturated Fat: 3gMonounsaturated Fat: 3gTrans Fat: 0.02gSodium: 467mgPotassium: 261mgFiber: 5gSugar: 6gVitamin A: 313IUVitamin C: 6mgCalcium: 203mgIron: 2mg
Tried this recipe?Let me know how it was!
Lemon Tahini Dressing Recipe (with variations!)
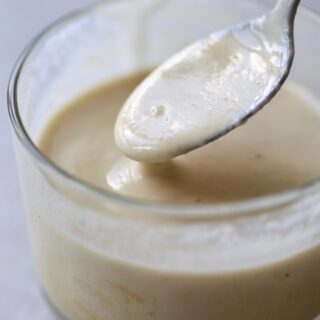
This easy to prepare, zesty and creamy Lemon Tahini Dressing is my go-to salad dressing whenever I'm in a pinch! We use it as a dressing for salads, drizzle it on wraps and drink it straight from the jar! Plus, there are so many different variations you can make so that you never get bored!
Also Featured In
This recipe is also featured in the following vegan recipe roundups:
If you didn't know by now, I'm obsessed with tahini.
I love it so much that I've found ways to include it in almost every kind of recipe, from Tahini Banana Bread, Easy Tahini Granola and even Chocolate Tahini No-Bake Cookies!
While all the examples above are for sweeter snacks and dessert, I often use tahini as the base for most of our savory dressings and condiments.
So, yeah.
I love tahini!
What is Tahini Anyway?
Tahini is basically the sesame seed version of peanut butter.
To make tahini, sesame seeds are toasted, hulled and ground into a runny "butter" or paste.
Tahini is often used as a dip on its own or used to make other items such as hummus, baba ganoush and halva.
Different Kinds of Tahini
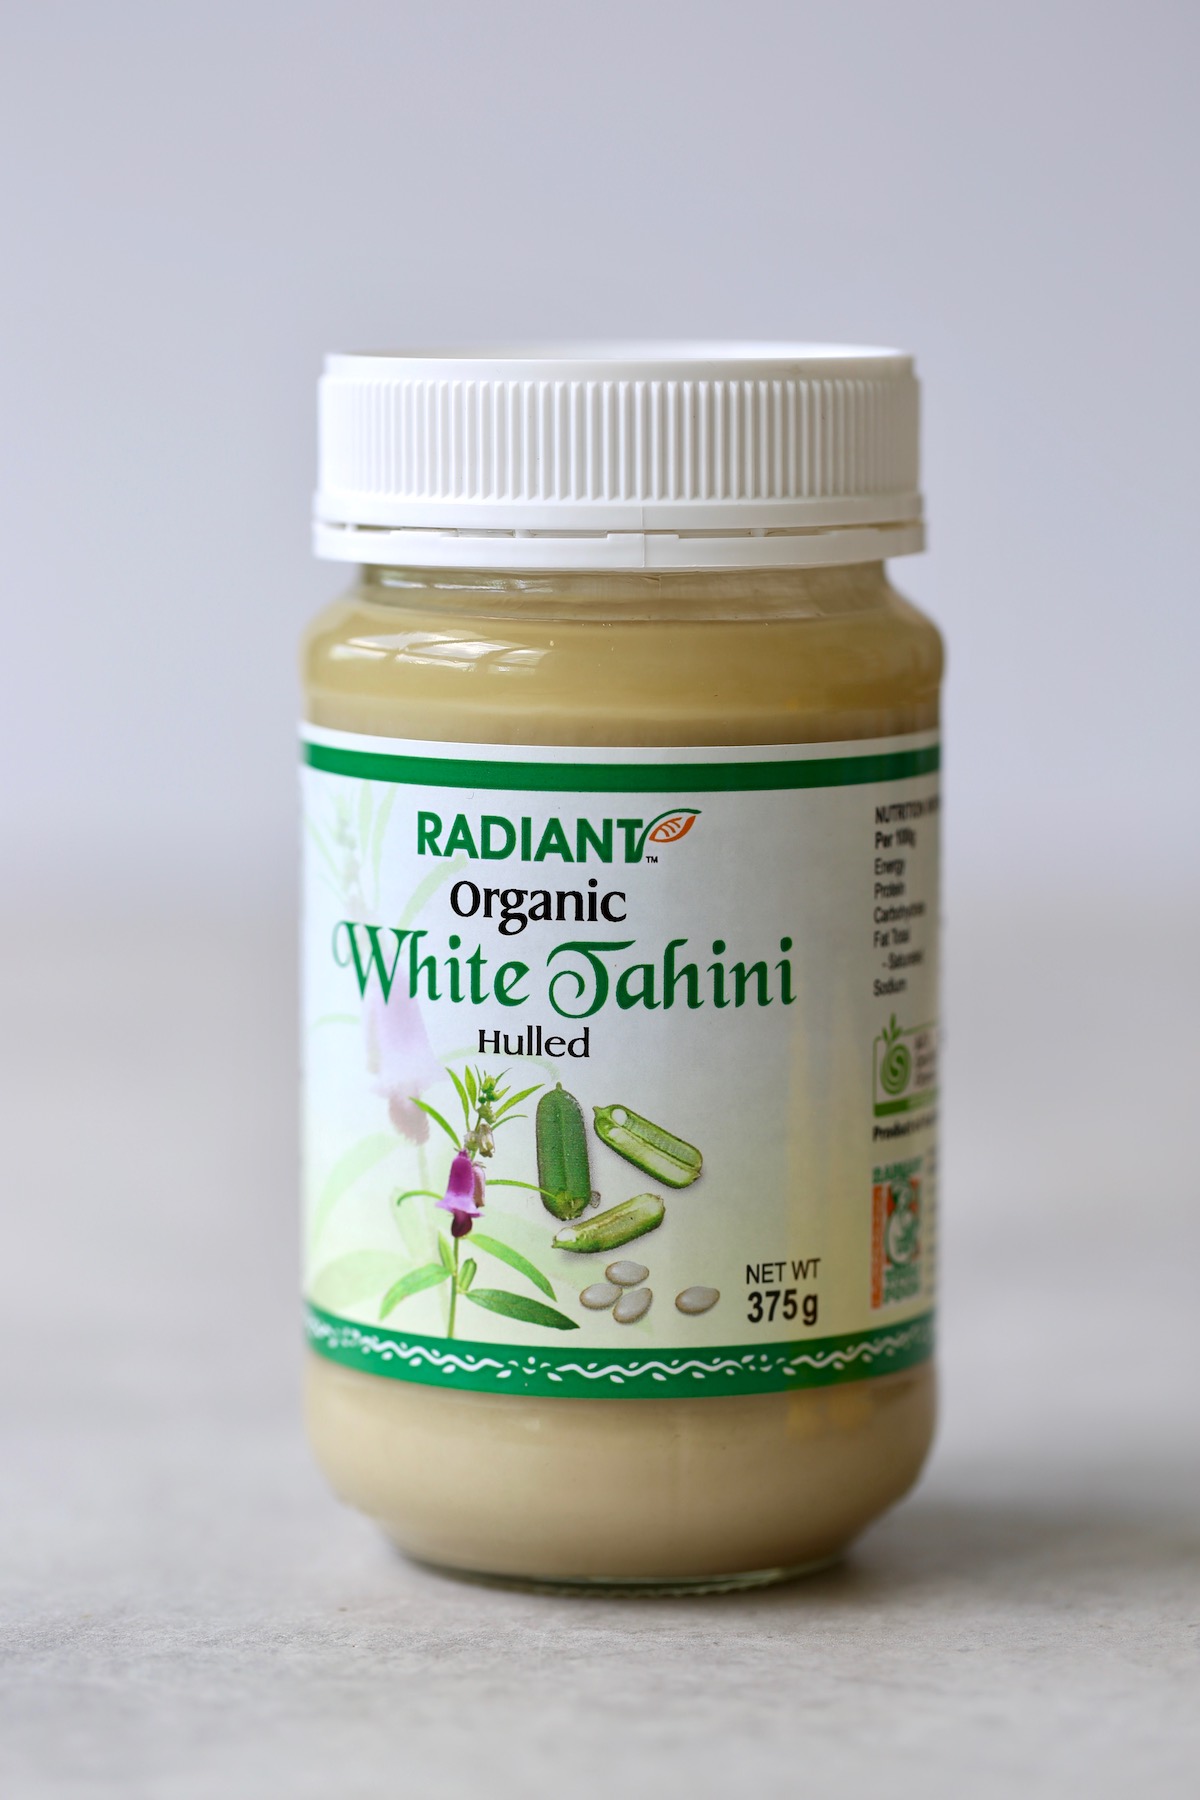
While the most popular kind of tahini is white tahini, there is also different variations of white tahini and there is even black sesame tahini.
What's the difference between each of these?
- White tahini: This is made from white sesame seeds. It is most popular in Middle Eastern dishes and condiments such as hummus and baba ganoush.
- Black tahini: This is simply tahini made from unhulled black sesame seeds. Black tahini is often found in sweet Asian desserts such as mochi or steamed buns.
- Hulled tahini: This is made from sesame seeds that have had the outer covering, or hulls, removed. The iron and calcium content of hulled tahini is lower than unhulled.
- Unhulled tahini: This is made from sesame seeds that still have their outer covering. The iron and calcium content of unhulled sesame seeds is substantially higher than hulled sesame seeds.
Best Brands of Tahini
The number of tahini brands available on the market is astounding...and probably overwhelming if you're new to purchasing and using tahini.
Over the years I've found some brands that I love and buy on a regular basis. However, the brands I have access to may be different than the ones you can find at your local grocery store.
Below I'll share with you some of my favorite brands as well as things to look for when trying out different brands of tahini.
When you're looking to purchase tahini, you want to find and use a tahini that is super smooth and doesn't have a clump of paste at the bottom and a pool of oil at the top.
While oil separating does occur naturally, I've found that the best brands don't have this issue.
I love to use tahini that I've purchased from world markets or middle eastern grocery stores.
As for specific brands, i love:
The runnier the better!
Basic Lemon Tahini Dressing Ingredients
This basic lemon tahini dressing is incredibly simple to make!
I'm sure you already have most of the ingredients on hand, which are listed here:
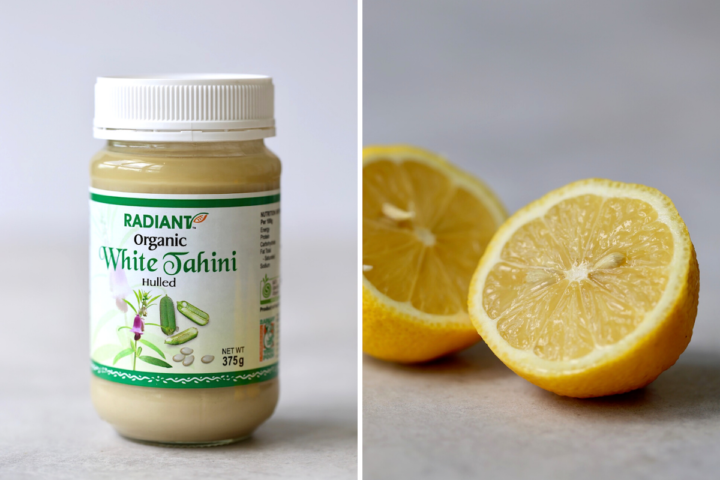
- Tahini
- Lemon juice
- Garlic
- Salt and pepper
- Water, to thin
If you're really in a pinch, like I sometimes am, a simple dressing made from just tahini and lemon juice is just as delicious.
However, if you have the time to include some fresh garlic and a pinch of salt, you'll end up with a more flavorful dressing.
I'll be sharing different flavor variations to this basic recipe below!
How to Make Tahini Dressing
All you'll need to make this dressing are some measuring cups, measuring spoons, a sealable jar and a spoon to mix everything together.
Once you make this dressing a few times, however, you can ditch the measuring equipment and just eyeball everything!
To make this basic Lemon Tahini Dressing, simply follow the step-by-step instructions below:
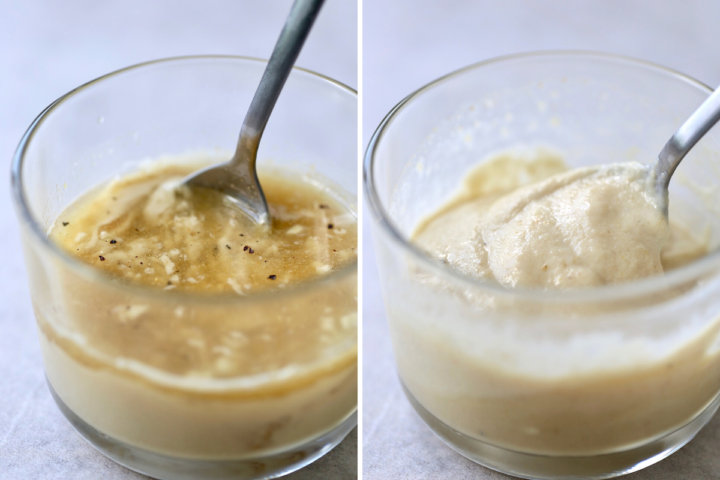
- Place all of the ingredients, except for the water, into a glass jar and stir until a thick paste forms. This happens when an acid, such as lemon juice, combines with tahini.
- Stir in water a little at a time until your desired consistency has been reached.
Taste the dressing and add more salt for saltiness, lemon juice for zest, maple syrup for sweetness or black pepper for kick!
Different Variations of Tahini Dressing
The best part of this tahini dressing is that it's easily adaptable.
Below I'll share some different flavor variations that you can try to jazz up this basic lemon tahini dressing recipe!
Sweet Lemon Tahini Dressing
To balance out the bitterness of the tahini, to the basic lemon tahini dressing recipe add
- 1 tablespoon maple syrup
- ½ teaspoon ground cumin
This is my go-to tahini dressing recipe as it seems to pair beautifully with so many dishes, especially vegan buddha bowls and salads!
Lemon Miso Tahini Dressing
To make lemon miso tahini dressing, to the basic lemon tahini dressing recipe.simply add:
- 2 tablespoons of yellow or white miso
This is one of my favorite dressings as it has rich umami flavor and makes for a great dressing or sauce for any asian-style recipe!
Also, if you love miso, you'll love these Vegan Miso Noodles!
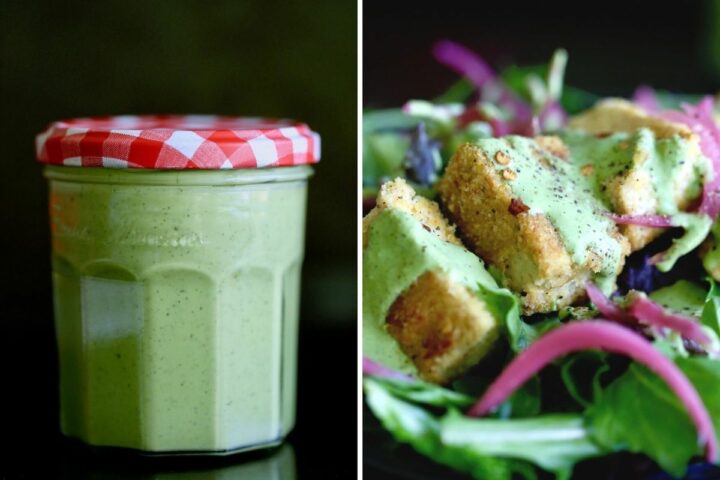
Herby Lemon Tahini Dressing
To add some freshness to your basic lemon tahini dressing add:
- A handful of fresh cilantro
- A handful of fresh parsley
- 2 teaspoons of maple syrup
Get creative and you'll find that you'll never get bored of this dressing!
How to Store Homemade Tahini Dressing
This dressing is best stored in a sealable jar in the fridge. Thanks to the lemon juice, the basic, sweet and miso variations of this dressing should last for about a week.
The herby lemon tahini dressing should be enjoy more quickly as the fresh herbs may go bad.
As this dressing sits in the fridge, it will most likely thicken up a little bit.
To thin it out before using, simply stir in a little water until it reaches your desired consistency.
Best Uses for Tahini Dressing
I love having some variation of this homemade lemon tahini dressing on hand because it seems to go so well with a bunch of different meals.
Below I'll share some of our favorite ways to use tahini dressing.
- Salad dressing
- Condiment for wraps and sandwiches
- Dip for veggies
- Sauce for buddha bowls
- Dressing for avocado toast
- Sauce for pasta/noodles
I'd love to know if you give this simple, easy to make Lemon Tahini Dressing a try!
Please let me know your thoughts in the comments below.
If you like it as much as we do, be sure to give the recipe a five star rating by clicking on the stars in the recipe card!
📖 Recipe
Lemon Tahini Dressing
This easy to prepare, zesty and creamy Lemon Tahini Dressing is my go-to salad dressing whenever I'm in a pinch!
Ingredients
Basic Lemon Tahini Dressing
- ½ cup tahini
- ¼ cup freshly squeezed lemon juice
- 1 clove garlic minced
- Salt and pepper to taste
- Water to thin
Sweet Lemon Tahini Dressing
- 1 tablespoon maple syrup
- ½ teaspoon ground cumin
Lemon Miso Tahini Dressing
- 2 tablespoons white or yellow miso
Herby Lemon Tahini Dressing
- Handful fresh cilantro
- Handful fresh parsley
- 2 teaspoons maple syrup
Instructions
- In a sealable jar, combine all of the ingredients for the basic recipe (except for the water) as well as the ingredients for one of the flavor variations if desired, and stir until a thick paste forms. If you are making the Herby Lemon Tahini Dressing Recipe, place all of the ingredients into a small blender including ¼ cup of water, and blend until smooth.
- Add water a little at a time until the dressing reaches your desired consistency.
- Taste and add more salt for saltiness, maple syrup for sweetness, lemon juice for zest or pepper for kick!
- Drizzle on salads, wraps or drink it straight from the jar!
Notes
This dressing is best stored in a sealable jar in the fridge. Thanks to the lemon juice, the basic, sweet and miso variations of this dressing should last for about a week.
The herby lemon tahini dressing should be enjoy more quickly as the fresh herbs may go bad.
As this dressing sits in the fridge, it will most likely thicken up a little bit.
To thin it out before using, simply stir in a little water until it reaches your desired consistency.
Nutrition
Serving: 2tablespoonsCalories: 85kcalCarbohydrates: 5gProtein: 3gFat: 6gSaturated Fat: 1gPolyunsaturated Fat: 3gMonounsaturated Fat: 2gCholesterol: 1mgSodium: 6mgPotassium: 81mgFiber: 1gSugar: 2gVitamin A: 10IUVitamin C: 3mgCalcium: 23mgIron: 1mg
Tried this recipe?Let me know how it was!
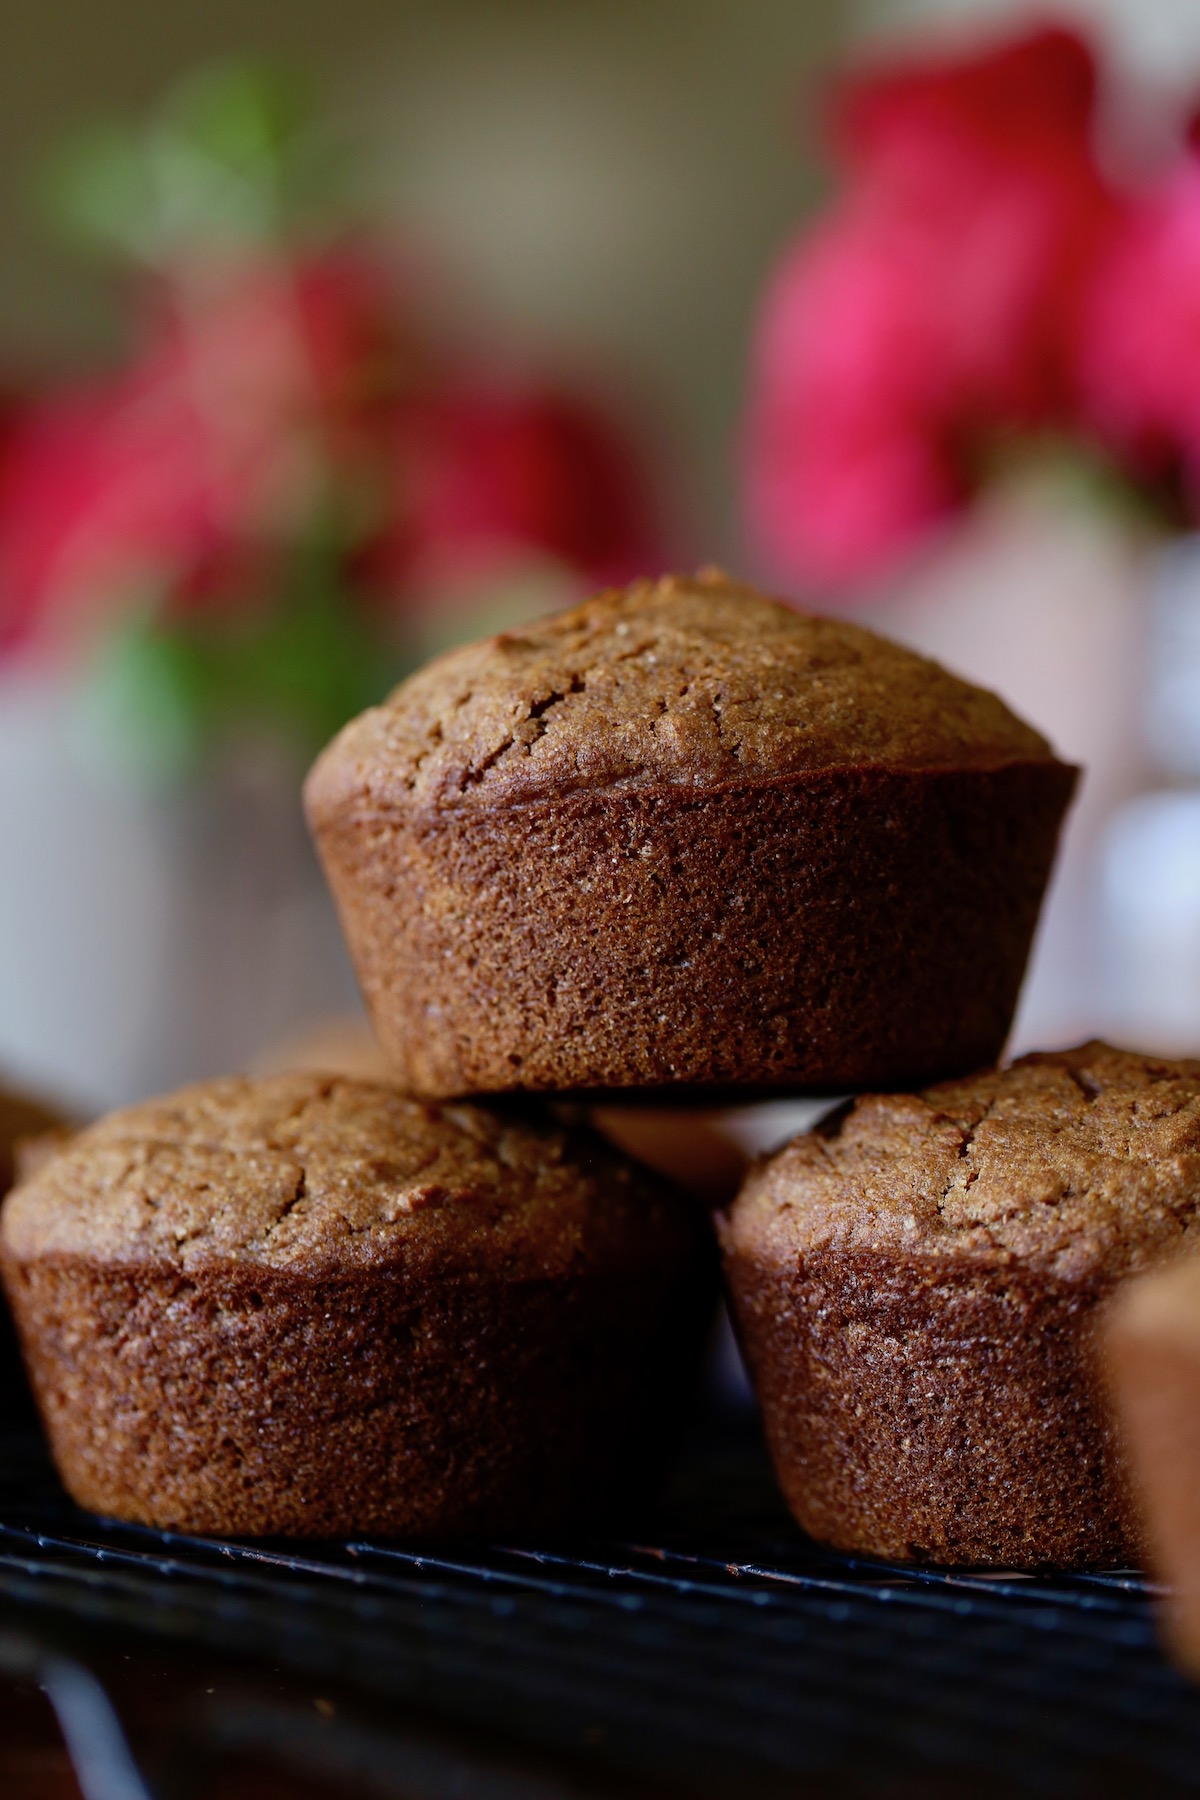
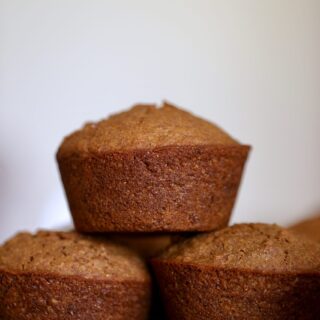
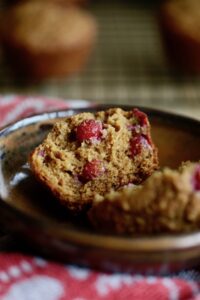
Vegan Raisin Bran Muffins
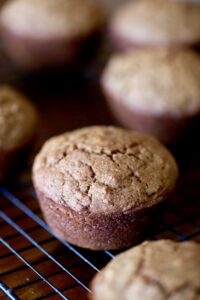
Made with minimal ingredients and full of fiber, these Vegan Raisin Bran Muffins are a hearty, delicious way to start your day! Plus, they're a great way to use up a box of cereal!

How could I forget about vegan bran muffins?!
Man, they're good!
We enjoy vegan muffins often in our house. I'm often making these Wholesome Vegan Banana Nut Muffins or these refreshing Vegan Cranberry Orange Muffins.
But it had been ages since I made these, despite how much we love them.
I have a recipe on my blog for Vegan Oat Bran Applesauce Muffins and we love those.
However, if you really want to impress your friends and family, you MUST make these Vegan Raisin Bran Muffins!
They're fluffy, moist and everything this kind of comfort food should be.
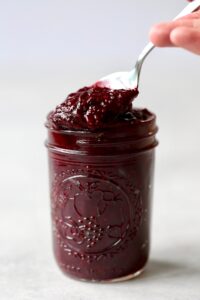
Smear some non-dairy butter and apple butter on top and you'll be in heaven!
Let me share with you how to make them!
How to Make Vegan Buttermilk
Before we jump into this vegan bran muffin recipe, we need to talk about how to make your own homemade vegan buttermilk.
This recipe calls for 2 cups of buttermilk and it couldn't be easier to make non-dairy buttermilk right in the comfort of your own home.
To make vegan buttermilk, all you need to do is add an acid to some non-dairy milk using the following ratio:
- 1 tablespoon acid
- 1 cup non-dairy milk
I like to use a liquid measuring cup to do this. First I place a tablespoon of an acid, usually apple cider vinegar, into the measuring cup. Then I add in non-dairy milk until it reaches the 1 cup line. Stir the mixture and allow these two ingredients to sit for 5 minutes so that the vinegar can "curdle" the non-diary milk to create vegan buttermilk!
For this recipe you'll need 2 tablespoons of apple cider vinegar and 2 cups of non-dairy milk.
Done and done!
How to Replace Eggs with Aquafaba
We also need to talk about aquafaba for a second.
If you're unfamiliar with aquafaba, it's simply the liquid from a can of chickpeas. I have no idea who thought to experiment with aquafaba, but it makes for a wonderful egg replacement in recipes such as this one, quick breads and even pavlova!
To replace an egg in baking using aquafaba, simply use the following ratio:
- 3 tablespoons aquafaba = 1 egg
This raisin bran muffin recipe usually calls for 2 eggs, so instead we are using 6 tablespoons of aquafaba.
Ingredients for Vegan Raisin Bran Muffins
Now that we know how to make vegan buttermilk and use aquafaba as an egg replacement, you have a better understanding of the ingredients needed for these Vegan Raisin Bran Muffins.
I'll list out everything you need below:
- 2 cups non-dairy milk
- 2 tablespoons apple cider vinegar
- ½ cup neutral oil
- ¾ cup coconut sugar
- 6 tablespoons aquafaba
- 4 cups Raisin Bran Cereal
- 2 cups whole wheat flour
- 2 teaspoons baking soda
- 1 teaspoon salt
Raisin Bran Muffin Substitutions
If you don't have these exact ingredients on hand, there are quite a few substitutions that you can make.
- Instead of making your own buttermilk using non-dairy milk and vinegar, you can always use 2 cups of store-bought vegan buttermilk or regular dairy buttermilk.
- If you eat eggs, you can use 2 eggs instead of the 6 tablespoons of aquafaba.
- If you're looking to cut back on oil, I've made these with both pumpkin puree and applesauce. While the texture will be a little different, both options work great!
- Regular cane sugar or white sugar will work instead of the coconut sugar
- Bran Flakes cereal is often what I use instead of Raisin Bran Cereal. This cuts back on the sugar content, without compromising on taste! If you choose to go this route, you can always stir in a couple handfuls of raisins to the batter before baking.
- White flour instead of whole wheat flour will work fine. However, the baking times may vary.
How to Make Vegan Raisin Bran Muffins

These are some of the easiest muffins to make. So if you're new to baking, you should definitely give this recipe a try!
Simply follow the directions below or in the recipe card and in 30 minutes you can be enjoying a warm treat right out of the oven.
- Step 1: Preheat your oven to 400F/200C and grease 16 muffin cups or 8 jumbo cups with cooking spray. Set the tin aside.
- Step 2: Prepare your vegan buttermilk by mixing together 2 tablespoons of apple cider vinegar and 2 cups on non-dairy milk. Allow the mixture to sit for 5 minutes while you prepare the rest of your ingredients.
- Step 3: In a stand mixer or using a mixing bowl and whisk, combine the wet ingredients one at a time, ending with your homemade buttermilk.
- Step 4: Next, stir in the dry ingredients one at a time, starting with the cereal and ending with the salt. Mix until just combined so that you don't over-mix your batter and end up with tough, chewy muffins.
- Step 5: Divide the batter evenly among your greased cups. Bake standard sized muffins for 13-17 minutes and jumbo for 16-20 minutes or until golden on top and a toothpick inserted into the center comes out clean.
- Step 6: Allow them to cool for a few minutes in the tin before carefully removing them to a wire rack to cool completely.
How to Store Homemade Muffins
There are a few ways you can store these for future use. First allow them to cool completely before using the methods listed below:
- Countertop: We personally go through these vegan muffins quickly. Because of this, I often store them in an airtight container or bag on the counter top for up to 2 days.
- Fridge: If I want our muffins to last longer, I will often store them in an airtight container in the fridge for about 5-6 days.
- Freezer: Whenever I meal prep larger batches or want them to last a really long time, I'll wrap them individually before placing them in a freezer bag in the freezer for 2-3 months. To thaw, I'll simply remove it from the freezer and place it in the fridge overnight. The next morning I'll microwave it for a few seconds until warm!
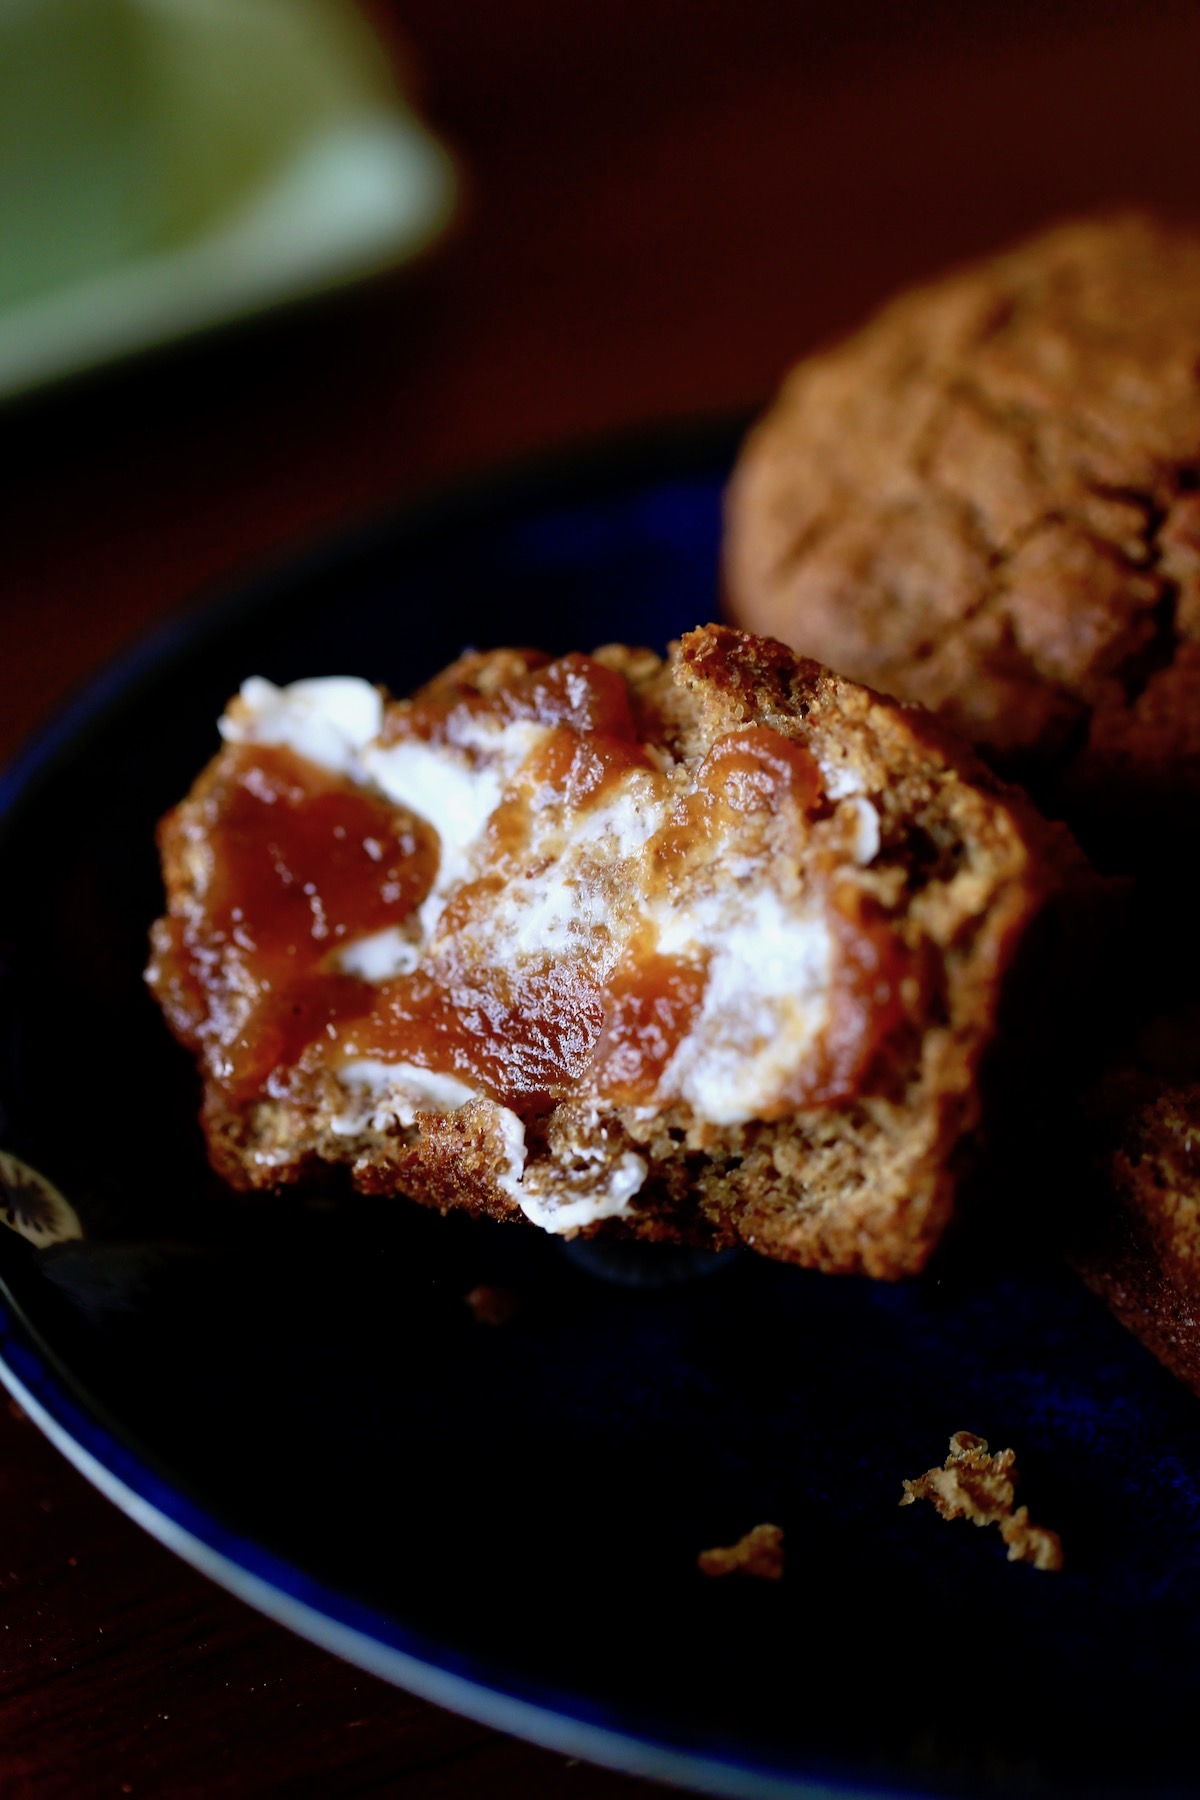
I'd love to know if you give this simple Vegan Raisin Bran Muffin recipe a try! We are absolutely in love with them, especially when eaten warm topped with vegan butter and apple butter.
YUM!
If you enjoy this recipe, be sure to give it a star rating by clicking on the stars in the recipe card. Then share the recipe with your friends and family!
📖 Recipe
Vegan Raisin Bran Muffins
Made with minimal ingredients and full of fiber, these Vegan Raisin Bran Muffins are a hearty, delicious way to start your day!
Ingredients
- 2 cups non-dairy milk
- 2 tablespoons apple cider vinegar
- ½ cup oil
- ¾ cup coconut sugar
- 6 tablespoons aquafaba*
- 4 cups raisin bran cereal or Bran Flakes Cereal**
- 2 cups whole wheat flour
- 2 teaspoons baking soda
- 1 teaspoon salt
Instructions
- Preheat your oven to 400 °F and line 16 muffin cups with silicone muffin liners or grease the cups with cooking spray. You can also make 8-9 jumbo muffins! Set the tins aside while you prepare the batter.
- To make the vegan buttermilk, place 2 tablespoons of apple cider vinegar into a liquid measuring cup. Next add your non-dairy milk up to the 2 cup line. Allow the mixture to sit for 5 minutes.
- In the bowl of a stand mixer or using a mixing bowl and whisk, mix together the oil and sugar until combined. Add in aquafaba and mix again. Next add in the buttermilk and mix again. Add in the remaining ingredients one at a time, mixing briefly after each ingredient has been added.
- Once the batter has just been combined, divide it evenly among the muffin cups.
- Divide the batter among your prepared muffin cups.
- Bake the muffins for 13-16 minutes for standard sized muffins or 17-20 minutes for jumbo muffins. They're done when they're slightly golden on top and a toothpick inserted into the center comes out clean.
Notes
This recipe was veganized and adapted from Pinch of Yum.
*Aquafaba is simply the liquid from a can of chickpeas. Whenever I'm cooking with chickpeas, I'll drain the liquid into a sealable jar and store it in the fridge for 3-4 days to use in baking.
**I like to use bran flakes instead of raisin bran as it contains less sugar. If you use bran flakes, you can always fold in a handful of raisins to the batter if desired.
Make sure the brand of cereal you are using is vegan if you want these muffins to be entirely vegan!
Nutrition
Serving: 1muffinCalories: 212kcalCarbohydrates: 33gProtein: 4gFat: 8gSaturated Fat: 1gPolyunsaturated Fat: 3gMonounsaturated Fat: 5gTrans Fat: 0.03gSodium: 354mgPotassium: 178mgFiber: 4gSugar: 15gVitamin A: 305IUVitamin C: 2mgCalcium: 54mgIron: 3mg
Tried this recipe?Let me know how it was!
Easy Instant Pot Berry Compote
Made with only 4 ingredients and three minutes of cooking time in a pressure cooker, this Instant Pot Berry Compote is a great condiment to dollop on pancakes, oatmeal or toast all throughout the week!
...Vegan Cranberry Orange Muffins
Studded with tart cranberries and fresh orange zest, these whole grain Vegan Cranberry Orange Muffins are a light and refreshing way to start the day!
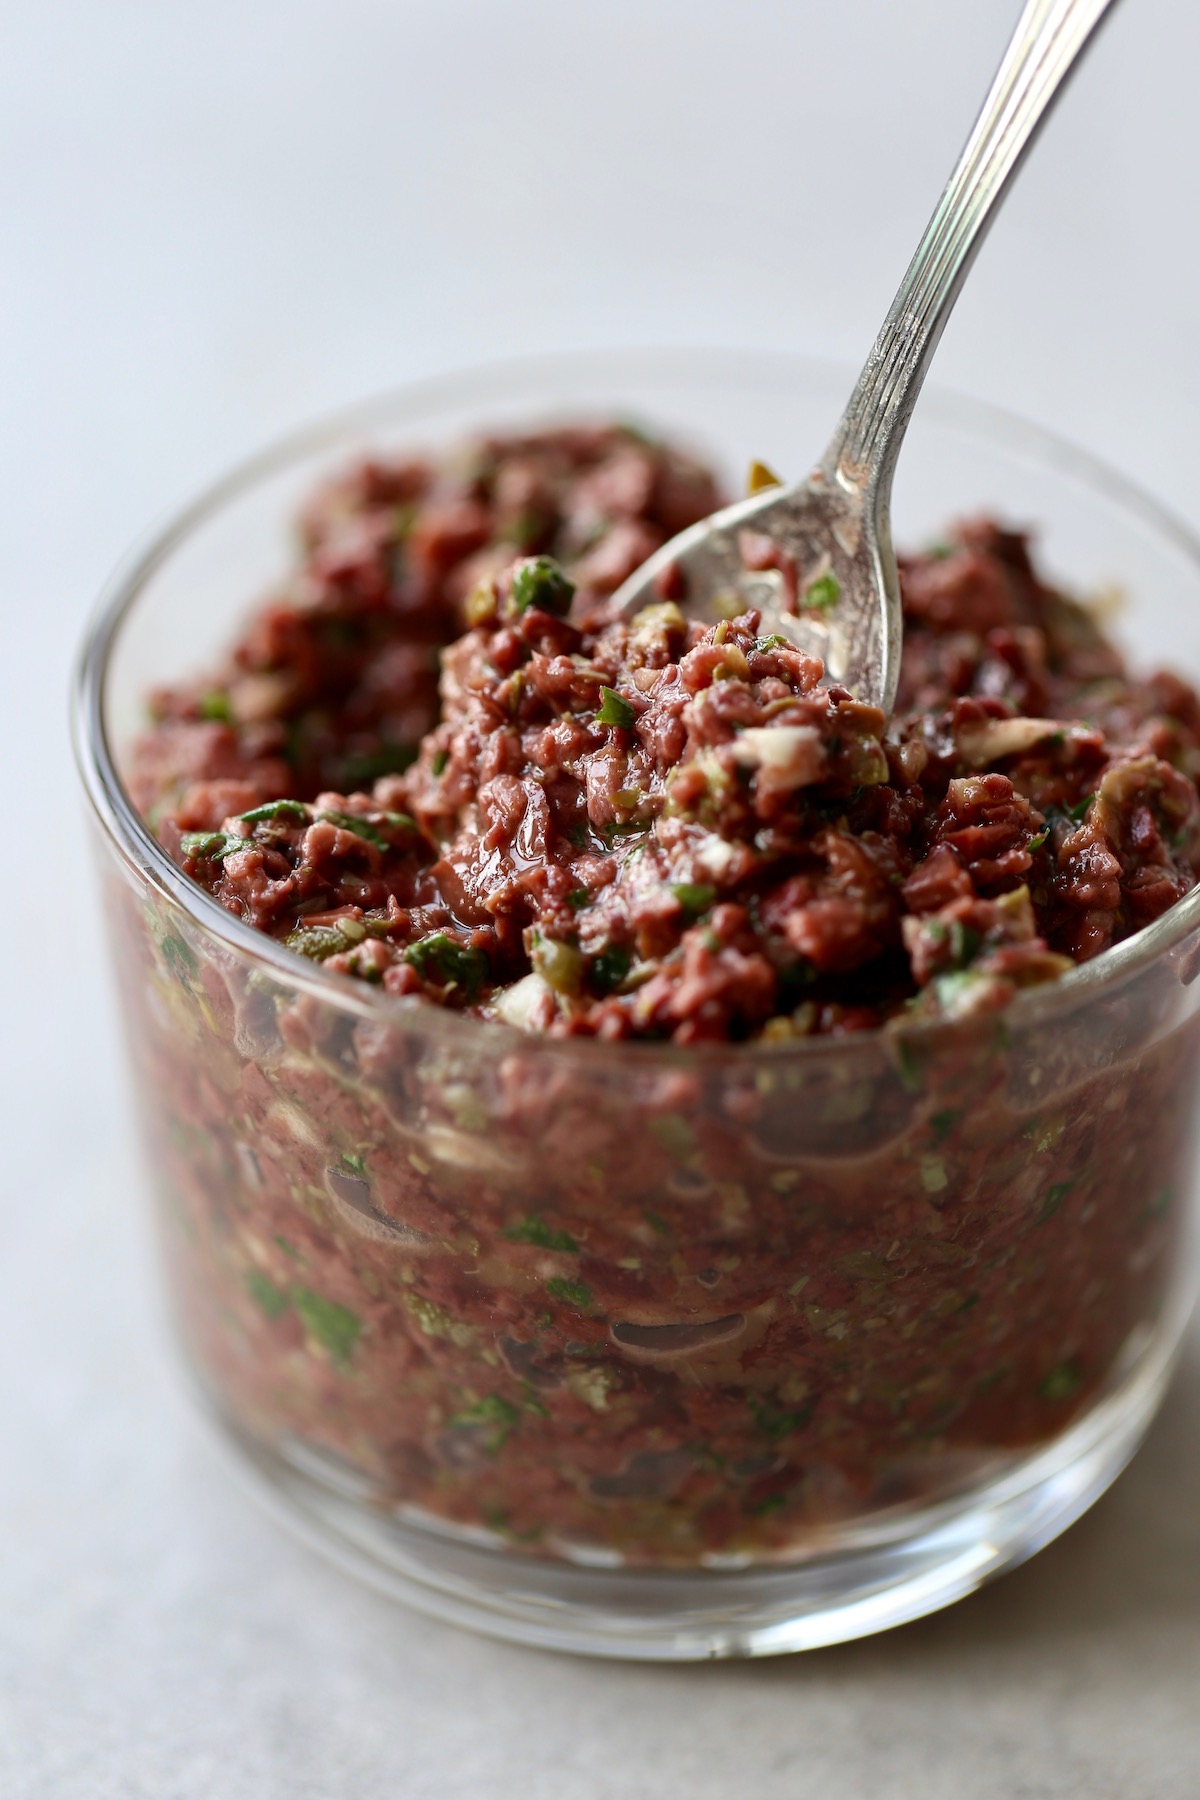
...Easy Kalamata Olive Tapenade Recipe

Salty Kalamata olives, zesty capers and fresh parsley combine to create an incredibly flavorful spread with this homemade tapenade recipe!
Also Featured In
This recipe is also featured in the following vegan recipe roundups:
My New Kalamata Olives Obsession
I used to hate olives.
As in, loathe them.
But then one bite of some freshly baked olive bread from a farmer's market in Ireland changed everything.
Now I adore olives!
Well, kalamata olives that is.
They're salty, rich and creamy and add so much flavor when added to wraps, sandwiches and salads.
Oh, and when you process them with zesty lemon juice and fresh parsley, you end up with the amazingness that is....TAPENADE!
What is tapenade?
Tapenade is a paste or dip that is usually based around black olives, capers and anchovies. The name tapenade actually stems from the Provençal word tapenas which means capers. It is popular in the south of France.
However, there are many varieties of tapenade. Today I'm showing you how to make a vegan tapenade that is based around purple, meaty Kalamata olives instead of black olives!
Ingredients
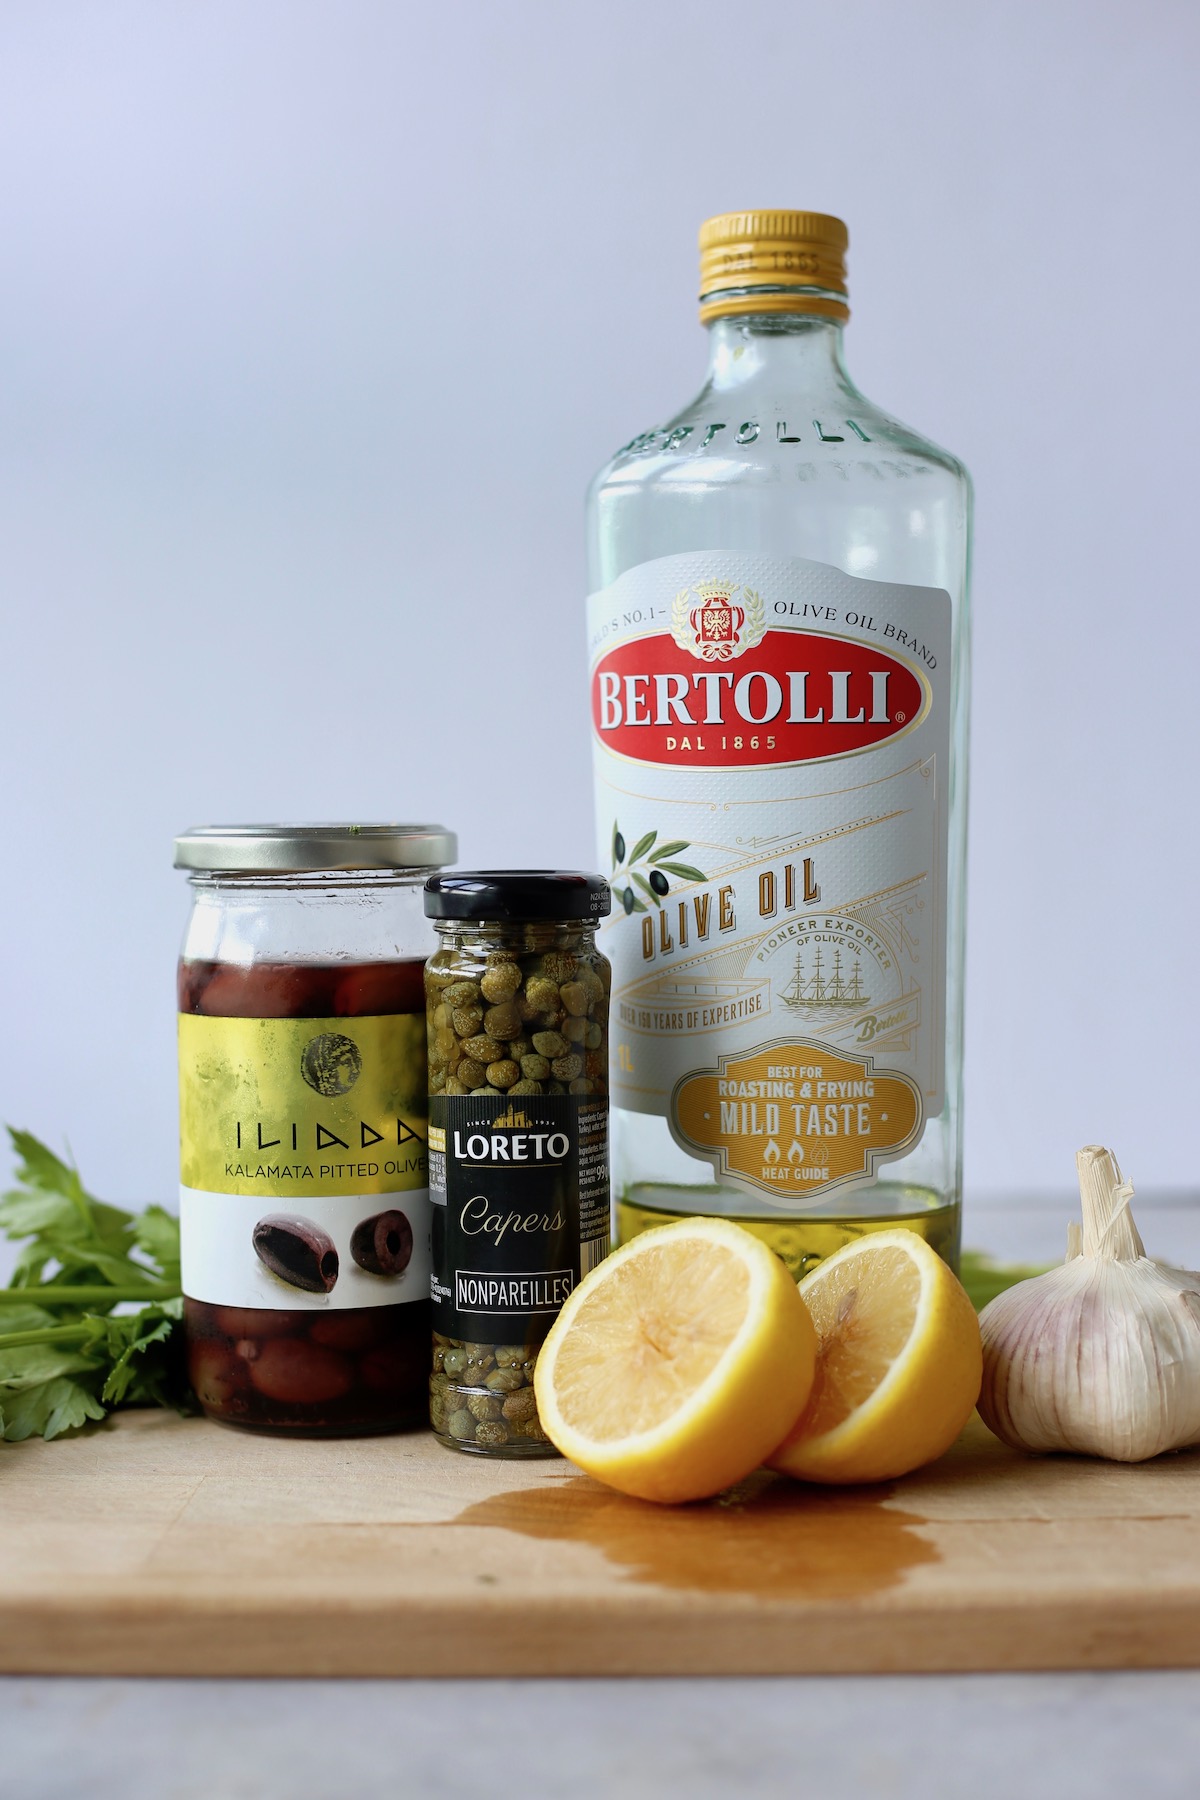
To make this Kalamata Tapenade, you'll only need a handful of ingredients. I'll list them out below:
- Garlic
- Kalamata olives
- Lemon juice
- Capers
- Fresh parsley
- Olive oil
- Salt and pepper, to taste
I know it can be easy to rely on bottled lemon juice, but trust me, freshly squeezed lemon juice is always better!
How to make tapenade
This homemade Kalamata Tapenade recipe couldn't be easier to make, especially if you purchase already pitted olives. Follow the step-by-step instructions below and you'll be enjoying fresh tapenade in minutes!
Step 1: Peel your garlic cloves and place them in a food processor. Process them on high for a few seconds until finely minced.
Step 2: Add in the remaining ingredients, excluding the salt and pepper, and process again until a chunky paste forms.
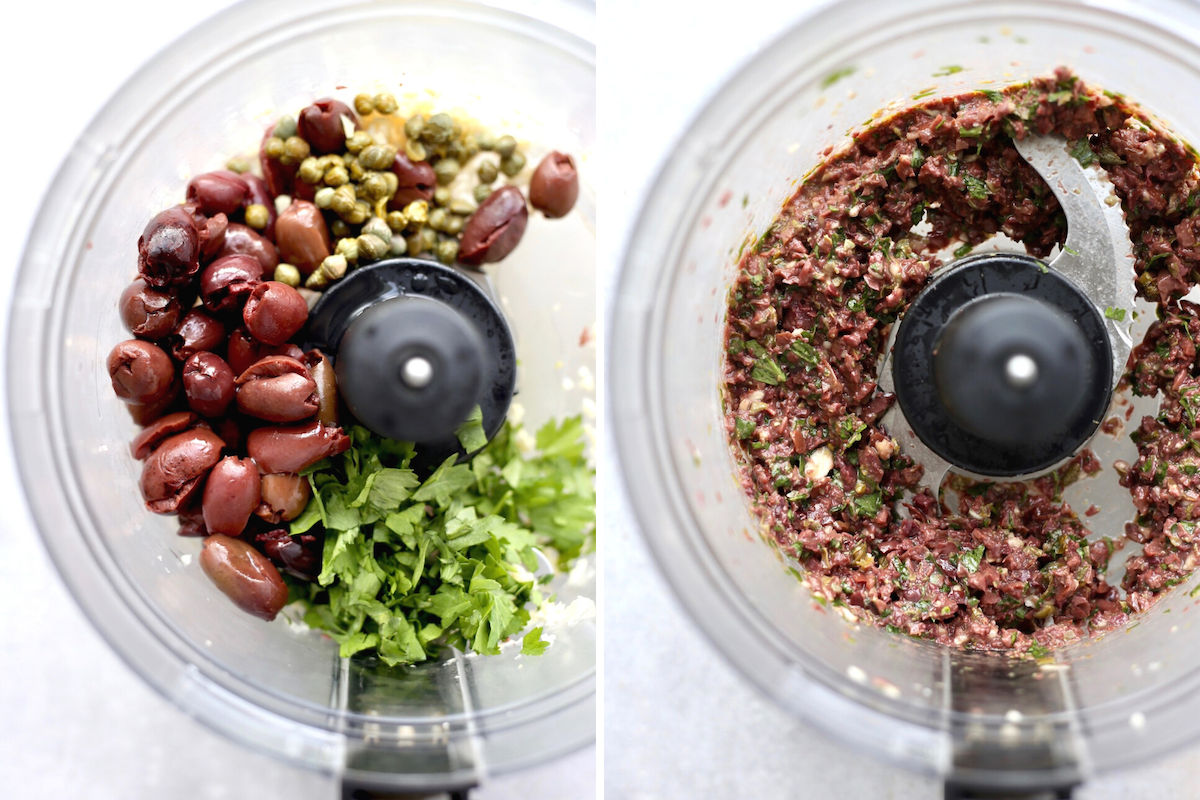
Step 3: Taste the tapenade and add more lemon juice or capers for zest, salt for saltiness or parsley for freshness.
Step 4: Enjoy the tapenade immediately or transfer the mixture to a sealable jar.

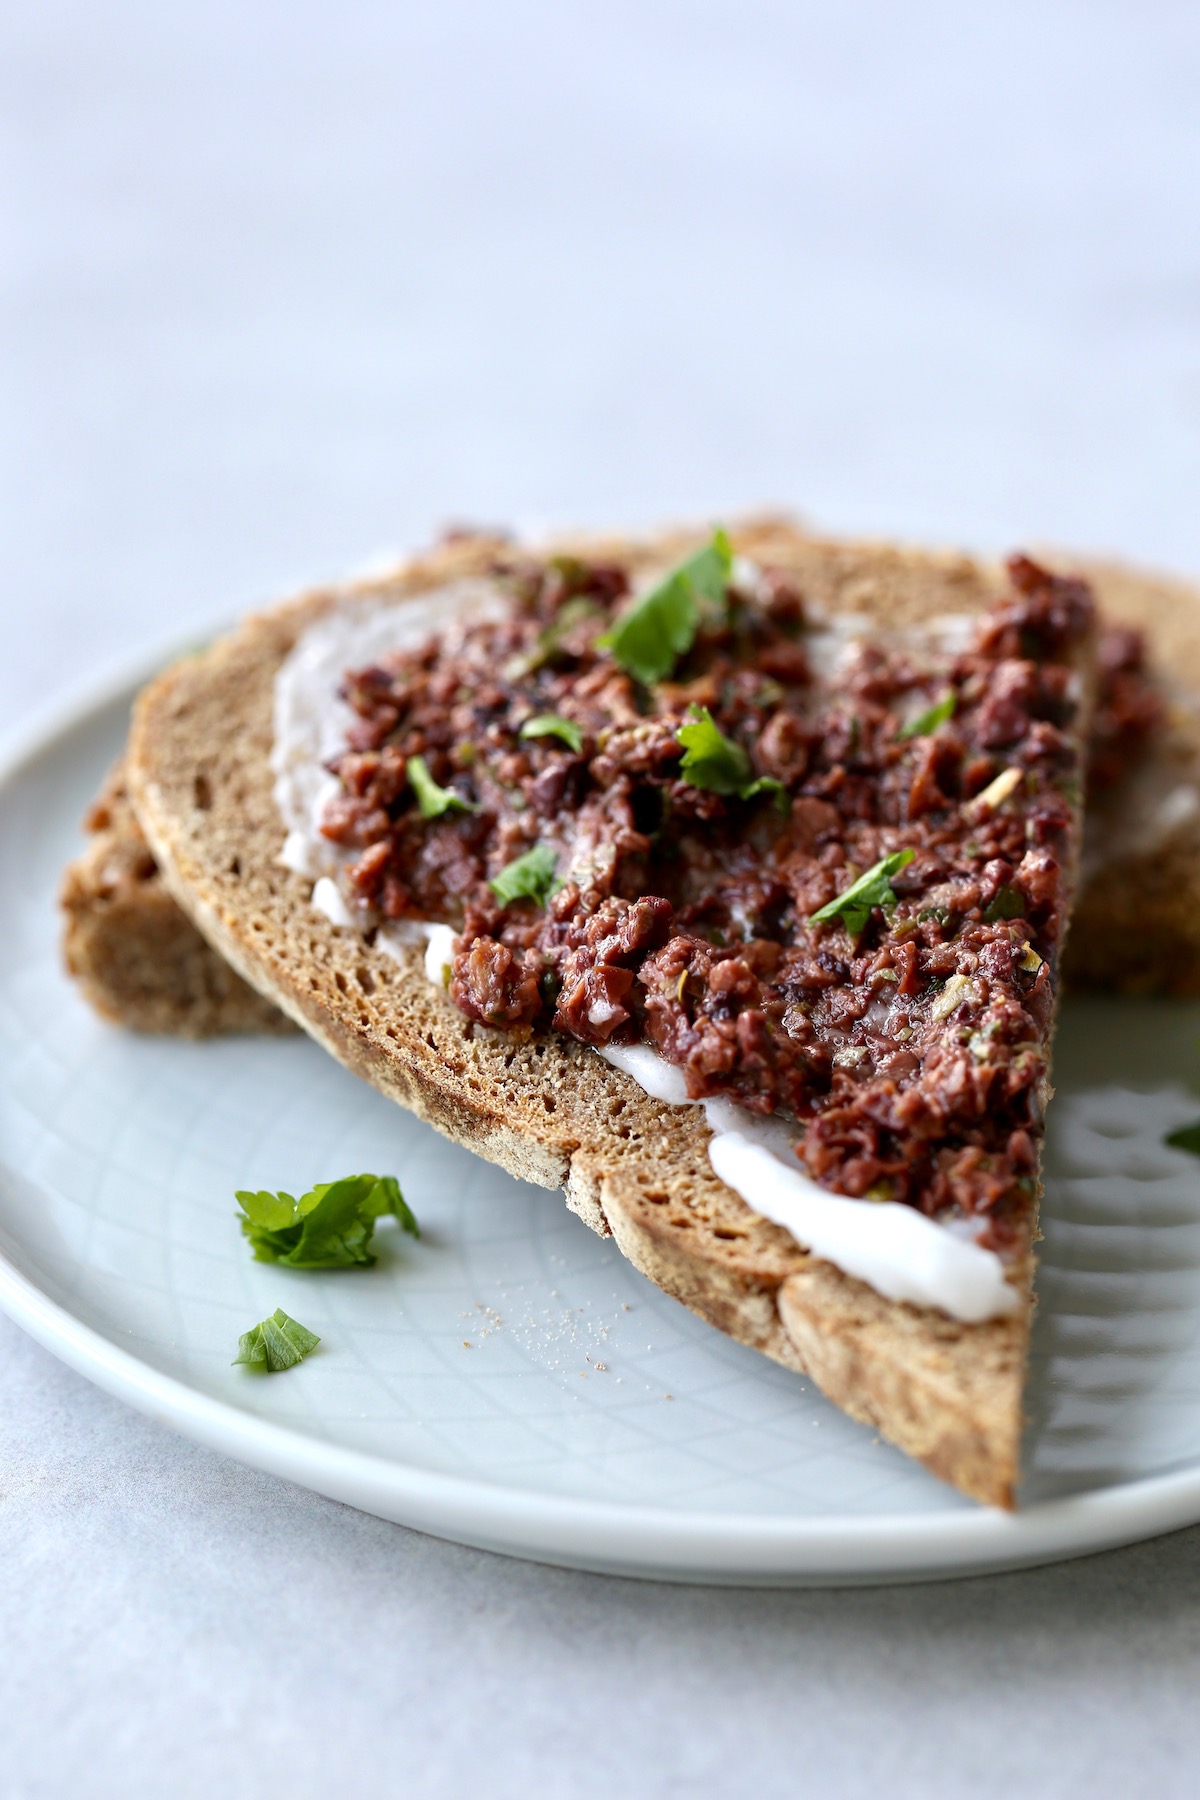
What to serve with tapenade
You mean, you don't eat tapenade with a spoon straight out of the jar?!
Well, in that case, there are numerous other ways to enjoy tapenade!
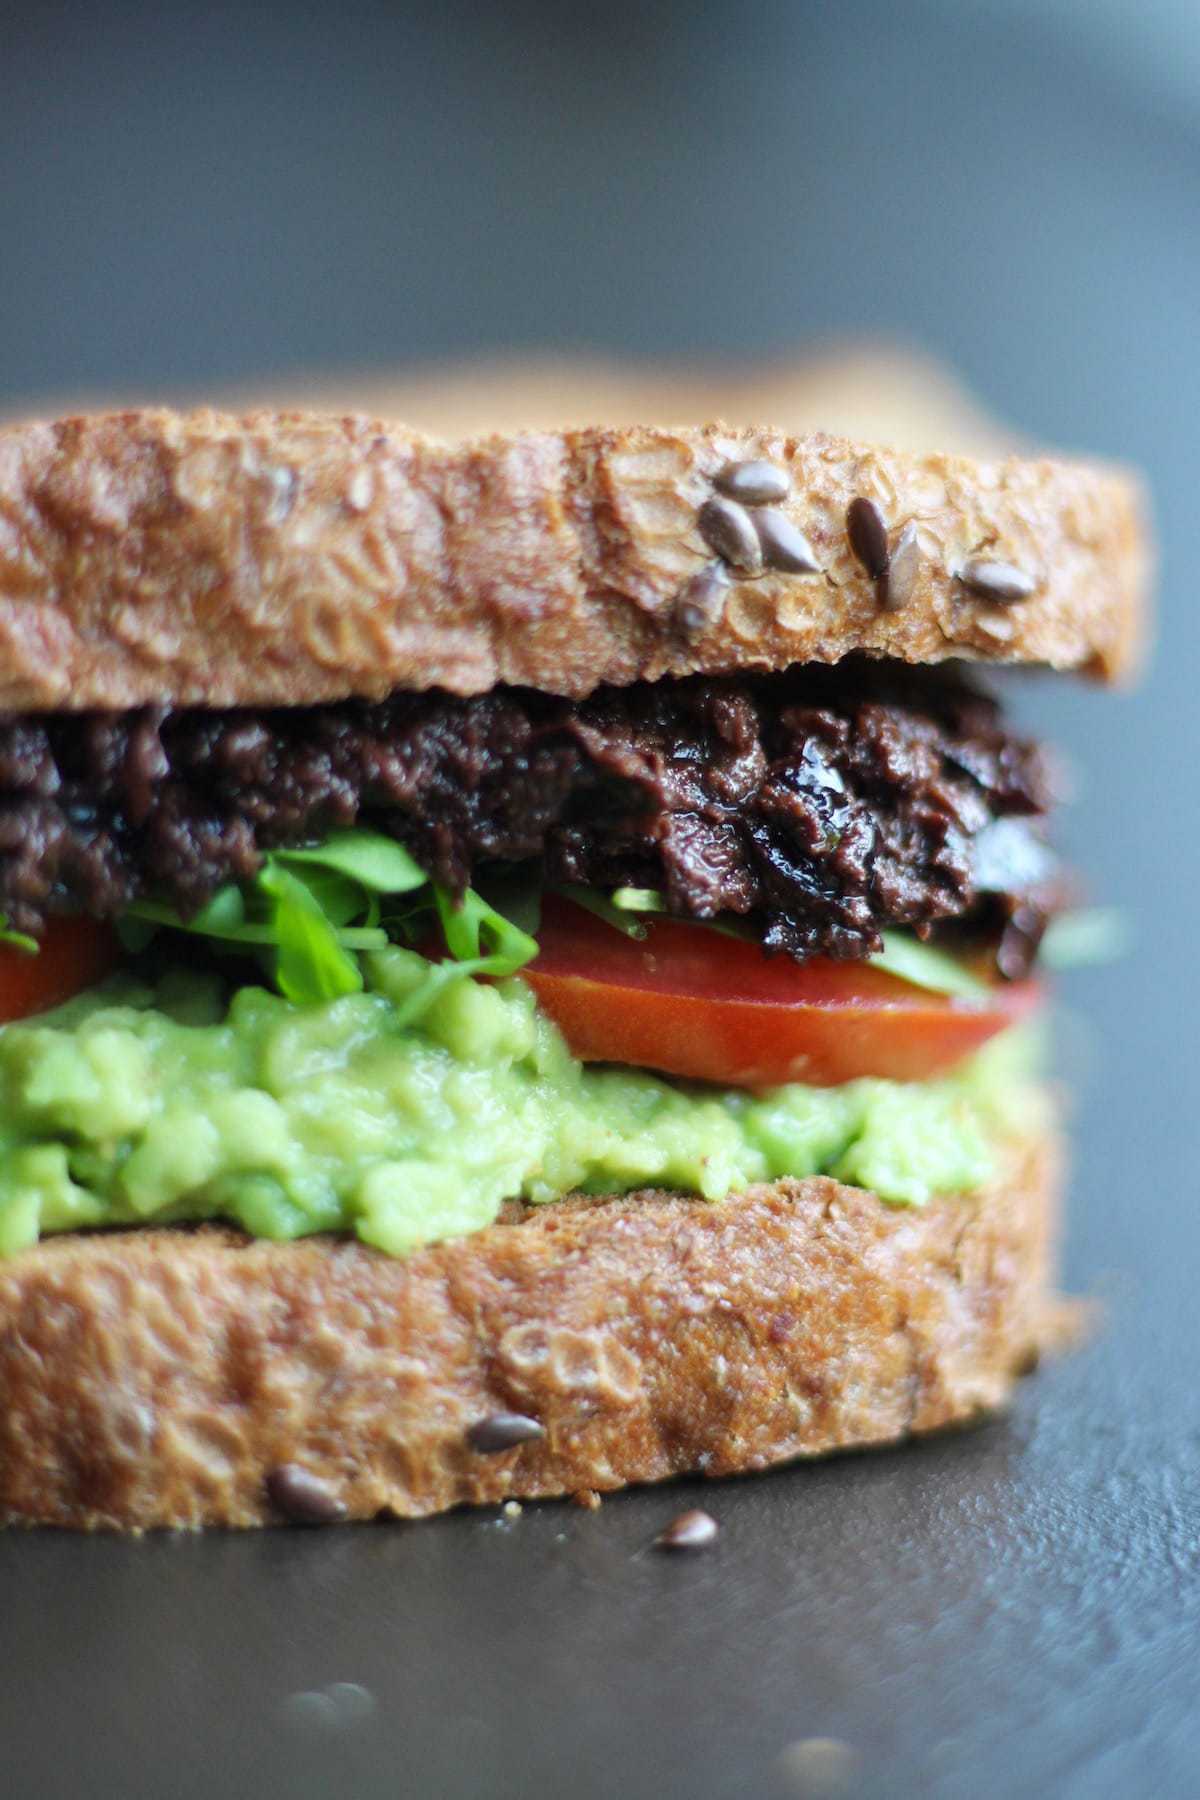
- We love it as a spread on sandwiches like in this Vegan Tapenade and Avocado Sandwich (pictured below)
- It tastes amazing on crackers, especially when paired with cream cheese.
- Add it to wraps, salads and buddha bowls for a burst of flavor.
- Use it as a garnish for pizza.
- Use it as a dip for fresh veggies.
- Stuff portobello mushrooms with it.
- Stir it into pasta sauce or classic hummus for extra umami flavor.
- Use it as a sauce for cold pasta salad.
- Fold it into yeasted bread dough to make a delicious olive loaf.
Storage
Store any leftover homemade tapenade in a sealable jar in the fridge for 1-2 weeks. Thankfully the acid from the lemon juice and capers will help to keep it from going bad too quickly!
Please let me know if you give this simple kalamata tapenade recipe a try and what you think!
📖 Recipe

Homemade Tapenade Recipe
Salty Kalamata olives, zesty capers and fresh parsley combine to create this addictive, flavorful homemade tapenade!
Equipment
Ingredients
- 2 cloves garlic peeled
- 1 cup pitted Kalamata olives
- 1 tablespoon lemon juice
- 1 tablespoon capers
- 3 tablespoons fresh parsley
- 1 tablespoon olive oil
- Salt and pepper to taste
Instructions
- Place the peeled garlic cloves into your food processor and process on high until well minced.
- Taste and add more salt for saltiness or lemon juice for zest.
- Transfer the mixture to a sealable jar.
Notes
Store in an airtight container for up to a week.
Nutrition
Serving: 2tablespoonsCalories: 338kcalCarbohydrates: 9gProtein: 2gFat: 35gSaturated Fat: 5gPolyunsaturated Fat: 3gMonounsaturated Fat: 26gSodium: 2336mgPotassium: 166mgFiber: 5gSugar: 1gVitamin A: 1554IUVitamin C: 24mgCalcium: 102mgIron: 2mg
Tried this recipe?Let me know how it was!
Basic Vegan Quick Bread Recipe (Perfect Every Time!)
Whether you want to make vegan banana bread, pumpkin bread or apple bread, you'll be all set with this Basic Vegan Quick Bread Recipe. Requiring just 9 ingredients and producing perfectly spongy and moist bread every time, you won't ever need another quick bread recipe!
...Crispy Oven Roasted Chickpeas

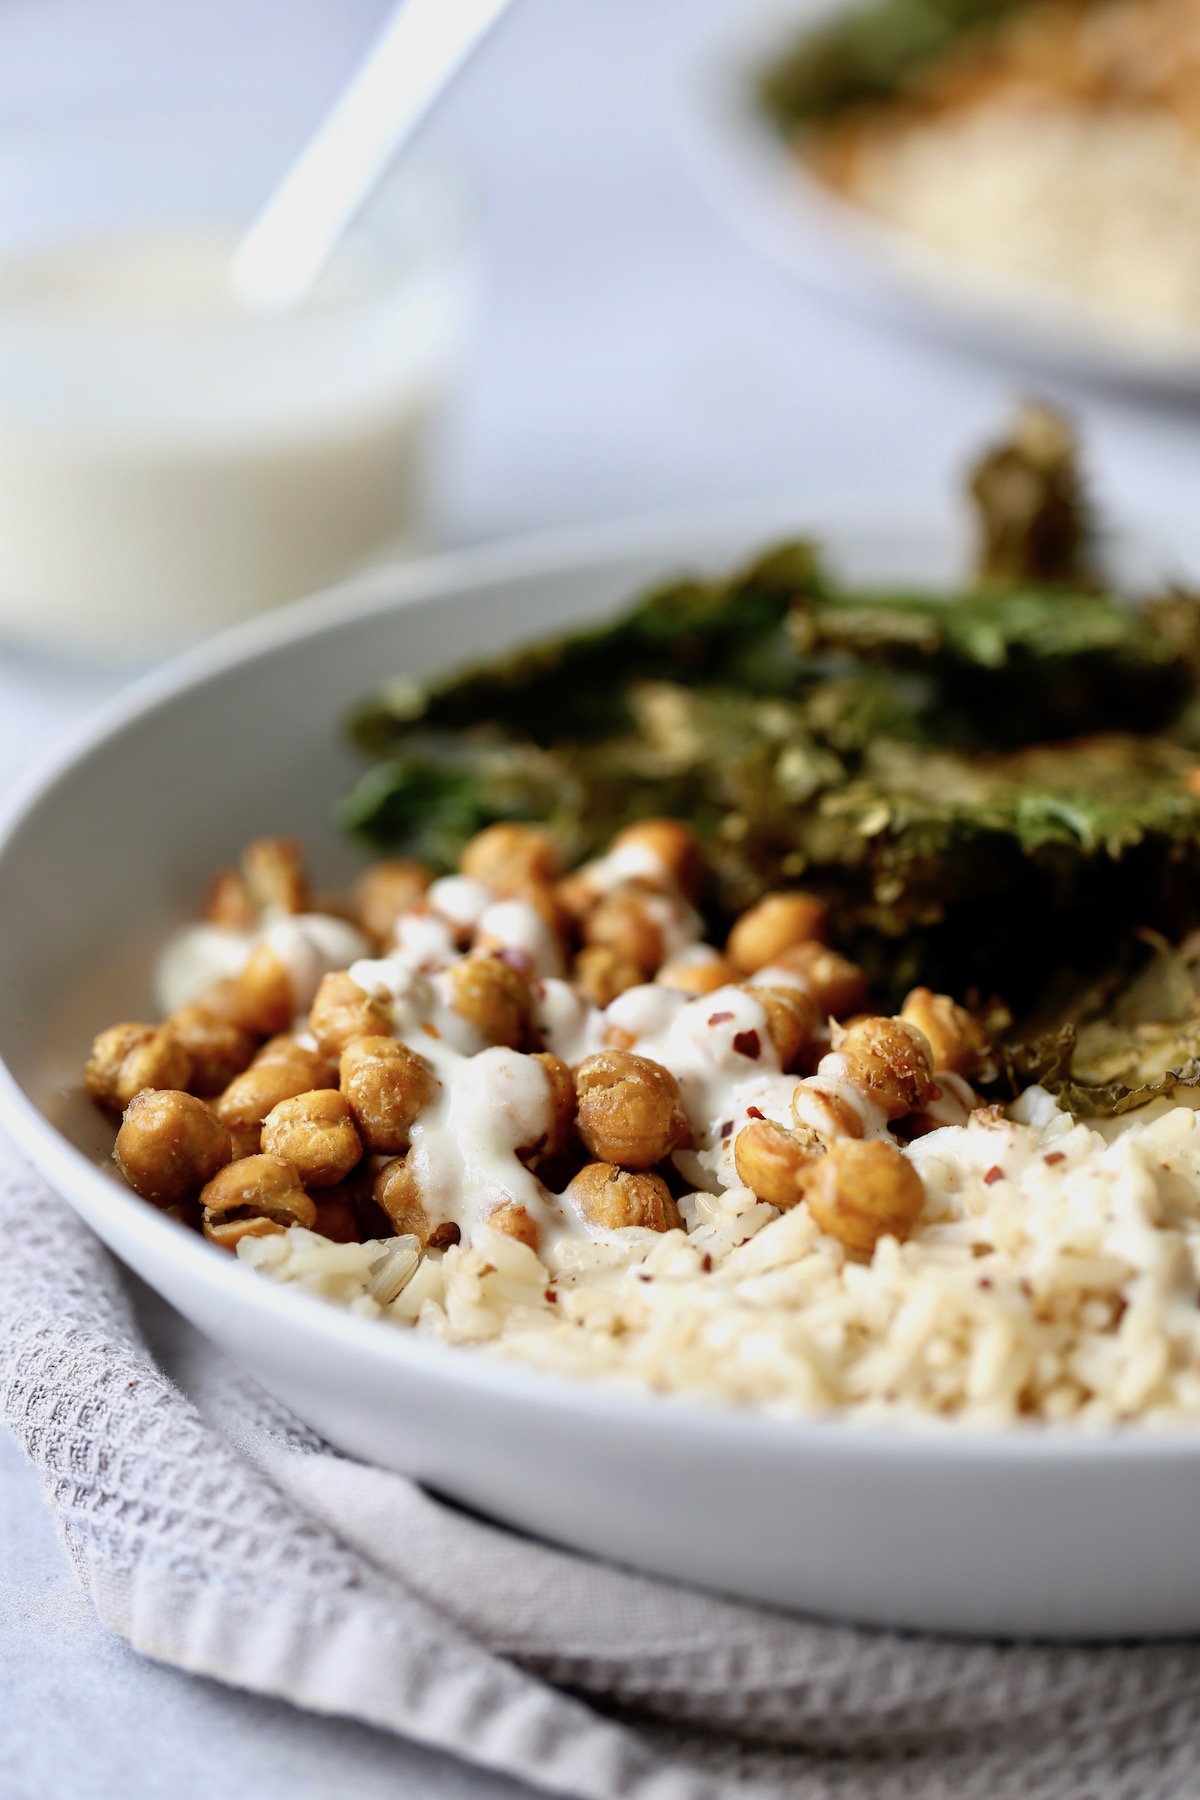
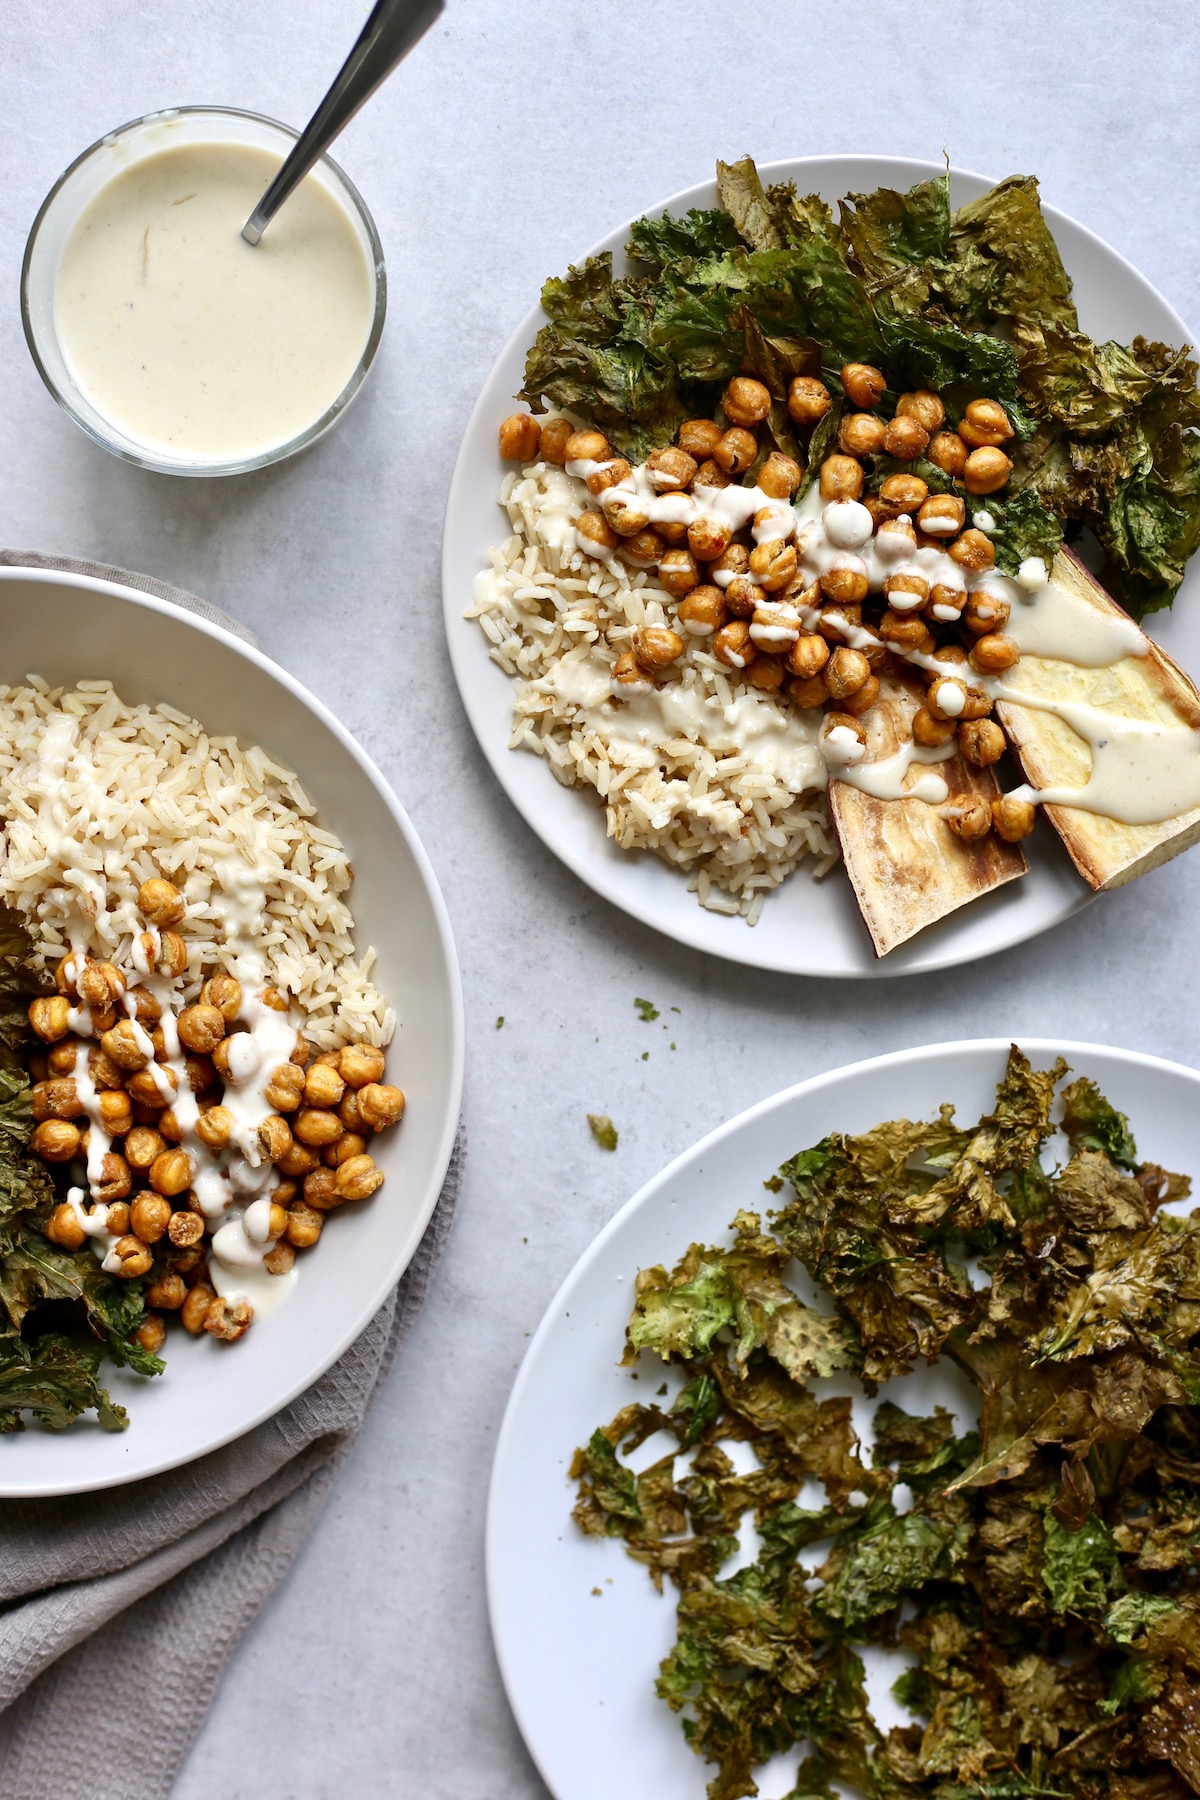
Once you learn how to make crispy chickpeas in your oven, you won't want to eat chickpeas any other way! Salty, crunchy and full of plant-based protein, these crispy oven-roasted chickpeas make for a great snack or protein source for buddha bowls.
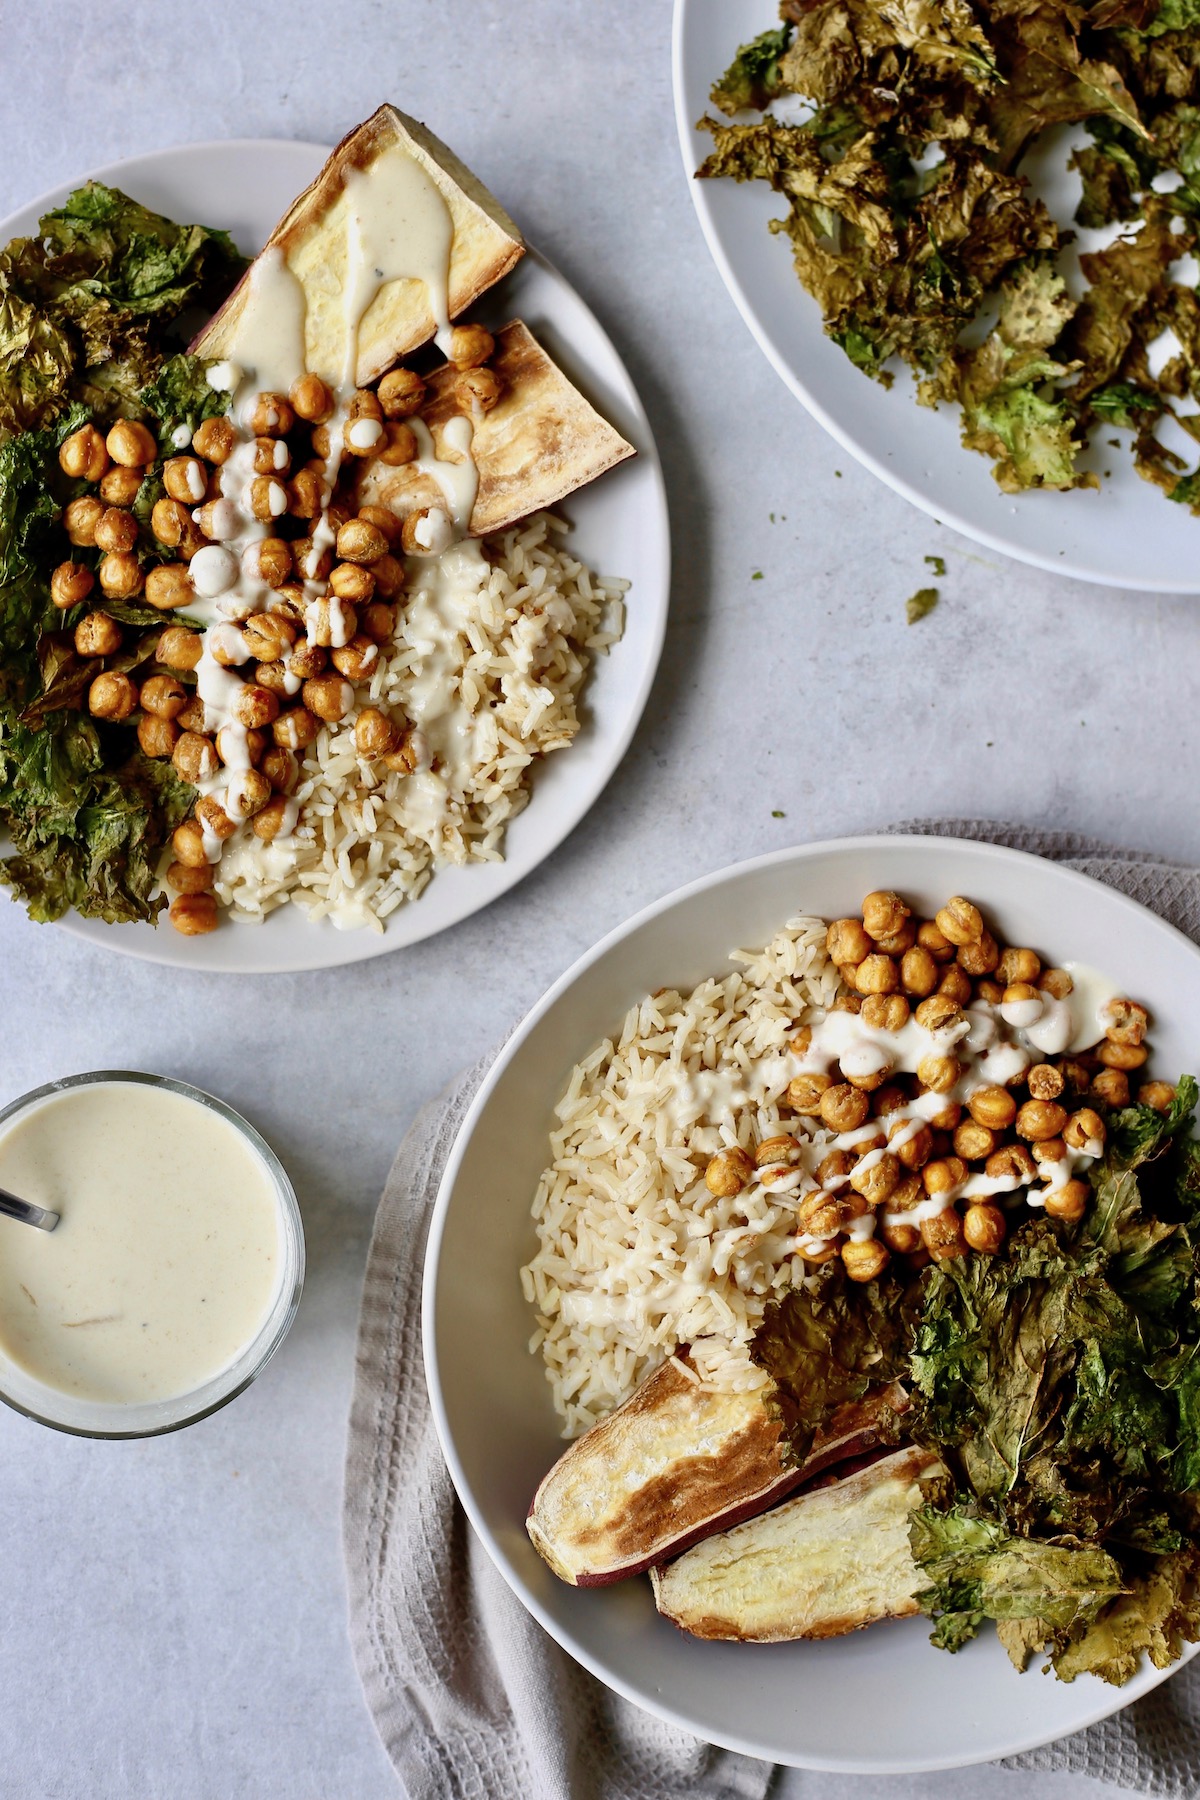
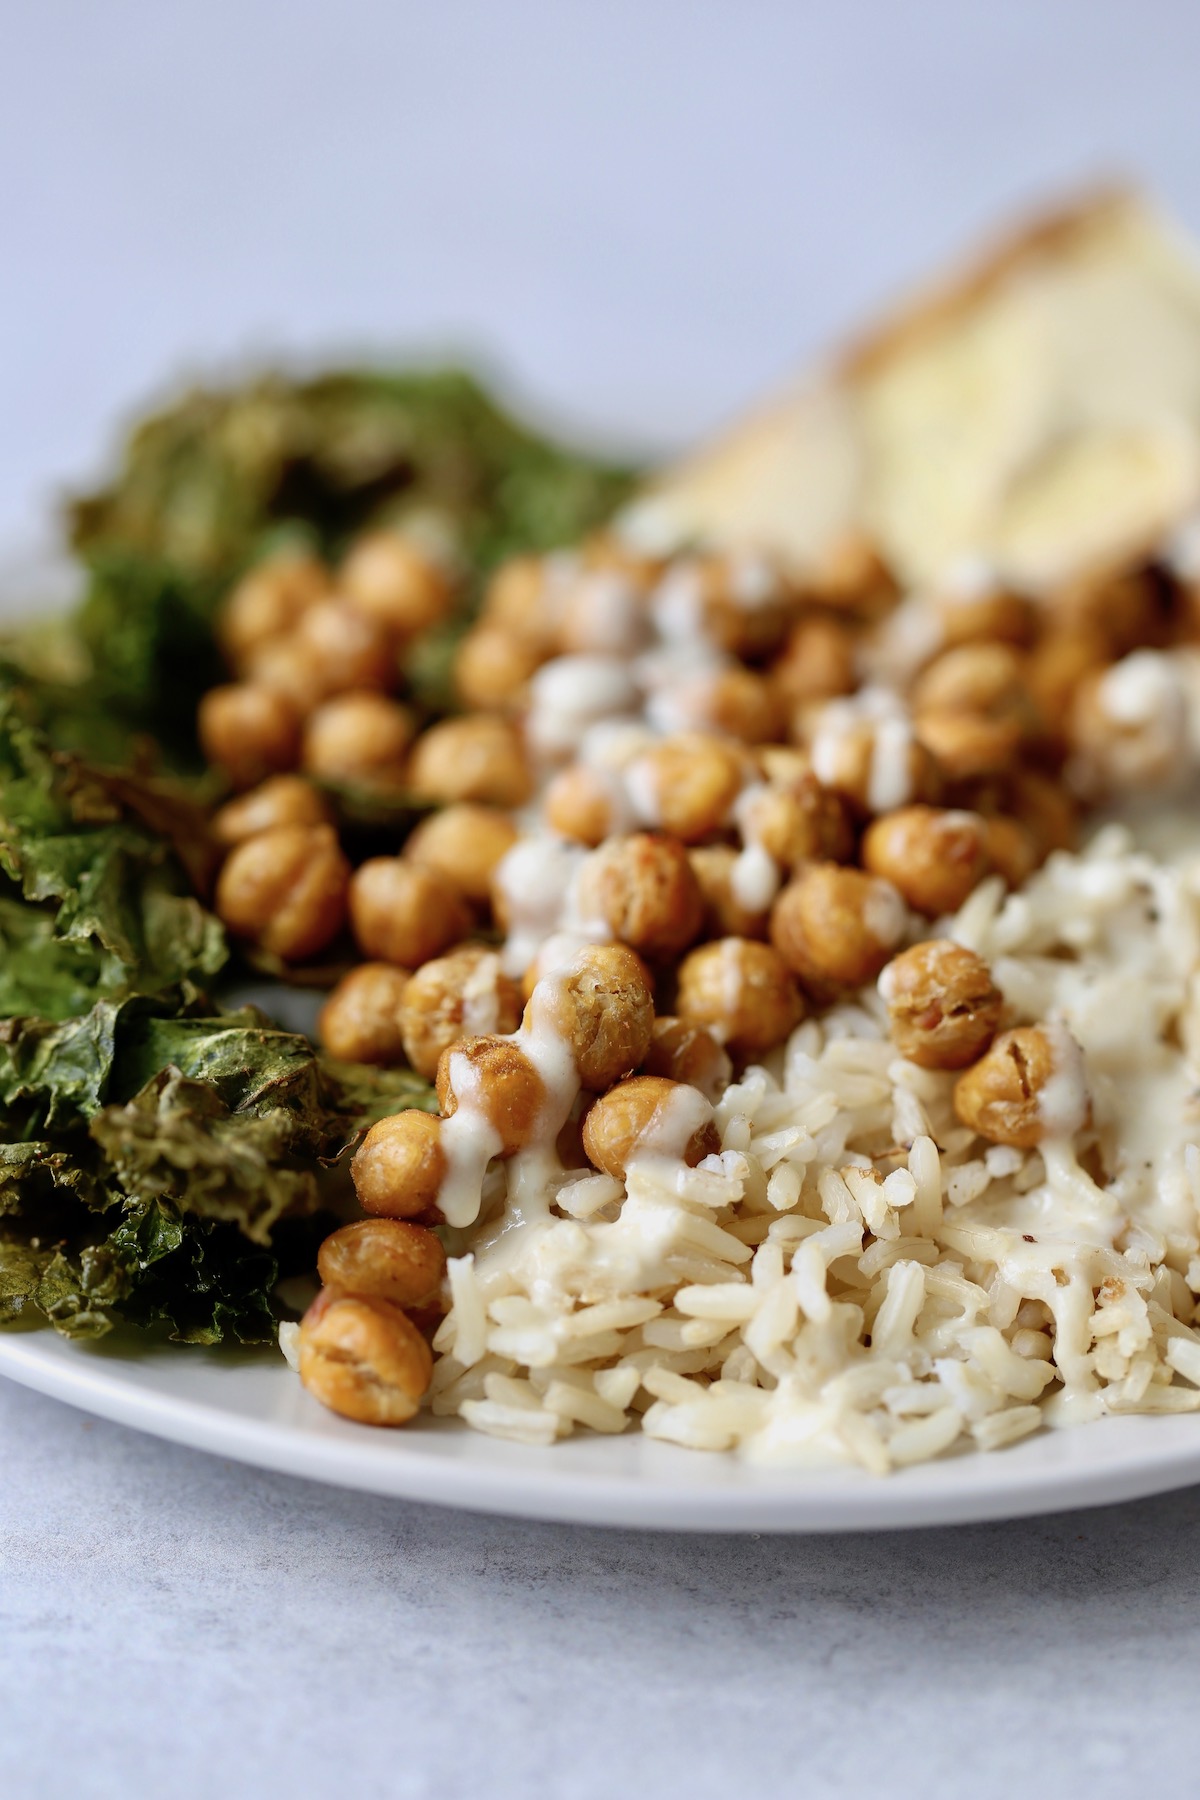
Chickpeas are such a versatile ingredient. We love them in Easy Buffalo Chickpea Salad or Classic No Tuna Salad. We love using them to make simple chickpea burgers. And of course, we love them baked in the oven until they become nice and crispy! Once I discovered the amazingness that is crispy chickpeas, I've never turned back! You too will love these simple, crunchy chickpeas. They make for a salty, protein-packed snack and taste amazing on buddha bowls when paired with roasted veggies and a yummy dressing like this Lemon Tahini Dressing!
[feast_advanced_jump_to]Health benefits of chickpeas (or garbanzo beans)
Chickpeas, also known as garbanzo beans, are a great source of plant-based carbohydrates and protein. In addition they are a good source of fiber. The fiber paired with the protein may help to keep you fuller for longer.
Being lower on the glycemic index, they may also help to manage your blood sugar levels.
Additionally, the fiber in chickpeas may help to improve your digestive health...if you know what I mean:)
One of the main things I love about chickpeas is that they are inexpensive and can be found in a can, making for a no-fuss, plant-based protein source!
Tips for making crispy chickpeas in the oven
There are a few things to keep in mind when making crispy chickpeas. Yes, you could deep fry them until crispy. However, if you want a healthier option, you can simply bake them in the oven. Just keep in mind the following tips!
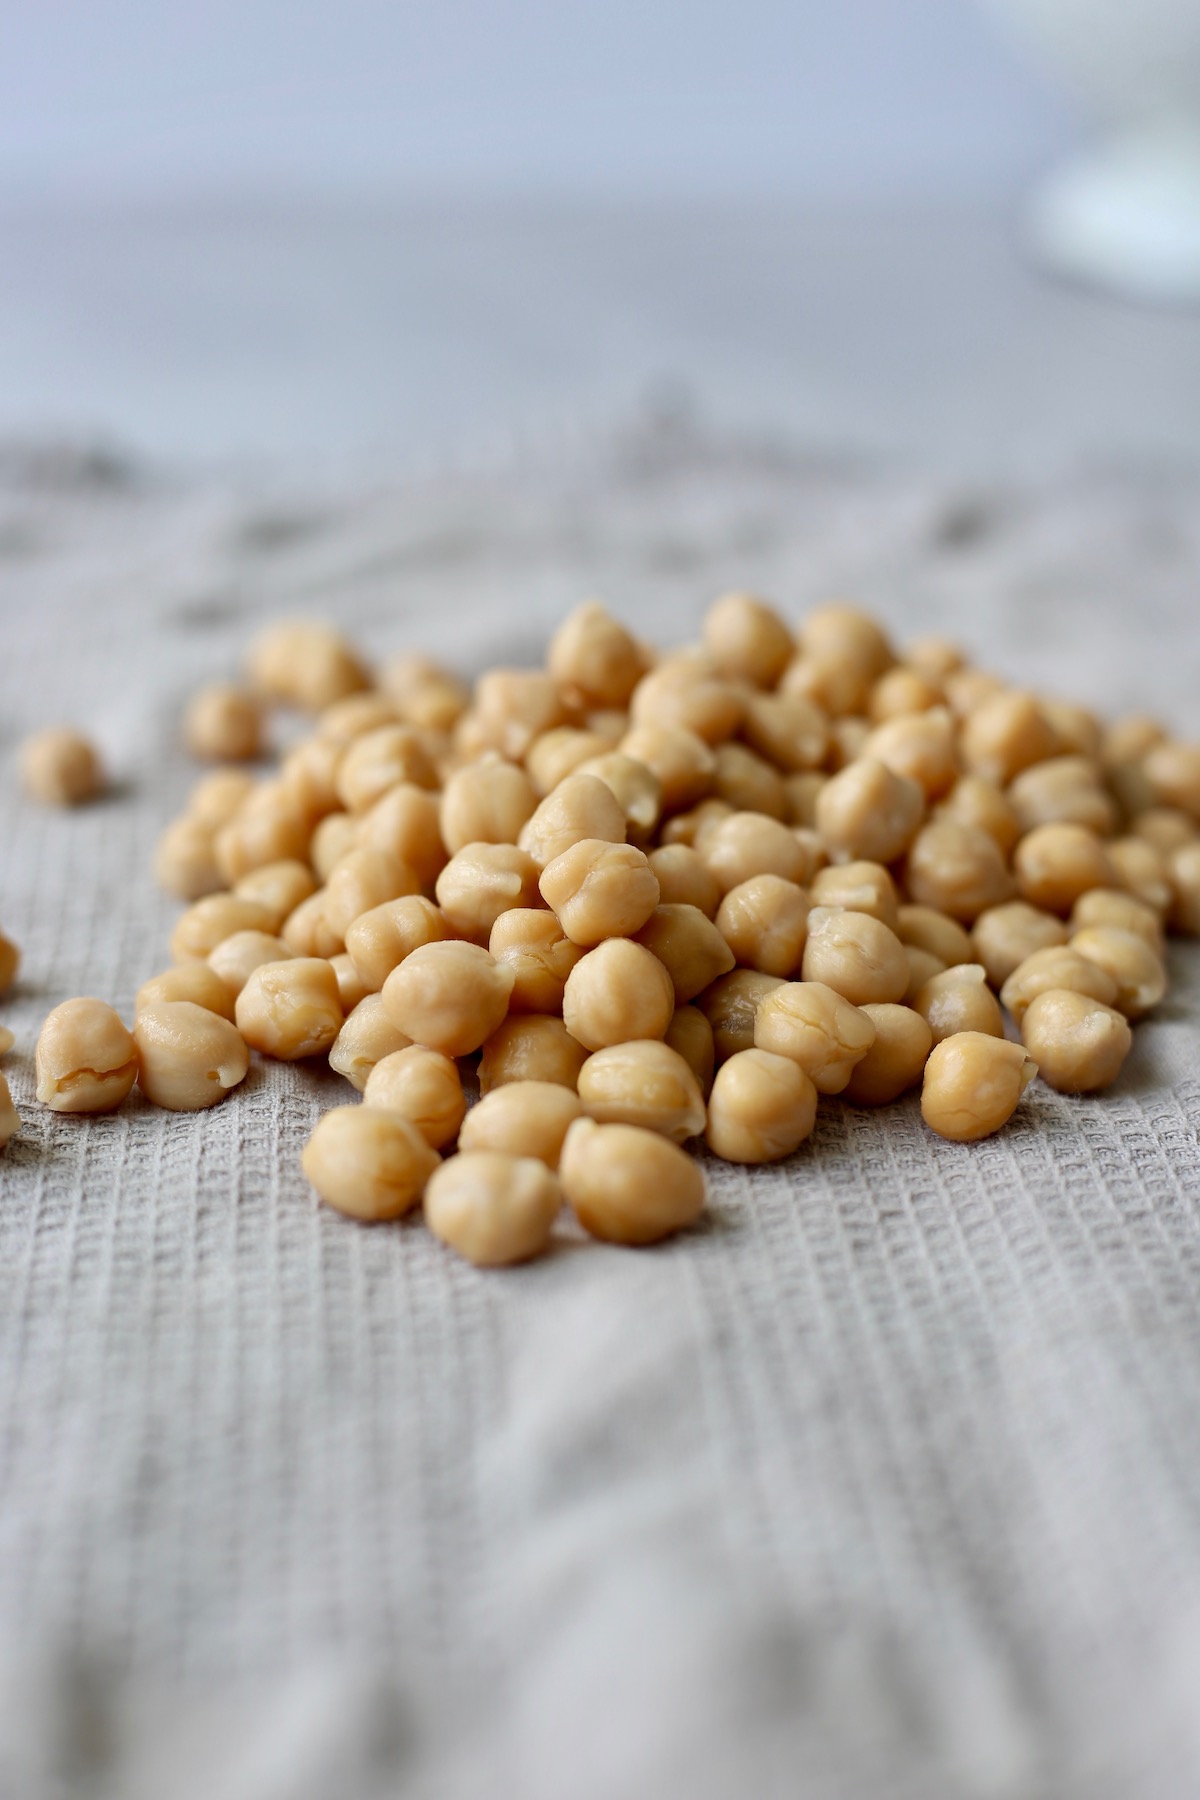
- Dry your chickpeas! In order for chickpeas to crisp up in the oven, they need to be dry. Otherwise the moisture from the chickpeas will cause them to steam instead of "fry." To do this, start by draining and rinsing a can of chickpeas. Then dump the chickpeas onto a clean tea towel and gently pat them dry. The drier they are, the crispier they will become!
- Add oil. You don't need a lot, but a touch of oil goes a long way when trying to get crispy chickpeas in the oven.
- Spice it up! Coating the chickpeas in lots of flavorful spices before baking them will take them from a yummy, salty snack to one you can't stop eating!
How to Make Crispy Chickpeas
No need to fry your chickpeas in order to make them crispy. You can do it in the oven! Just follow these simple step-by-step instructions:
Step 1: Preheat your oven to 400°F / 200°C and grease a baking sheet with cooking spray. Set it aside.
Step 2: Drain and rinse your chickpeas. Pour them onto a clean tea towel and gently pat them dry. You'll want them as dry as possible!
Step 3: Place the dried chickpeas into a mixing bowl and drizzle over a couple teaspoons of olive oil. Add in some salt and spices and stir the chickpeas so that they are well coated in the oil and spices.
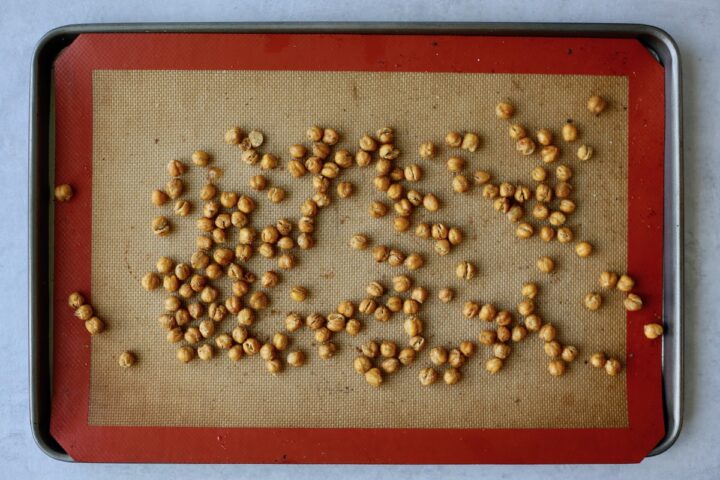
Step 4: Pour the seasoned chickpeas onto your prepared baking sheet and spread them out into a single layer. The more space they have, the crispier they will become!

Step 5: Roast the chickpeas for about 20 minutes. Give them a shake or a stir and return them to the oven for another 15-20 minutes or until golden and crispy.
Step 6: Enjoy them as a snack or use them as a protein source for buddha bowls!
Storage
I've found that crispy, roasted chickpeas don't stay crispy for much longer than a day. However, no need to waste them if you have leftovers! While they may lose their crunch, they are still a flavorful, protein-packed food.
I like to store leftover in an airtight container at room temperature for about a day. If I won't eat them in a day's time, then I'll store them in the fridge for 2-3 days.

Let me know if you give these crispy oven-roasted chickpeas a try! We're obsessed with them and I make them 1-2x a week to snack on or use as a topping for buddha bowls. We specifically love to pair them with this hummus recipe or this Lemon Miso Tahini Dressing!
📖 Recipe

Crispy Oven Roasted Chickpeas
Salty, crispy and easy to make, these oven roasted chickpeas make for a delicious snack or protein source for your next meal!
Instructions
- Preheat your oven to 400 °F and line a baking sheet with a silicone baking mat or grease it with cooking spray. Set aside.
- Drain and rinse the chickpeas. Dump them onto a clean tea towel and thoroughly pat them dry.
- Place them into a bowl and drizzle them with olive oil. Sprinkle over the cumin and sea salt and stir to make sure each chickpea is well coated.
- Pour the chickpeas onto your prepared baking dish and spread them out so they have lots of room. Roast them in the oven for 15 minutes. Stir the chickpeas or give the pan a little shake before allowing them to roast for another 10-20 minutes, or until golden and crunchy. Sprinkle over more sea salt if necessary.
- Enjoy them as a snack or use them as a protein source for buddha bowls!
Notes
This recipe can be easily doubled or tripled. Just make sure the chickpeas aren't too crowded in the oven so that they can get crispy.
Nutrition
Calories: 25kcalCarbohydrates: 0.2gProtein: 0.1gFat: 3gSaturated Fat: 0.4gPolyunsaturated Fat: 0.3gMonounsaturated Fat: 2gSodium: 194mgPotassium: 7mgFiber: 0.1gSugar: 0.02gVitamin A: 4IUVitamin C: 0.03mgCalcium: 3mgIron: 0.2mg
Tried this recipe?Let me know how it was!
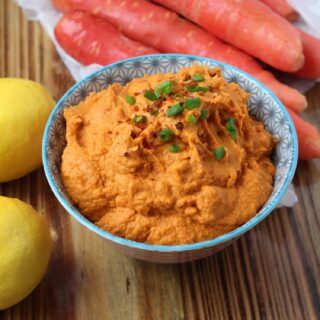
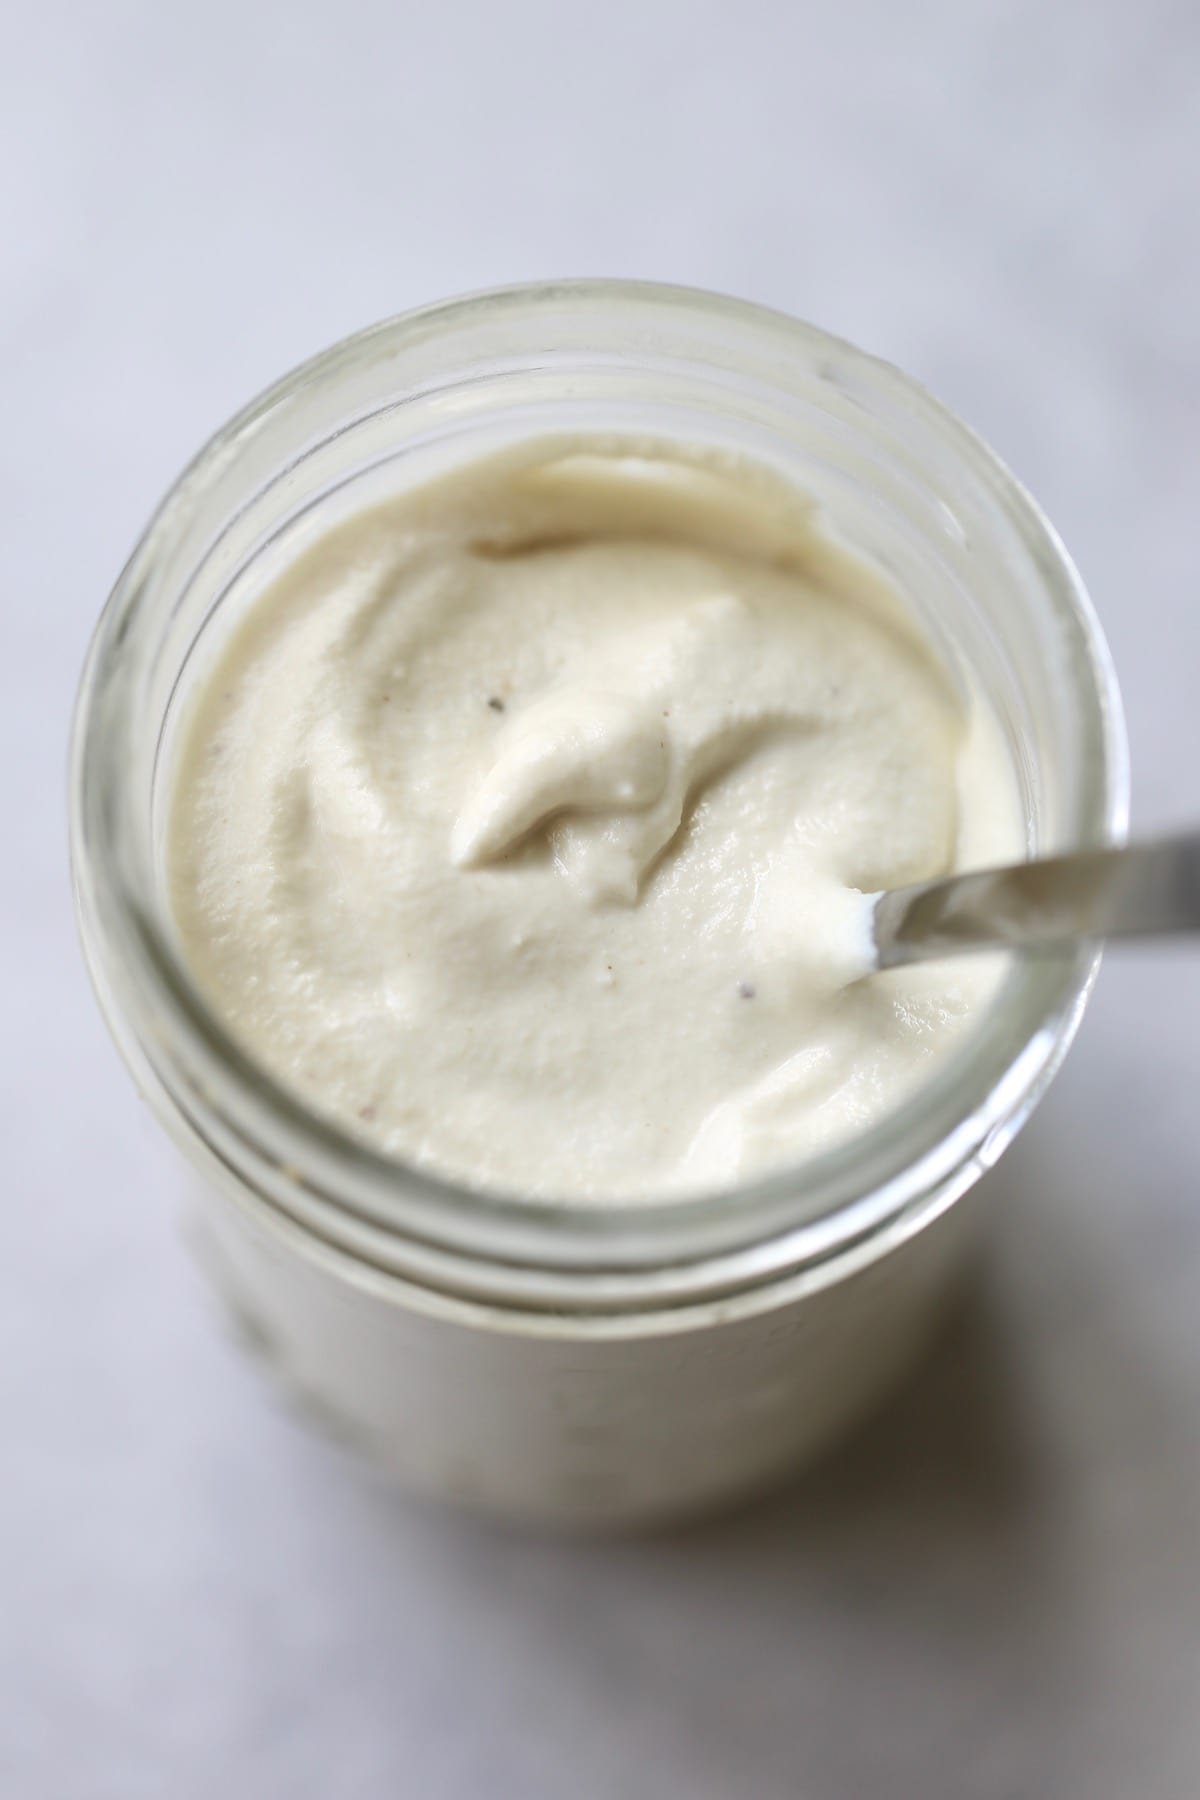
Beanless Carrot Hummus

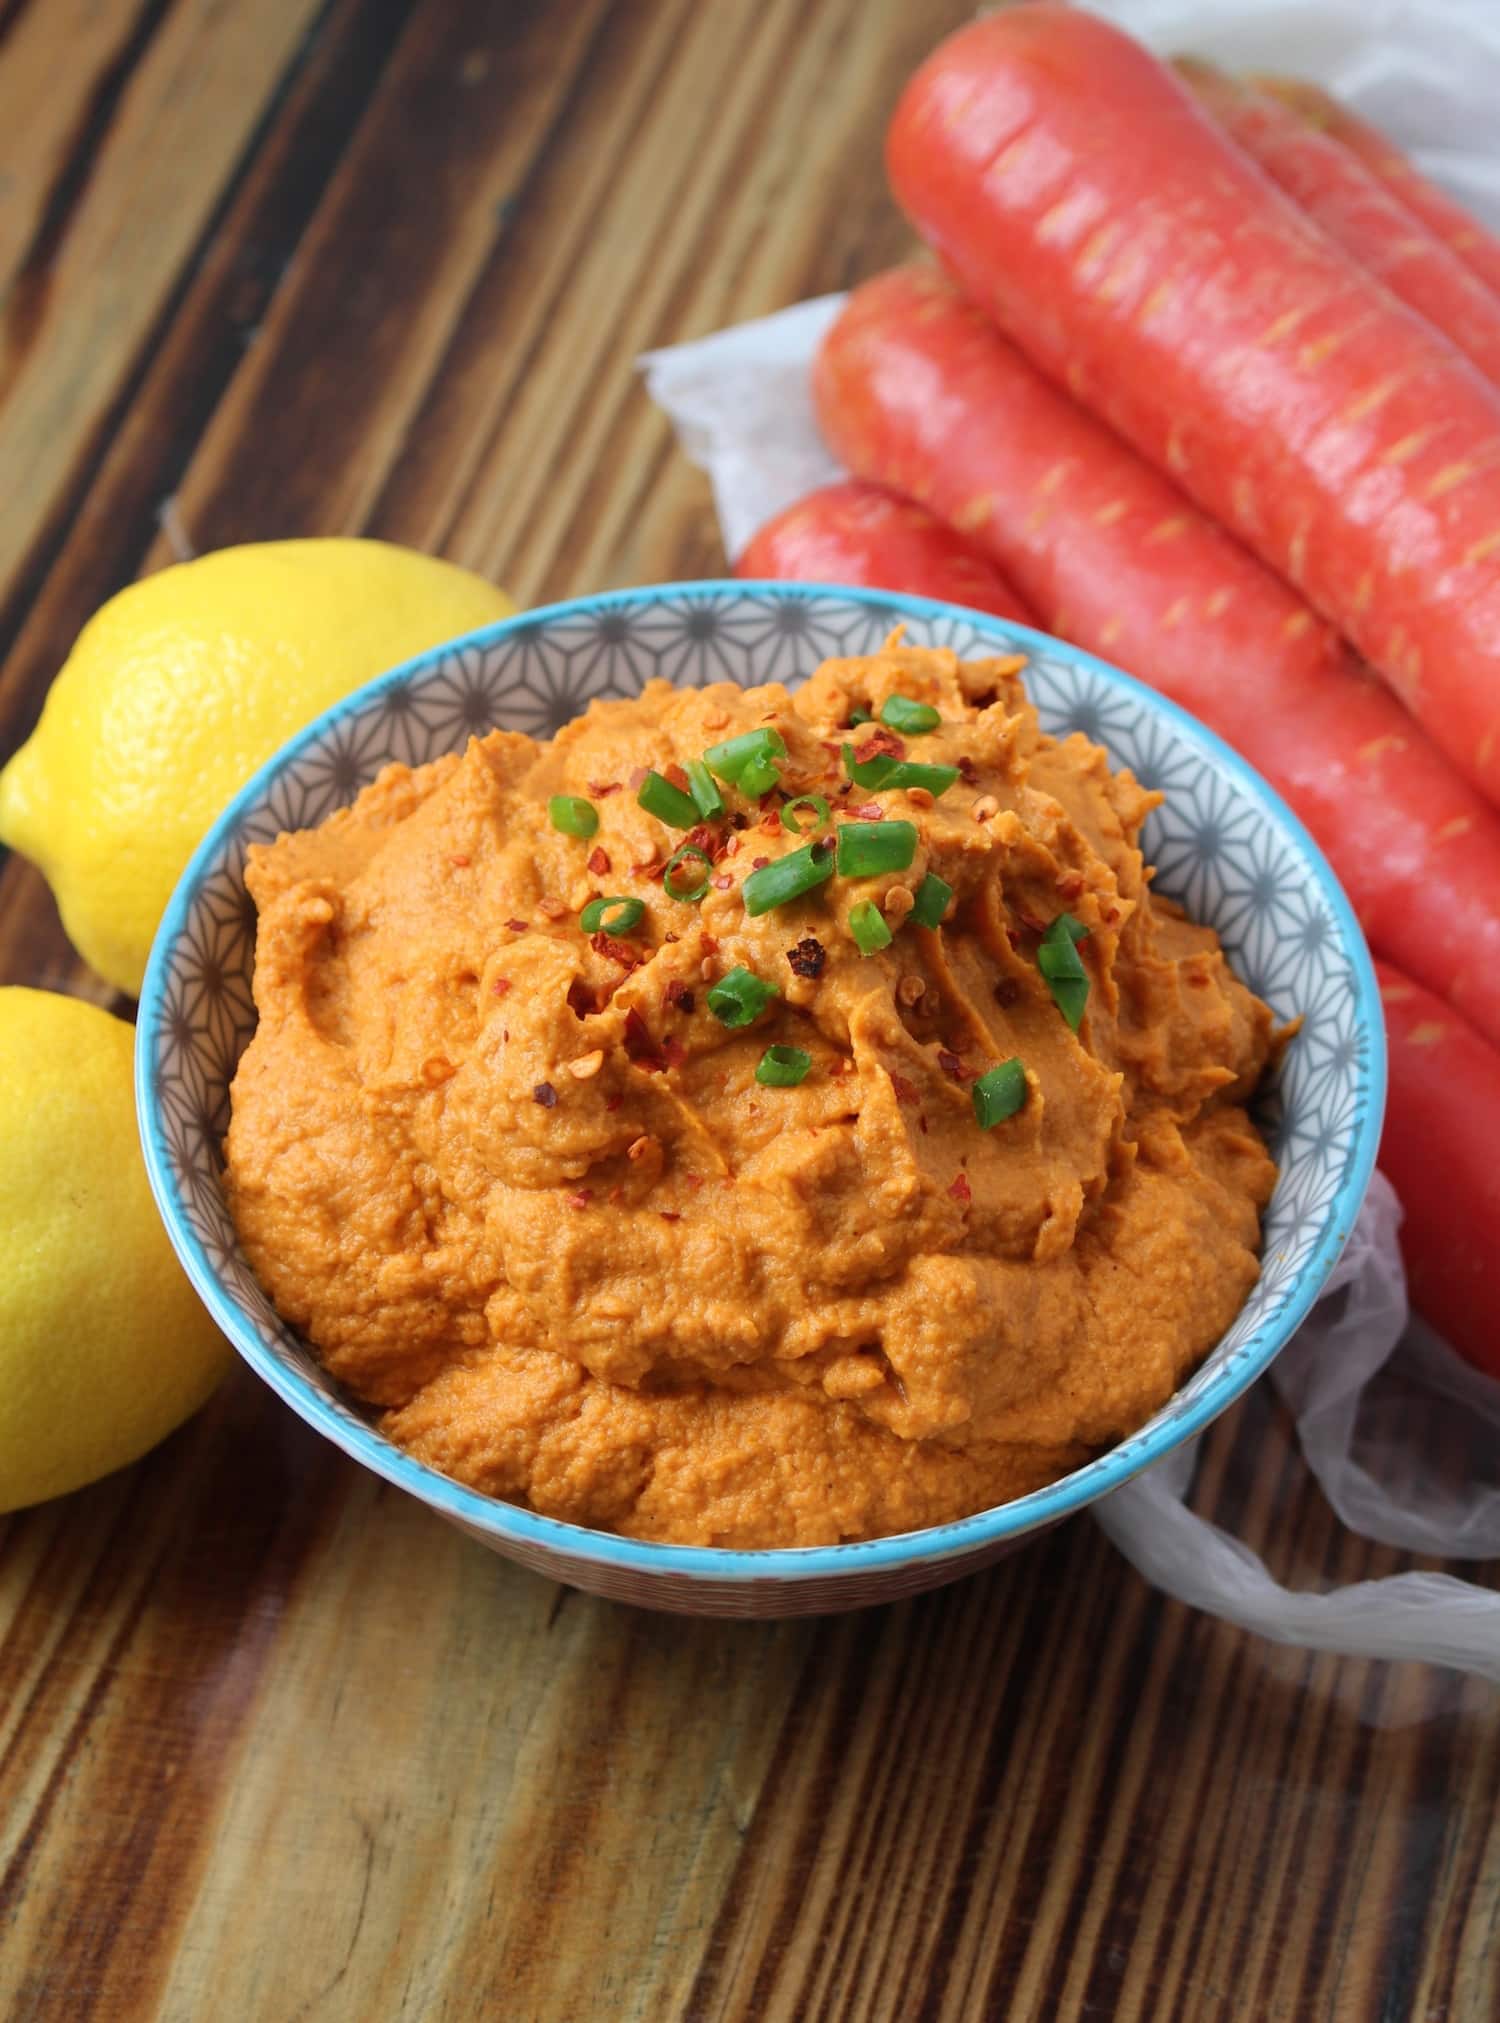
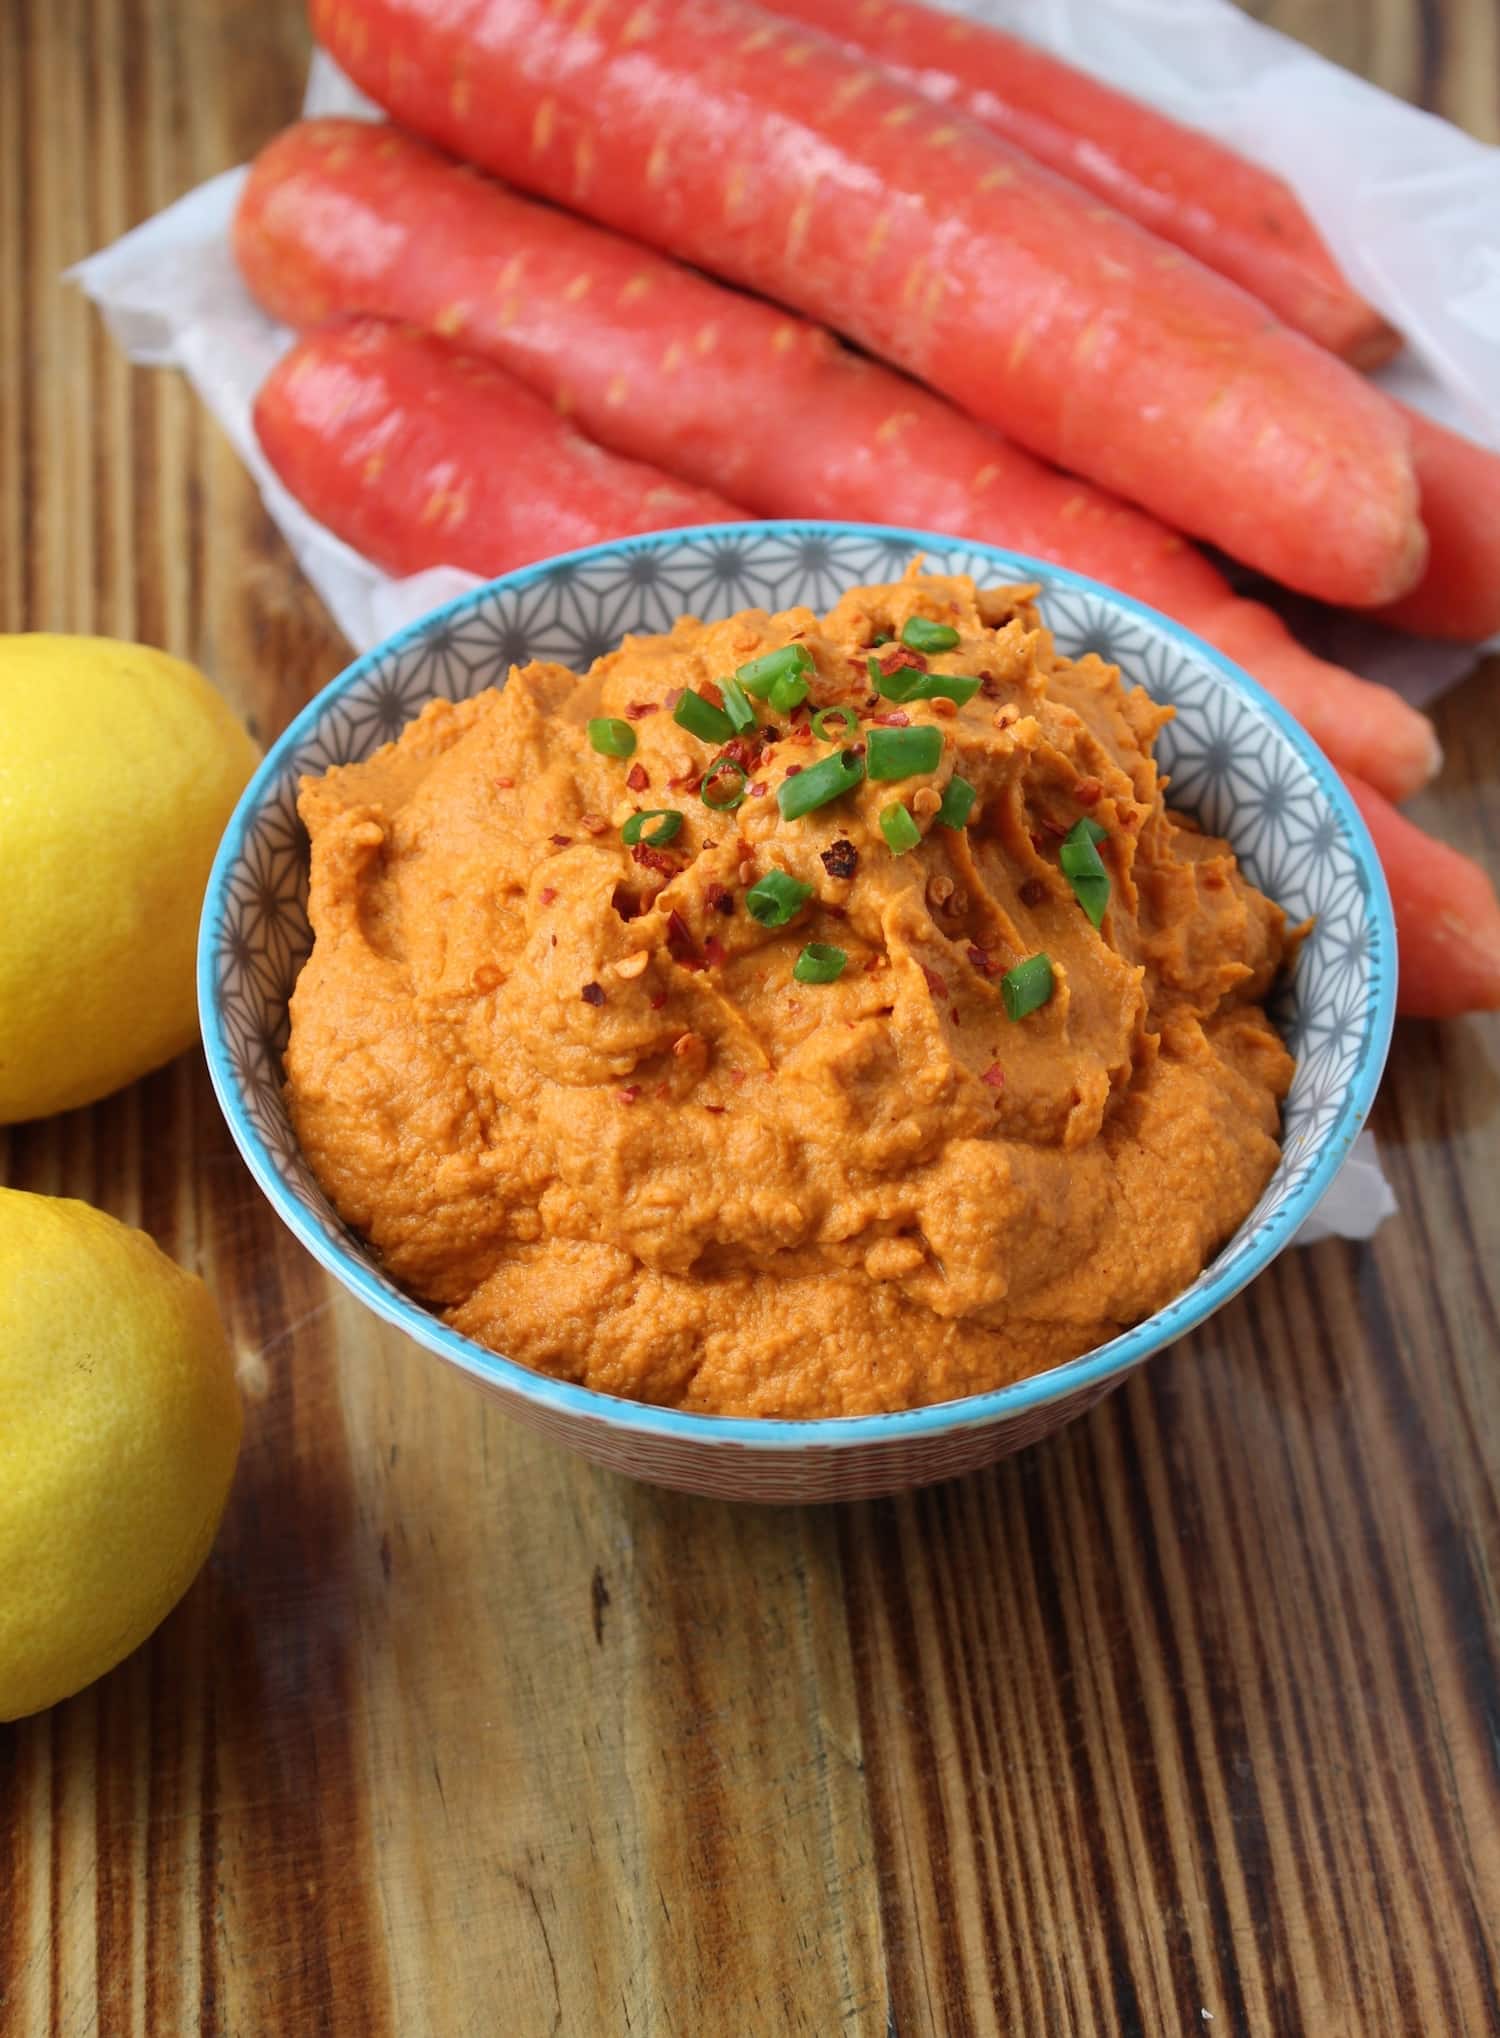
This creamy and vibrant Beanless Carrot Hummus is a healthy and flavorful dip that will spice up any savory meal.
This recipe is featured in my 8 Plant-Based Hummus Recipes roundup!
Brett and I are officially speaking Chinese!
Well, in very short snippets that is. And our sentences are very random. Think: "The black bear is on top of the cutting board" or "the red snake is in between the girl and the tree." Yeah, we have a lot of fun coming up with creative, unusual sentences.
Even though our sentences are short and random, we're still excited to finally attempt speaking! For the first three weeks of our language tutoring we were only allowed to listen to our teacher speaking Chinese. It's a crucial stage during which we're taught to recognize 300 different words and hopefully get a better grasp on the four different tones found in the Chinese language. We only did 2 ½ hours of class a day, but we would record different sections of our class so that we could review what we learned by ourselves later in the afternoon. I've definitely had my teacher's voice stuck in my head for the past three weeks!
This past Monday was our first class where we could speak. At first it was a little nerve-racking to attempt speaking the words we've only been listening to for the past three weeks. There are so many weird sounds in Chinese--sounds that our English-speaking-mouths aren't used to making--so I was curious as to how the words I've only heard my teacher say would sound coming out of my mouth.
Welp, turns out I definitely do sound weird and apparently I also feel the need to clench my eyes shut and make pronounced lip gestures when trying to pronounce a more difficult word. Hopefully those habits will go away as speaking becomes more natural!
Yes, please go away puckered lips and squinty eyes.
Other than language learning, life is pretty simple. Since we can't communicate with many people yet, our afternoons seem to be spent running errands, exercising at the National park by our house (gorgeous!), or reviewing language. Oh, and of course shopping at the markets! We've been eating a lot of steamed veggies, potatoes and rice for dinners, mainly because my rice cooker does all the cooking and I haven't felt the desire to make anything extravagant yet. Thankfully I have felt a bit more creative in our snacks and condiments. Lots of dips, sauces and energy bites have been made lately including Vegan Sweet Chili Sauce and Oil-Free Edamame Hummus.
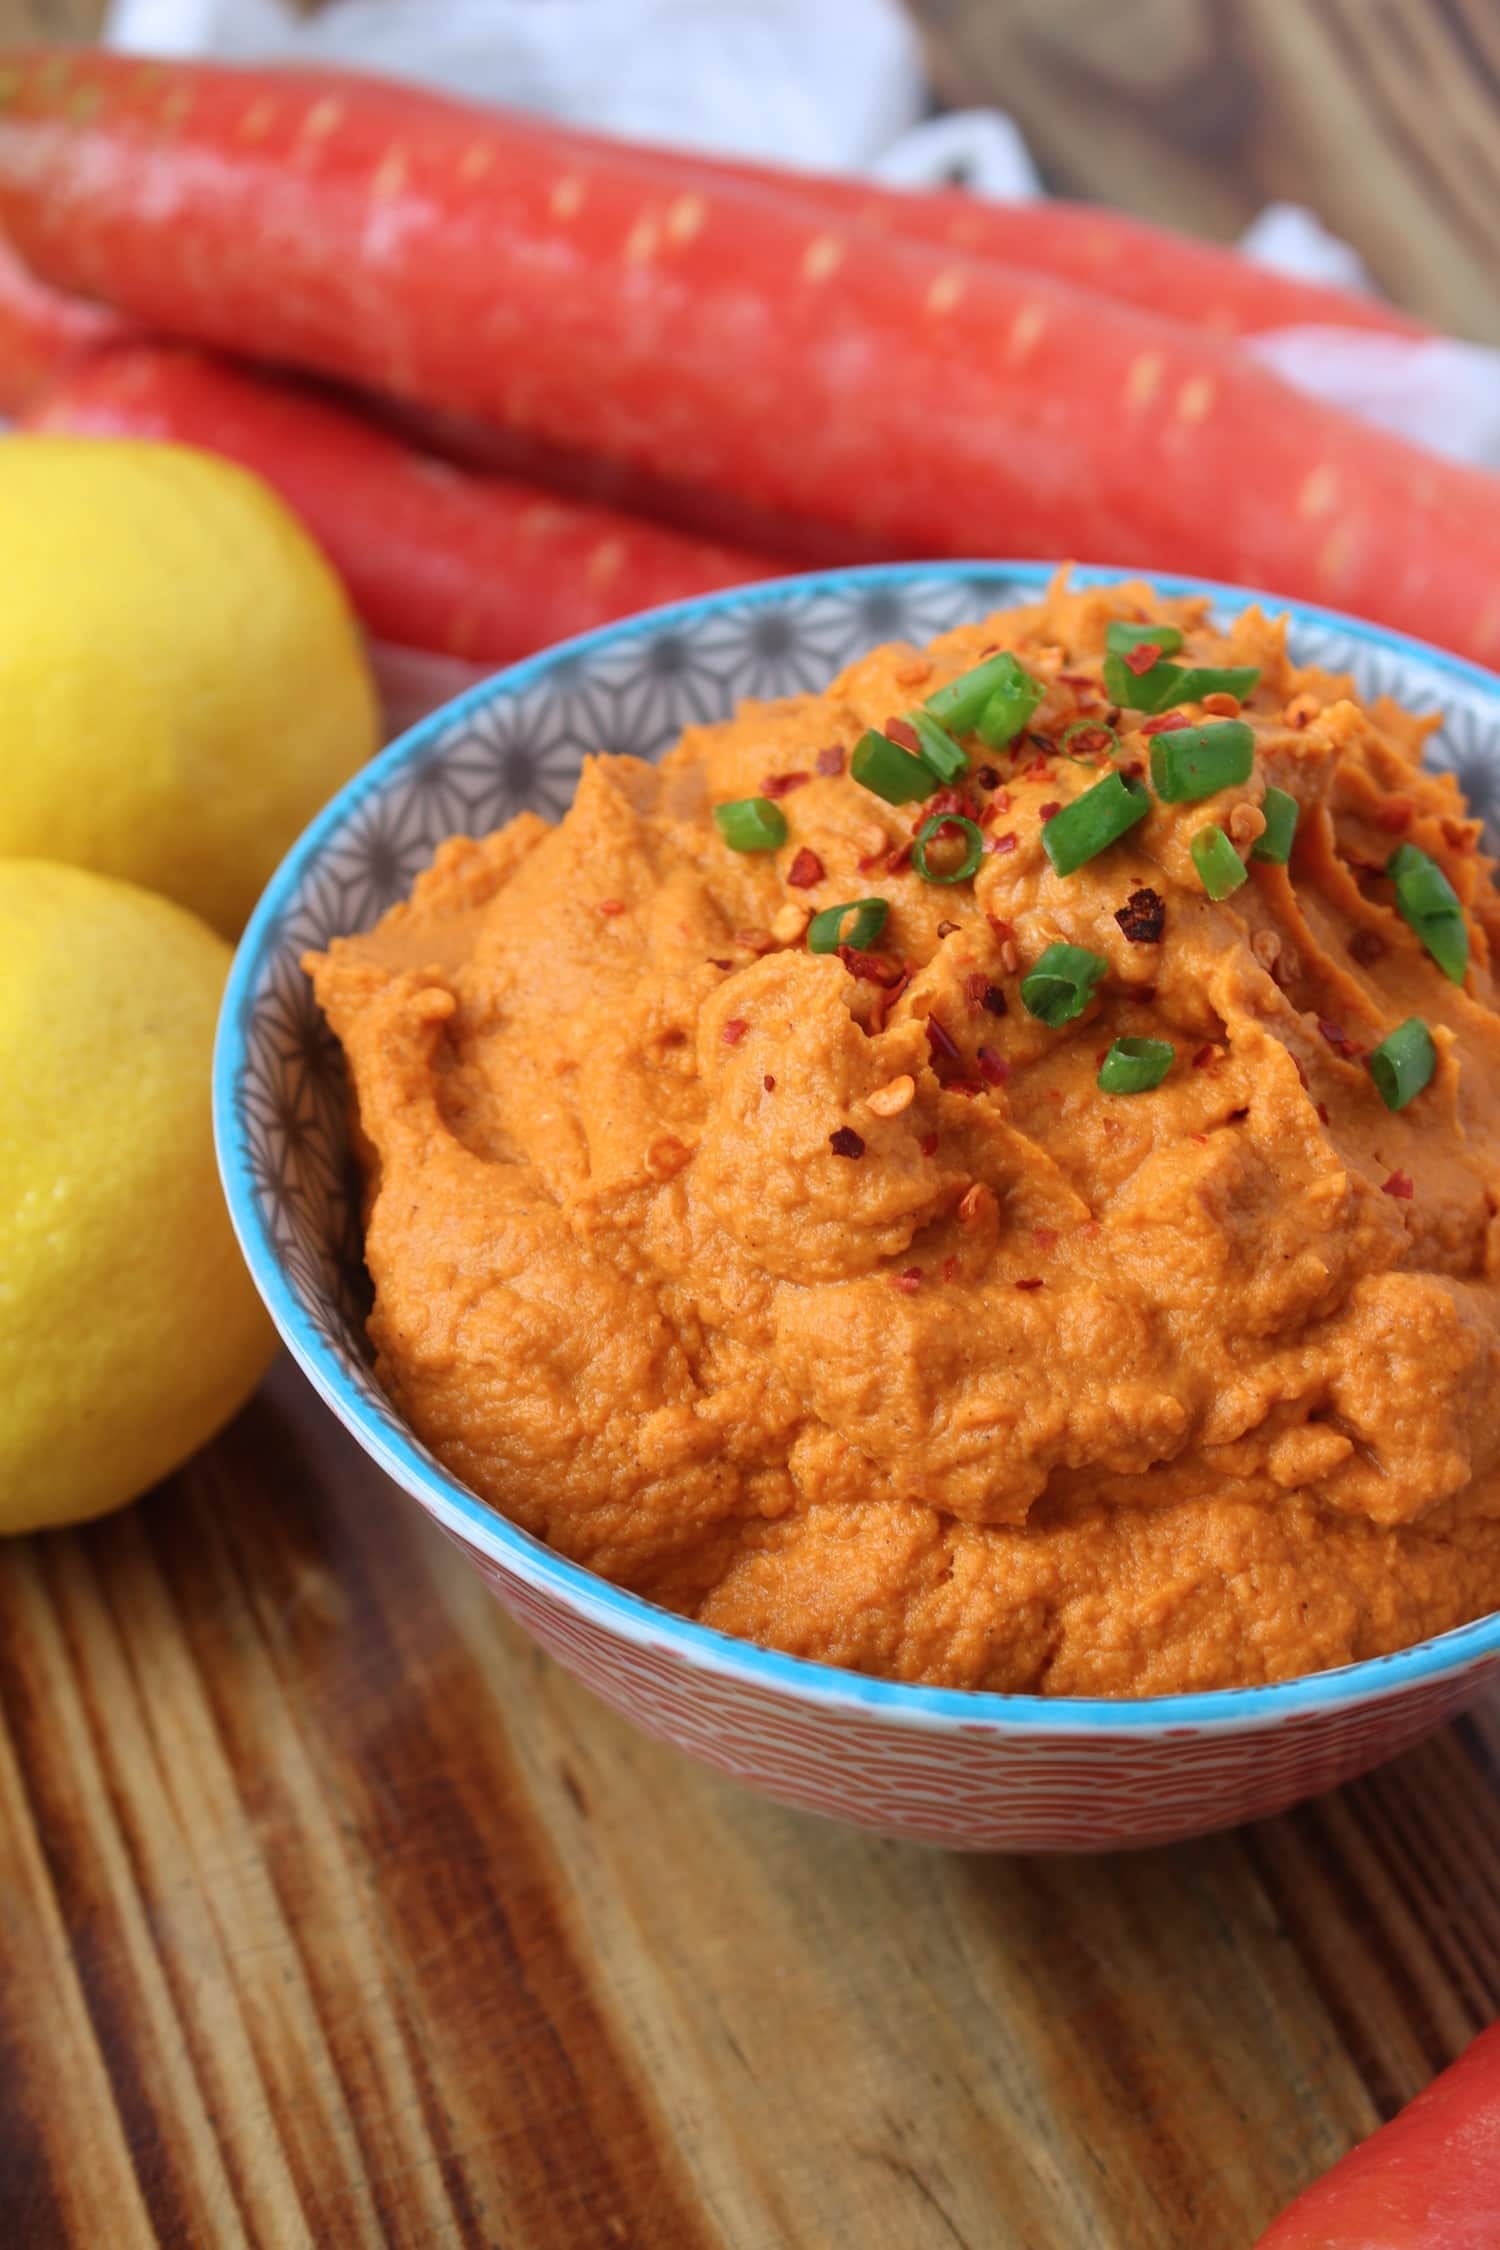
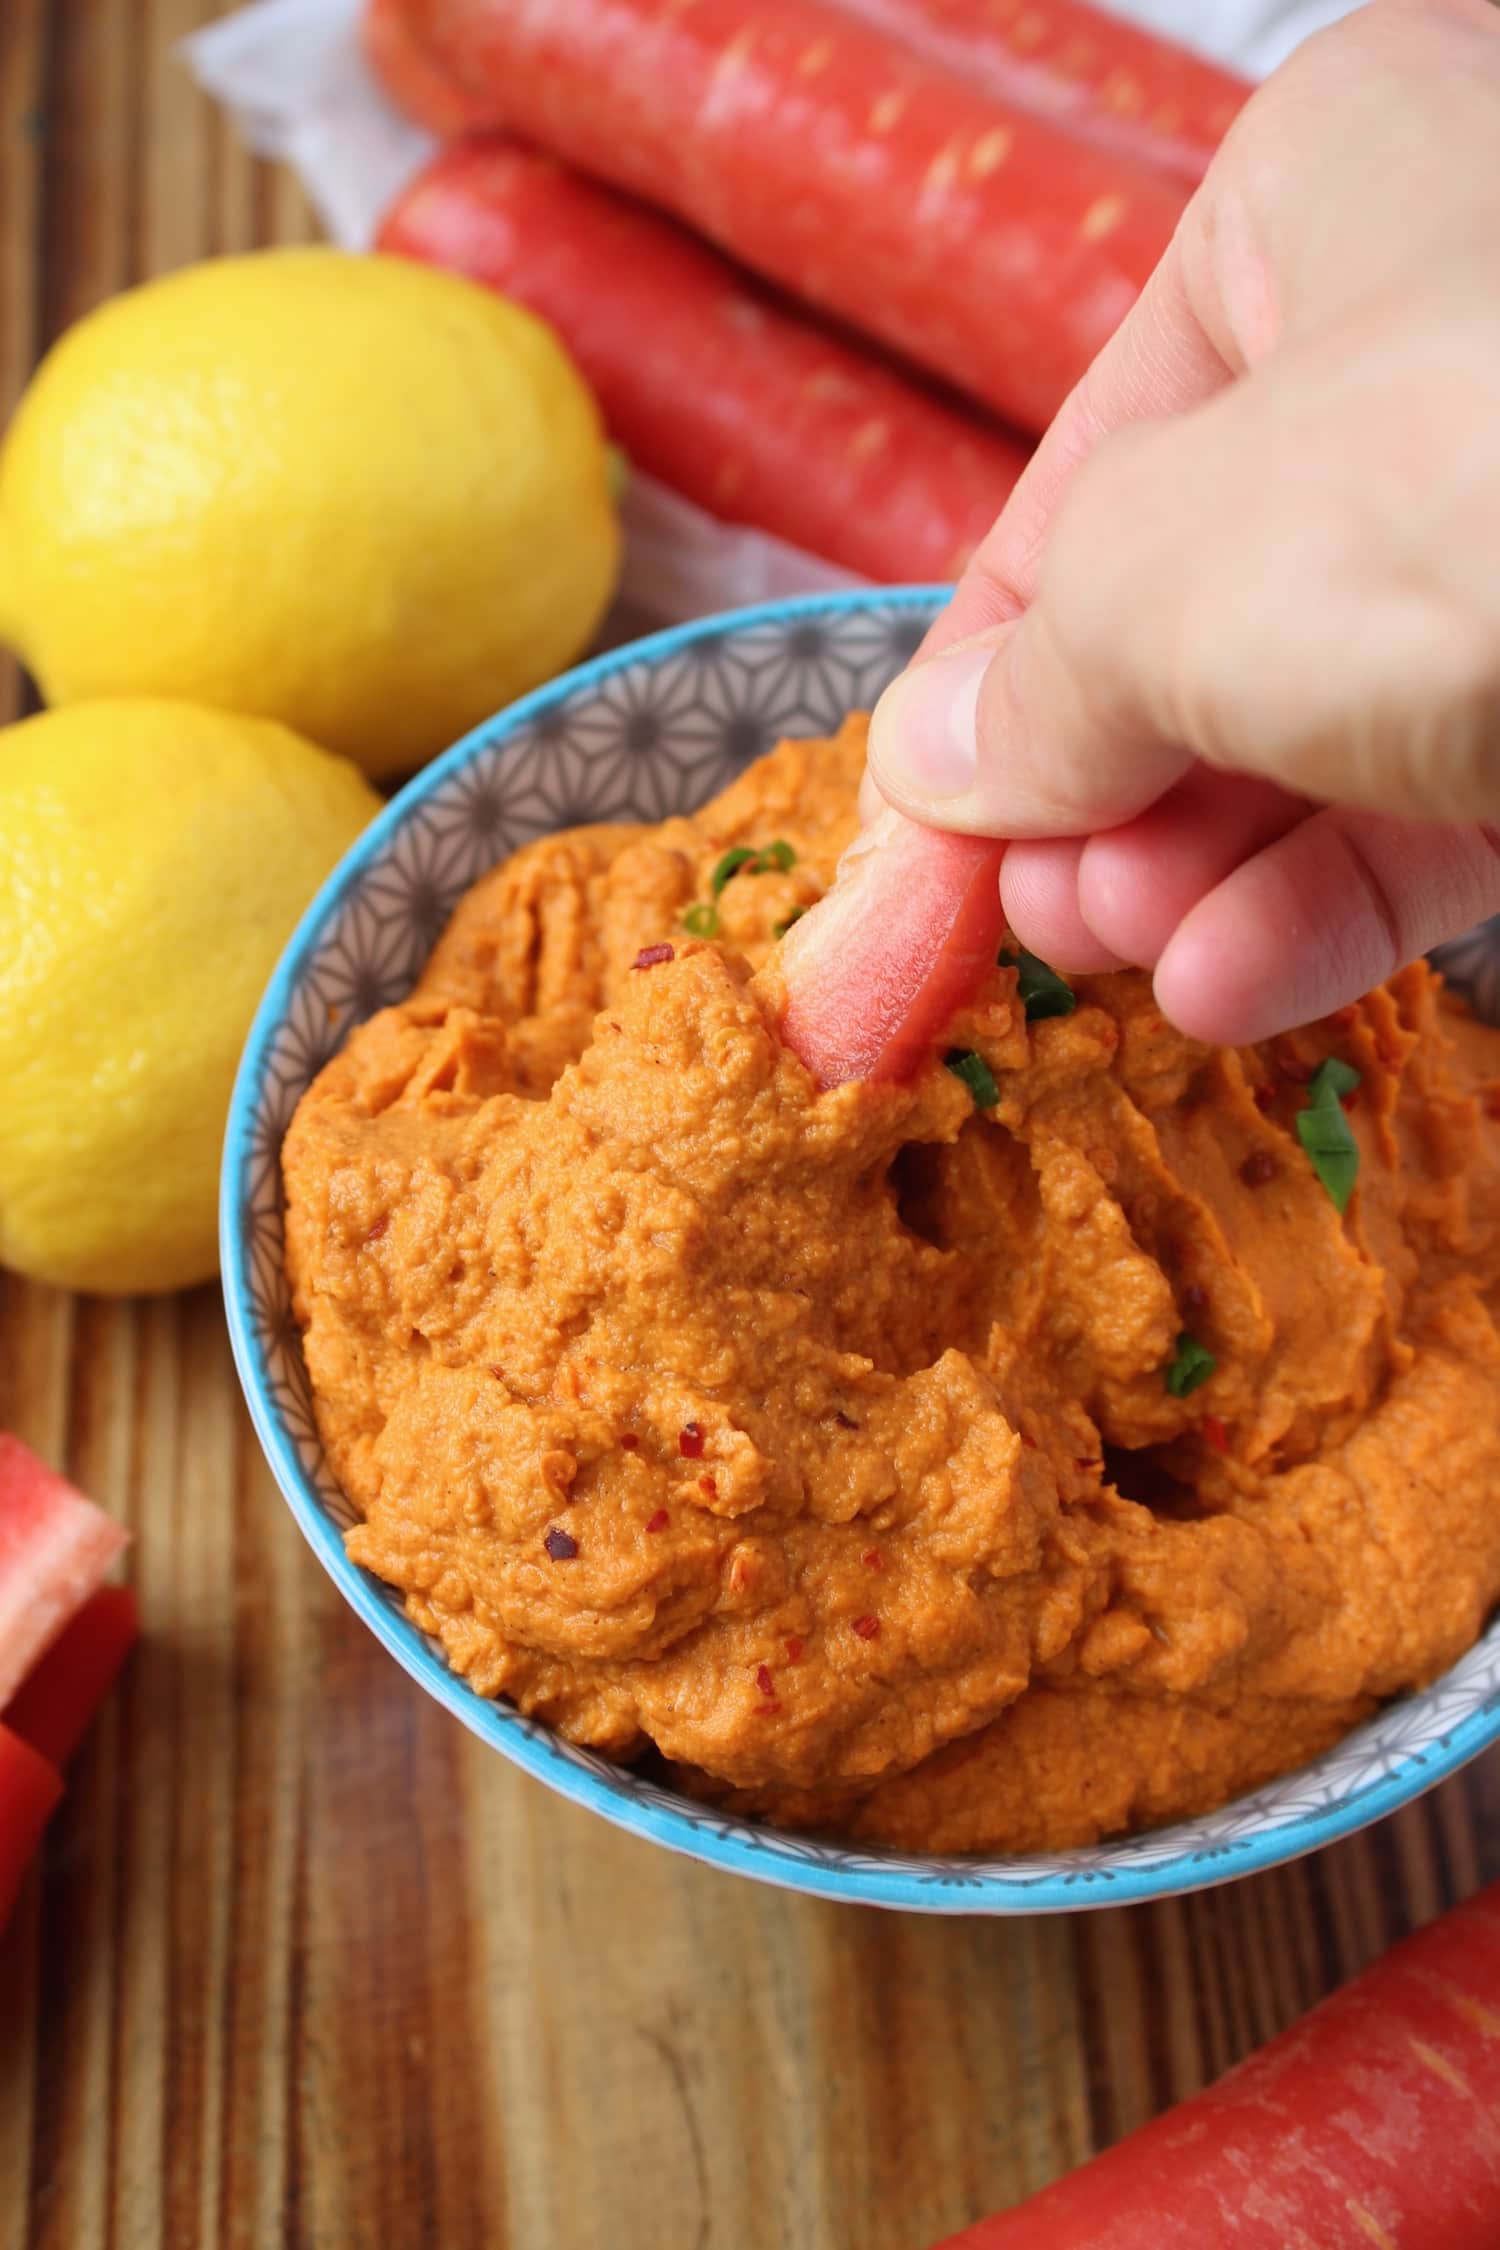
I hope you guys aren't too disappointed to see another "hummus" recipe, because this Beanless Carrot Hummus really is amazing! I requires just 5 ingredients (excluding salt and pepper) and is mainly carrots! It's the perfect savory spread for toast and goes great on top of salads. To prepare this Beanless Carrot Hummus, all you have to do is steam some carrots and blend them up with some spices in a blender or food processor. Easy Peasy!
If you make this Beanless Carrot Hummus, leave a comment below with your thoughts! Even better, take a picture and post it on Instragram (#theconscientiouseater) so that I can see your beautiful creation!
📖 Recipe
Beanless Carrot Hummus
This creamy and vibrant Beanless Carrot Hummus is a healthy and flavorful dip that will spice up any savory meal.
Ingredients
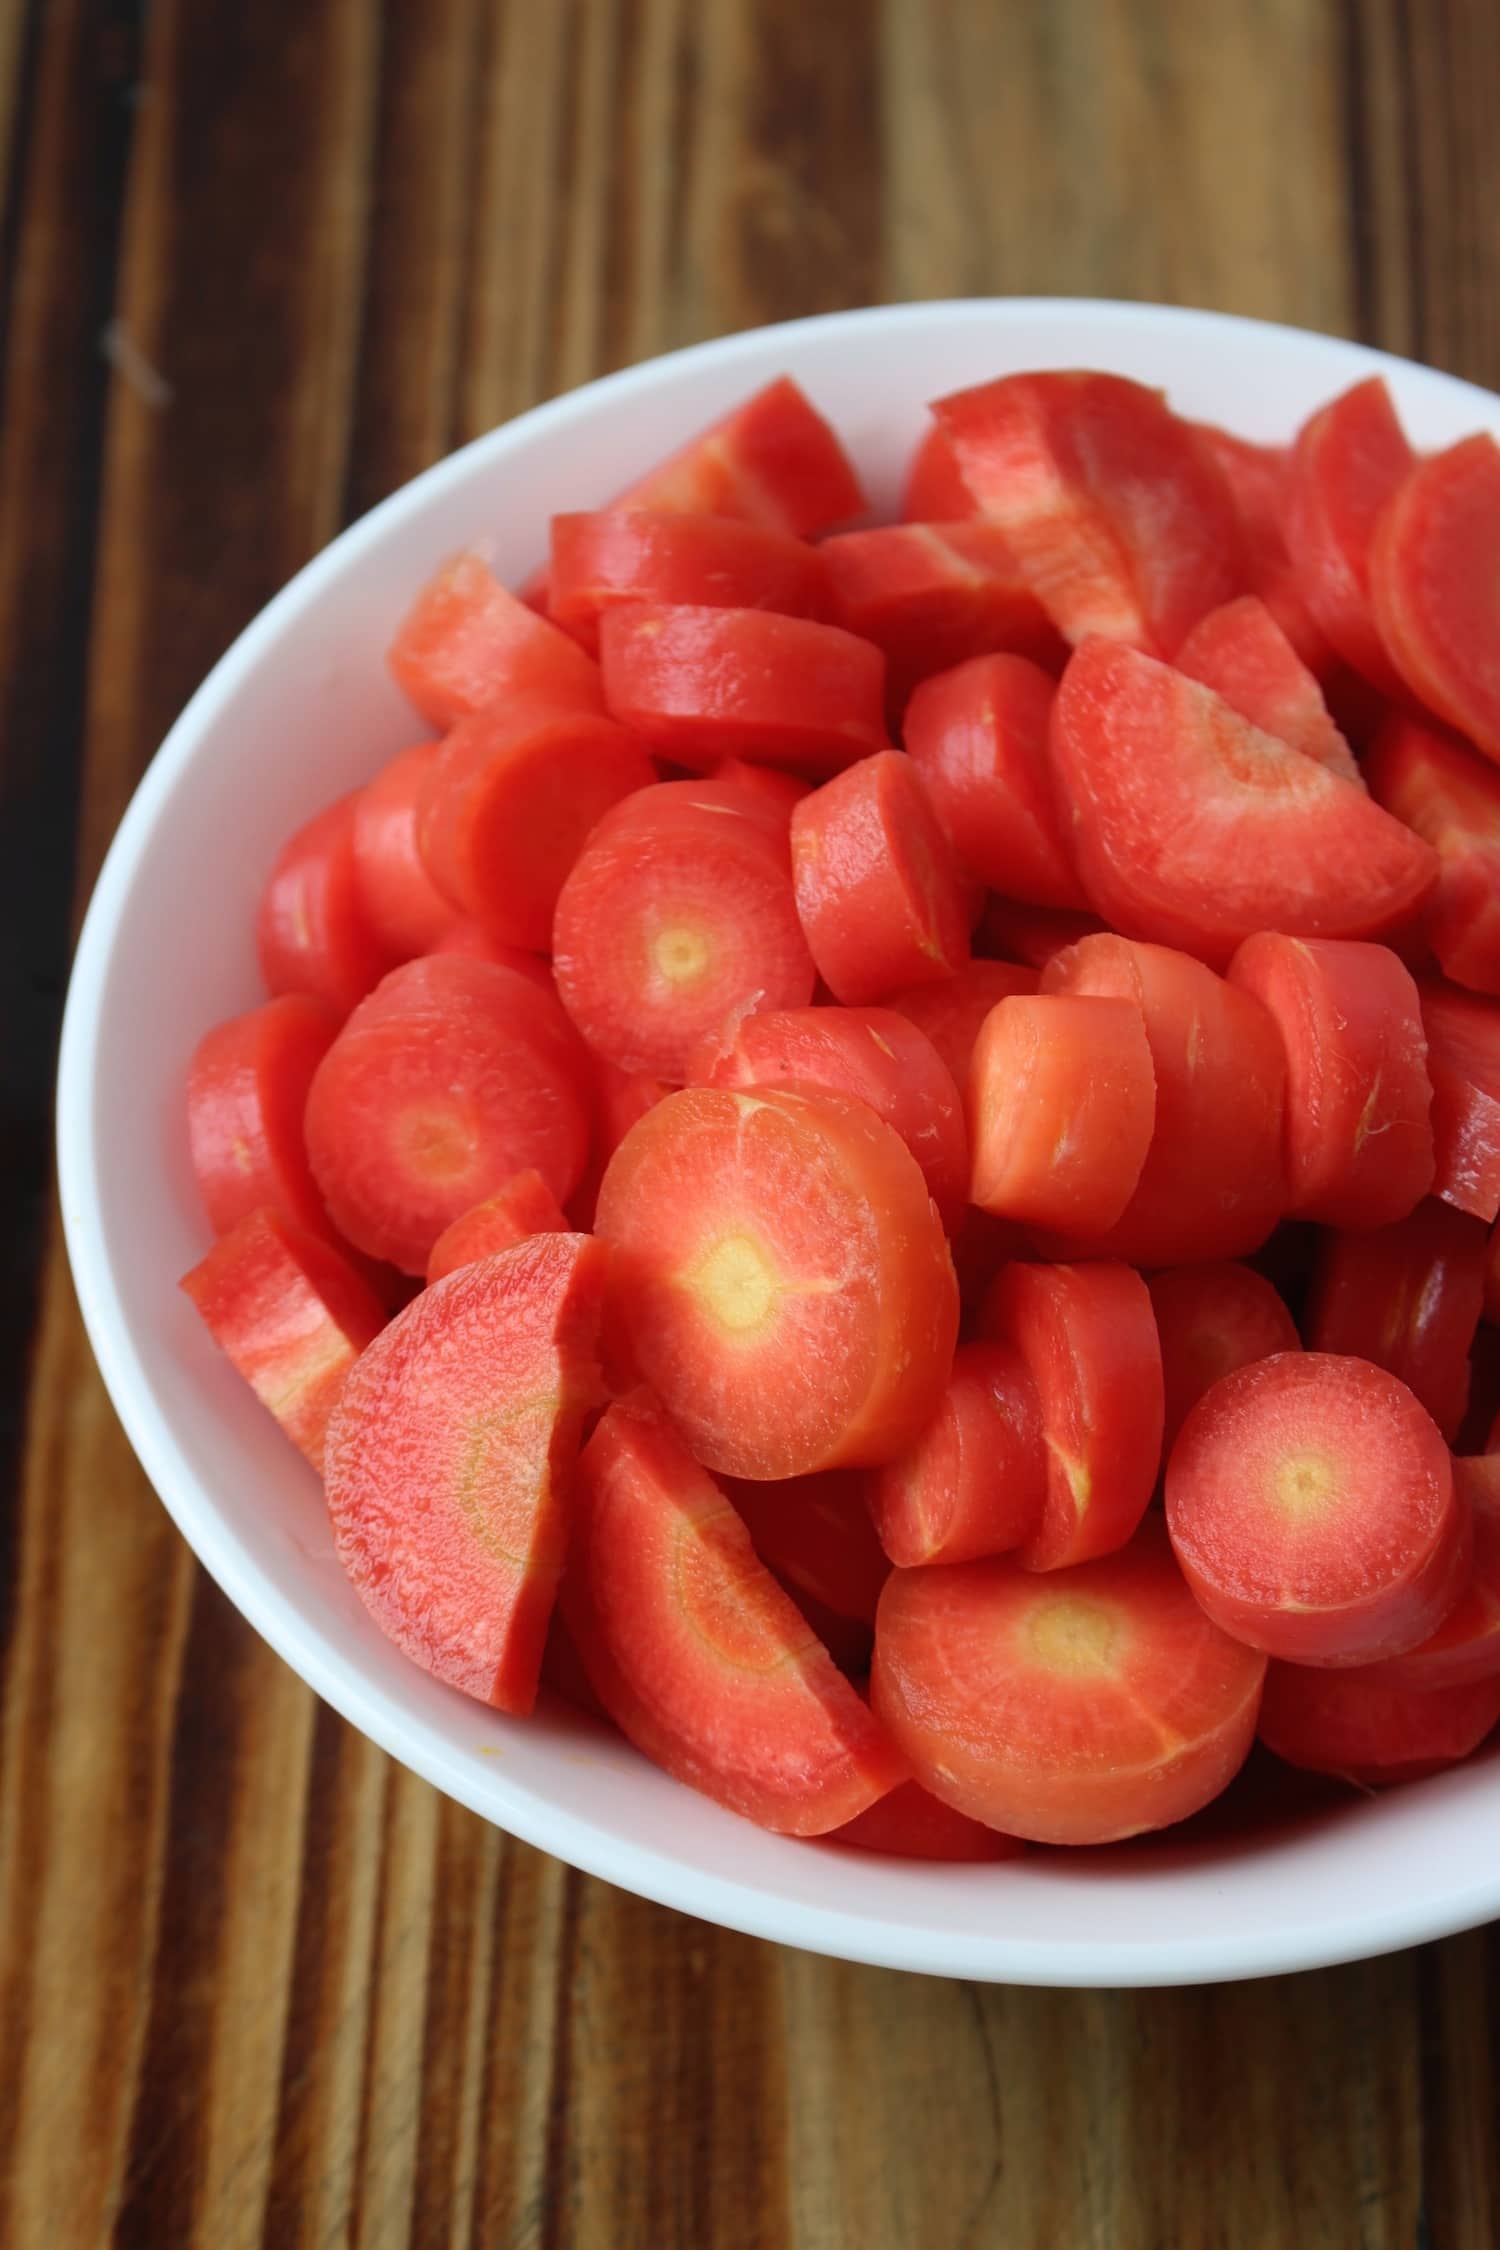
- 1 pound carrots peeled, coarsely chopped (3.5 cups sliced)
- ¼ cup tahini
- Juice of ½ lemon
- 2 teaspoon ground cumin
- 3 garlic cloves
- ½ teaspoon salt
- Freshly ground pepper
Instructions
- In a steamer or the steaming tray in your rice cooker, steam the 3 ½ cups of sliced carrots until fork tender.
- Place the steamed carrots and remaining ingredients into a high powered blender or food processor and process until smooth.
- Top with fresh herbs and chili flakes and serve!
- Store in an airtight container in the fridge for up to a week.
Notes
This is the perfect savory spread for toasts or it works wonderfully on top of salad.
Nutrition
Serving: 0.5cupCalories: 115kcalCarbohydrates: 13gProtein: 3gFat: 7gSaturated Fat: 1gPolyunsaturated Fat: 3gMonounsaturated Fat: 3gSodium: 301mgPotassium: 373mgFiber: 3gSugar: 4gVitamin A: 15174IUVitamin C: 9mgCalcium: 58mgIron: 1mg
Tried this recipe?Let me know how it was!
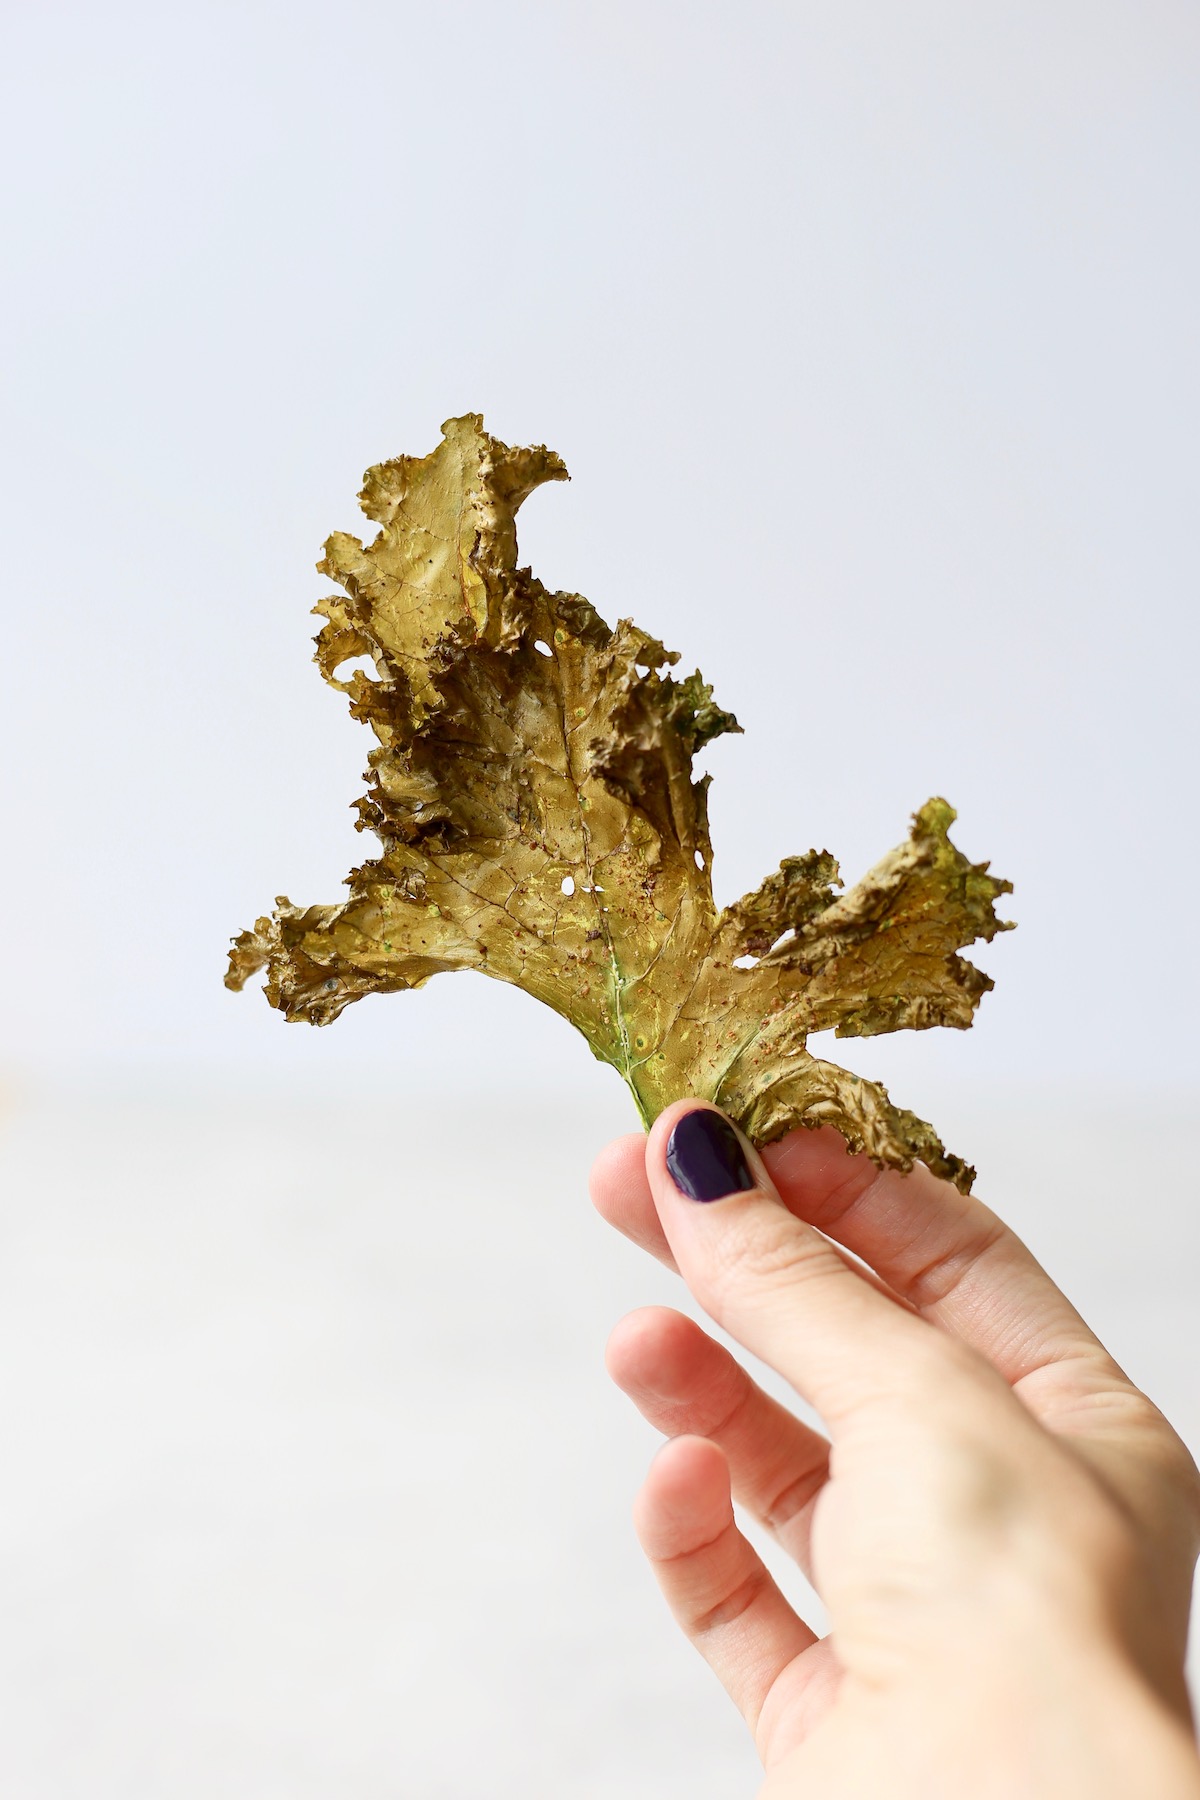
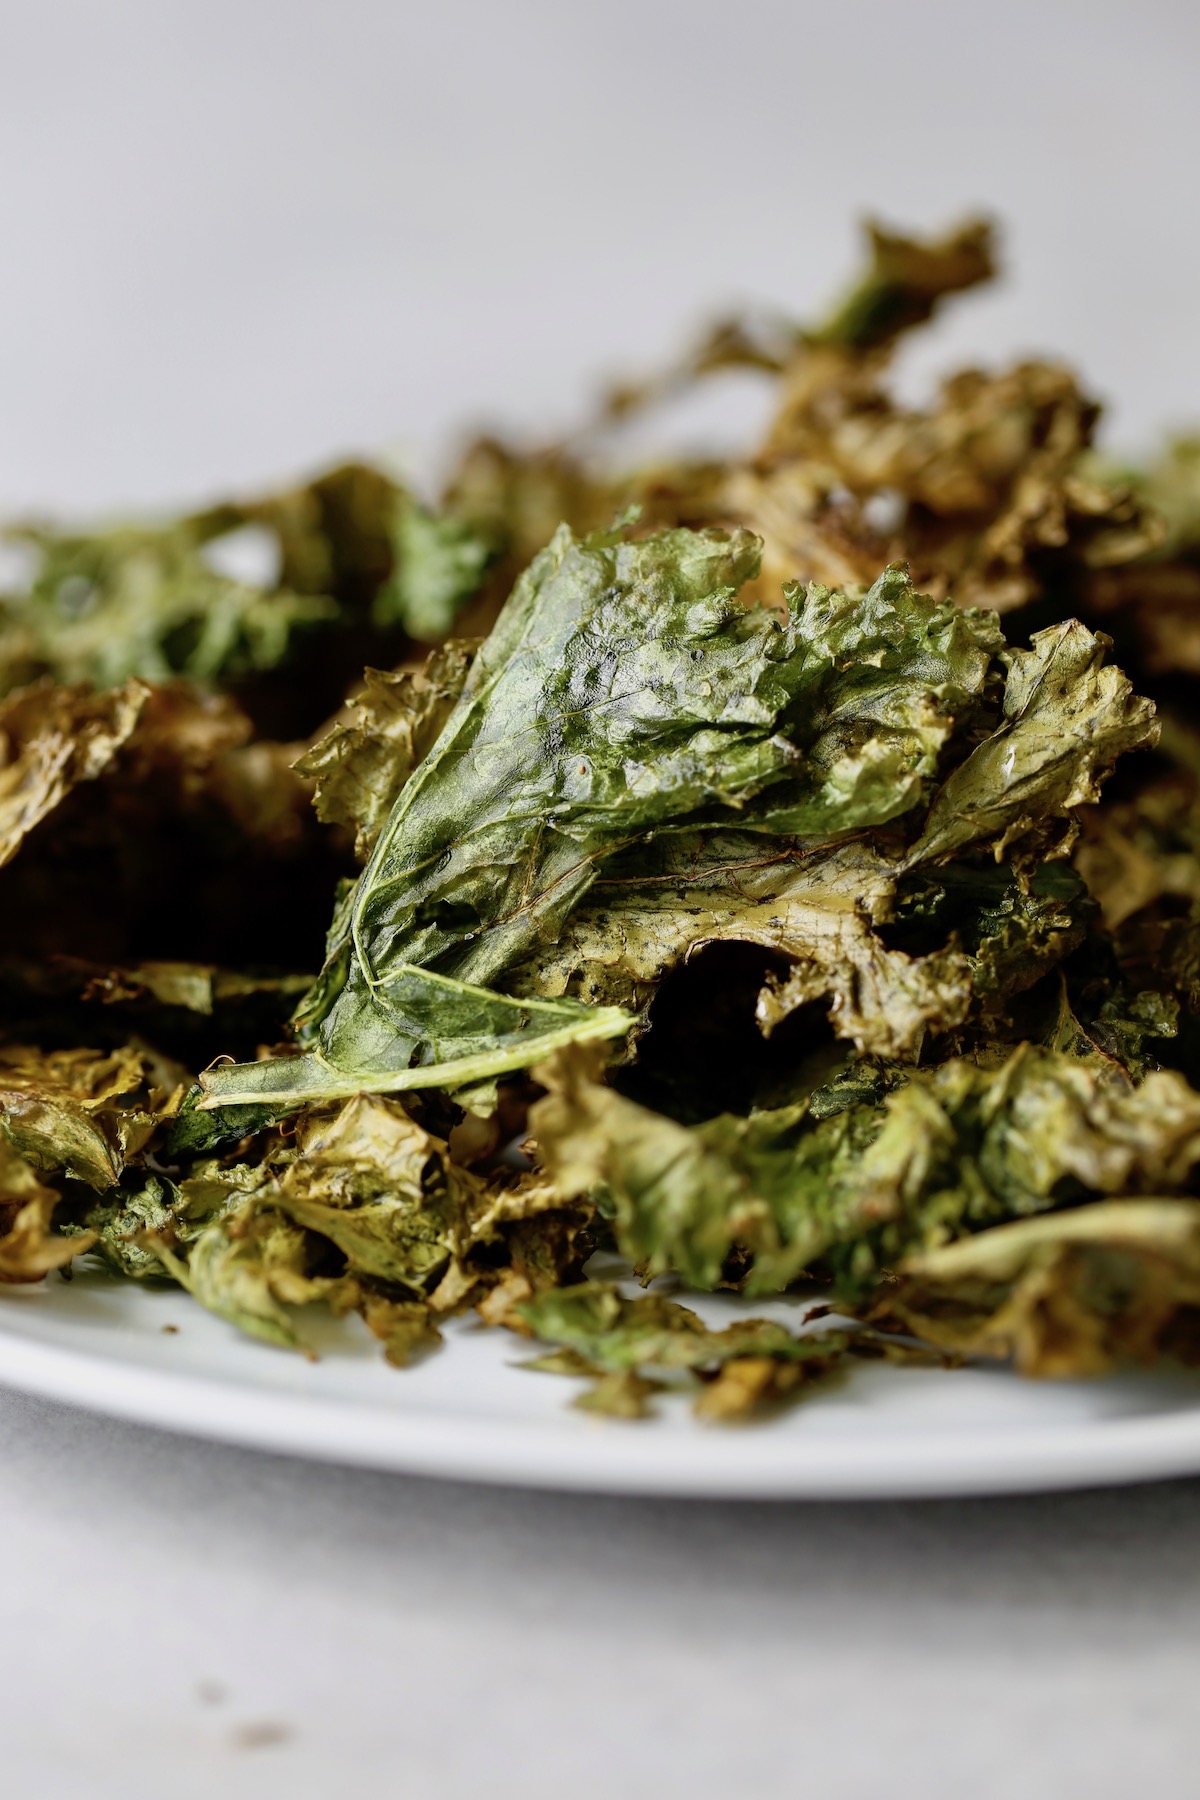
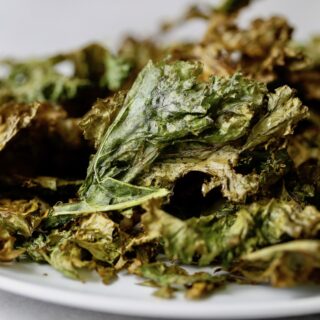
How to Make Kale Chips (Crispy Baked Kale!)
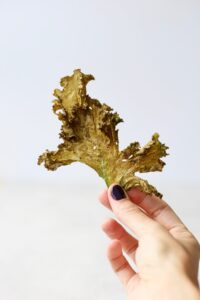
You'll want to have kale every day once you discover how to make kale chips at home! They're crispy, salty and melt in your mouth. Eating your greens will never be easier!
Also Featured In
This recipe is also featured in the following vegan recipe roundups:
While I love chocolate, I love eating veggies just as much!
In the past, eating vegetables meant having a green leaf salad with some carrots, cucumber and store-bought dressing drizzled on top.
Now, I enjoy a wide variety of vegetables, cooked in a variety of ways.
While eating kale raw (like in this Quinoa, Kale and Squash Salad) is a great way to get in your greens, my current favorite obsession is baked kale chips.
You guys. If you've never baked your kale, you're in for a real treat!
What are kale chips?
Companies are sneaking veggie powders into all kinds of processed foods these days. So while you may think kale chips are green, store-bought chips with a little kale powder snuck into them, think again!
Real kale chips are just...kale!
But baked.
Yes, you can turn kale leaves into crispy, melt-in-your-mouth chips, simply by baking them in a little oil and salt.
I'll show you how to do it below!
Ingredients
Like I mentioned above, making kale chips at home really only requires three ingredients, which I'll list out below:
- Kale
- Oil
- Salt
Yes, you can get more creative using a variety of spices and even sauces, but for simple chips that's all you need.
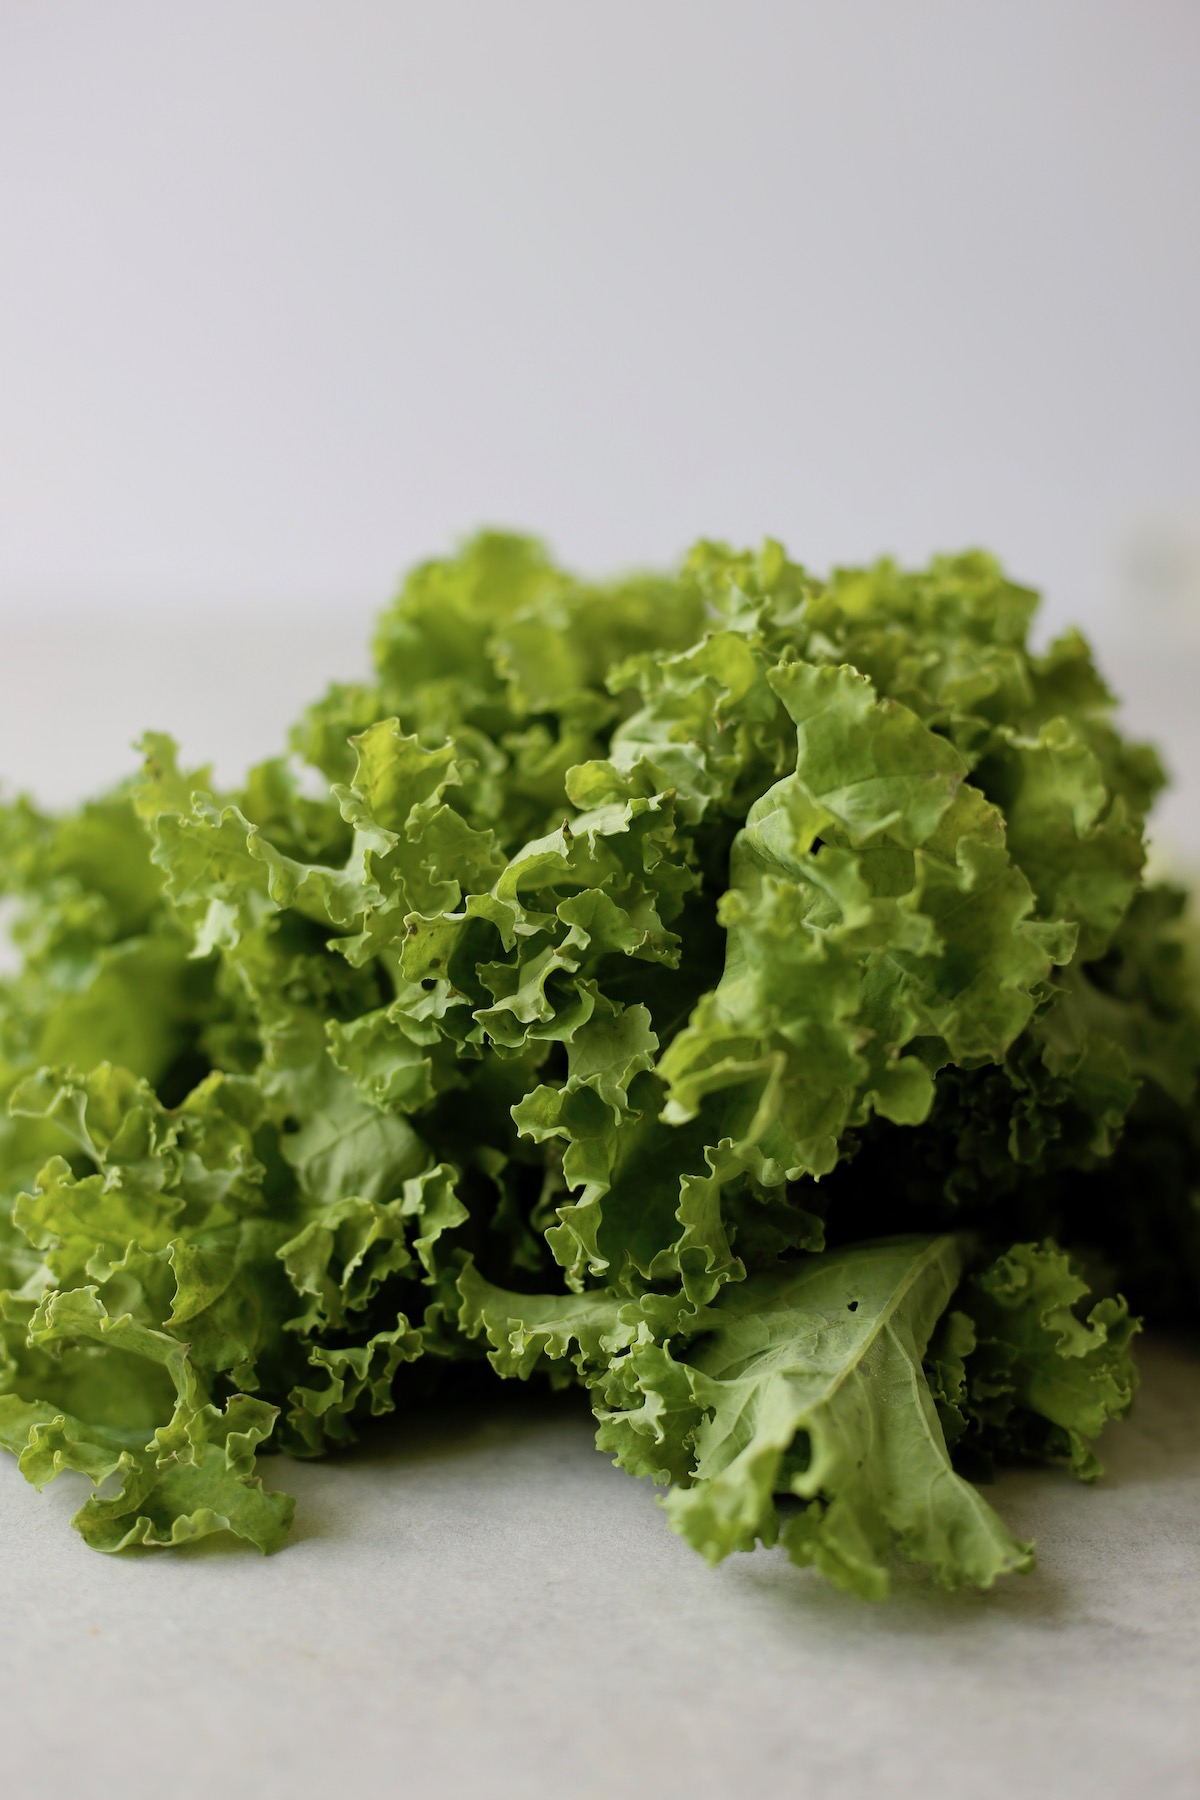
Best type of kale for making homemade kale chips
There are three more common types of kale:
- Curly Kale
- Tuscan Kale
- Russian Red Kale.
I personally love to use curly kale as it is hearty and has lots of creases and crevices to make for a crispy, delicious chip. It's also readily available at most local grocery stores (which is a huge plus).
6 tips for making kale chips
Kale chips are so easy to make and you can easily get creative when making them. However, there are a few things to keep in mind when trying to create super crispy, delicious kale chips.
- Use curly kale. All the creases and crevices make for the best kale chips!
- Dry your kale thoroughly. If your kale is wet in any way, it won't crisp up, but instead will steam. To get crispy kale, you need to make sure your kale leaves are super dry!
- Don't overcrowd your baking sheets. Just like you need your kale chips to be dry in order for them to become crispy, you also need to give them lots of space on the baking sheet so that they have room to breath.
- Add oil. While you don't have to use a lot, you need to add a little bit of oil in order to get nice and crispy kale chips.
- Experiment with spices. I personally love to use garlic salt when making homemade kale chips, but you can definitely bump up the flavor by using different, bolder spices!
- Watch them closely. Kale chips can burn easily, especially ones that are smaller in size, so be sure to watch them closely towards the end of the baking time.
If you follow all of these top tips, you'll most likely end up with some delicious kale chips!
How to make kale chips (step-by-step)
Below I'll share step-by-step instructions on how to make your very own kale chips.
Step 1: Preheat your oven to 400°F / 205°C and line 2 baking sheets with silicone baking mats or spray them with cooking spray. De-stem the kale by pulling the leaves off the stems.
Step 2: If your kale isn't organic, wash the leaves and then dry them as much as possible with a tea towel. Your kale won't get crispy if it's wet! If you are using organic kale, I often just look for dirt and bugs. If the leaves are clean I honestly just leave them as is so that they are as dry as possible!
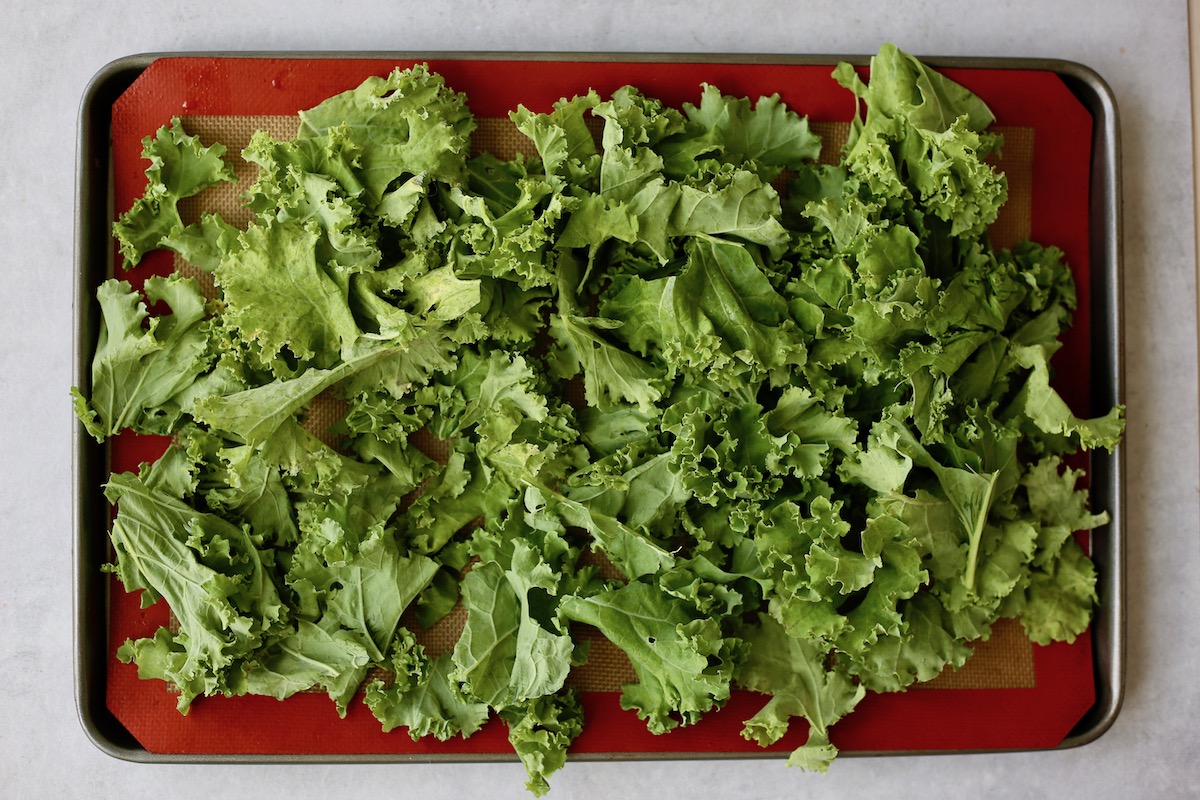
Step 3: Place the dried leaves into a large mixing bowl and drizzle a little olive oil over the top of the kale leaves. Use your hands to gently massage the oil onto all of the leaves so that every leaf has been lightly coated. Rip any larger leaves into smaller pieces.
Step 4: Spread the leaves out into a single layer so that there aren't any leaves on top of each other. You may not be able to fit all of the kale on two baking sheets. If that's the case, cook them in multiple batches or use the remaining kale in a salad, etc. Sprinkle the oil-coated kale with a little sea salt or, my personal favorite, garlic salt!
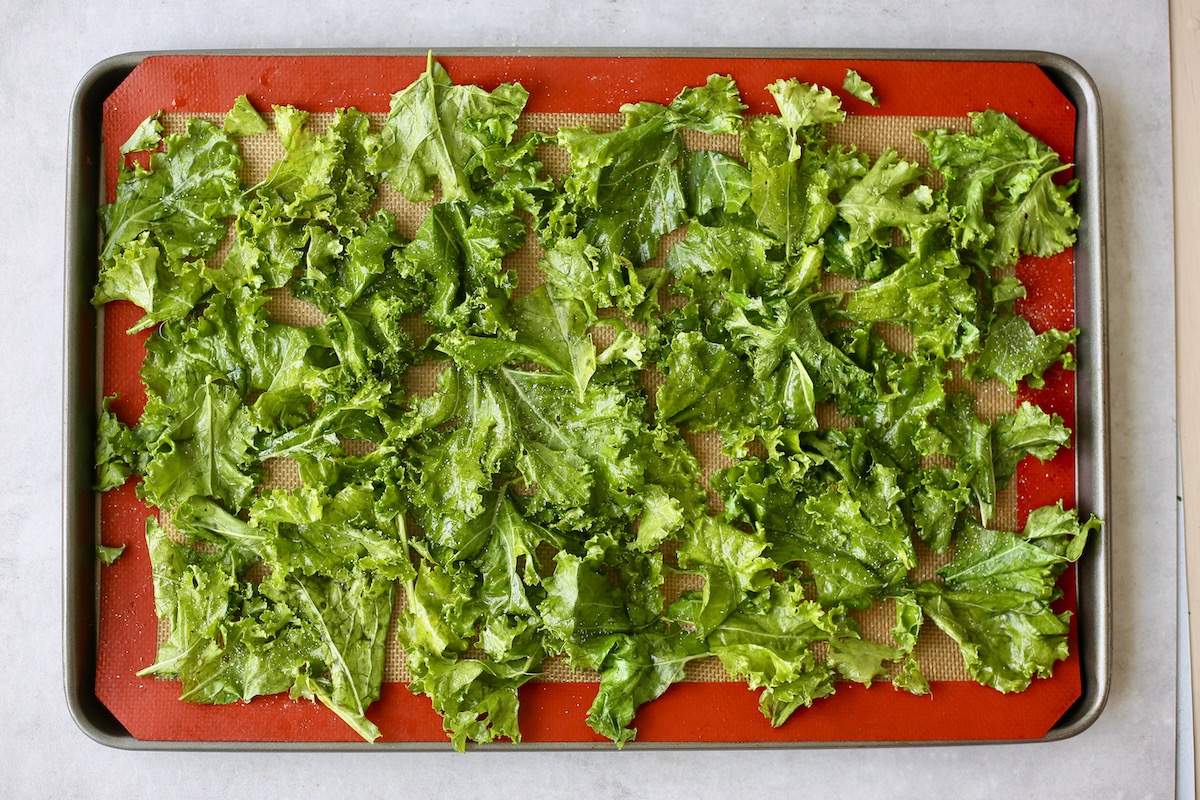
Step 5: Bake the kale at 400°F / 205°C for 10-15 minutes or until slightly brown and crispy. The pieces of kale can burn quickly so keep an eye on them towards the end as every oven varies!
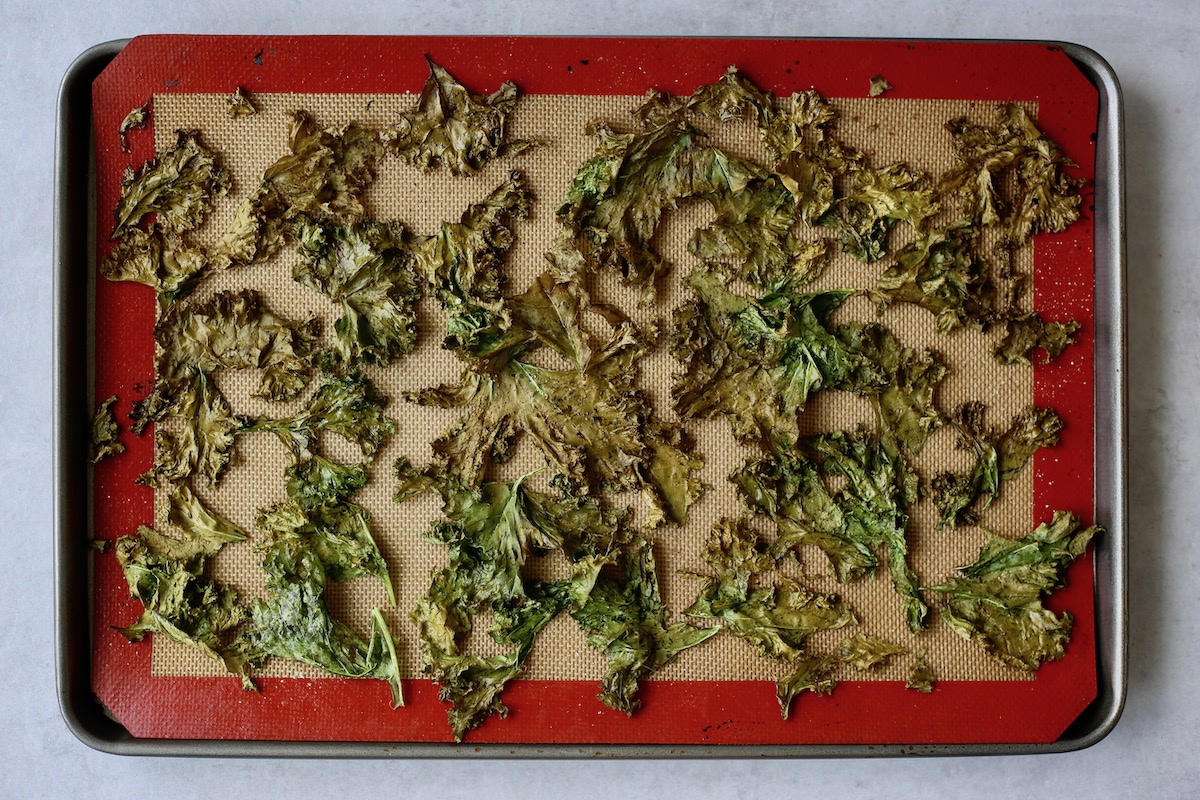
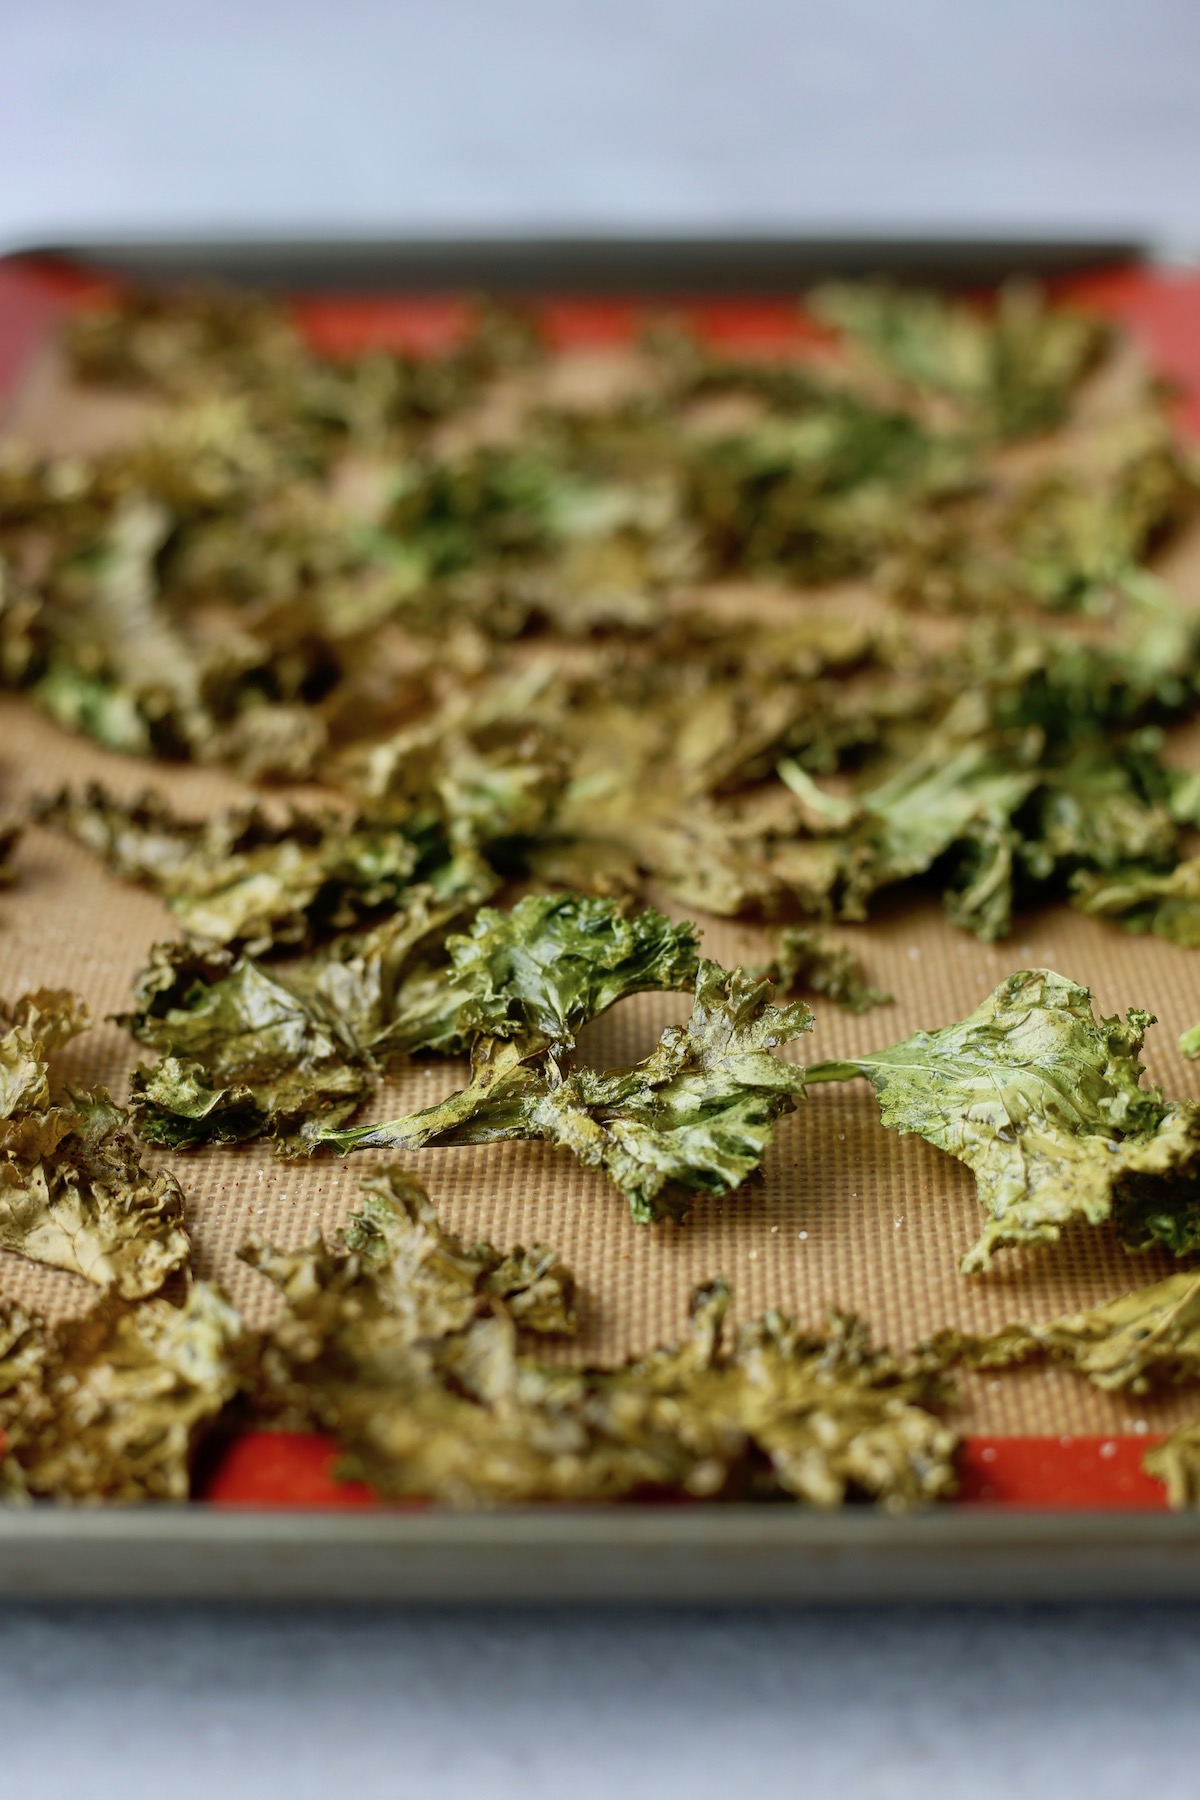
Step 6: Allow the chips to cool a little before enjoying. They taste best and are crispiest just after baking.
Once I learned how easy it is to make homemade kale chips this way, I went overboard making them almost every day!
Eventually... I toned it down.
But don't say I didn't warn you!
Storage
In my opinion, kale chips are crispiest and taste the best immediately after baking.
However, if you have leftovers, my recommendation is to store them in an air-tight container at room temperature for 1-2 days. They will lose their crispiness, but will still taste delicious.
Alternatively, you can also store them in an air-tight container in the fridge, but they will definitely wilt. If you do that, you could use them in a salad or stir them into a stew.
📖 Recipe
How to Make Kale Chips
Crispy, salty and melt-in-your-mouth good, once you learn how to make kale chips, you'll never want to eat kale any other way!
Ingredients
- 1 head curly kale stems removed
- ½ tablespoon olive oil
- Salt or garlic salt! to taste
Instructions
- Preheat your oven to 400 °F and line two baking sheets with silicone baking mats or spray them well with cooking spray.
- De-stem your kale by pulling the leaves off the stems. If needed, wash the leaves and dry them thoroughly with a tea towel. The leaves have to be dry in order for them to get crispy!
- Place the leaves into a large mixing bowl and drizzle over a little bit of olive oil. Massage the oil into the leaves so that each leaf is lightly coated in oil. While you massage the leaves, rip any larger leaves into smaller pieces.
- Spread the leaves out onto your lined baking sheets, making sure they are in a single layer and not on top of each other. If you have too many leaves, you can always bake them in multiple batches.
- Sprinkle the leaves with salt or garlic salt (or whatever spices you desire) and bake them for 10-15 minutes, watching carefully towards the end to keep them from burning.
- Remove the chips from the oven and allow them to cool slightly before enjoying! They taste best and are crispiest when eaten soon after baking.
Notes
In my opinion, kale chips are crispiest and taste the best immediately after baking.
However, if you have leftovers, my recommendation is to store them in an air-tight container at room temperature for 1-2 days. They will lose their crispiness, but will still taste delicious.
Alternatively, you can also store them in an air-tight container in the fridge, but they will definitely wilt. If you do that, you could use them in a salad or stir them into a stew.
Nutrition
Calories: 16kcalCarbohydrates: 0.01gProtein: 0.01gFat: 2gSaturated Fat: 0.2gPolyunsaturated Fat: 0.2gMonounsaturated Fat: 1gSodium: 0.2mgPotassium: 1mgFiber: 0.01gSugar: 0.003gVitamin A: 25IUVitamin C: 0.2mgCalcium: 1mgIron: 0.01mg
Tried this recipe?Let me know how it was!
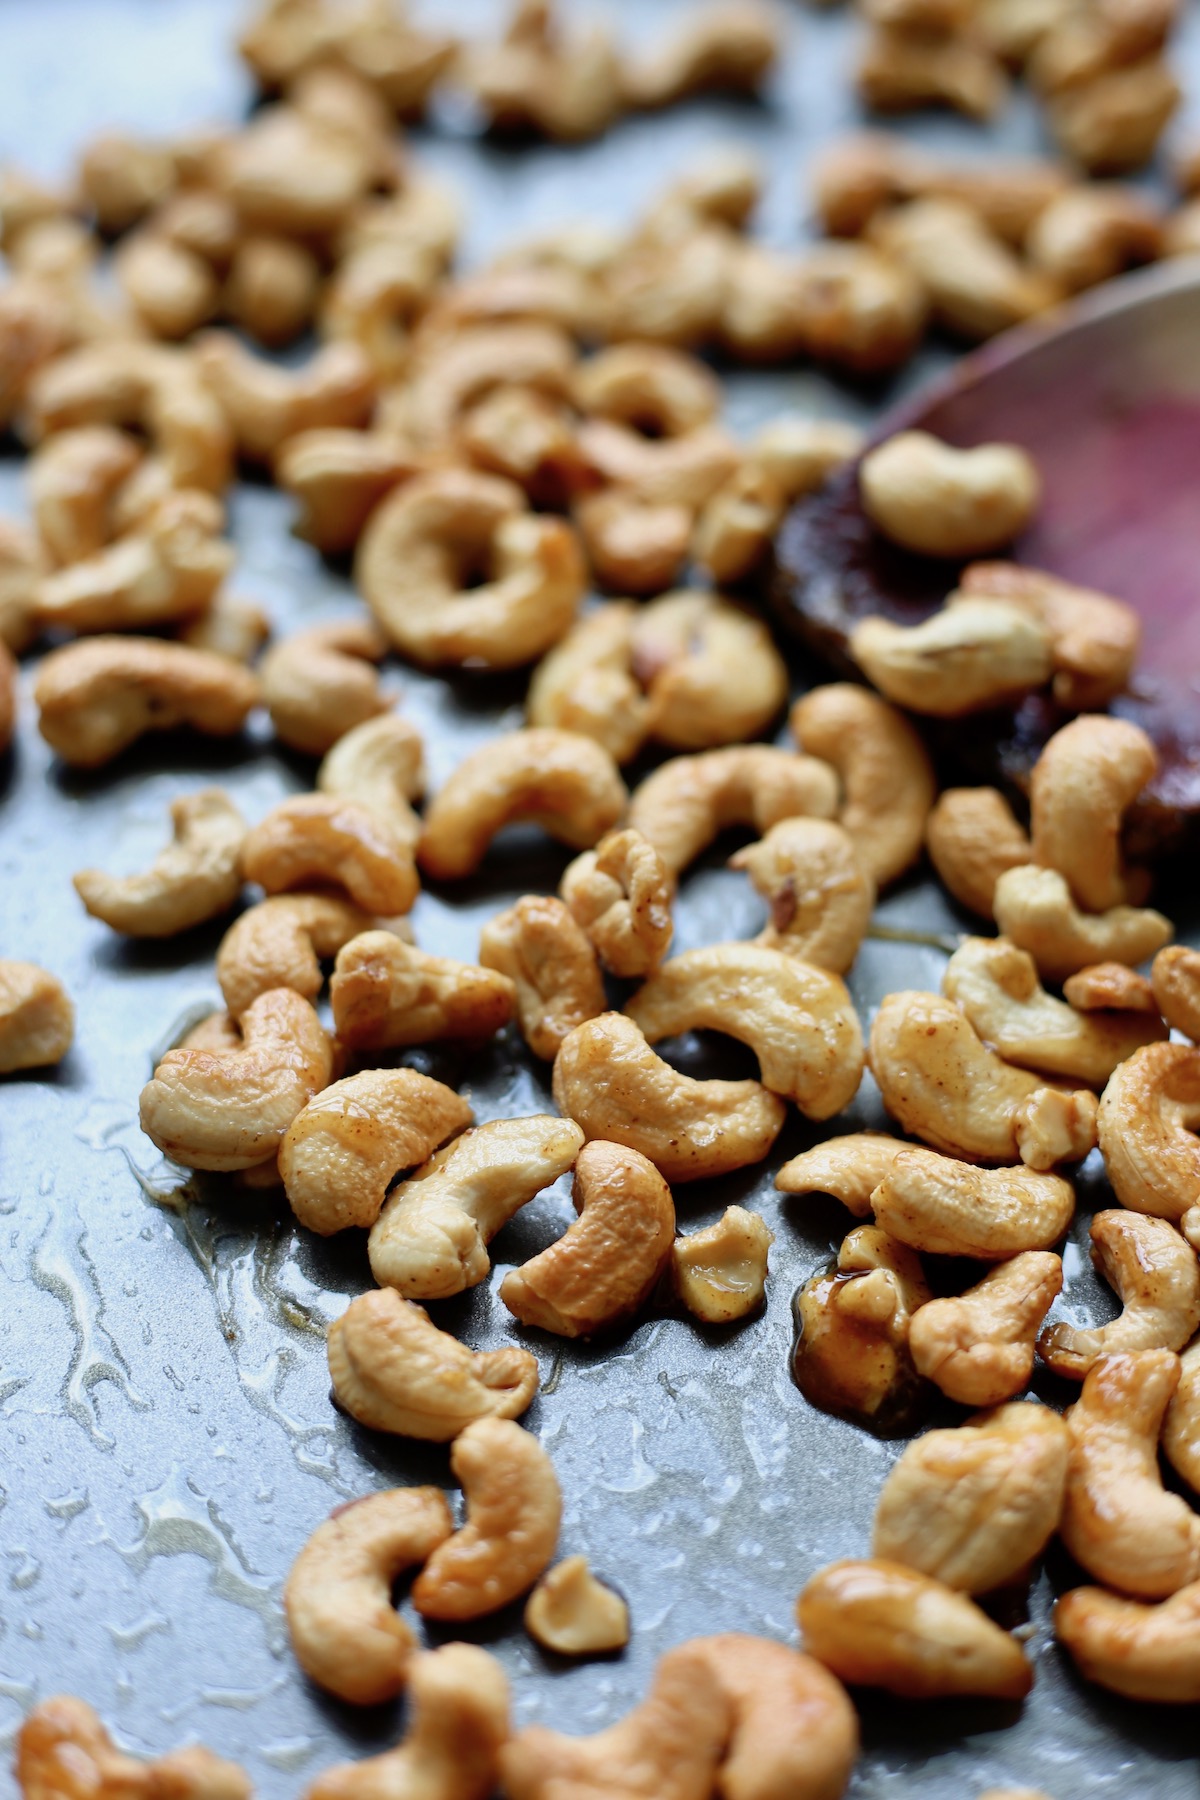
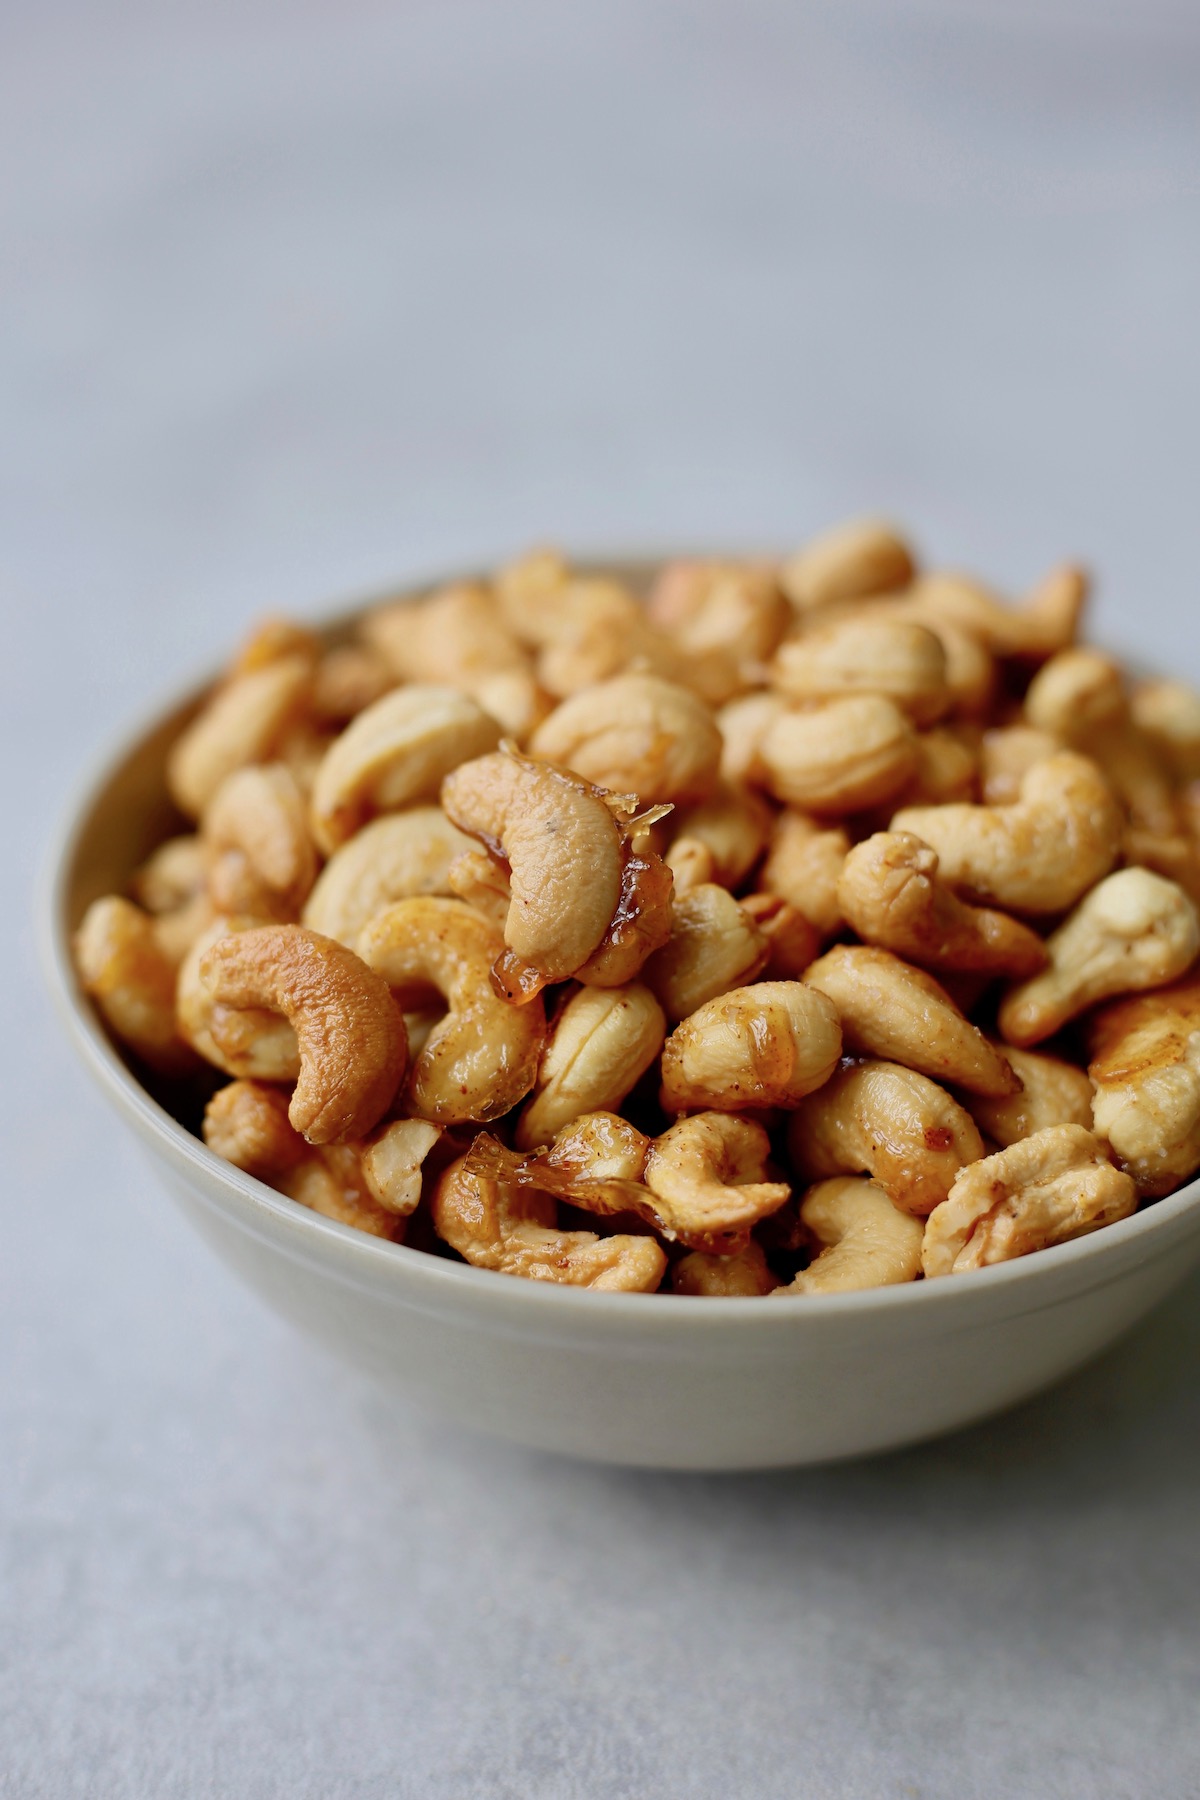
Sweet and Spicy Roasted Cashews
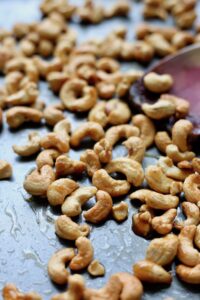
Ready in only 15 minutes, these easy to prepare Sweet and Spicy Roasted Cashews have the perfect balance of sweetness and heat to keep you going back for more. They never last long in our house!
Our family is nuts about nuts! We demolish jars of homemade peanut butter, snack on baked into homemade granola and and drizzle decadent pecan butter on muffins as if it was frosting.
And whenever we're craving something a little bit more savory and salty, I love to make these Sweet and Spicy Roasted Cashews to have on hand all throughout the week!
[feast_advanced_jump_to]Why Everyone Loves This Recipe!
These sweet and spicy cashews really are the perfect vegan snack. Whenever I bring a batch to my friend's house, they get devoured in no time and everyone asks for the recipe.
- These nuts take 15 minutes to make...yep, just 15 minutes!
- Maple syrup and salt create the perfect balance of sweet and salty, making everyone reach for another handful.
- A touch of cayenne pepper adds in just a hint of heat that tingles the back of your throat...in a good way!
- These roasted cashews are a fun way to jazz up raw nuts and to get you snacking on more whole-food ingredients.
- A batch of these roasted cashews is the perfect appetizer or party snack.
Ingredients
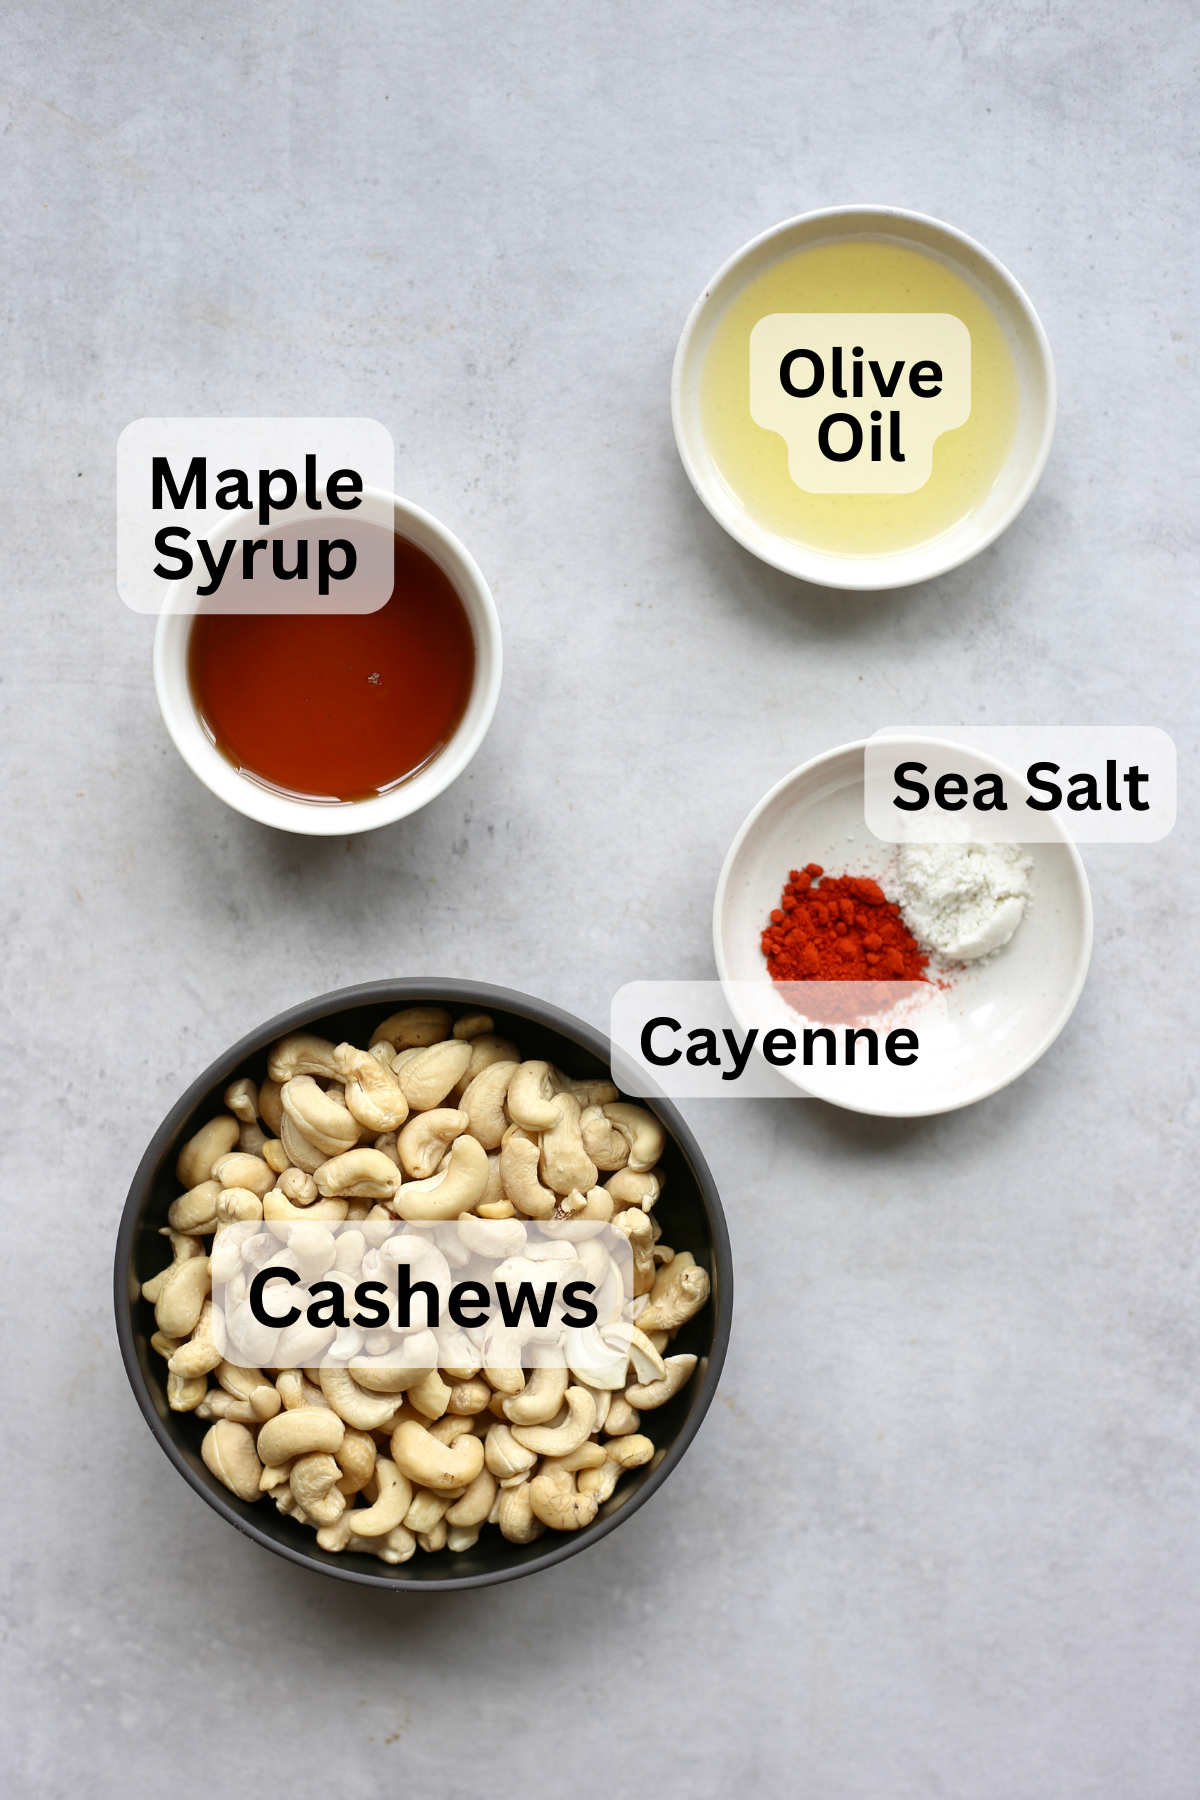
- Raw cashews - Make sure your cashews are raw. You don't want to roast already roasted cashews! I love to buy raw nuts in bulk on-line as they are so much cheaper that way. Then I just store them in my freezer to keep them from going rancid.
- Olive oil - I'd recommend using a more mild olive oil instead of extra virgin olive oil. Olive oil add some richness that vegetable or canola oil won't add.
- Maple syrup - Use the real stuff! You won't regret it.
- Ground cayenne - Cayenne is the key ingredient in this recipe. But don't add too much! Just a touch adds a little somethin' somethin' that will make people wonder, "Why are these so addicting?!"
See recipe card below for a full list of ingredients and measurements.
Substitutions and Variations
- Nuts - Don't have cashews on hand? Try almonds! Or even peanuts! Just remember that different nuts roast at different and obviously have different flavor profiles.
- Oil - If you don't have olive oil on hand, coconut oil or even just a basic vegetable oil would work too. I just love the richness that olive oil gives these roasted cashews.
- Cayanne - If you don't have ground cayenne in your pantry, but really want to make these nuts ASAP, try out a different ground chili. Maybe chipotle powder? Or simple ground chili? If you like a certain ground chili in your food, you'll probably enjoy it on these cashews as well.
- Spice Level - If you don't like spicy food, simply omit the ground cayenne! The maple syrup and salt add plenty of flavor to make these nuts addicting.
How to Make Roasted Cashews
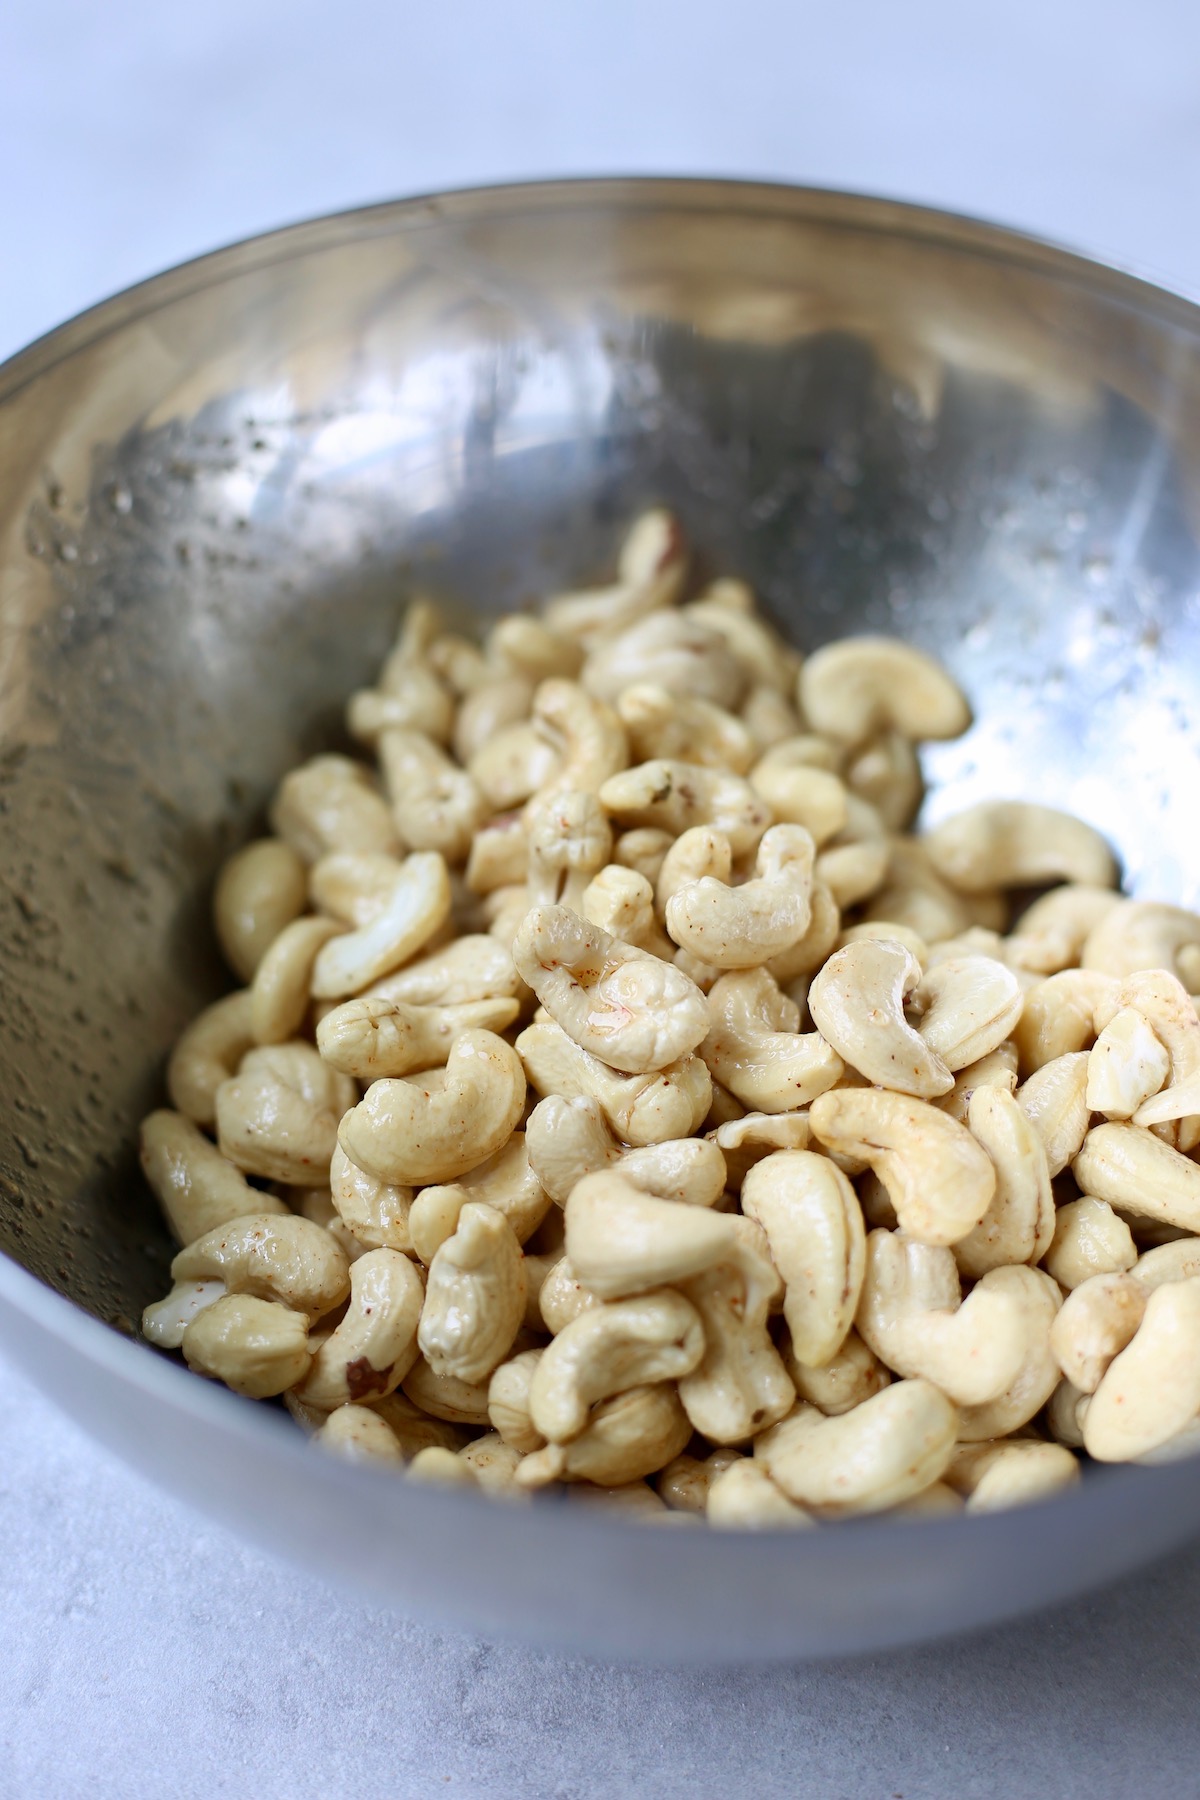
Step 1: Preheat your oven to 350°F / 175°C and line a baking sheet with a silicone baking mat. In a mixing bowl, combine all of the ingredients, starting with just ¼ teaspoon salt, and stir everything together well.
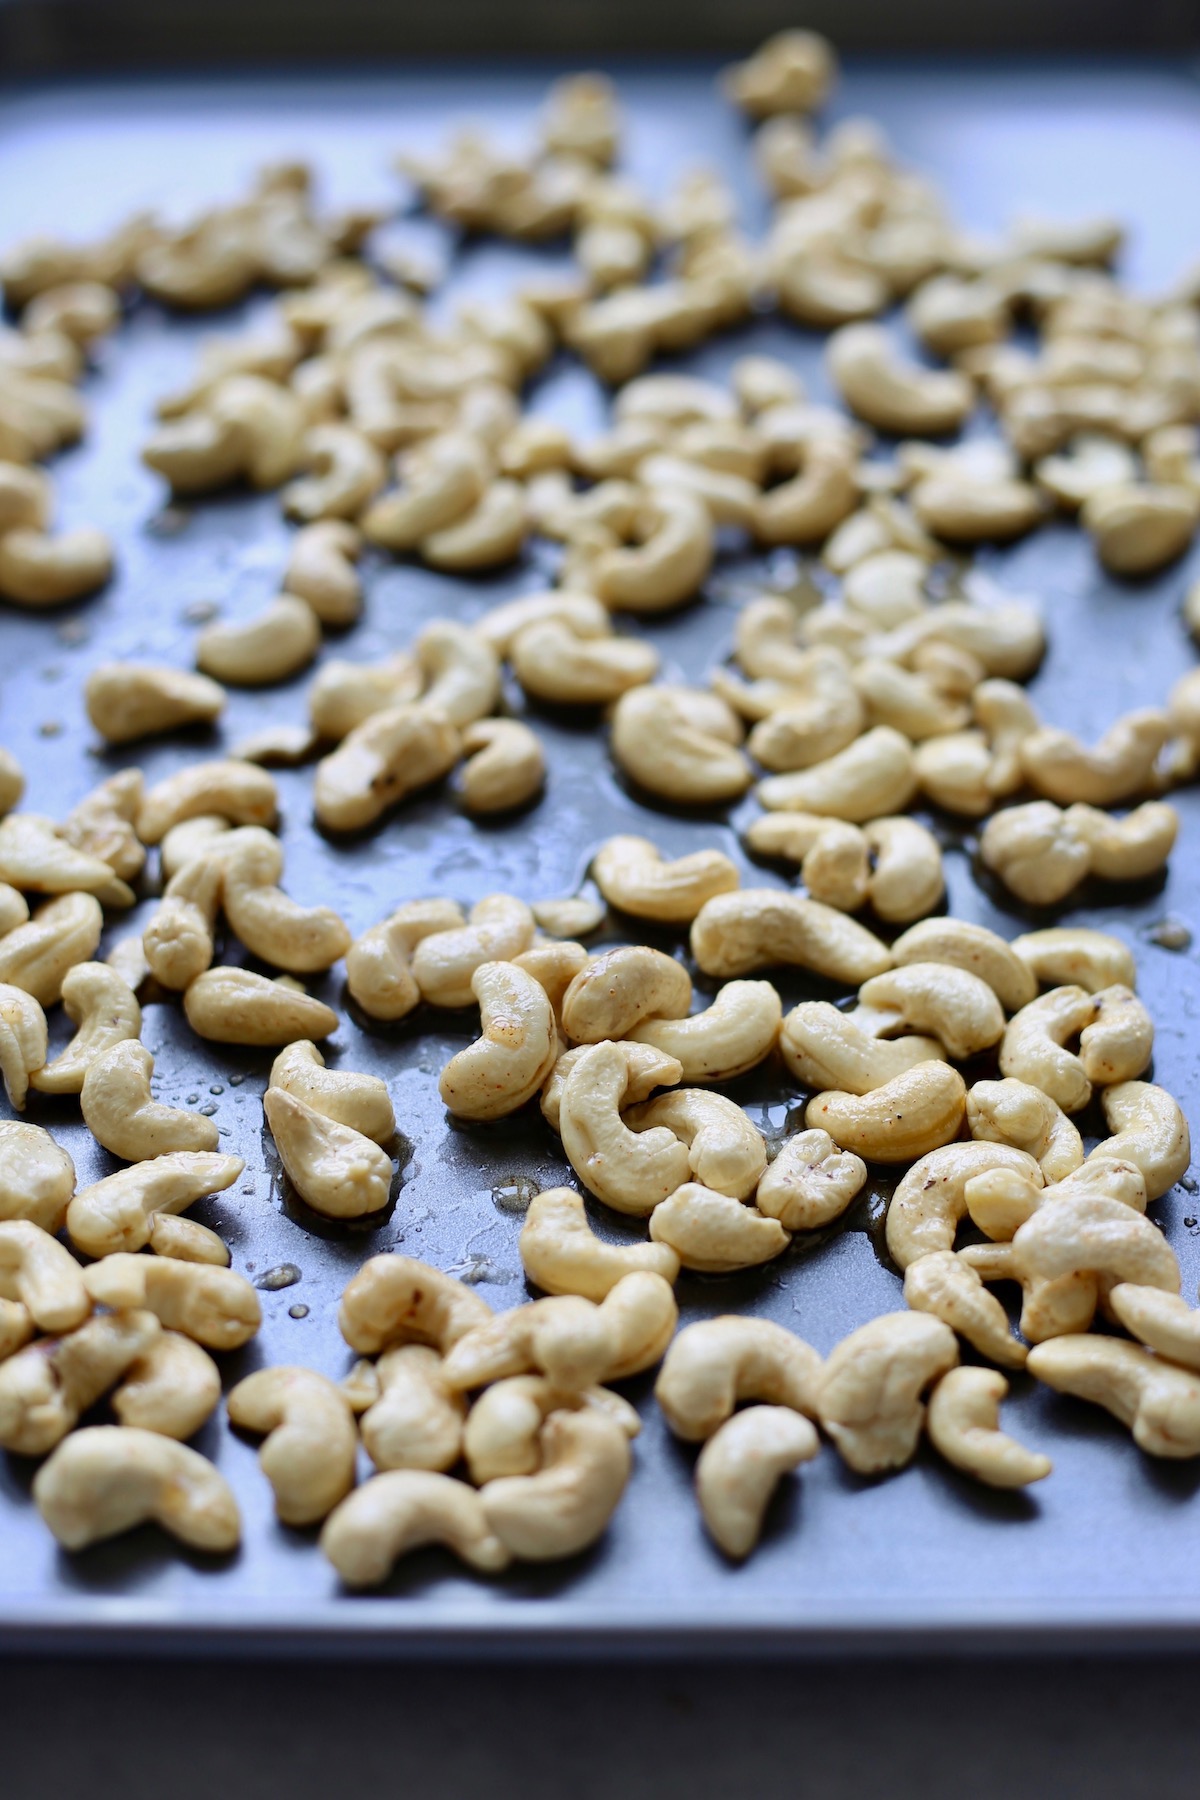
Step 2: Pour the cashews out onto your lined baking dish with any of the excess liquid and spread them out into a single layer.
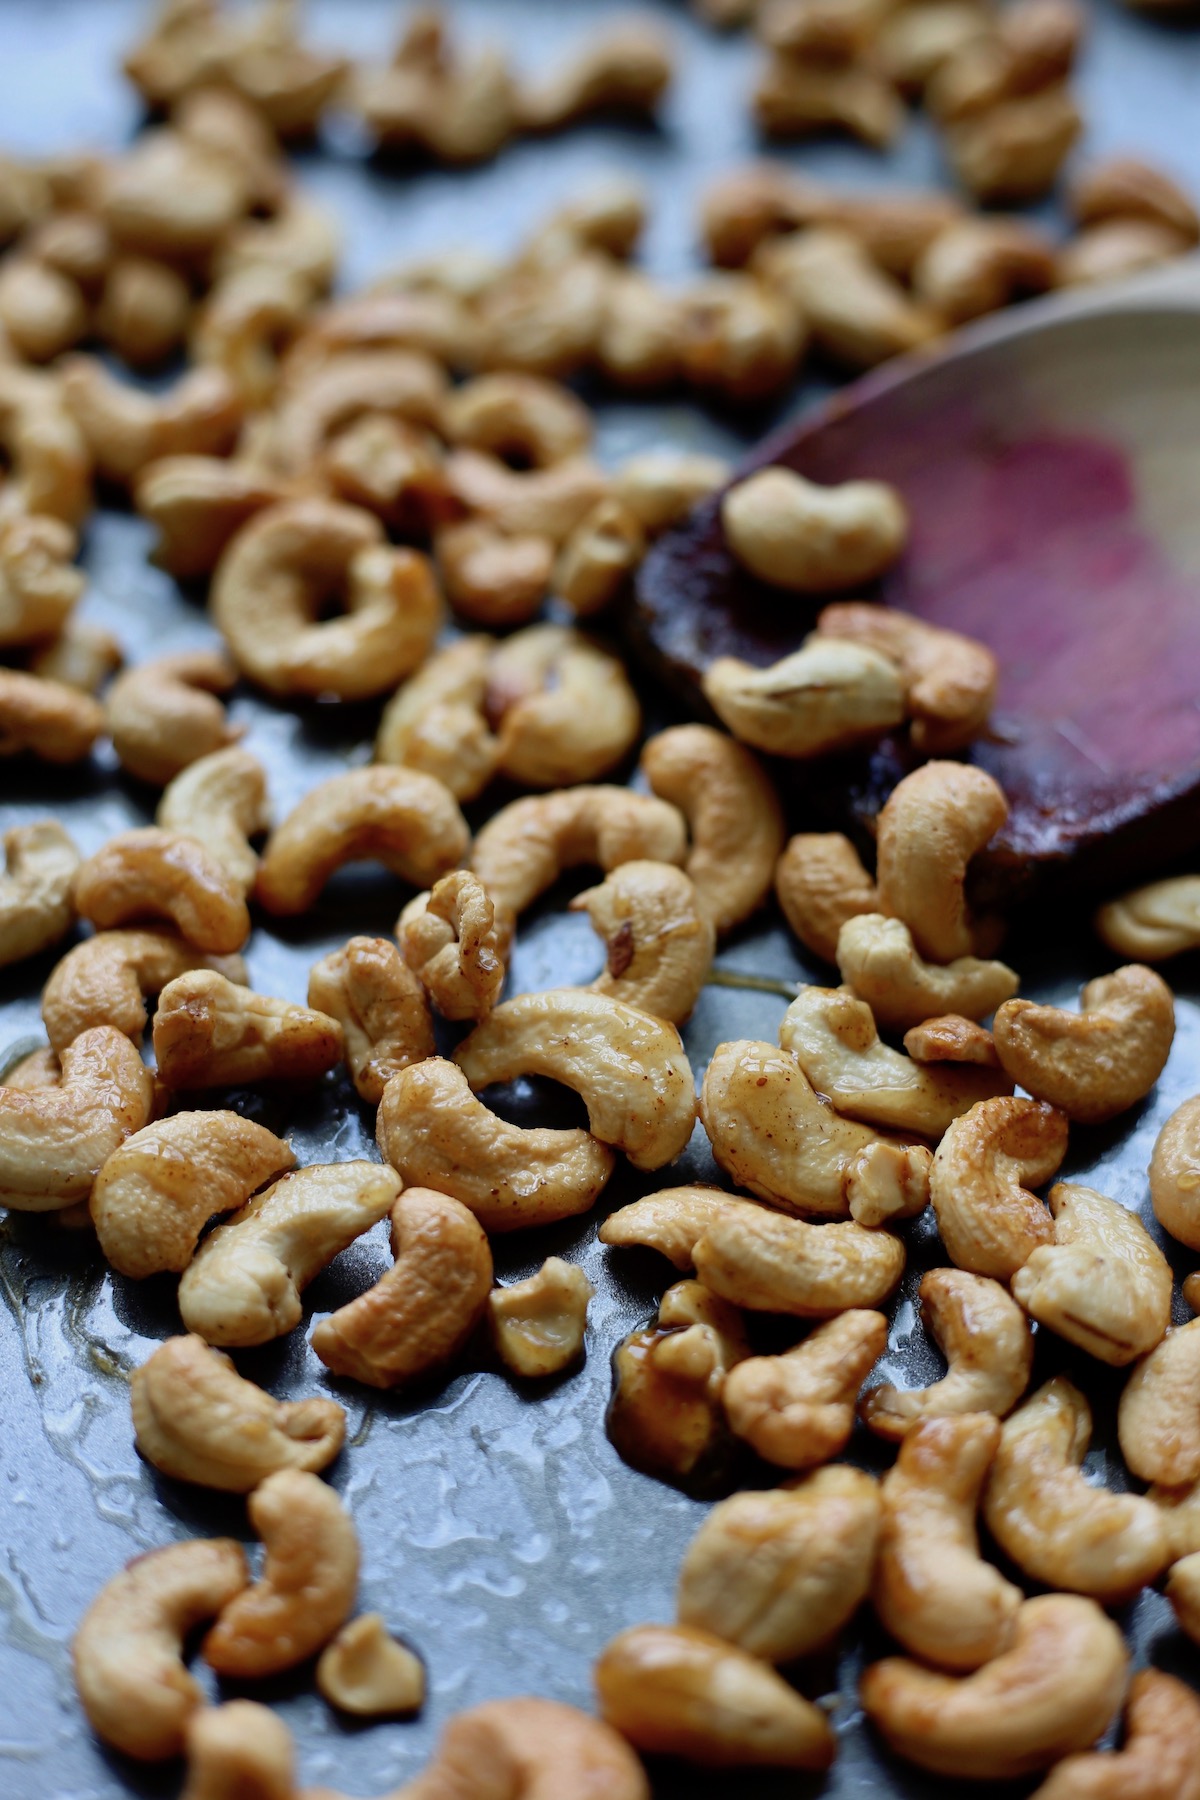
Step 3: Roast the cashews for 5 minutes. Then remove them from the oven and give them a little stir before roasting them again for 4-5 more minutes. Watch them closely towards the end to keep them from burning!
Step 4: Remove the cashews from the oven, sprinkle them with the remaining ½ teaspoon sea salt, and allow them to cool completely before enjoying them or storing them in an airtight container. They get crunchier once they cool so be patient!
Expert Tips
- Watch your nuts! By that I mean, keep an eye on your nuts towards the end of the baking time. Nuts will continue to roast once they come out of the oven, so be sure to take them out as soon as they turn golden and are fragrant.
- I love to stir some sea salt onto the nuts before baking as well as reserving some sea salt to sprinkle on them once they come out of the oven. Adding half of the salt to the these roasted cashews after they've roasted brings out a lot more flavor.
Recipe FAQs
How do you roast raw nuts?
The amount of time it takes to roast nuts will vary depending on the nut. At 350°F / 175°C it should never take more than 15 minutes. Sometimes there are smaller nuts or stray pieces that will toast or burn quicker than larger nuts. Pine nuts are super easy to burn! My best tip for roasting nuts is to keep an eye on them. Don't walk away and check them often after 7 minutes or so.
Do you have to roast nuts with oil?
You don't necessarily have to coat your nuts in oil before roasting them, but a little bit of oil can add extra flavor and crunch. If you add oil to your nuts, you can try to have the oil match the nut (almond oil with almonds etc.), but otherwise a neutral oil works fine.
What are candied nuts?
Candied nuts are raw nuts that have been coated in a little oil (or whipped aquafaba or egg whites!) and some form of sugar and then baked in the oven. Alternatively, you can also cook them in a skillet. When heated, the sugars in the sweetener melt and then harden once cooled to give your nuts the most amazing, crunchy, sweet exterior.
Are candied nuts healthy?
I believe all foods can take part in a healthy diet and lifestyle! While candied nuts contain more oil and sugar than regular raw or roasted nuts, they can also make your meals more satisfying.
How should I store roasted nuts?
These roasted and candied cashews taste better the sooner they're eaten, but you can also store them in an airtight container for up to a week. I don't recommend refrigerating or freezing these cashews.
More Vegan Cashew Recipes

Love this recipe? Please leave a 5-star 🌟🌟🌟🌟🌟 rating in the recipe card below & a review in the comments section further down the page.
📖 Recipe

Sweet and Spicy Roasted Cashews
These sweet and spicy roasted cashews are an addictive snack that will be loved by all your family and friends!
Equipment
Ingredients
- 2 cups raw cashews
- 1 tablespoon olive oil
- 2 tablespoons maple syrup
- ¾ teaspoon sea salt divided
- ½ teaspoon ground cayenne pepper*
Instructions
- Preheat your oven to 375 °F and line a baking sheet with parchment paper.
- In a bowl, mix together all of the ingredients, starting with just ¼ teaspoon sea salt. *You can also add more or less ground cayanne pepper to taste.
- Pour the coated nuts into your lined baking sheet. Spread the nuts out so that they're not touching each other.
- Bake the cashews for 5 minutes. Give them a stir before returning them to the oven to bake another 4-5 minutes or until golden.
- Remove the nuts from the oven and sprinkle over the remaining ½ teaspoon of sea salt.
- Allow the cashews to cool completely so they become hard and caramelized.
Notes
- Be sure to remove the cashews right as they turn golden and become fragrant. They will continue to roast a little bit more as they cool, so be sure not to over roast them.
- Add half of the salt before roasting the cashews and the other half after they've roasted.
- Store the nuts in an airtight container at room temperature for 1-2 weeks.
Nutrition
Calories: 831kcalCarbohydrates: 53gProtein: 24gFat: 64gSaturated Fat: 11gPolyunsaturated Fat: 11gMonounsaturated Fat: 36gSodium: 890mgPotassium: 907mgFiber: 4gSugar: 20gVitamin A: 208IUVitamin C: 1mgCalcium: 71mgIron: 9mg
Tried this recipe?Let me know how it was!
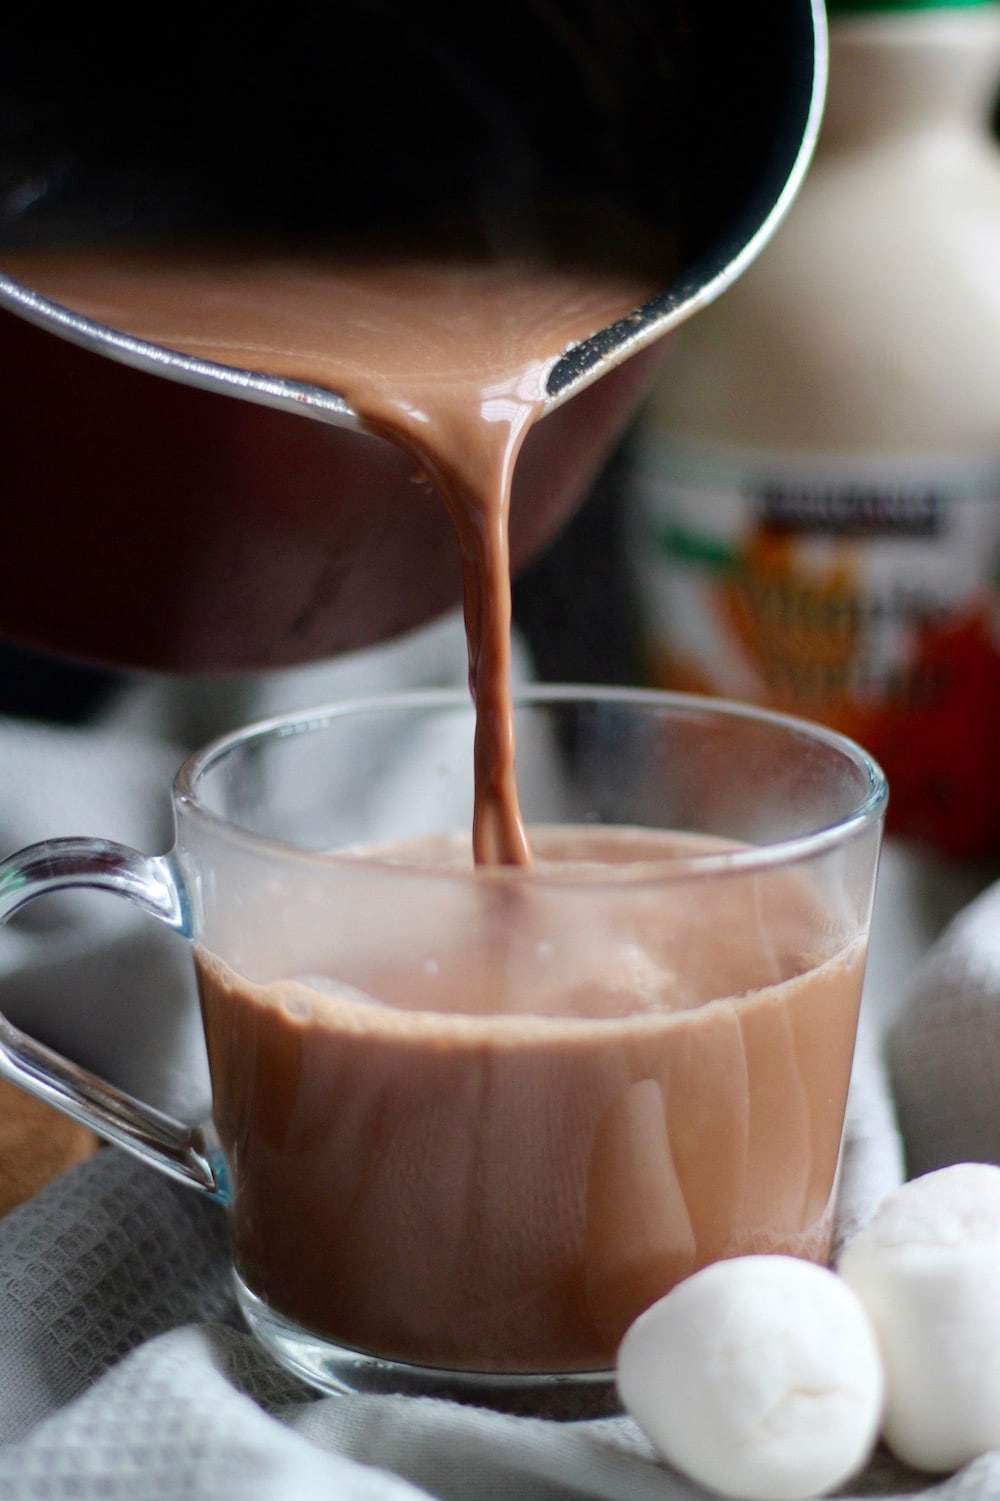
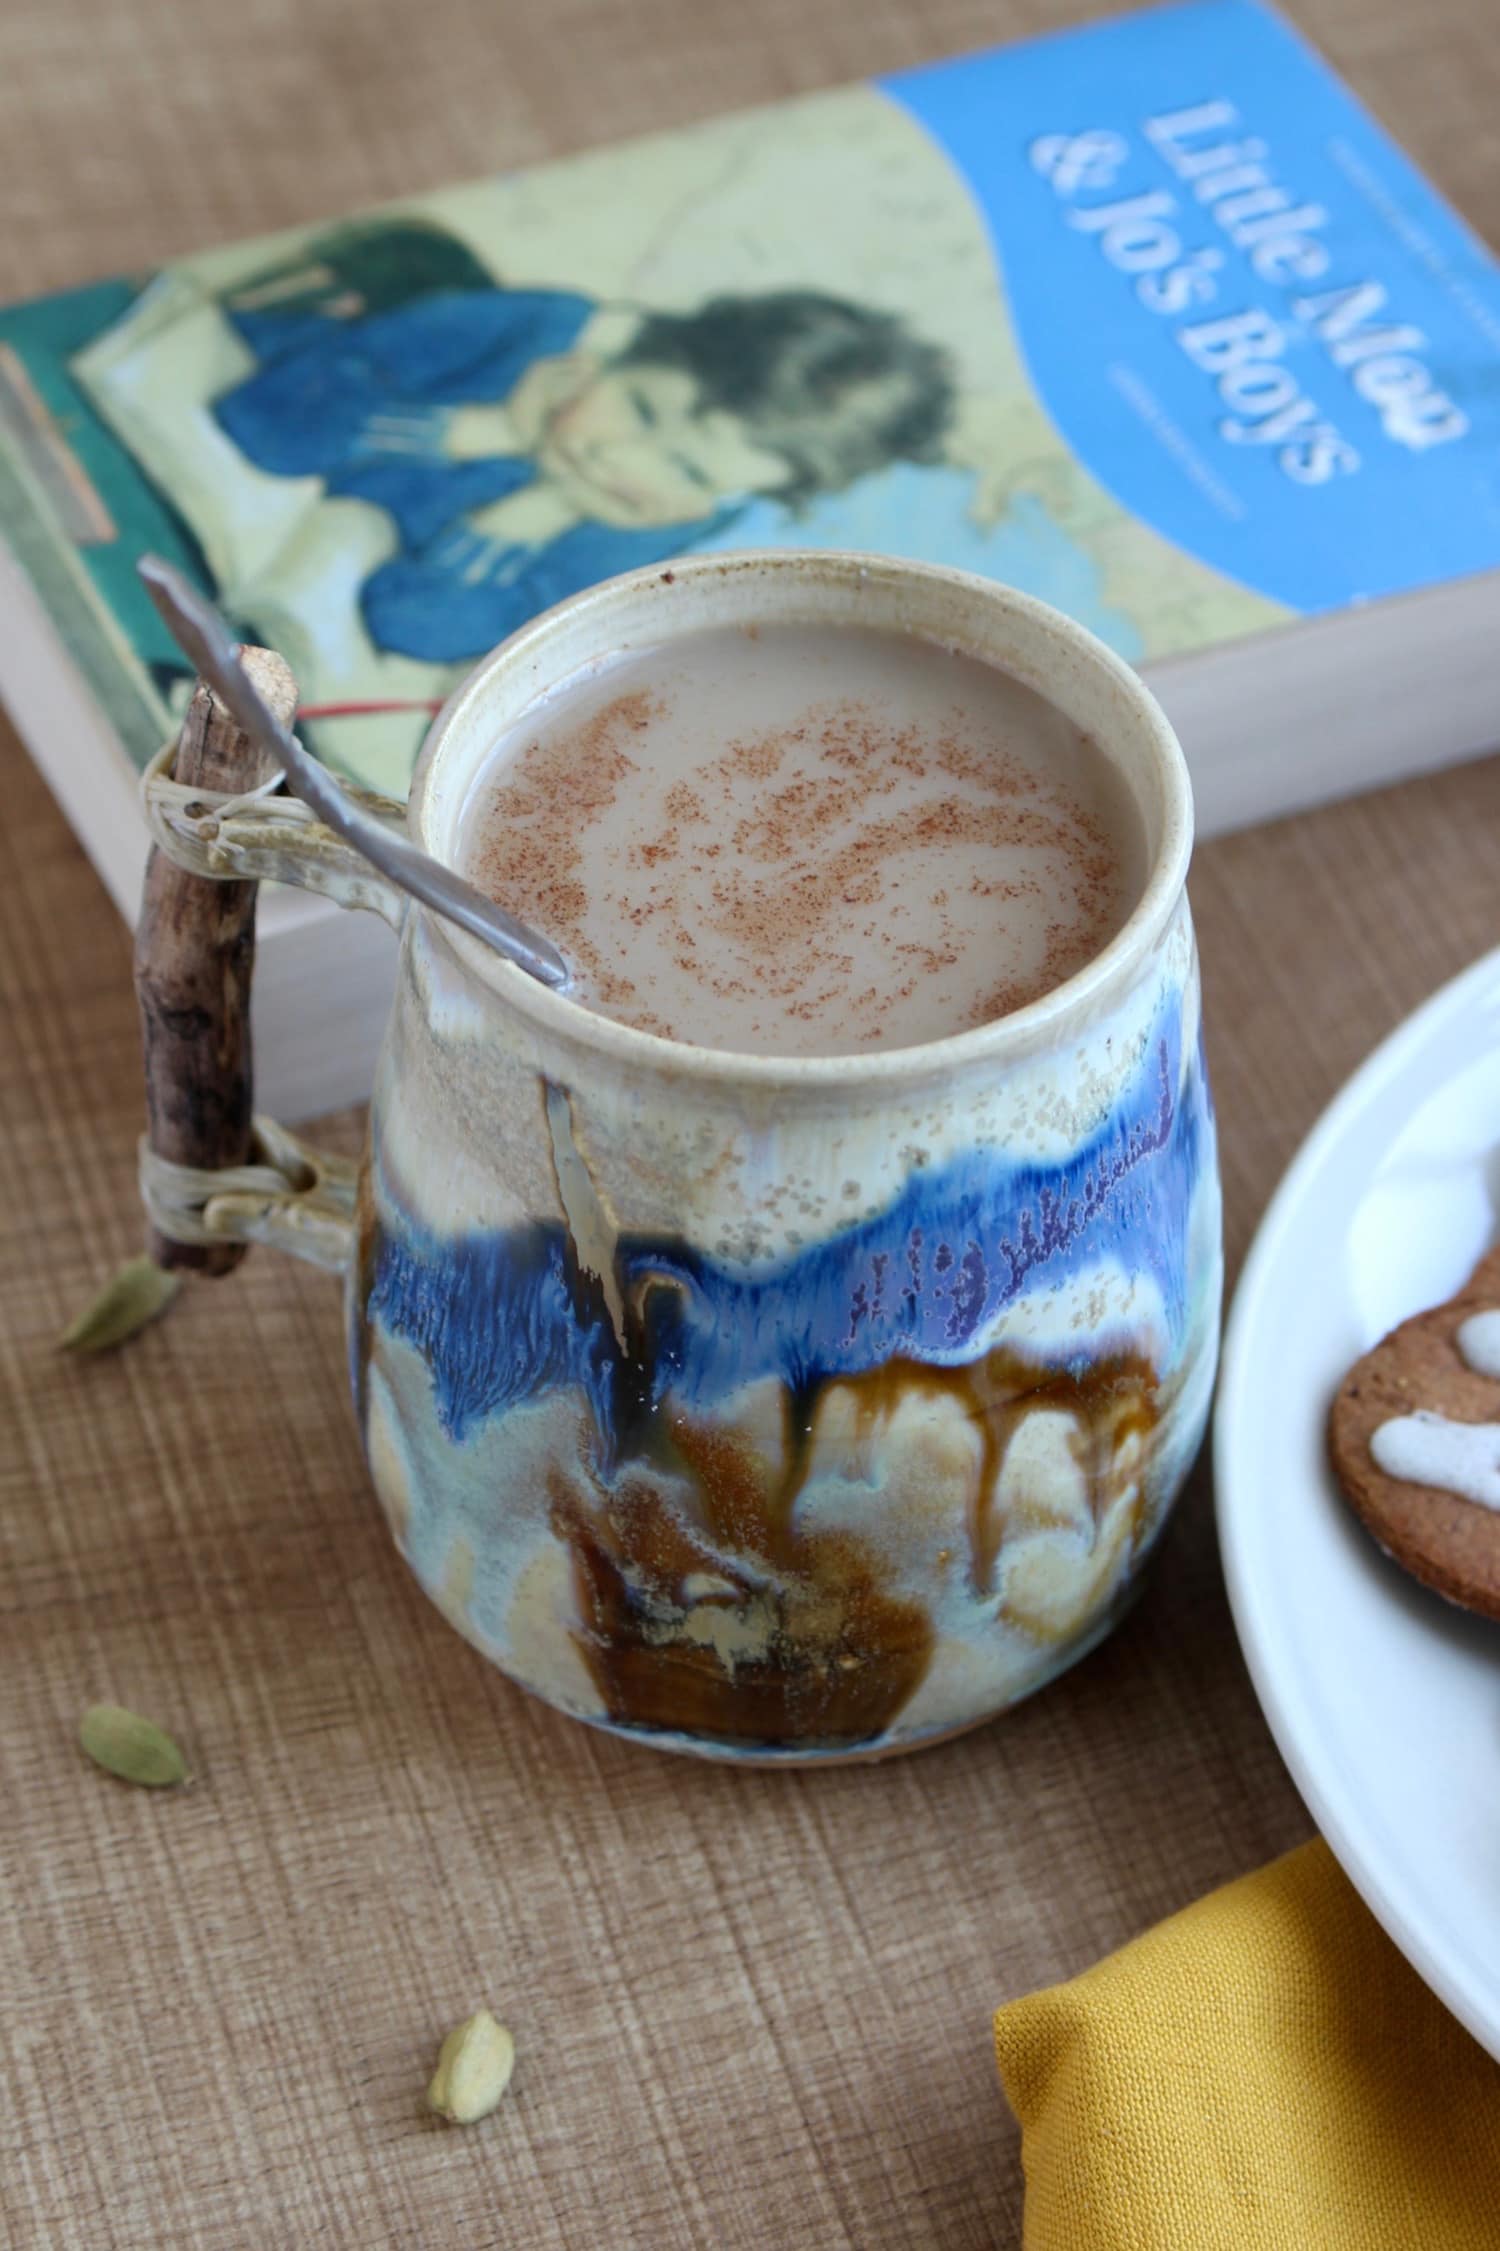
Dairy-Free Indian Chai Recipe

This warm and spicy dairy-free Indian Chai is a deliciously perfect beverage to warm you up during the cold winter months or any time of the year.

[feast_advanced_jump_to]
You had to guess that personally visiting India I would post some Indian recipes, right?
Honestly, my chai kick started even before our trip to India. I'm guessing it was because I was looking forward to all the delicious food we were going to eat!
But actually being in India made such a difference in how I now make a Indian Chai and how I enjoy it myself.
The woman we stayed with in India let me join her in the kitchen to see how she makes her chai. She grinds her spices up and adds them towards the end of the process, which was very interesting to me.
Alternatively, I love to boil my spices whole and then strain them. Boiling the spices for a while, leaves you with some beautifully spiced tea that tastes amazing with some dairy free milk and sweeter.
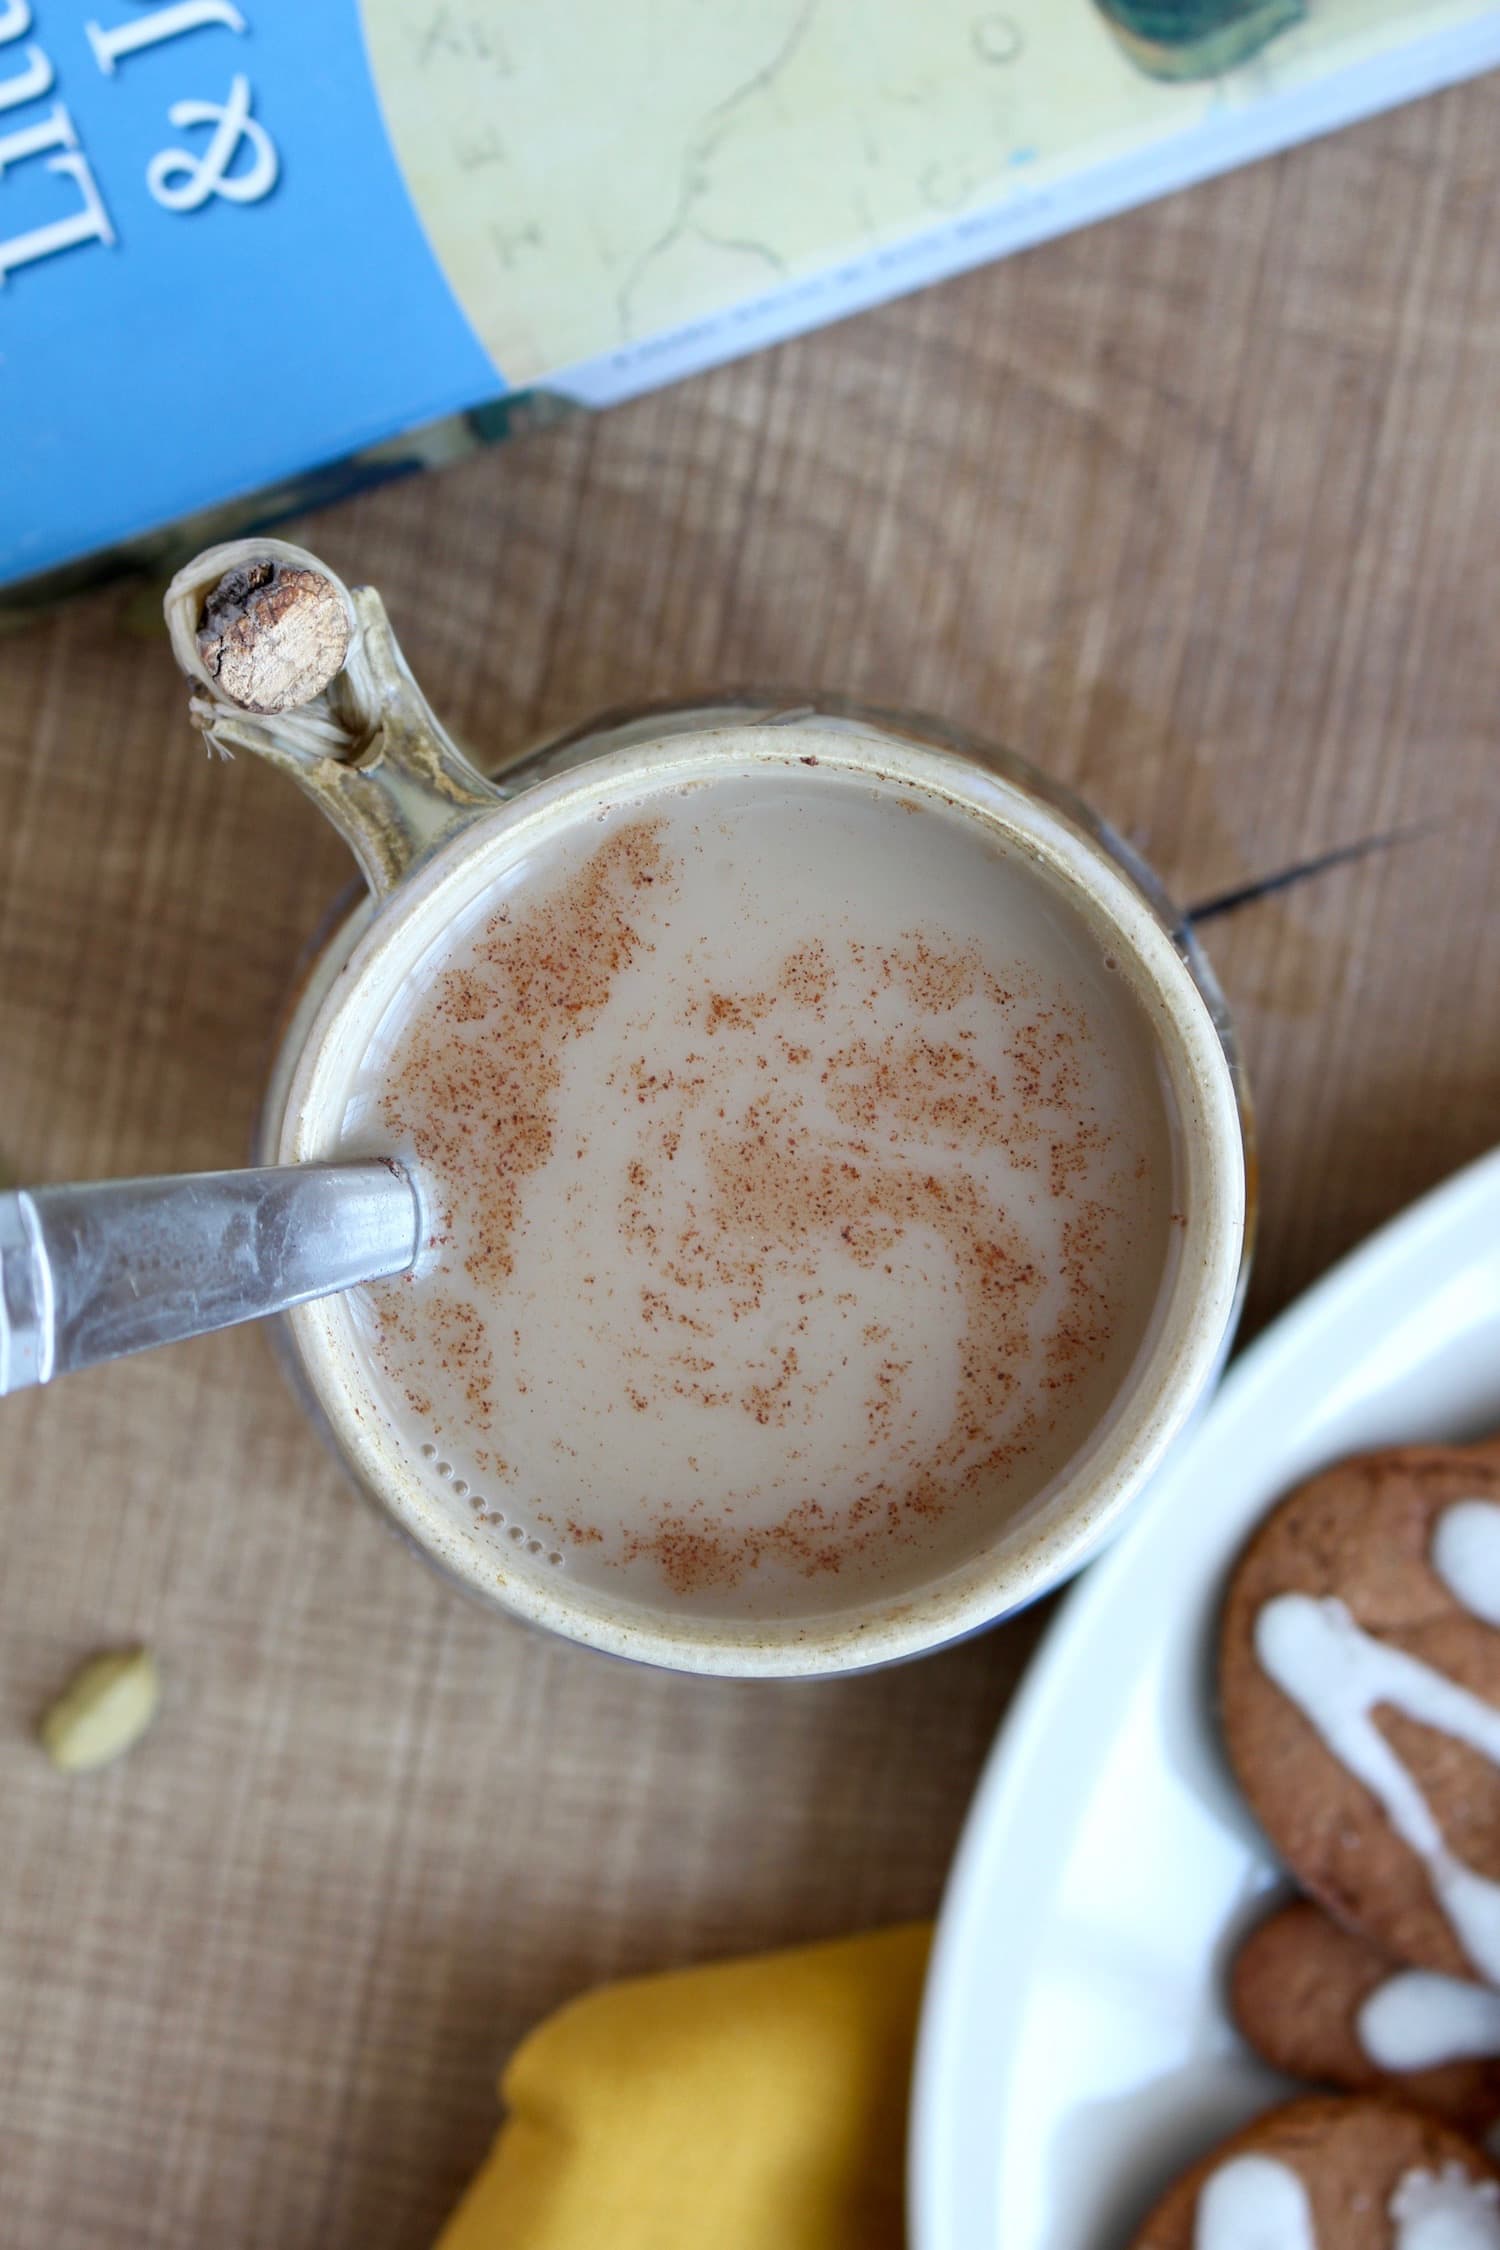
Whether it's the holidays or just a cold winter morning, a warm mug full of this dairy-free Indian Chai is simply delightful.
When you pair this cup of Chai with a delicious vegan cookie recipe, it makes a fun way to entertain guests or treat yourself.

If you try out this Dairy-Free Indian Chai recipe let me know! Leave a comment or tag #theconscientiouseater on Instagram!
I hope your day is full of quality time with those you love and a some sort of delicious warm drink!
📖 Recipe

Dairy-Free Indian Chai
This warm and spicy authentic Dairy-Free Indian Chai, is the perfect beverage to warm you up this Holiday season.
Ingredients
- 4 cups of water
- 1 cinnamon stick
- 8 cardamom pods lightly crushed
- 10 whole cloves
- 4 black pepper corns
- 1 star anise
- 2 slices fresh ginger root
- 2 teaspoons loose leaf black tea
- 3 cups non-dairy milk
- ¼ cup sweetener or to taste
Instructions
- In a sauce pan, combine the water and spices and bring it to a boil. Cover the pot, reduce the heat to a simmer, and allow the spices to infuse the water for about 30 minutes.
- After 30 minutes, add in the black tea and allow it to simmer for 3-4 minutes.
- Strain the water into another container and then pour it back into the pot.
- Add in the non-dairy milk and liquid sweetener or sugar to taste. The sweetness make this tea, so be generous! Bring the liquid back to a simmer, watching carefully so that it doesn't overflow.
- Pour into cups and serve.
Notes
Always use the freshest spices possible for this drink!
Nutrition
Calories: 98kcalCarbohydrates: 12gProtein: 6gFat: 4gSaturated Fat: 0.4gPolyunsaturated Fat: 2gMonounsaturated Fat: 1gTrans Fat: 0.003gSodium: 103mgPotassium: 312mgFiber: 3gSugar: 5gVitamin A: 700IUVitamin C: 14mgCalcium: 284mgIron: 2mg
Tried this recipe?Let me know how it was!
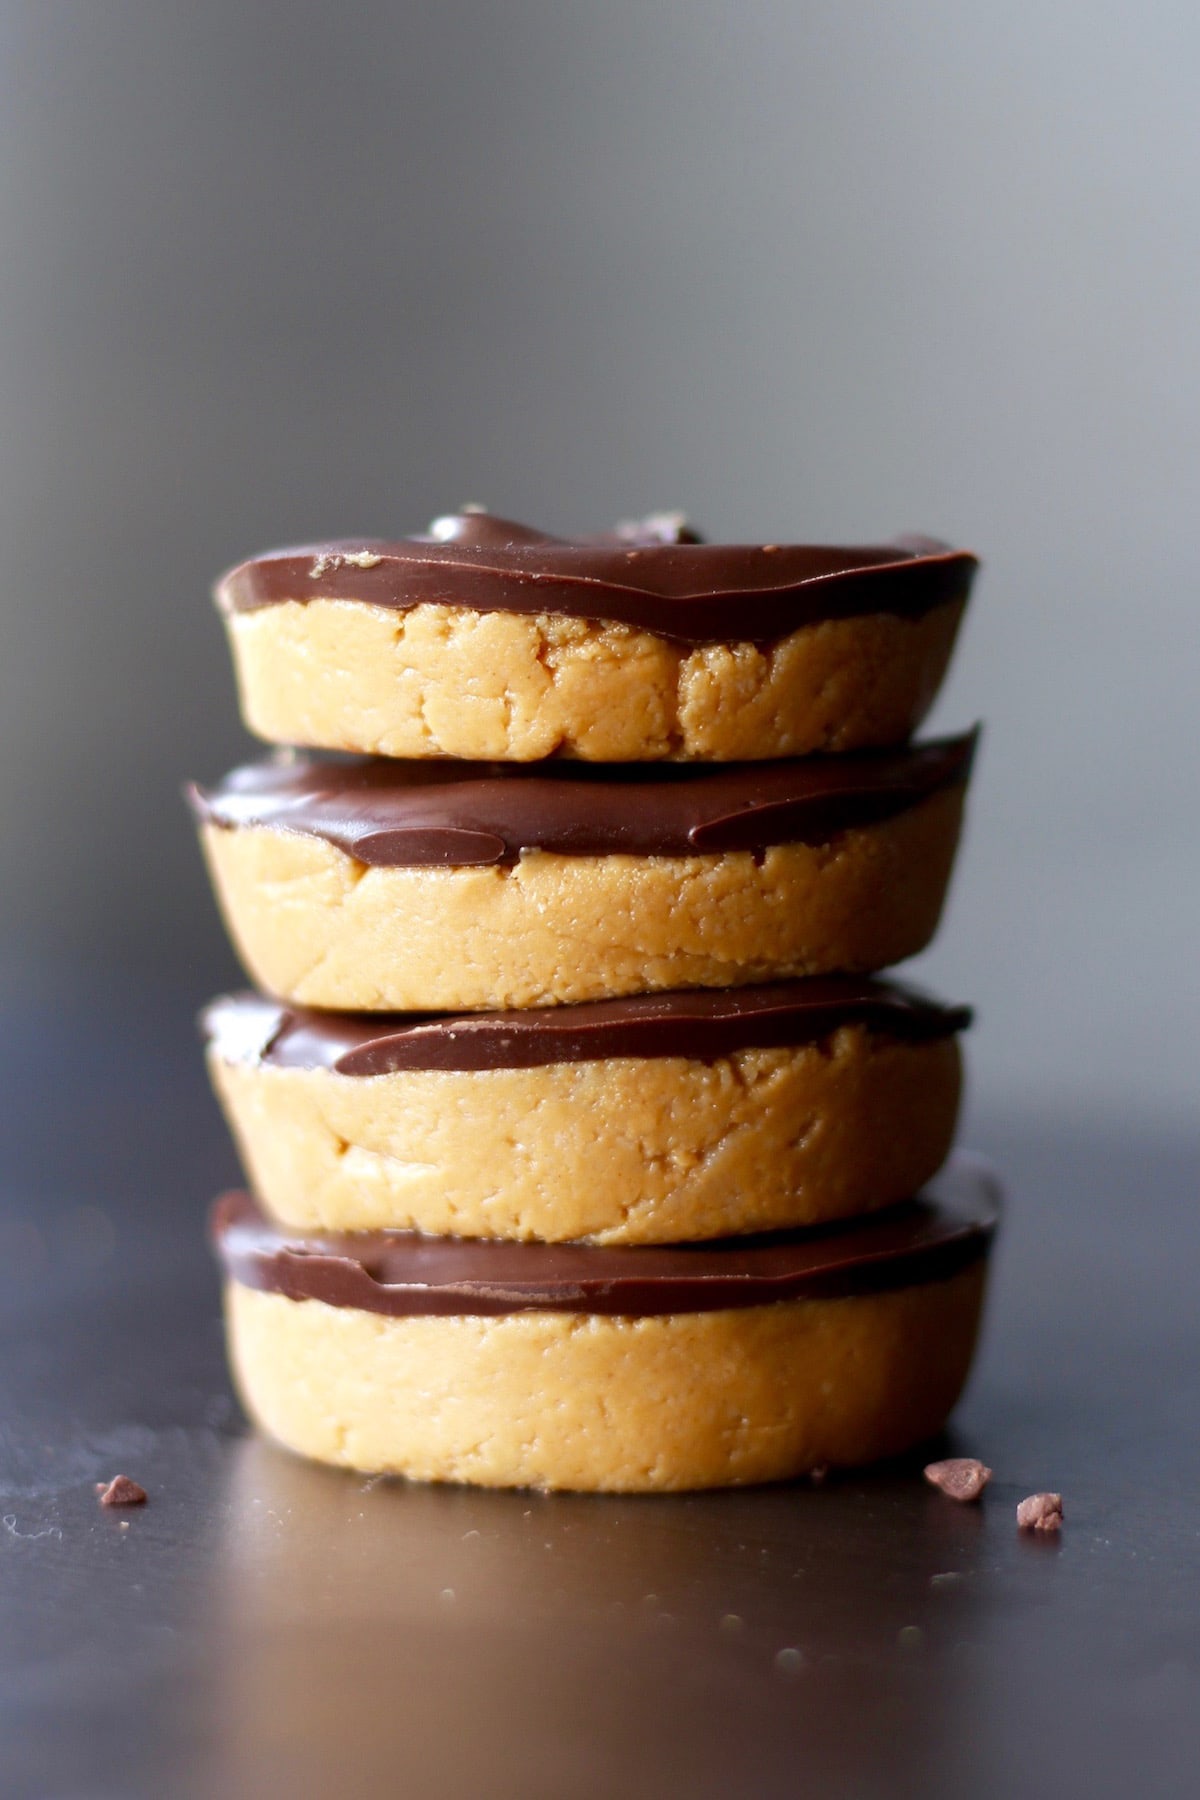
Easy Peanut Butter Cups (Vegan + Gluten Free)
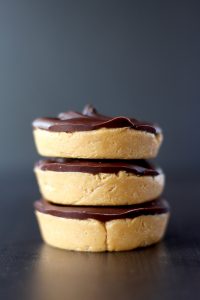
Made with creamy, natural peanut butter and rich dark chocolate, these vegan and gluten free Peanut Butter Cups will be gone in minutes!

[feast_advanced_jump_to]
Do any of you not like peanut butter? Brett and I (and Harper too now!) go through insane amounts of peanut butter.
I eat it most mornings with my oatmeal.
I use it in energy bites.
Brett loves peanut butter with a freshly cut up apple.
The list is endless.
We recently moved into our friend’s house which we’re subleasing for the next few months and my friend left behind a few tubs of peanut butter for us to use. Paired with the two bags that I brought with us from our previous house, we were stocked!
Yet, while making these peanut butter cups, I realized that our peanut butter stash was starting to get low. How on earth did we go through so much peanut butter so quickly?!
I’m still kind of at a loss for where it all went, but I’m just thankful that we found a decently priced brand of natural peanut butter here so I can easily restock when necessary. Plus, now that these gluten free peanut butter cups have become one of our favorite desserts, I know I’ll be needing lots of peanut butter on hand in the future! If you, too, love the combo of peanut butter and chocolate, then you need to try out these dairy-free peanut butter blossoms!

These delicious cups are amazing for a few reasons. For starters, this recipe is incredible simple to make as they only require a handful of ingredients and minimal effort. Apart from the chocolate on top, the cups are minimally sweetened, making for a subtly sweet, yet satisfying treat.
I love that you can make them into different shapes, whether that’s peanut butter cups or even into bars. Also, if you don’t have chocolate chips on hand (or dairy free ones, which can often be the case for me living overseas), you can easily use a chopped up chocolate bar or a simple homemade chocolate recipe, which I’ll share below!
How To Make Homemade Chocolate
Whenever I’m in a pinch and need non-dairy chocolate chips, but only have dairy chocolate chips on hand, I love to whip up my own homemade chocolate recipe.
I use this recipe all the time for a chocolate drizzle or to coat fruit or nuts in for a quick dessert. I almost always have these ingredients on hand so melted chocolate is always available when the baking itch hits. Plus, it’s sweetened with maple syrup which makes me love it even more!
To make your own homemade chocolate, all you need to do is whisk together:
- ½ cup melted coconut oil
- ¼ cup cocoa or cacao powder
- ¼ cup maple syrup
- A pinch of salt
- A splash of vanilla
This makes for a rich, dark chocolate, which I personally love, but feel free to experiment with adjusting the sweetness level to your liking!

More Vegan Peanut Butter Recipes
If you are like me and enjoy anything involving peanut butter, be sure to check out the recipes below! Let me know if you give any of these delicious recipes a try!
- Peanut Butter Oatmeal Chocolate Chip Cookies
- Creamy Peanut Butter Sweet Potato Curry
- Peanut Butter Coconut Granola Bars
- Vegan Peanut Butter Blossom Cookies
- Peanut Butter Pretzel Cookie Dough Balls
- Low Fat Chocolate Peanut Butter Muffins for Two
- Healthy Peanut Butter and Banana Baked Oatmeal

Easy Vegan Peanut Butter Cups Recipe
I'd love to know if you make this recipe and whether you go the cup or bar route.
Leave a comment down below letting me know your thoughts and be sure to rate the recipe and share it with others as well!
📖 Recipe

Easy Peanut Butter Cups (Vegan + Gluten Free)
Made with creamy, natural peanut butter and rich dark chocolate, these vegan and gluten free Peanut Butter Cups will be gone in minutes!
Equipment
Ingredients
- 1 cup natural peanut butter
- 1 cup almond flour
- 2 tablespoons maple syrup
- ¼ teaspoon salt
- 1 cup non dairy chocolate chips
Instructions
- In a bowl, mix together the peanut butter, almond flour, maple syrup and salt until a uniform dough forms.
- Press the peanut butter dough into a parchment paper-lined pan or silicone muffin cups, depending on what shape and size you desire.*
- Place the chocolate chips into a bowl and microwave them for 30 seconds. Stir the chocolate chips and continue this process until the chocolate is mostly melted. If there are a couple chocolate chips still in tact, just stir the warm chocolate until everything is melted.
- Pour the melted chocolate over the peanut butter base and smooth into an even layer. Place the bars or cups into the fridge or freezer until the chocolate sets.
- If making bars, allow the pan to sit at room temperature for a bit before cutting into bars. I love using silicone baking dishes or muffin cups as it make for easy removal.
- Store the bars or cups in an airtight container for up to a week.
Notes
*I feel like using an 8x8 pan would make the bars too thin. I love to use muffin cups so that I can make each cup however thick I want. I also highly recommend using silicone pans or muffin cups as you don't have to deal with baking paper.
Nutrition
Serving: 1cupCalories: 213kcalCarbohydrates: 14gProtein: 6gFat: 17gSaturated Fat: 4gPolyunsaturated Fat: 2gMonounsaturated Fat: 4gSodium: 42mgPotassium: 102mgFiber: 2gSugar: 9gCalcium: 43mgIron: 1mg
Tried this recipe?Let me know how it was!
The BEST Vegan Banana Bread Recipe!
This fluffy and moist Vegan Banana Bread Recipe is honestly the only banana bread recipe you'll ever need. It requires just 9 ingredients and one bowl to make. You'll be making a loaf every week!
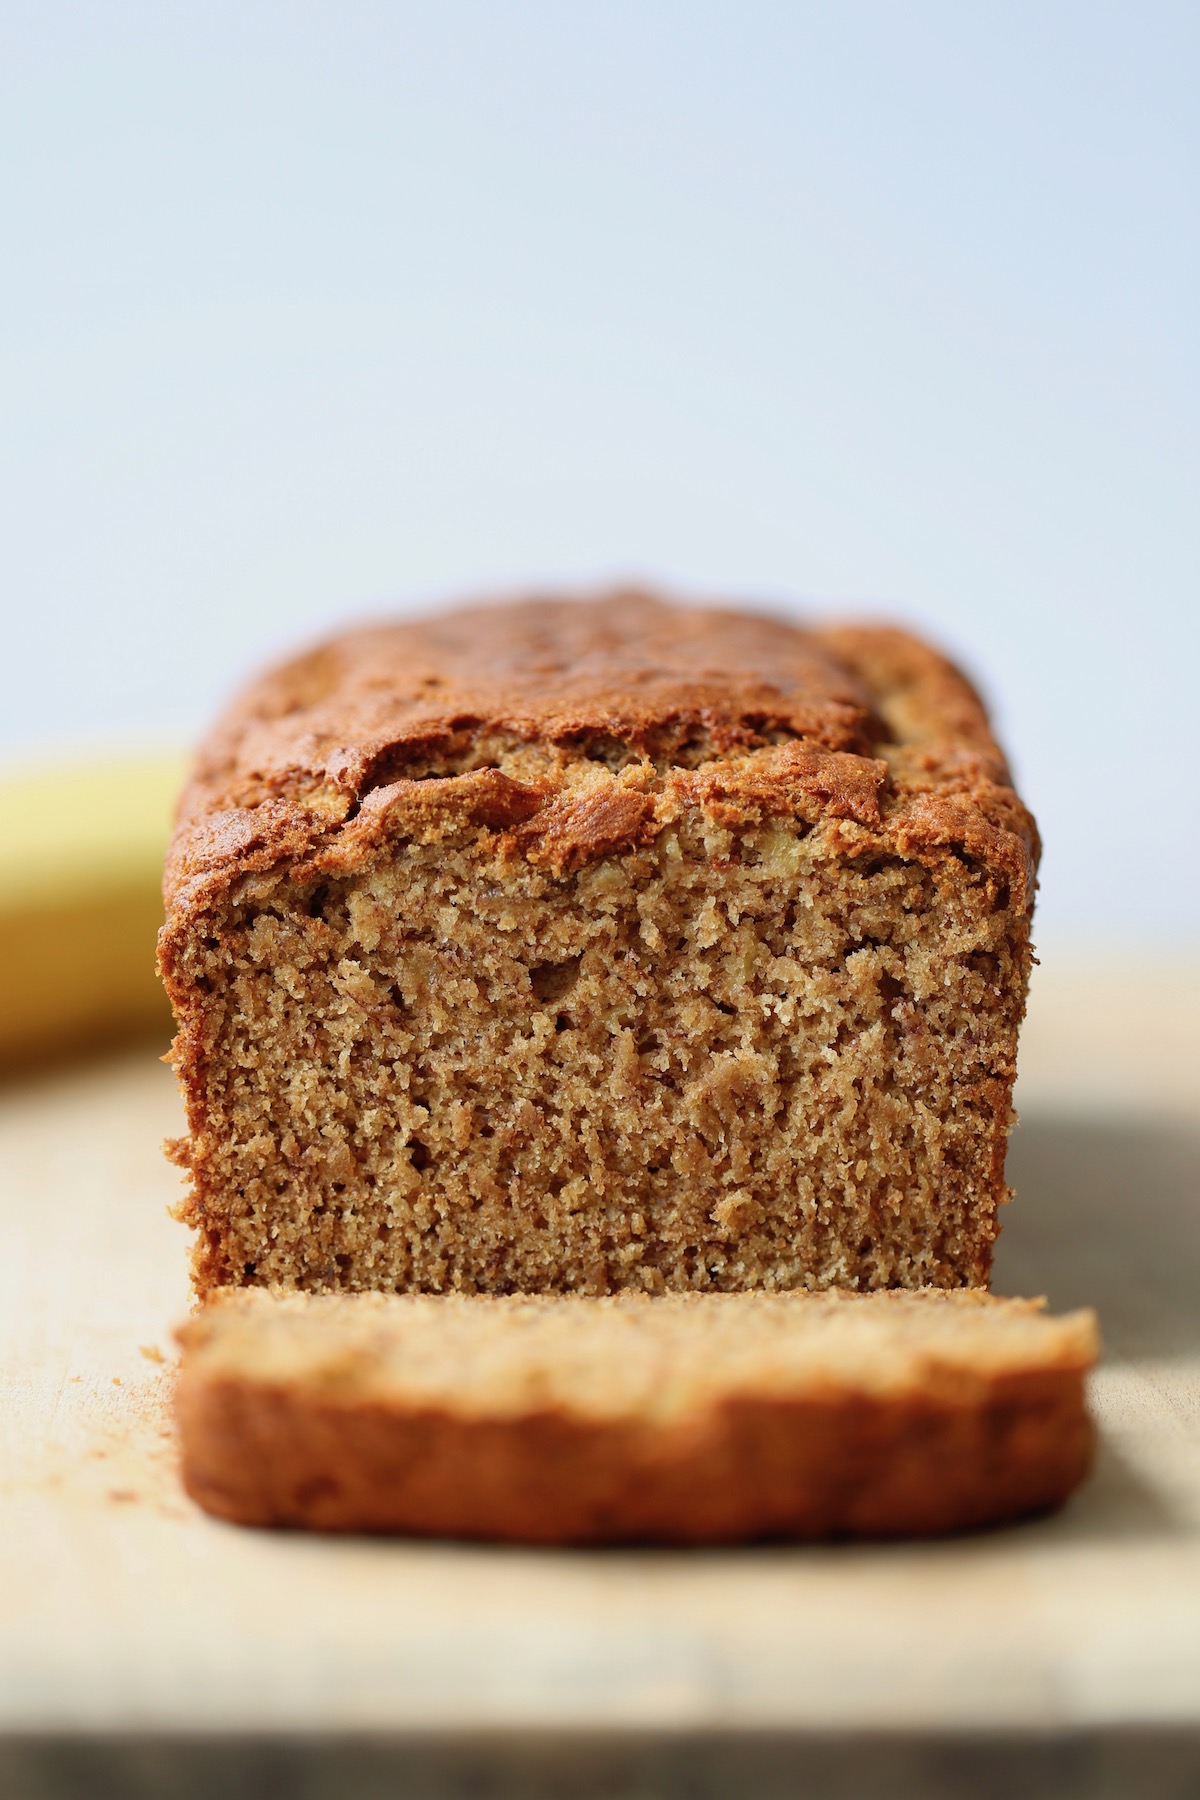
If you look in my fridge at any point throughout the year, you'll probably find a loaf of vegan banana bread.
We love it that much!
Believe it or not, I have quite a few variations of vegan banana bread recipes on the blog. My favorite banana bread recipes are my Chickpea Flour Banana Bread, Sourdough Banana Bread and this Black Sesame Tahini Vegan Banana Bread.
However, when it comes to my ABSOLUTE FAVORITE banana bread recipe, it's the recipe I'm sharing with you today.
Today's vegan banana bread recipe results in the most fluffy and moist banana bread. It's a classic recipe that requires just 9 ingredients and one bowl to make.
It's my go-to recipe whenever I'm making a loaf of banana bread for a holiday breakfast or to serve to family and friends.
I really hope you guys enjoy this recipe as much as we do!
Ingredients for Classic Vegan Banana Bread
I'll admit, I've gone through seasons of trying to health-ify everything I baked. You know, using applesauce instead of oil or maple syrup instead of sugar.
Now, while I still enjoy doing that at times, when it comes to making the best loaf of vegan banana bread, you really need to stick to classing baking ingredients.
I'll list out everything you need to make the best vegan banana bread below:
- Bananas (super spotty and ripe!)
- Sugar
- Oil
- Aquafaba (the liquid from a can of chickpeas)
- Cinnamon
- Baking powder
- Baking soda
- Sea salt
- Flour (you can use white or whole wheat)
- Optional mix-ins: chocolate chips, walnuts, dried fruit, etc.
I love to make this recipe with Bob's Red Mill Whole Wheat Flour, but white flour or a mix of white and whole wheat works great!
What About Gluten-Free Flour?
So I have some sad news.
I tried testing this recipe using a gluten-free 1-to-1 flour and it did not work. Sometimes it does and sometimes it doesn't. For some reason, with vegan banana bread it just didn't turn out.
So I don't recommend substituting the flour in this recipe for gluten-free flour. Stick to either white or whole wheat flour!
Egg Substitutions for Vegan Banana Bread
A lot of vegan banana bread recipes (including some of mine!) call for flax eggs instead of actual chicken eggs.
However, in this recipe, I love to use aquafaba, which is simply the liquid from a can of chickpeas.
Aquafaba acts as a great binder in this banana bread. To use aquafaba as an egg replacement, I just use 3 tablespoons of aquafaba to replace one egg. So in this recipe you'll need 2 egg's worth of aquafaba, or 6 tablespoons of aquafaba.
How to Make Vegan Banana Bread
This banana bread recipe is so easy to make. You probably already have all the ingredients on hand. As for kitchen equipment to prepare the batter, you'll just need a large mixing bowl and a wooden spoon or whisk.
Below are the step-by-step instructions on how to make the BEST vegan banana bread.
- Step 1: Preheat your oven to 350F/175C and grease a standard loaf pan or line it with parchment paper. Set it aside.
- Step 2: In a large mixing bowl, mash 4 super ripe bananas.
- Step 3: To the mashed bananas, add in the sugar, oil, aquafaba, cinnamon, baking powder, baking soda and salt. Whisk well to combine.
- Step 4: Stir in the flour until just combined.
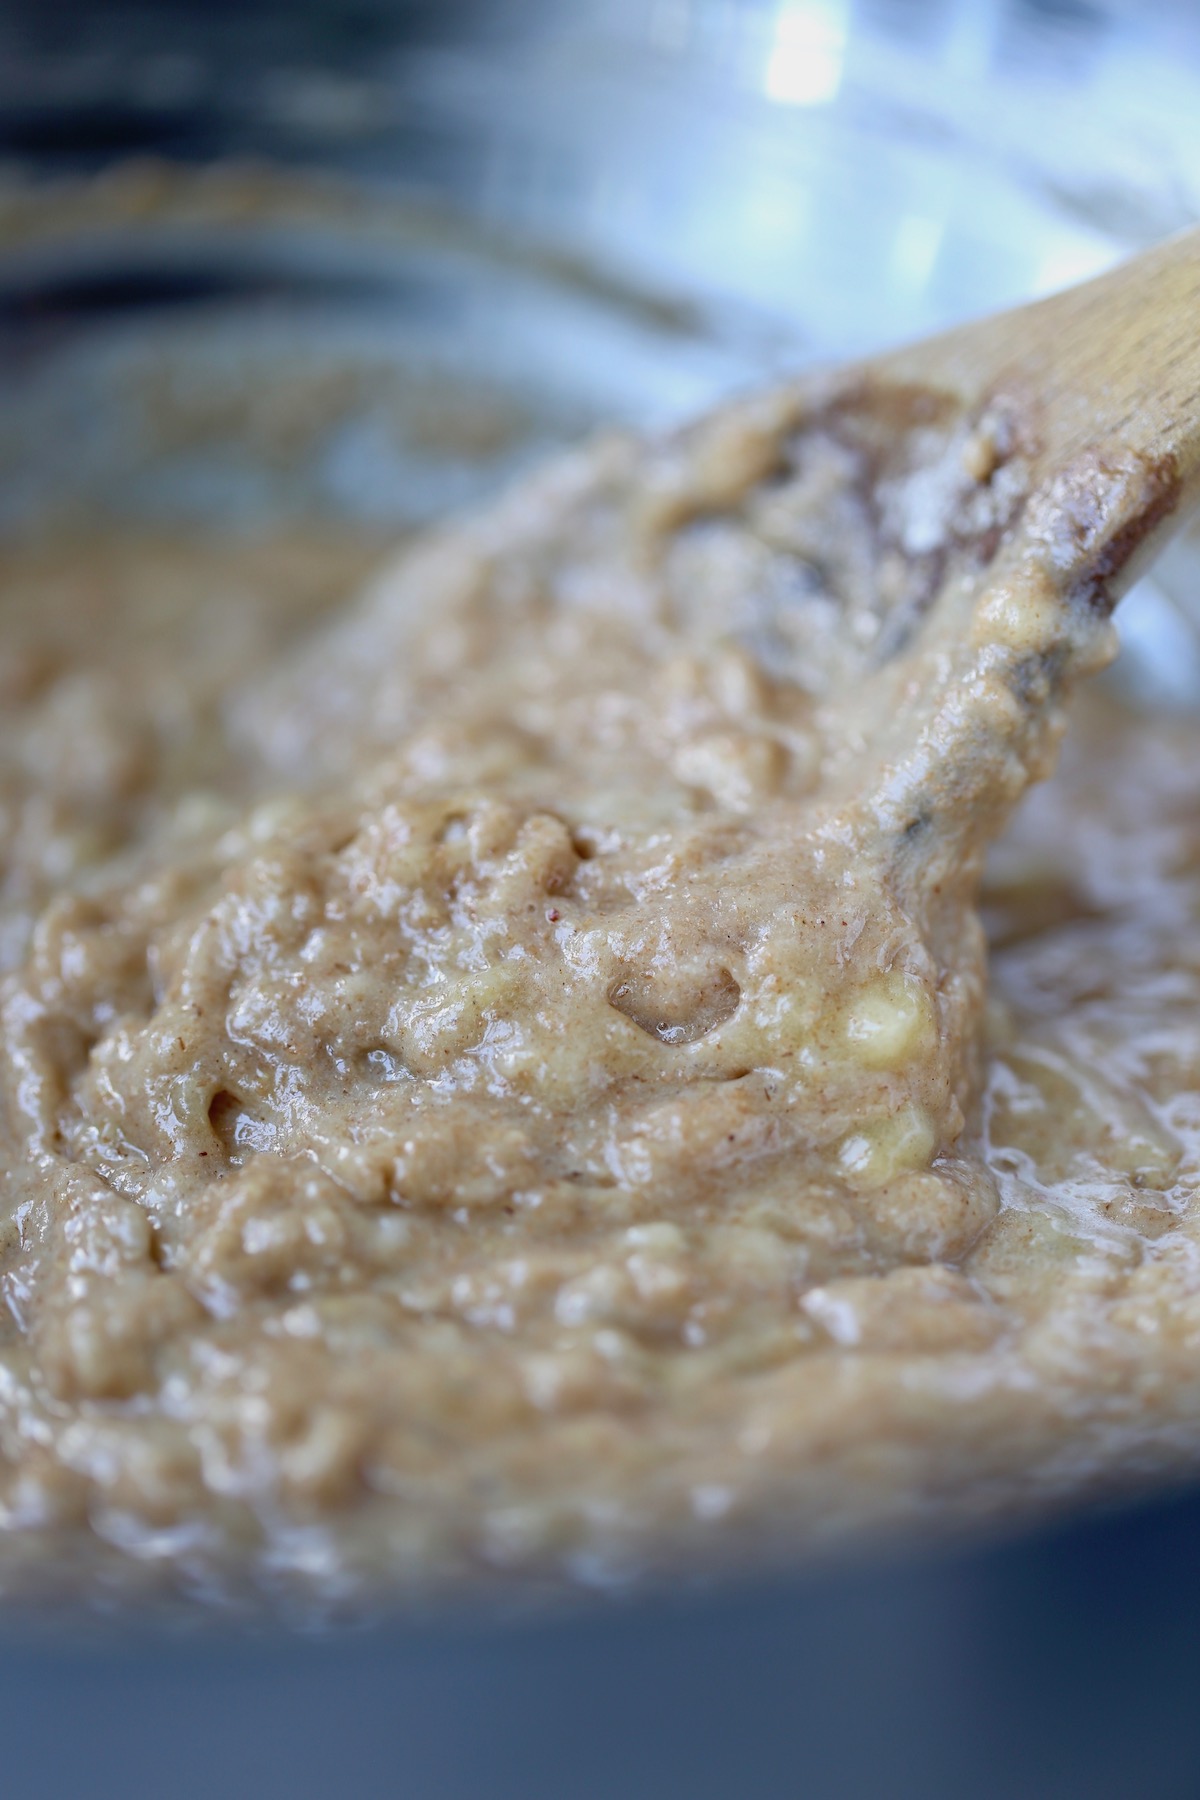
- Step 5: Lastly, fold in whatever mix-ins you desire. We love using chocolate chips!
- Step 6: Pour the batter into your greased or lined loaf pan and bake the bread for 55-65 minutes or until a toothpick inserted into the center comes out clean. Keep an eye on it starting at 50 minutes as every oven is different.
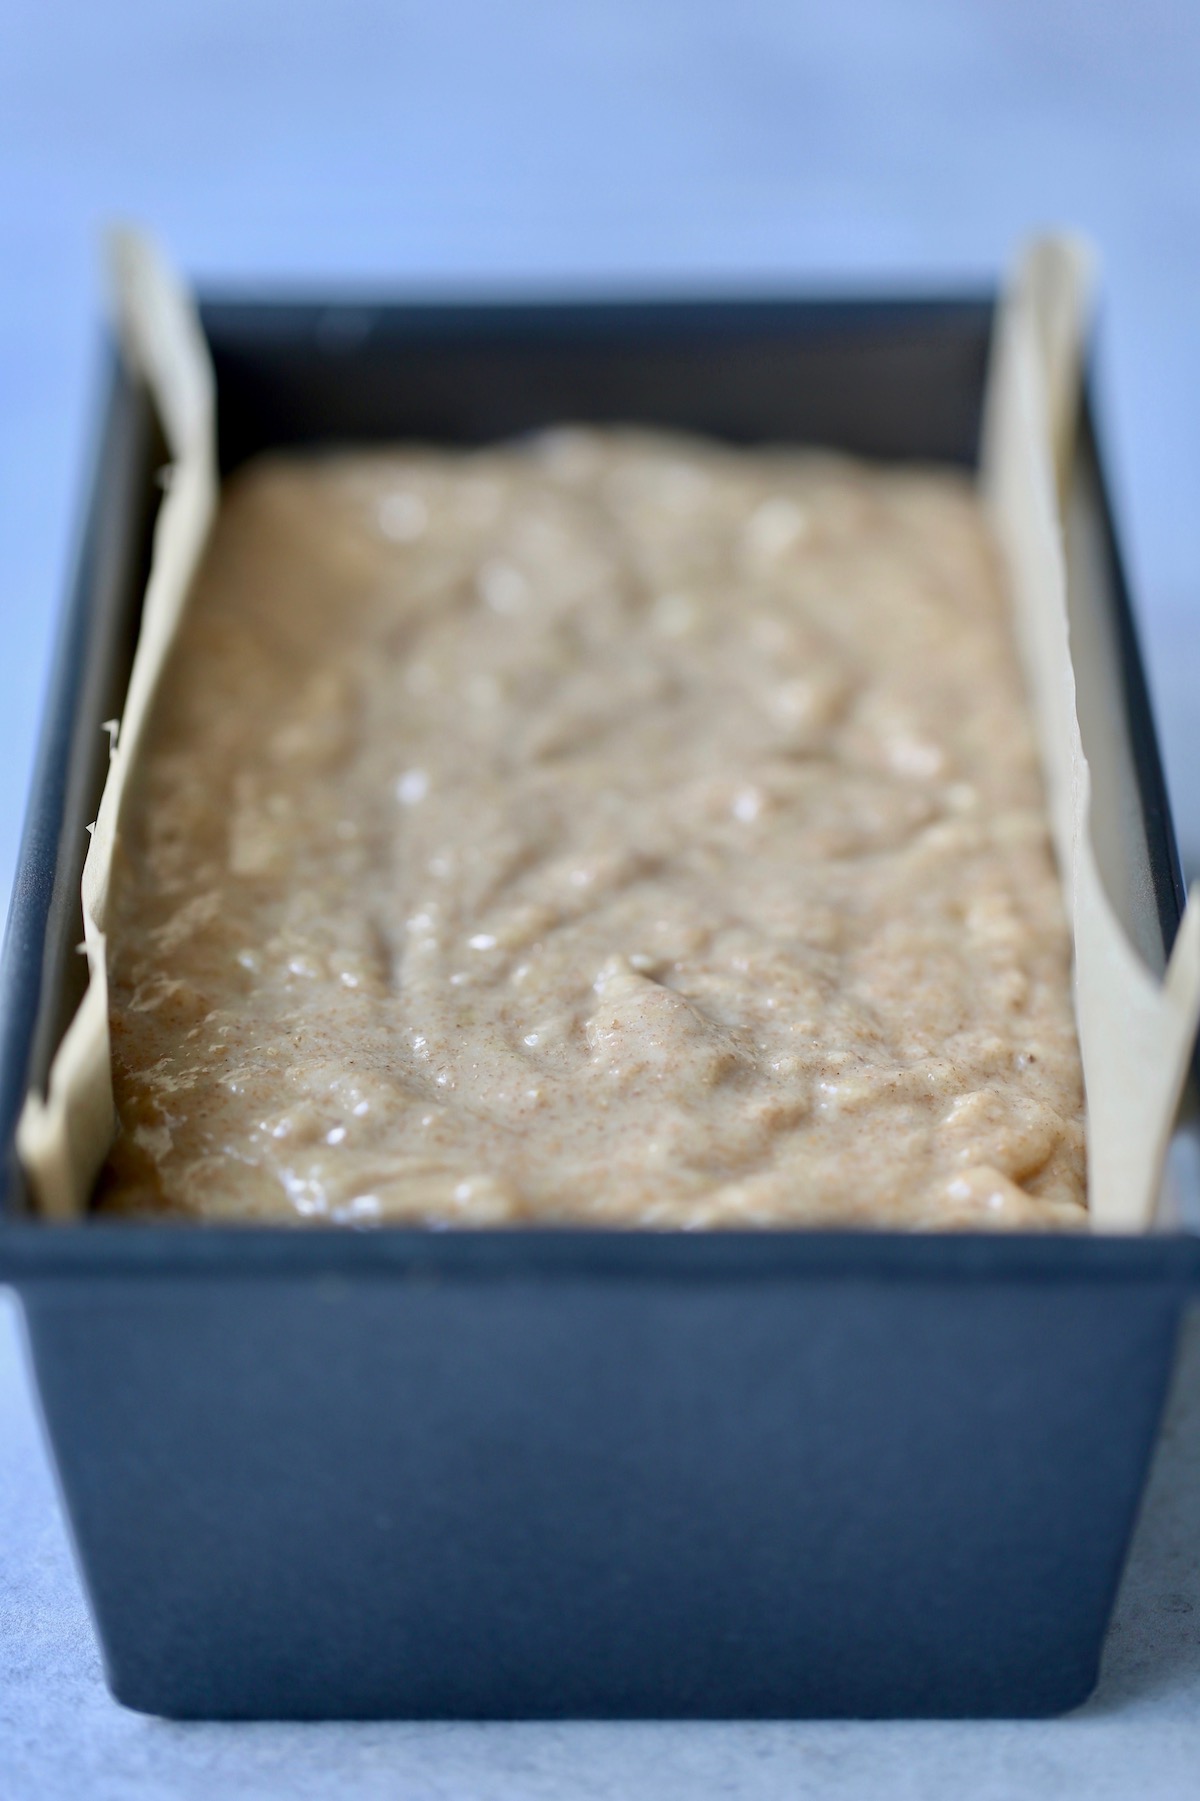
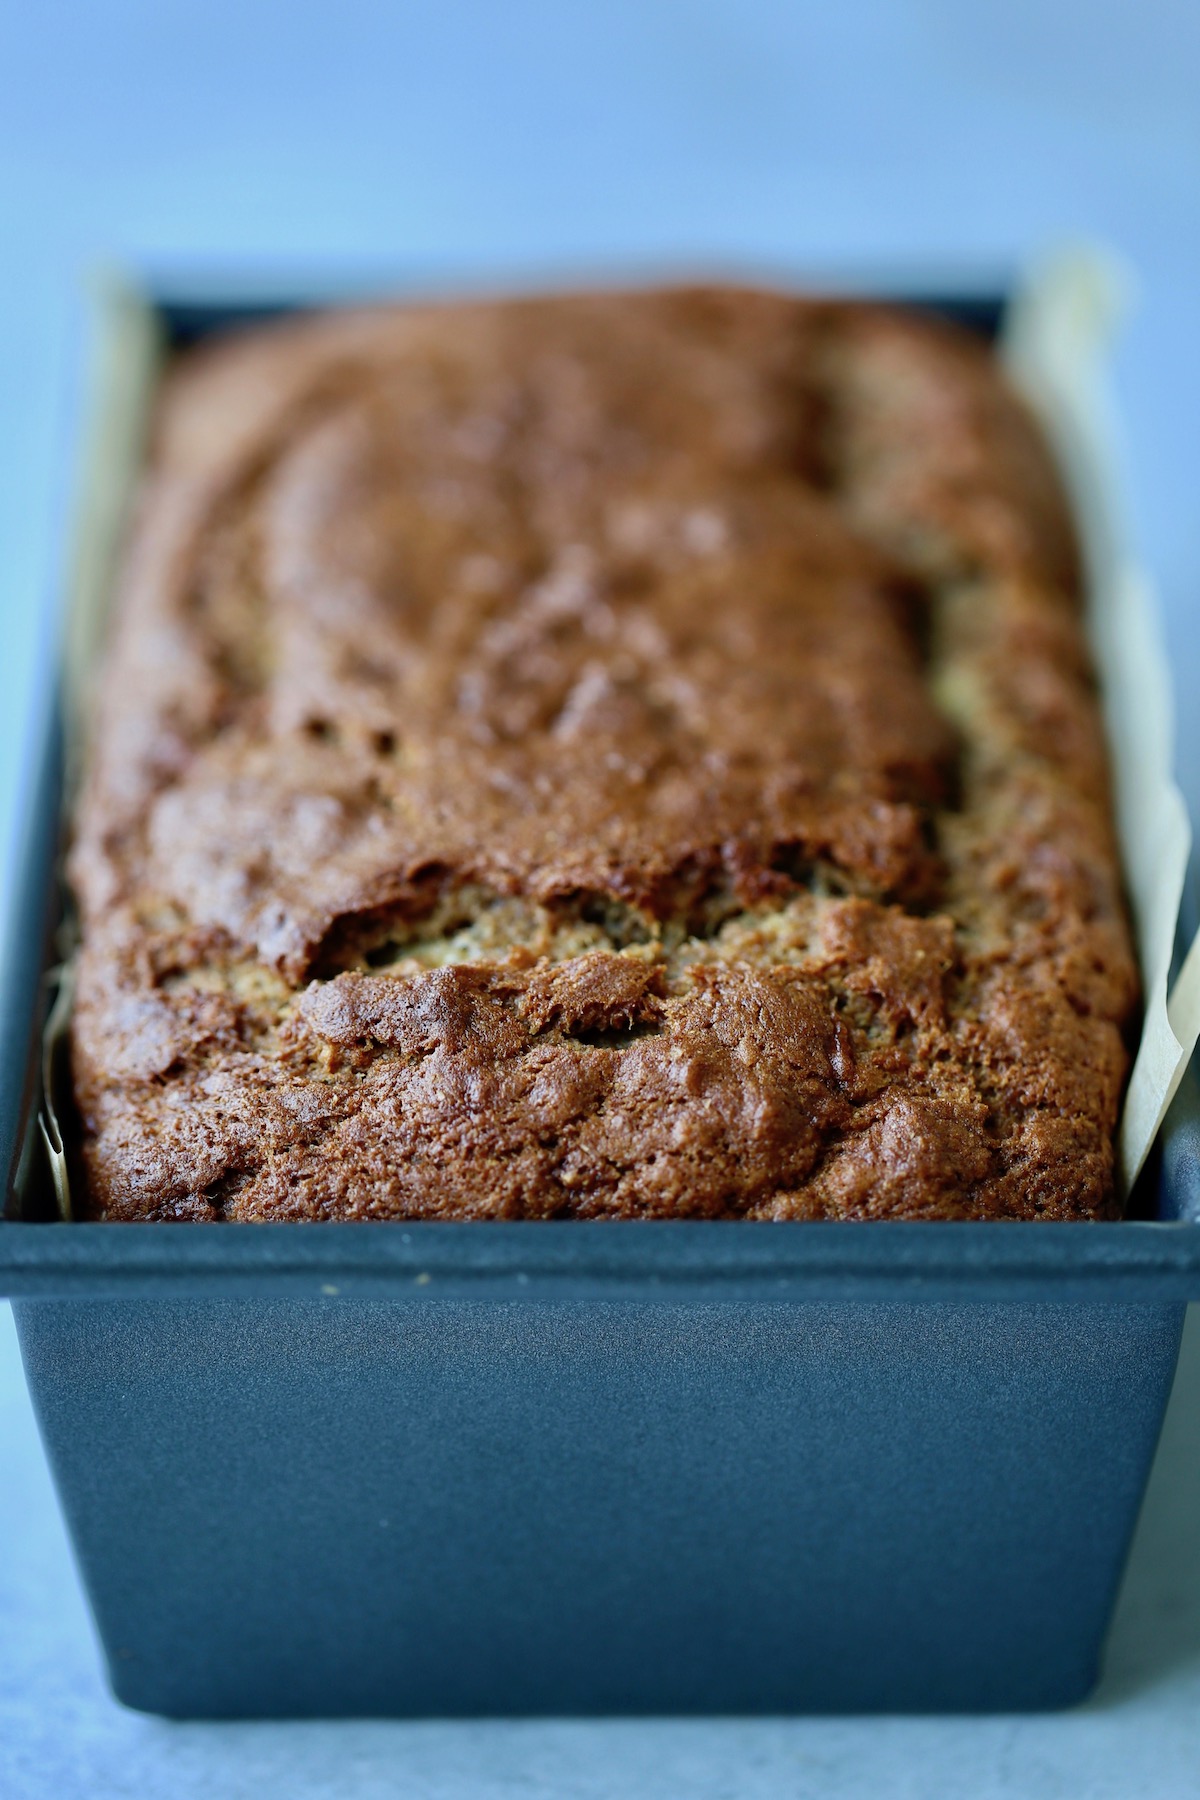
- Step 7: Allow the bread to cool in the pan for 10-15 minutes before carefully removing it and allowing it to cool completely on a wire rack. Slice and enjoy!
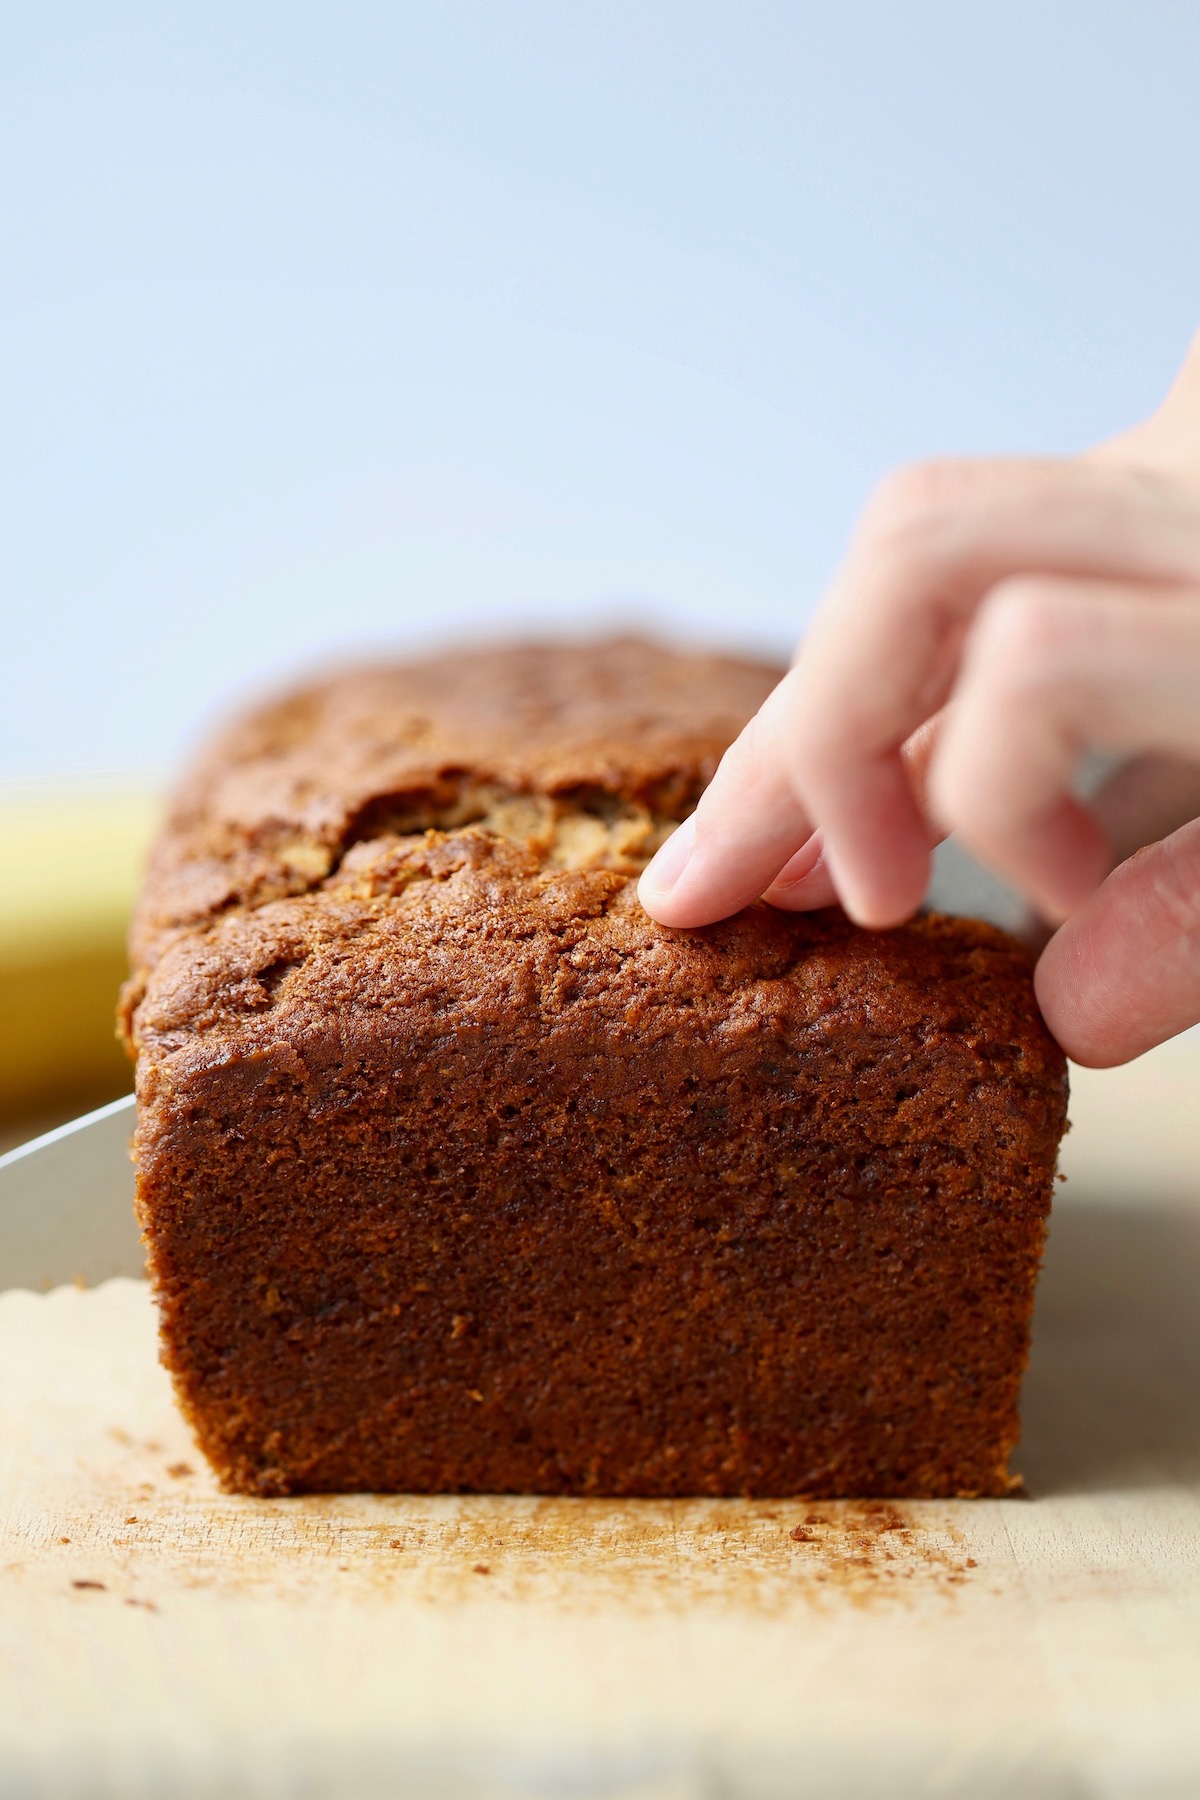
How to Store Vegan Banana Bread
This vegan banana bread probably won't last long, but if you have leftovers, you can easily store it for later.
- Fridge: Because we eat through a loaf of banana bread fairly quickly, we love to store ours in the fridge. To store banana bread in the fridge, simply place it in an air tight container or wrap it in plastic wrap before storing it in the fridge for up to 4-5 days.
- Freezer: You can freeze slices or whole loaves of banana bread. To keep the banana bread from getting freezer burnt, allow it to cool completely before wrapping it whole or in slices in plastic wrap or aluminum foil. Then place the wrapped portions in freezer-safe zip lock bags and freeze it for up to 4 months. To thaw, simply place it in the fridge overnight or until able to slice.
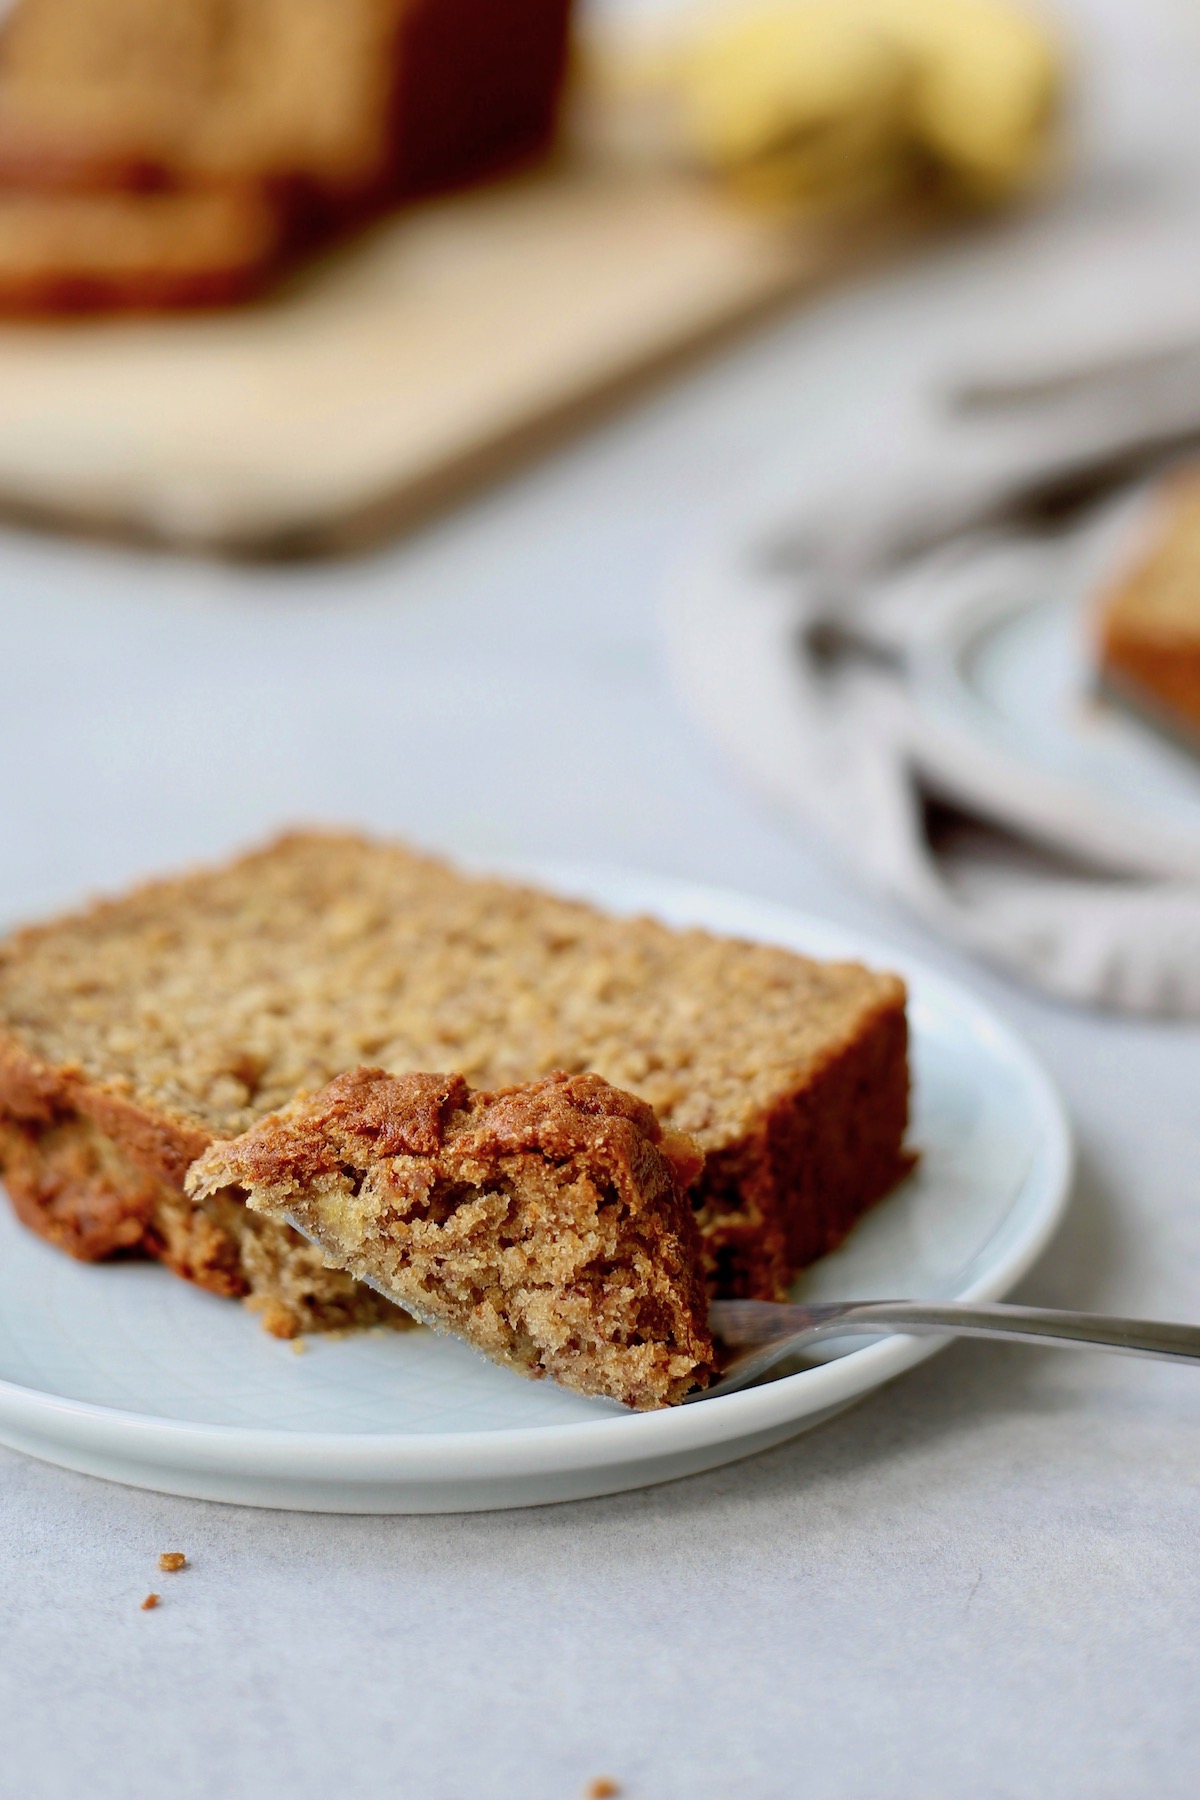
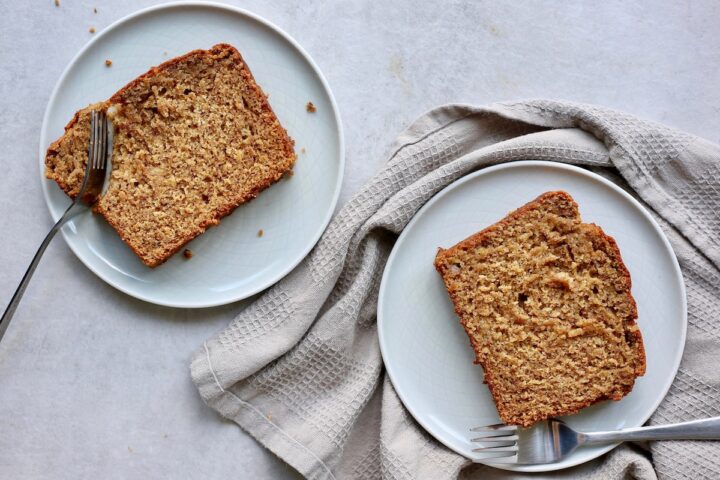
📖 Recipe
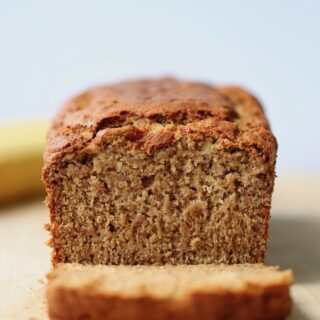
The BEST Vegan Banana Bread Recipe
This fluffy and moist Vegan Banana Bread Recipe is honestly the only banana bread recipe you'll ever need. It requires just 9 ingredients and one bowl to make. You'll be making a loaf every week!
Ingredients
- 4 ripe bananas
- 1 cup cane sugar*
- ½ cup oil
- 6 tablespoons aquafaba
- 1 teaspoon cinnamon
- 2 teaspoon baking powder
- 1 teaspoon baking soda
- ½ teaspoon fine sea salt
- 2 cups flour white or whole wheat
Instructions
- Preheat your oven to 350 °F and grease a standard loaf pan or line it with parchment paper. Set it aside.
- In a large mixing bowl, mash 4 super ripe bananas.
- To the mashed bananas, add in the sugar, oil, aquafaba, cinnamon, baking powder, baking soda and salt. Whisk well to combine.
- Stir in the flour until just combined.
- Lastly, fold in whatever mix-ins you desire. We love using chocolate chips!
- Pour the batter into your greased or lined loaf pan and bake the bread for 55-65 minutes or until a toothpick inserted into the center comes out clean. Keep an eye on it starting at 50 minutes as every oven is different.
- Allow the bread to cool in the pan for 10-15 minutes before carefully removing it and allowing it to cool completely on a wire rack. Slice and enjoy!
Notes
*I often decrease the sugar down to ½ cup and it tastes just as amazing!
Nutrition
Serving: 1sliceCalories: 258kcalCarbohydrates: 42gProtein: 3gFat: 10gSaturated Fat: 1gPolyunsaturated Fat: 3gMonounsaturated Fat: 6gTrans Fat: 0.04gSodium: 260mgPotassium: 164mgFiber: 2gSugar: 21gVitamin A: 26IUVitamin C: 3mgCalcium: 46mgIron: 1mg
Tried this recipe?Let me know how it was!
Vegan Ranger Cookies

Chock full of texture from chewy oats, flaky coconut and crispy cereal, these Vegan Ranger Cookies are sure to please everyone who gives them a try!

Cookies are the perfect dessert for so many reasons.
They're baked in the perfect single-serving-package.
They can be classic, like these Bakery Style Vegan Chocolate Chip Cookies.
They can be unique, like these Zucchini Oatmeal Chocolate Chip Cookies.
They can be on the healthier side, like these Whole Whole Maple Syrup Sweetened Chocolate Chip Cookies.
They can be made to dip in tea or coffee, like these Vegan Pumpkin Chocolate Chip Biscotti.
Basically, there is a cookie recipe for everyone and today I'm sharing with you one of my current favorite vegan cookie recipes: Vegan Ranger Cookies!
What are Ranger Cookies?
That's a good question...a question I'm not sure I can accurately answer!
Ranger cookies, sometimes called Cowboy Cookies, may have been invented by Laura Bush when she baked them for a presidential bake-off during the 2000 election year.
I had never heard of ranger cookies until my Mom randomly told me she had baked them and that I should "veganize" them. As soon as I saw the ingredients they called for, I knew I had to make a vegan version.
They are full of texture from chewy oatmeal, flaky coconut and crispy cereal, and they end up being so delicious.
Oh yeah, and they also have chocolate chips in them.
Seriously, what's not to love?!
Ingredients for Vegan Ranger Cookies
Like most cookie recipes, these ranger cookies call for mostly pantry staples. Below I'll list out all of the ingredients you'll need to make them!
- Vegan butter (I love using Earth Balance)
- Brown sugar
- Cane sugar
- Sea salt
- Aquafaba (the liquid from a can of chickpeas!)
- Flour (Gluten-free if necessary!)
- Baking powder
- Baking soda
- Rolled oats
- Shredded coconut
- Chocolate chips (dairy-free)
- Crispy rice cereal (you can also use cornflakes)
These ranger cookies definitely focus on the mix-ins, which is why I love them so much.
The oatmeal adds chewiness. The coconut, flakiness. The chocolate chips, sweetness and crunch. And the cereal, crispness!
Are Ranger Cookies Gluten Free?
It's really easy to make these cookies completely gluten-free.
To do so, simply use a gluten-free 1-to-1 baking flour in place of the regular flour!
How to Make Vegan Ranger Cookies
These vegan ranger cookies are easy to make and are made in a similar manner to regular chocolate chip cookies.
Below I'll tell you how to make them with step-by-step instructions:
Step 1: Preheat your oven to 350°F / 175°C and line two baking sheets with parchment paper or silicone baking mats.
Step 2: Using a hand mixer, beat together the butter, sugars and salt until fluffy. Add in the aquafaba and beat a little more until smooth.
Step 3: In a separate mixing bowl, whisk together the flour, baking soda and baking powder. Add this flour mixture to the butter and sugar mixture and beat until well combined.
Step 4: Stir in the oats, shredded coconut, chocolate chips and cereal until just combined.
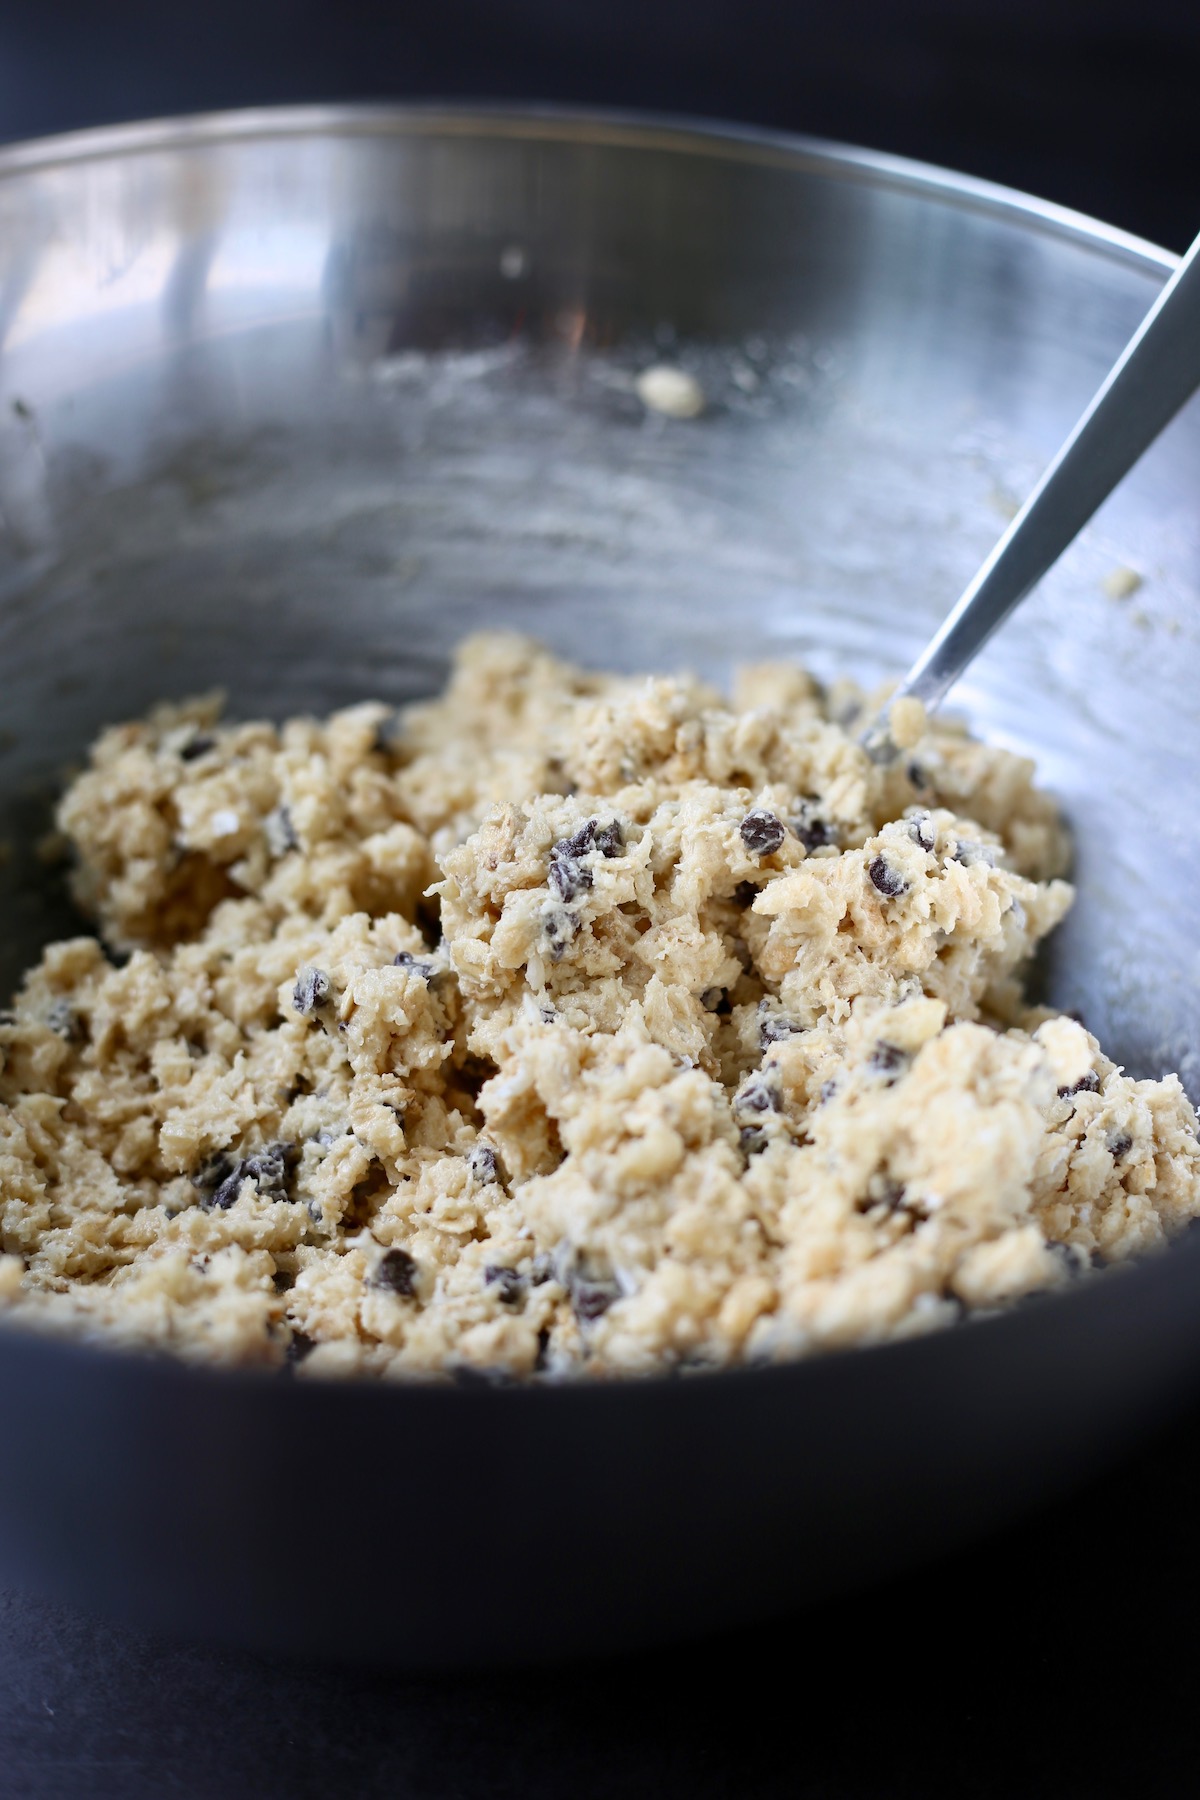
Step 5: Drop the dough by rounded spoonfuls onto the prepared baking sheets, leaving 2 inches or so between each cookie.

Step 6: Bake the cookies for 10-12 minutes. Remove the cookies from the oven and allow them to cool.

Equipment
To bake cookies, you can easily get away with using a large mixing bowl, measuring cups, measuring spoons, a wooden spoon, baking sheets and an oven.
However, this recipe calls for a hand mixer, which is a great kitchen gadget to have on hand if you enjoy baking. A hand mixer allows you to beat together the butter and sugar until nice and smooth and fluffy. If you don't have a hand mixer, you can always cream butter and sugar together with a wooden spoon and a little elbow grease.
I also LOVE baking with my silicone baking mats. They make clean up super easy and keep your cookies from sticking to the baking sheet.
Storage
In general, vegan or dairy-free cookies can be stored just like any other cookie.
Room Temperature: If I know that we are going to eat through the batch of cookies in a few days, I store them in an airtight container at room temperature.
Freezer: You can also freeze vegan cookies, which is a great option if you're making a bunch of cookies at one time or meal prepping. Simply allow the cookies to cool completely before flash freezing them. To flash free, place the cookies in the freezer in a single layer. Once chilled and mostly frozen, you can then place them all in a freezer-friendly zip lock bag to be stored in the freezer for 1-2 months. To enjoy the cookies, simply remove a few from the freezer the night before and allow them to thaw in the fridge or at room temperature.

I'd love to know if you give these ranger cookies a try and what you think. We are absolutely obsessed with them, so I hope you love them as much as we do!
If you enjoy them, be sure to leave a 5 star rating by clicking on the stars in the recipe card. Then share the recipe with your friends and family!
📖 Recipe

Vegan Ranger Cookies
Chock full of texture from chewy oats, flaky coconut and crispy cereal, these Vegan Ranger Cookies are sure to please everyone who gives them a try!
Ingredients
- ½ cup vegan butter
- ½ cup brown sugar
- ½ cup granulated sugar
- ¼ teaspoon salt
- 3 tablespoons aquafaba
- 1 cups flour use gluten-free 1-to-1 flour if necessary
- ½ teaspoon baking soda
- ¼ teaspoon baking powder
- ½ cup old-fashioned rolled oats
- ½ cup unsweetened shredded coconut
- ½ cup chocolate chips
- 1 ½ cups crispy rice cereal or cornflakes
Instructions
- Preheat your oven to 350 °F and line two baking sheets with parchment paper or silicone baking mats.
- Using a hand mixer, beat together the butter, sugars and salt until fluffy. Add in the aquafaba and beat a little more until smooth.
- In a separate mixing bowl, whisk together the flour, baking soda and baking powder. Add this flour mixture to the butter and sugar mixture and beat until well combined.
- Stir in the oats, shredded coconut, chocolate chips and cereal until just combined.
- Drop the dough by rounded spoonfuls onto the prepared baking sheets, leaving 2 inches or so between each cookie.
- Bake the cookies for 10-12 minutes. Remove the cookies from the oven and allow them to cool.
Notes
In general, vegan or dairy-free cookies can be stored just like any other cookie.
- Room Temperature: If I know that we are going to eat through the batch of cookies in a few days, I store them in an airtight container at room temperature.
- Freezer: You can also freeze vegan cookies, which is a great option if you're making a bunch of cookies at one time or meal prepping. Simply allow the cookies to cool completely before flash freezing them. To flash free, place the cookies in the freezer in a single layer. Once chilled and mostly frozen, you can then place them all in a freezer-friendly zip lock bag to be stored in the freezer for 1-2 months. To enjoy the cookies, simply remove a few from the freezer the night before and allow them to thaw in the fridge or at room temperature.
Nutrition
Serving: 1cookieCalories: 136kcalCarbohydrates: 20gProtein: 1gFat: 6gSaturated Fat: 3gPolyunsaturated Fat: 1gMonounsaturated Fat: 1gTrans Fat: 0.02gSodium: 102mgPotassium: 46mgFiber: 1gSugar: 12gVitamin A: 323IUVitamin C: 1mgCalcium: 12mgIron: 1mg
Tried this recipe?Let me know how it was!
Nutella Hot Chocolate (Vegan!)

Creamy chocolate hazelnut butter and dark cocoa combine together to form a rich and decadent dairy free Nutella Hot Chocolate!
...15 Delicious Vegan Cookie Recipes!
The holidays have arrived!
Halloween, Thanksgiving and Christmas are quickly approaching and it's time to bake, serve and eat ALL the vegan cookies!
To help you with your holiday meal planning, I put together a round-up of 15 of my favorite vegan cookie recipes.
I know round-ups can be overwhelming, so let me highlight a few of my favorite vegan cookies. If you can only try a few of these recipes, be sure to make these Vegan Peanut Butter Blossoms, these Chewy Oatmeal Apricot Almond Cookies and these Easy Vegan Sugar Cookies.
You won't be disappointed!
If you try any of these recipes out, be sure to let me know! Leave a comment down below, rate the recipe you try and be sure to share this round-up with others!
15 Delicious Vegan Cookie Recipes
1
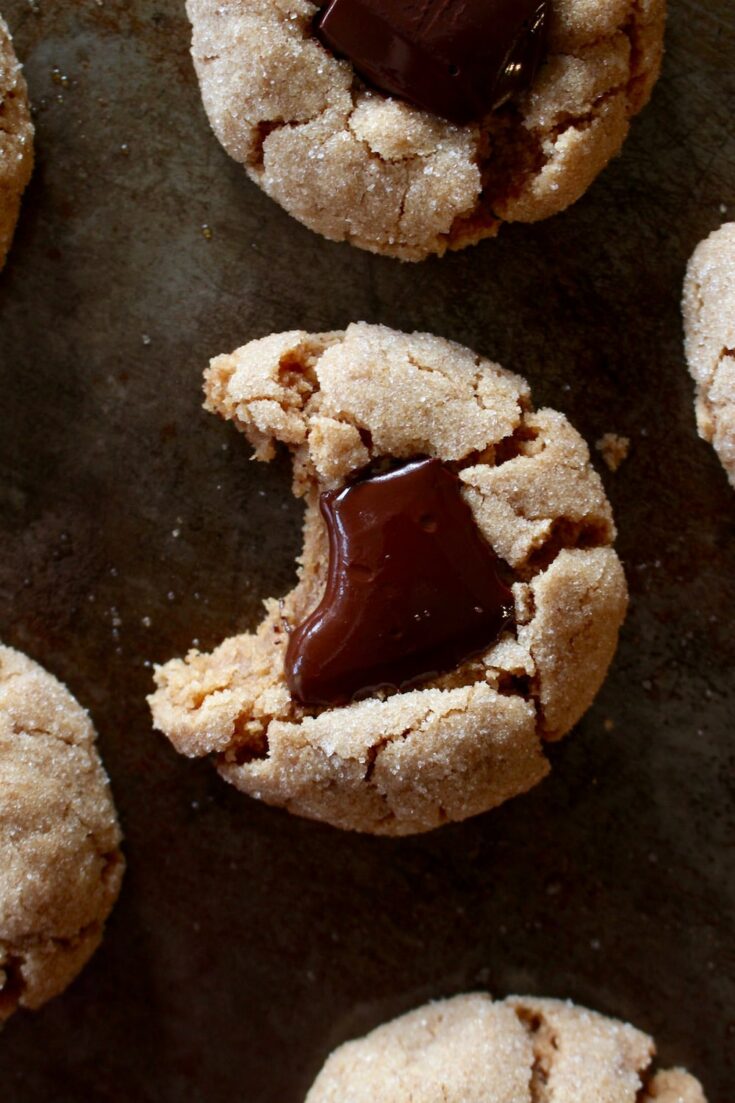
Vegan Peanut Butter Blossom Cookies
Enjoy a delicious dairy and egg free version of your favorite childhood treat with these Vegan Peanut Butter Blossom Cookies!
2

Easy Vegan Sugar Cookies!
Baked into fun shapes and decorated with festive colors, these Easy Vegan Sugar Cookies are alway my go-to cookies for the holiday season!
3

Vegan Ranger Cookies
Chock full of texture from chewy oats, flaky coconut and crispy cereal, these Vegan Ranger Cookies are sure to please everyone who gives them a try!
4
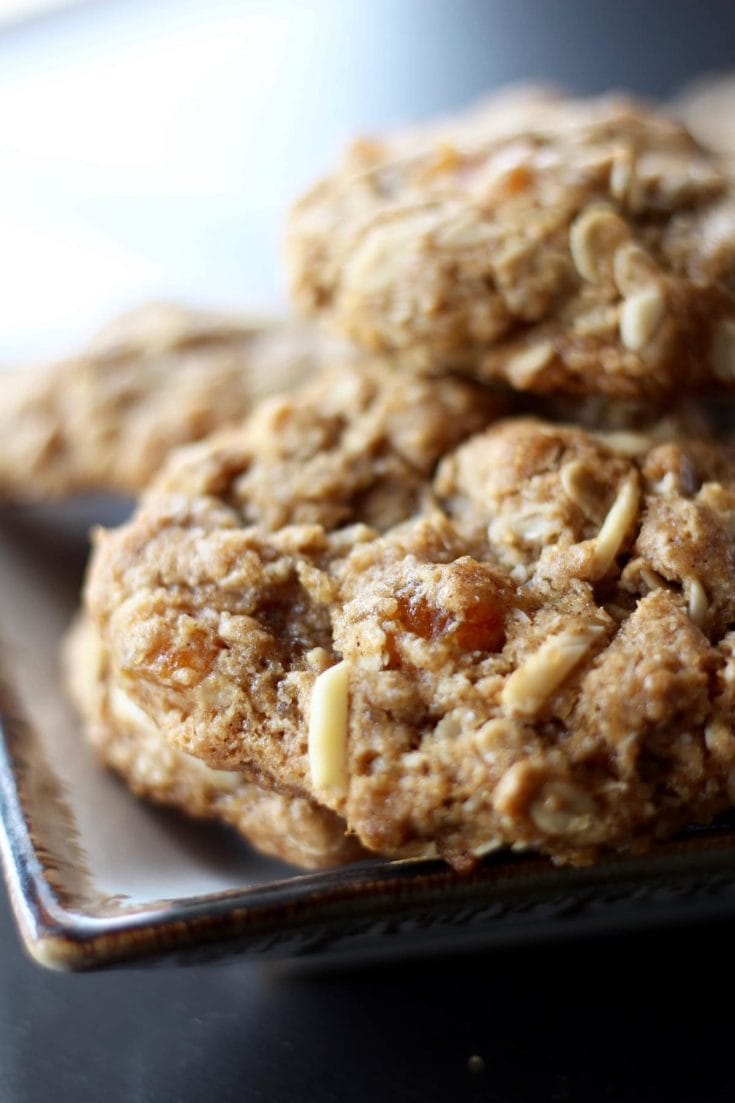
Chewy Oatmeal Apricot Almond Cookies (Vegan!)
Made with hearty oats and sweet, chewy dried apricots, these sweet and chewy Oatmeal Apricot Almond Cookies will be devoured in minutes!
5
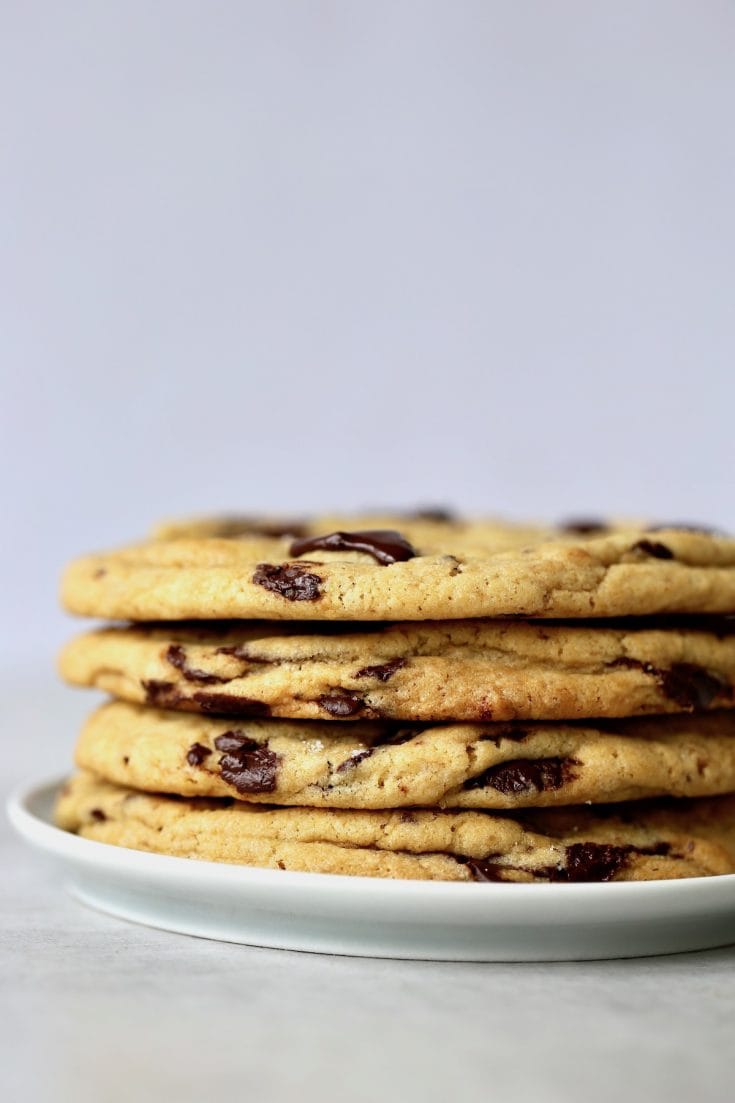
Bakery Style Vegan Chocolate Chip Cookies
Full of melted chocolate chunks and topped with sea salt, these jumbo Bakery-Style Chocolate Chip Cookies are a sure crowd pleaser!
6
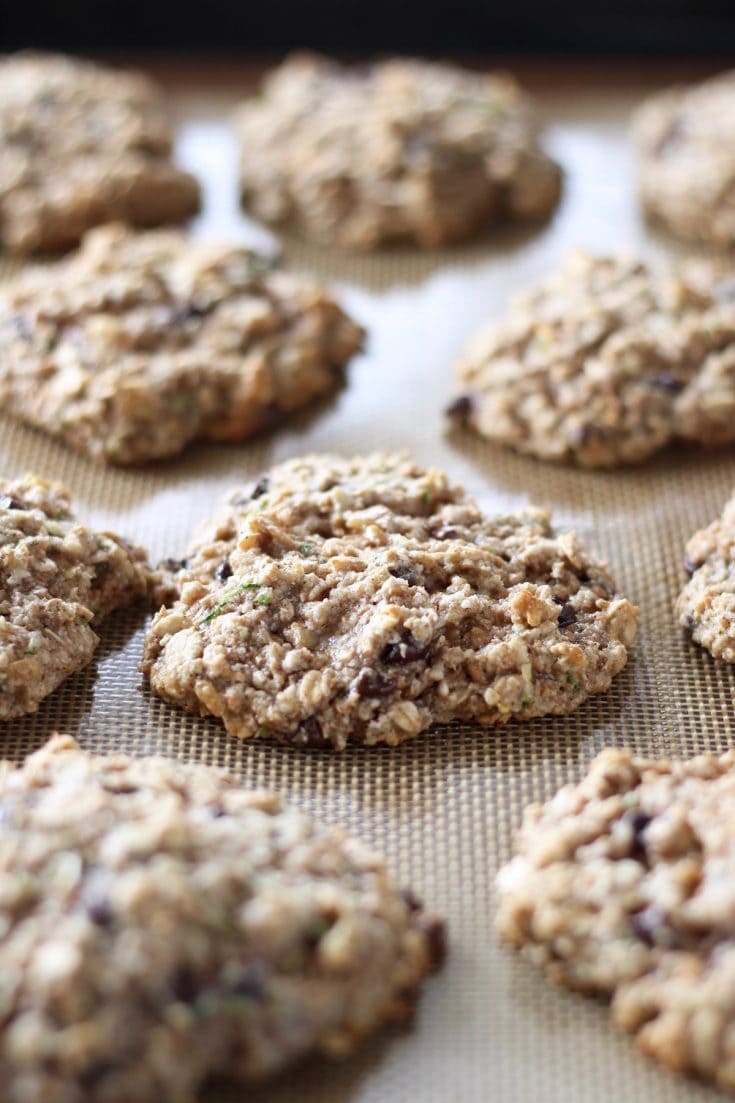
Zucchini Oatmeal Chocolate Chip Cookies
Full of crunchy walnuts, rich chocolate chips and hearty oats, these Zucchini Oatmeal Chocolate Chip Cookies are the perfect dessert for any time of year!
7
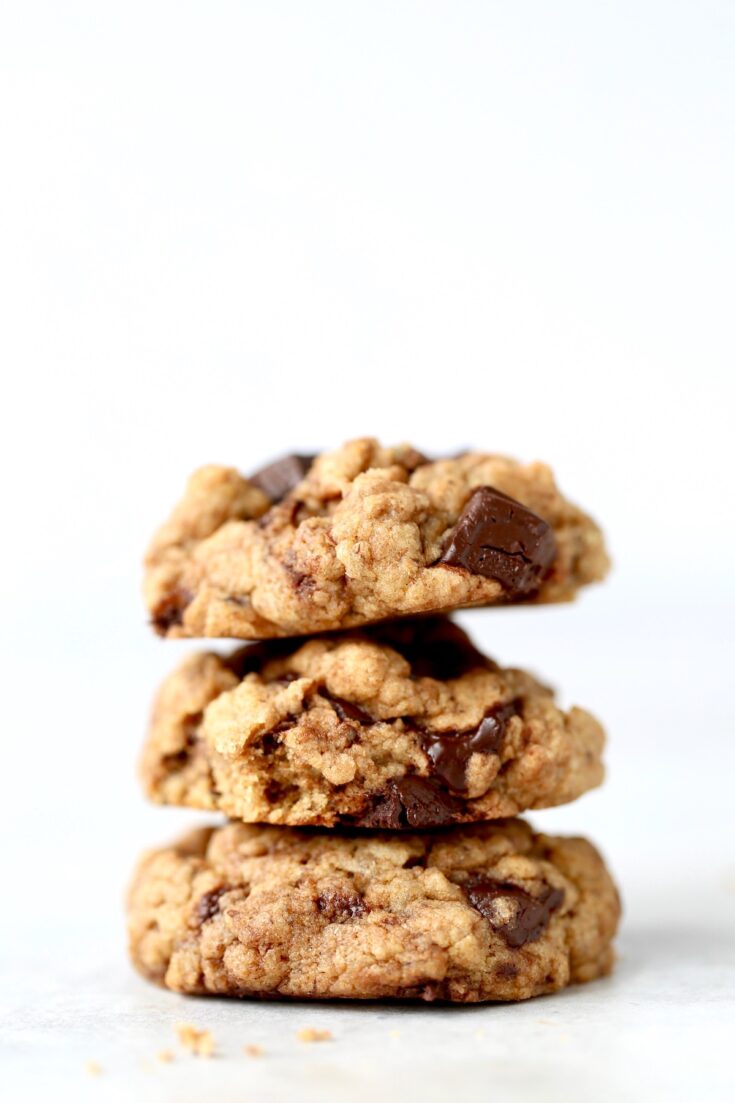
Vegan Maple Syrup Whole Wheat Chocolate Chip Cookies
These Maple Syrup Whole Wheat Vegan Chocolate Chip Cookies are sweet and chewy, while still packing a nutritious punch! No one will know they're healthy!
8
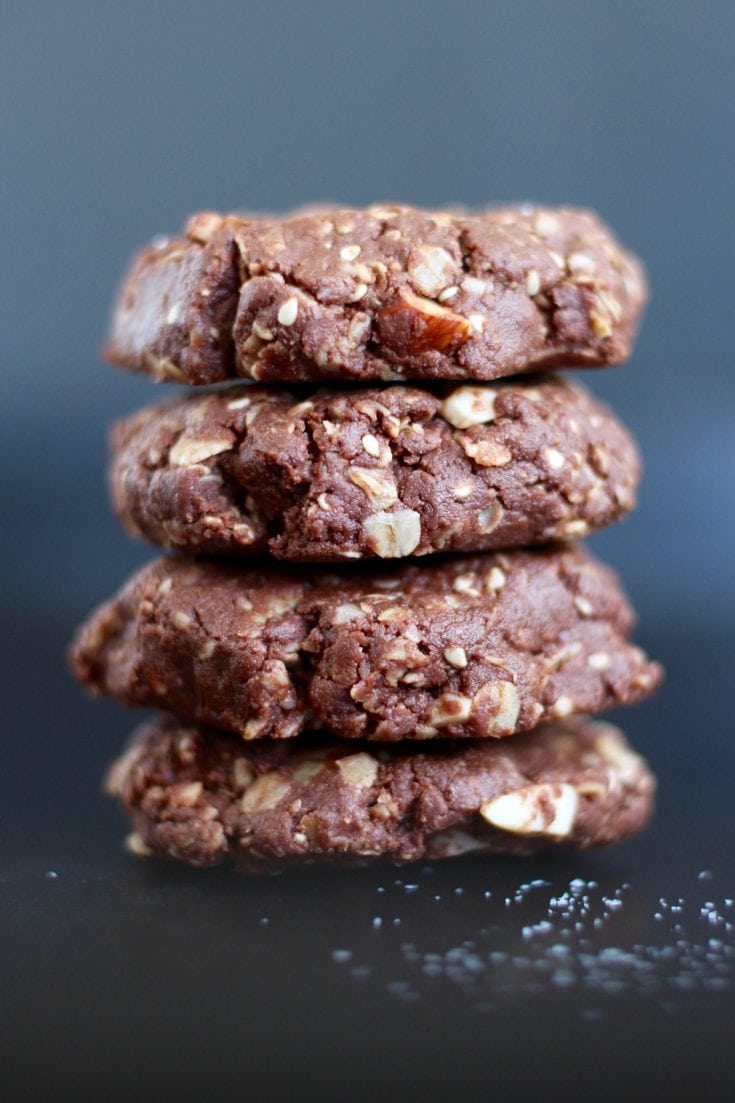
Chocolate Tahini No Bake Cookies (Vegan + Gluten Free)
Melted chocolate chips, runny tahini and chewy oats make for the most amazing, decadent Chocolate Tahini No Bake Cookies!
9

Almond Butter Coconut No Bake Cookies
Made with creamy Almond Butter and chewy coconut, these Almond Butter Coconut No Bake Cookies are melt in your mouth good!
10
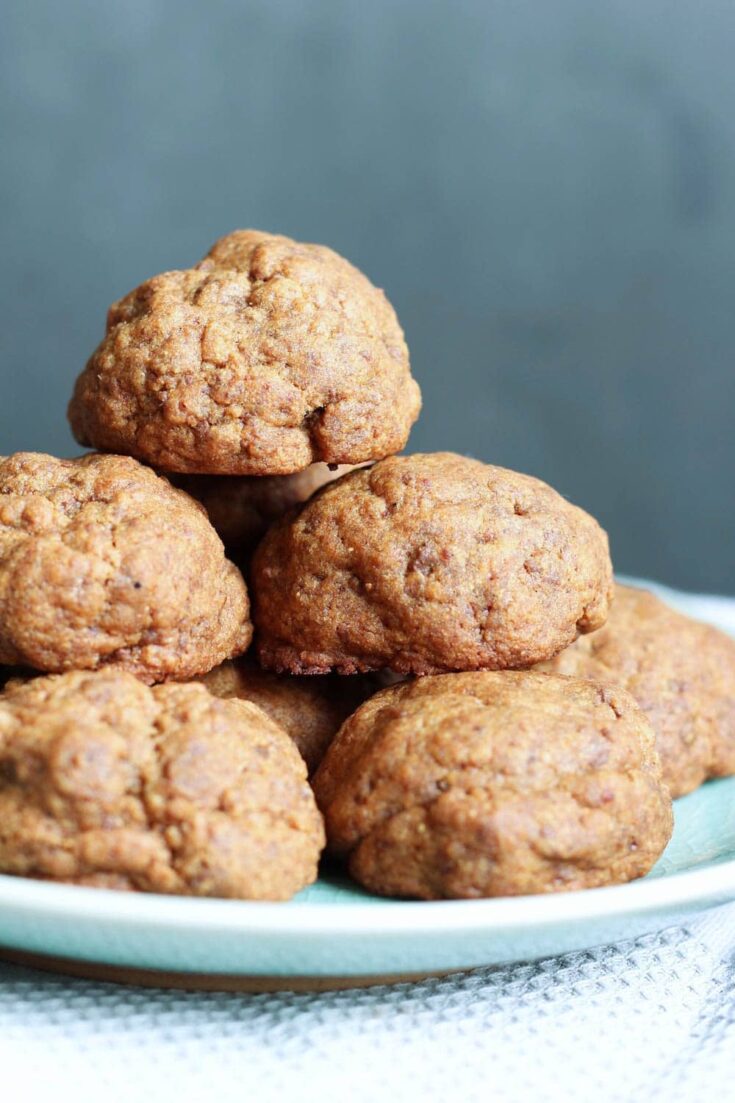
Vegan Chocolate Chip Gingersnap Cookies
Filled with warming spices and rich chocolate chips, these spicy and sweet Vegan Chocolate Chip Gingersnap Cookies are sure to please!
11
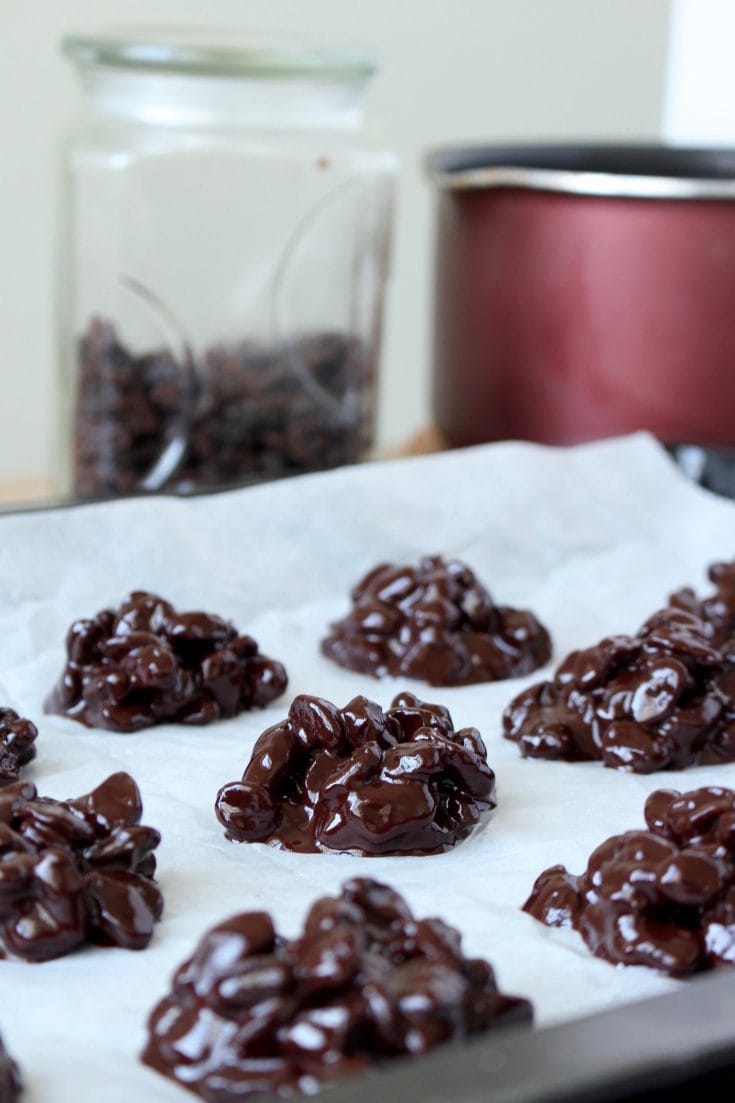
Vegan Chocolate Covered Raisin Drop Cookies
With chewy, sweet raisins and silky dark chocolate, these Vegan Chocolate Covered Raisin Drop Cookies are a delicious, rich treat for this holiday season.
12
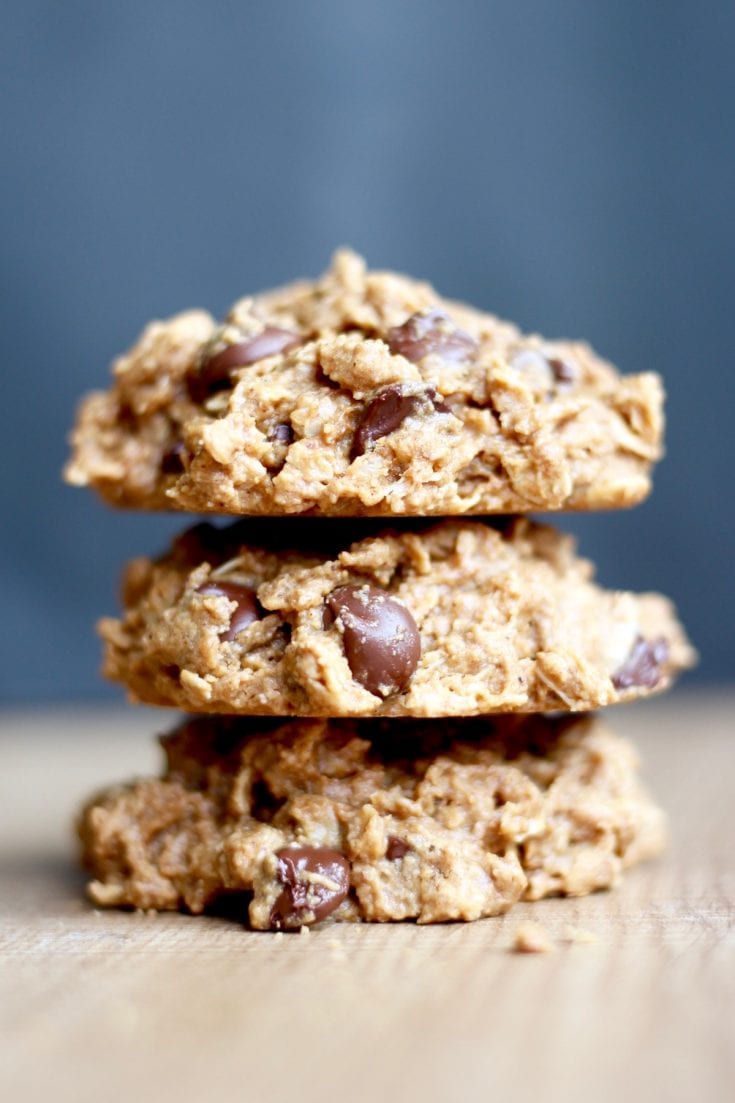
Peanut Butter Oatmeal Chocolate Chip Cookies (Vegan + GF)
Sweetened with maple syrup and flavored with natural peanut butter, theses gluten free Peanut Butter Oatmeal Chocolate Chip Cookies wont last long!
13
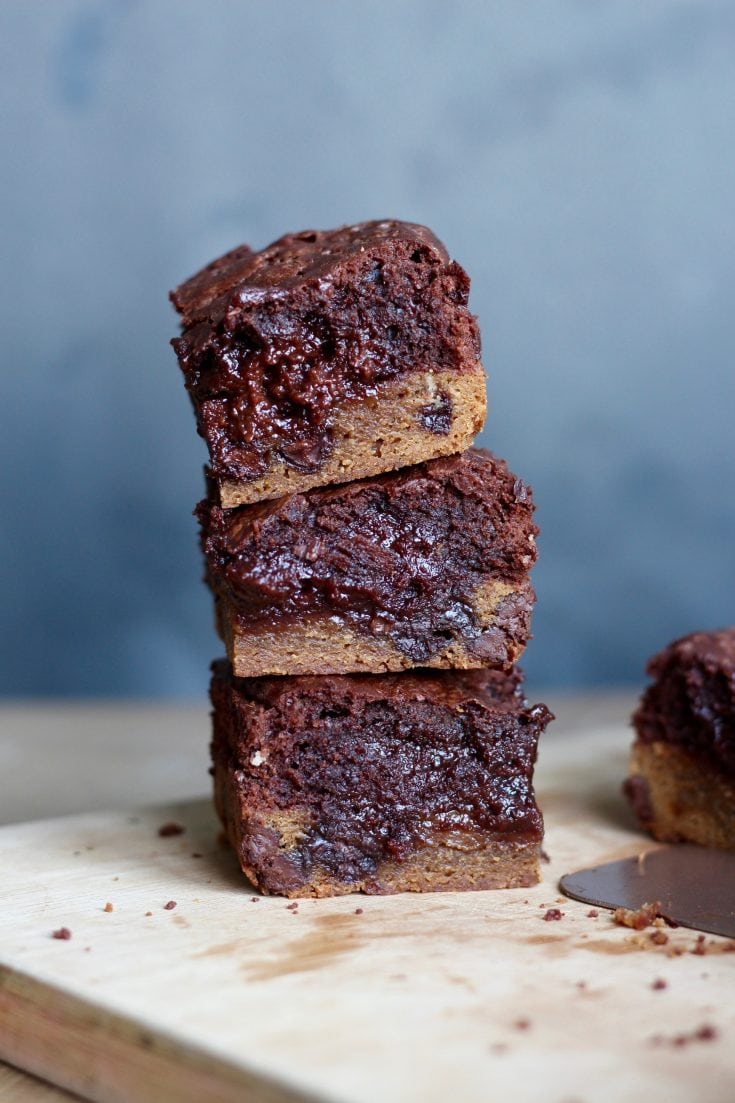
Vegan Brookies
With a classic chocolate chip cookie base and a fudgy, rich brownie topping, these Vegan Brookies will be the star dessert at any party!
14

Vegan Buckeyes
Made with natural peanut butter and sweetened with maple syrup, these Vegan Buckeyes are a delicious and healthy way to enjoy one of your favorite desserts!
15
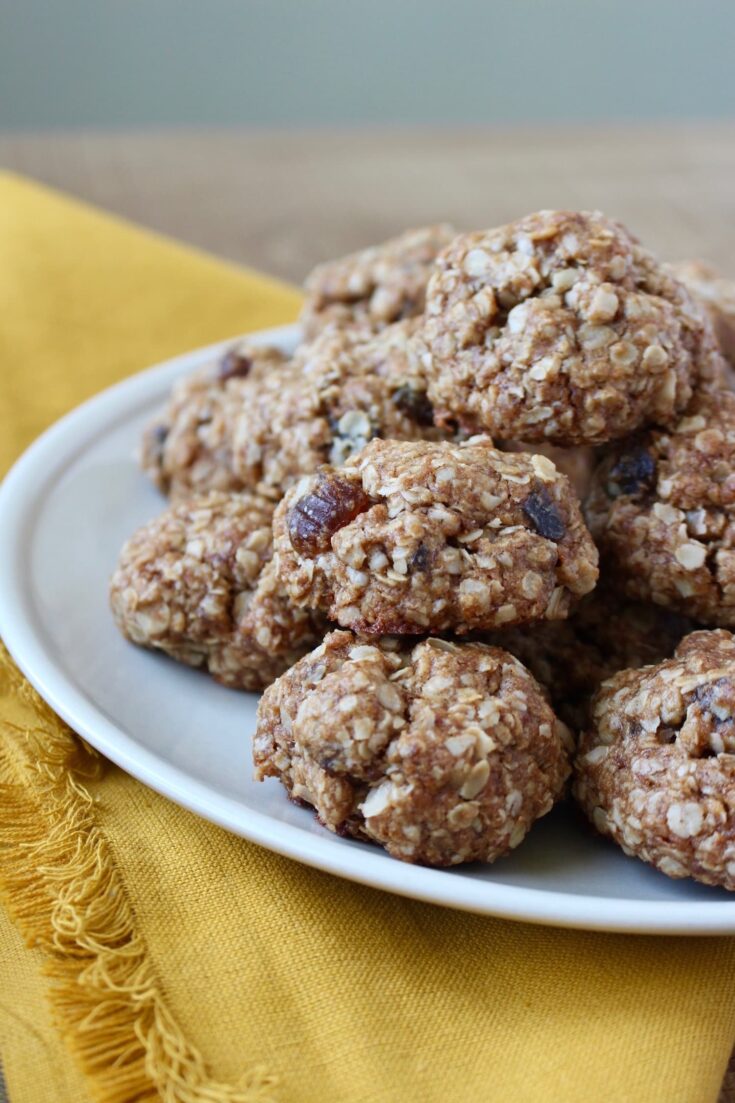
Chewy Vegan Oatmeal Date Cookies
These delicious Chewy Vegan Oatmeal Date Cookies are perfectly sweet, hearty, and caramel-y, no one will even know they're whole grain plus dairy and egg free!
Roasted Cauliflower Chowder (V GF)

Full of hearty veggies and soothing broth, this vegan roasted cauliflower chowder recipe will be sure to keep you warm and satisfied this winter season!

Even though we live in hot and humid Malaysia, we are always enjoying soup.
From my favorite Red Lentil Pumpkin Soup to One-Pot Vegan Zuppa Toscana to this Creamy Tomato Zucchini Soup, you can never run out of flavor combinations when it comes to soup.
Even the most unique combinations are delicious, like this Creamy Vegan Pumpkin Soup with a peanut butter twist!
And of course, it's mandatory to pair a hearty bowl of soup with some delicious, homemade bread! We love this 4 Ingredient Whole Wheat Artisan Bread and this No Knead Whole Wheat Sandwich Bread.
YUM!
Ingredients
This soup starts as most good vegetable-based soups start...with olive oil, garlic, onion and some hearty vegetables.
Here are all of the ingredients you'll need to make this easy, vegan cauliflower chowder.
- Cauliflower
- Garlic
- Olive oil
- Vegan butter
- Onion
- Carrots
- Celery
- Dried thyme
- Bay leaf
- Flour (can use gluten-free if needed!
- Vegetable broth
- Unsweetened non-dairy milk
- Nutritional yeast
- Salt and pepper (lots!)
How to Make Cauliflower Chowder
Below are the step-by-step instructions for making this delicious vegan cauliflower chowder:
Step 1: Start by preheating your oven to 400°F / 205°C and lining a baking sheet with a silicone baking mat, parchment paper or greasing it with cooking spray.
Step 2: Roughly chop up the head of cauliflower into florets and spread them onto your baking sheet. Add on the cloves of garlic and drizzle everything with about a tablespoon of olive oil. Stir to coat.
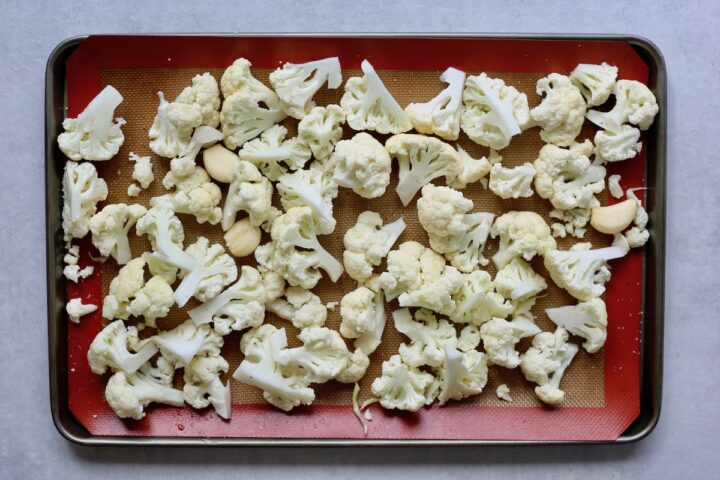
STEP 3: Roast the cauliflower and garlic for about 20-25 minutes, stirring halfway through, or until soft and slightly charred.
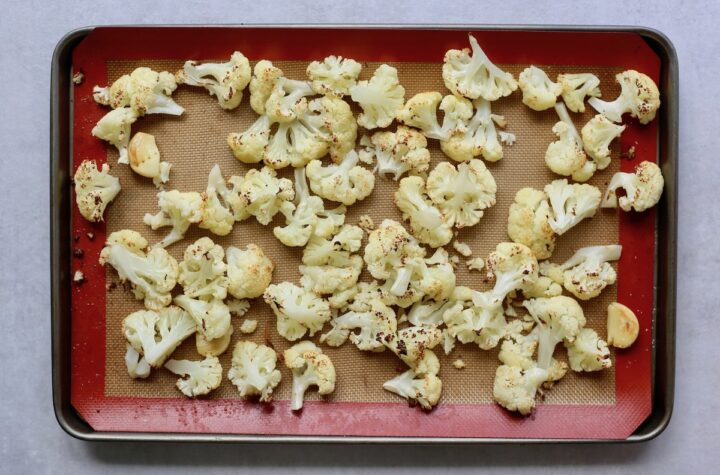
Step 4: In a large pot over medium heat, melt the vegan butter and saute the onion until soft and translucent, about 2-3 minutes.
Step 5: Add in the chopped up carrots and celery and cook for another 5 minutes, stirring occasionally.
Step 6: Once the cauliflower and garlic are done roasting, roughly chop up the cauliflower and mince the roasted garlic cloves. Add them, along with the bay leaf and dried thyme, to the pot.
Step 7: Sprinkle the flour over top of the vegetables and cook until the flour disappears. Pour in the vegetable broth and stir everything together. Bring the mixture to a simmer and allow everything to simmer for 10 minutes.
Step 8: Lastly stir in the non-dairy milk and nutritional yeast and season liberally with salt and freshly ground black pepper. I've found this soup can use a good bit of salt so don't be shy!
PRO TIP: If desired, you can use an immersion blender to blend part of the soup so that it's more creamy and smooth.

Step 9: Ladle the warm chowder into bowls, top with more freshly ground black pepper and nutritional yeast, and serve with a nice piece of crusty bread!
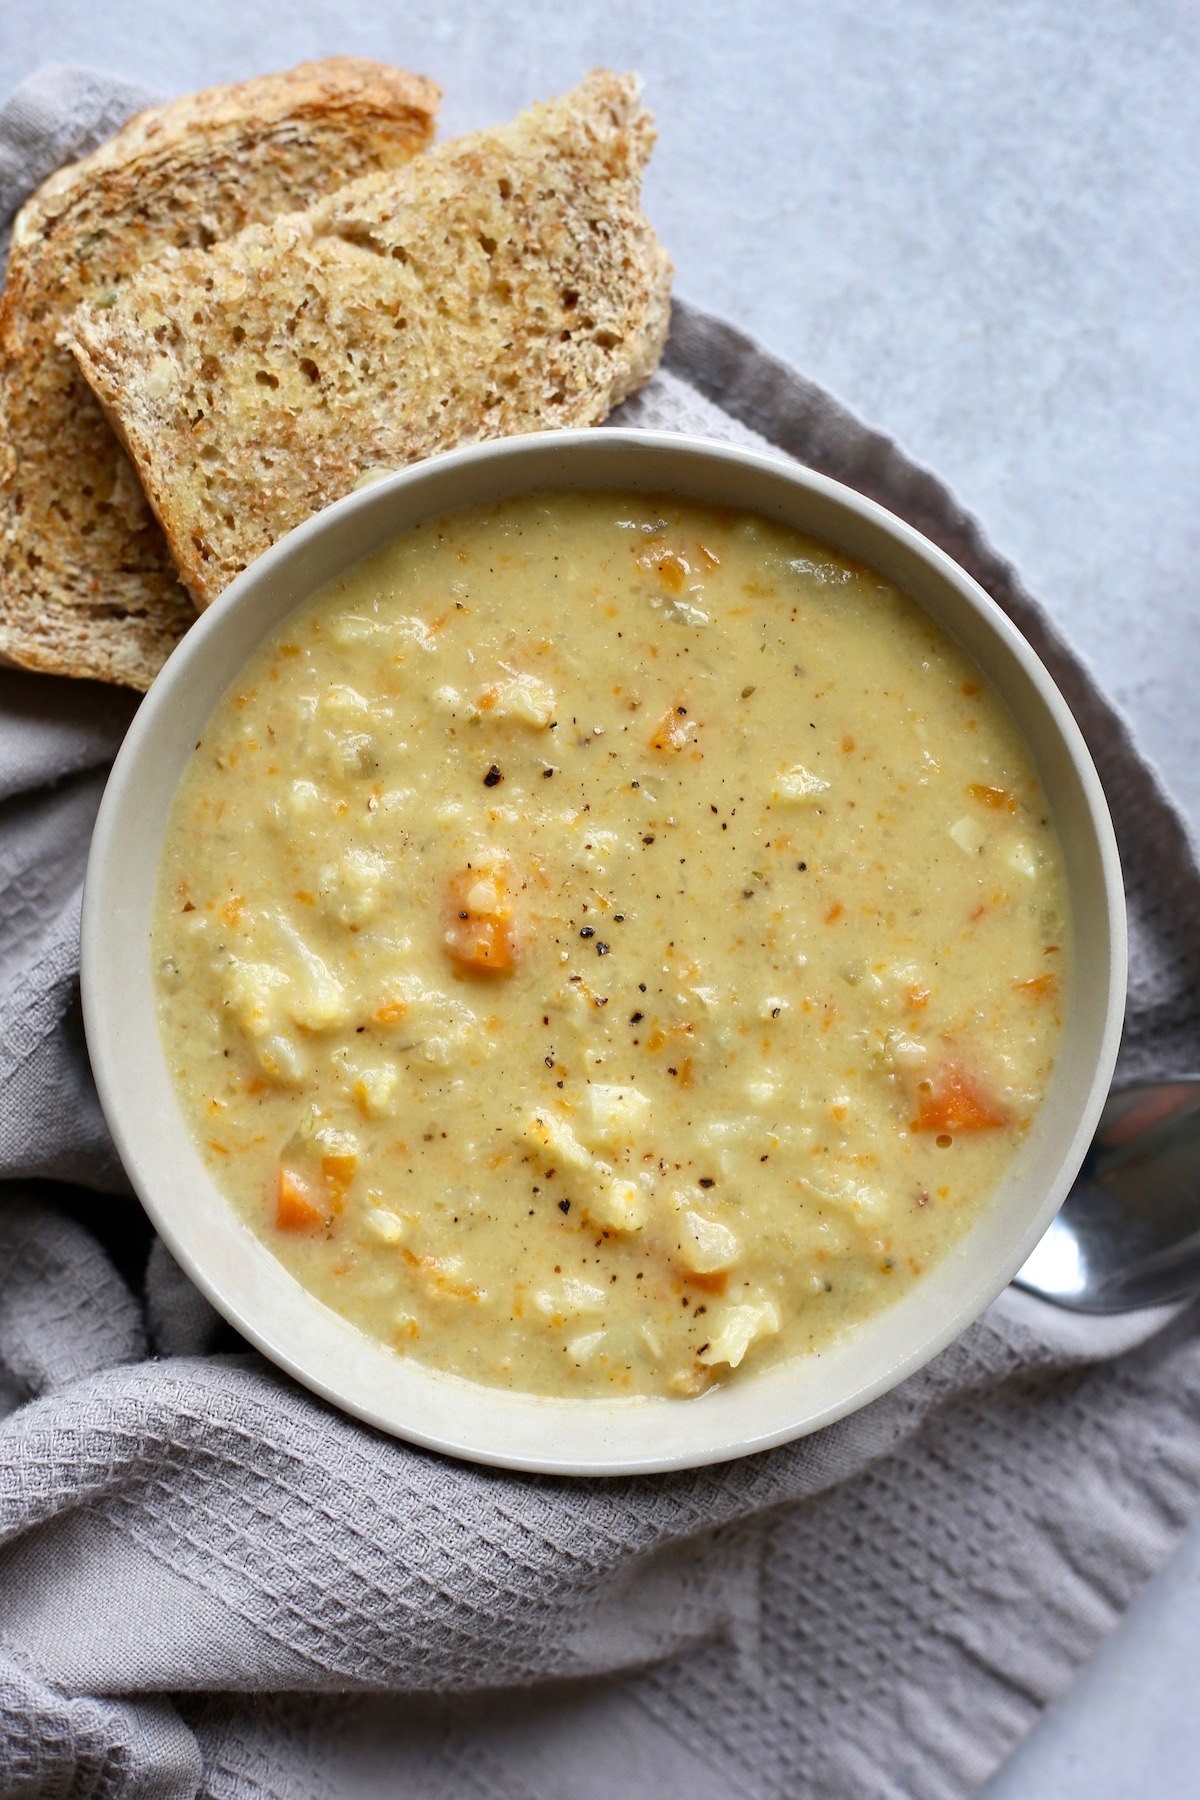
Is Chowder Gluten Free?
Chowder is a thicker type of soup that often contains milk or cream. To make chowder rich and creamy without milk or cream, you often start by making a roux which involves flour.
In most cases, chowder sold at a restaurant isn't gluten-free. However, if you make it at home, it's really easy to make it gluten-free. Simply use a gluten-free all purpose flour!
For instance, in this recipe, I recommend using a 1-to-1 gluten-free flour blend in order to make this cauliflower chowder completely gluten free.
My Favorite Kitchen Appliances for Making Soup
I feel like soup can be as easy or as hard to make as you want. You can simply use one pot and call it a day, or you can use various kitchen appliances and gadgets to make fancier, more elaborate soups.
Below I'll share some of my favorite small (and big!) kitchen appliances to use when it comes to making soup.
- Immersion Blender: This is a smaller kitchen gadget that I wish I had purchased earlier. It makes blending soups so much easier than having to transfer the soup to a blender.
- Silcone Baking Mats: Whenever I need to roast vegetables (like in this recipe!) I love to use silicone baking mats to keep the vegetables from sticking to the pan.
- High Speed Blender (like the Vitamix!): I love to make creamy soups by making my own, homemade cashew cream. To make cashew cream, you simply blend soaked cashews with water. While you don't technically need a high speed blender to do this, I find they produce a super smooth cream to stir into soups.
- Lemon Squeezer: A squeeze of lemon can often take a soup from bland and boring to amazing. I highly recommend this lemon squeezer!
How to Store Leftover Soup
I love making large batches of soup because I find that the soup gets more flavorful the longer it sits in the fridge (well, up to a certain point)! Below I'll share how to store any leftover soup...that is if you have any!
- Fridge: To store leftover soup in the fridge, simply allow it to cool completely before placing it in an airtight container and storing it in the fridge for 2-3 days.
- Freezer: To freeze leftover soup, allow it to cool before placing it in a freezer-safe container and storing it in the freezer. To thaw, simply let it sit in the fridge overnight before warming
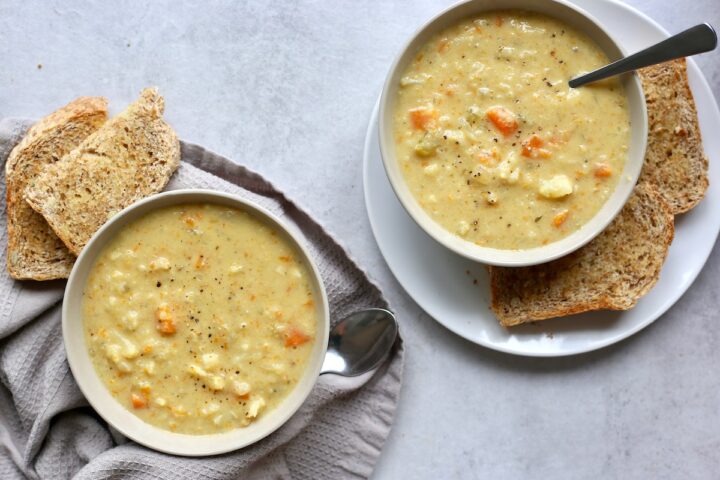
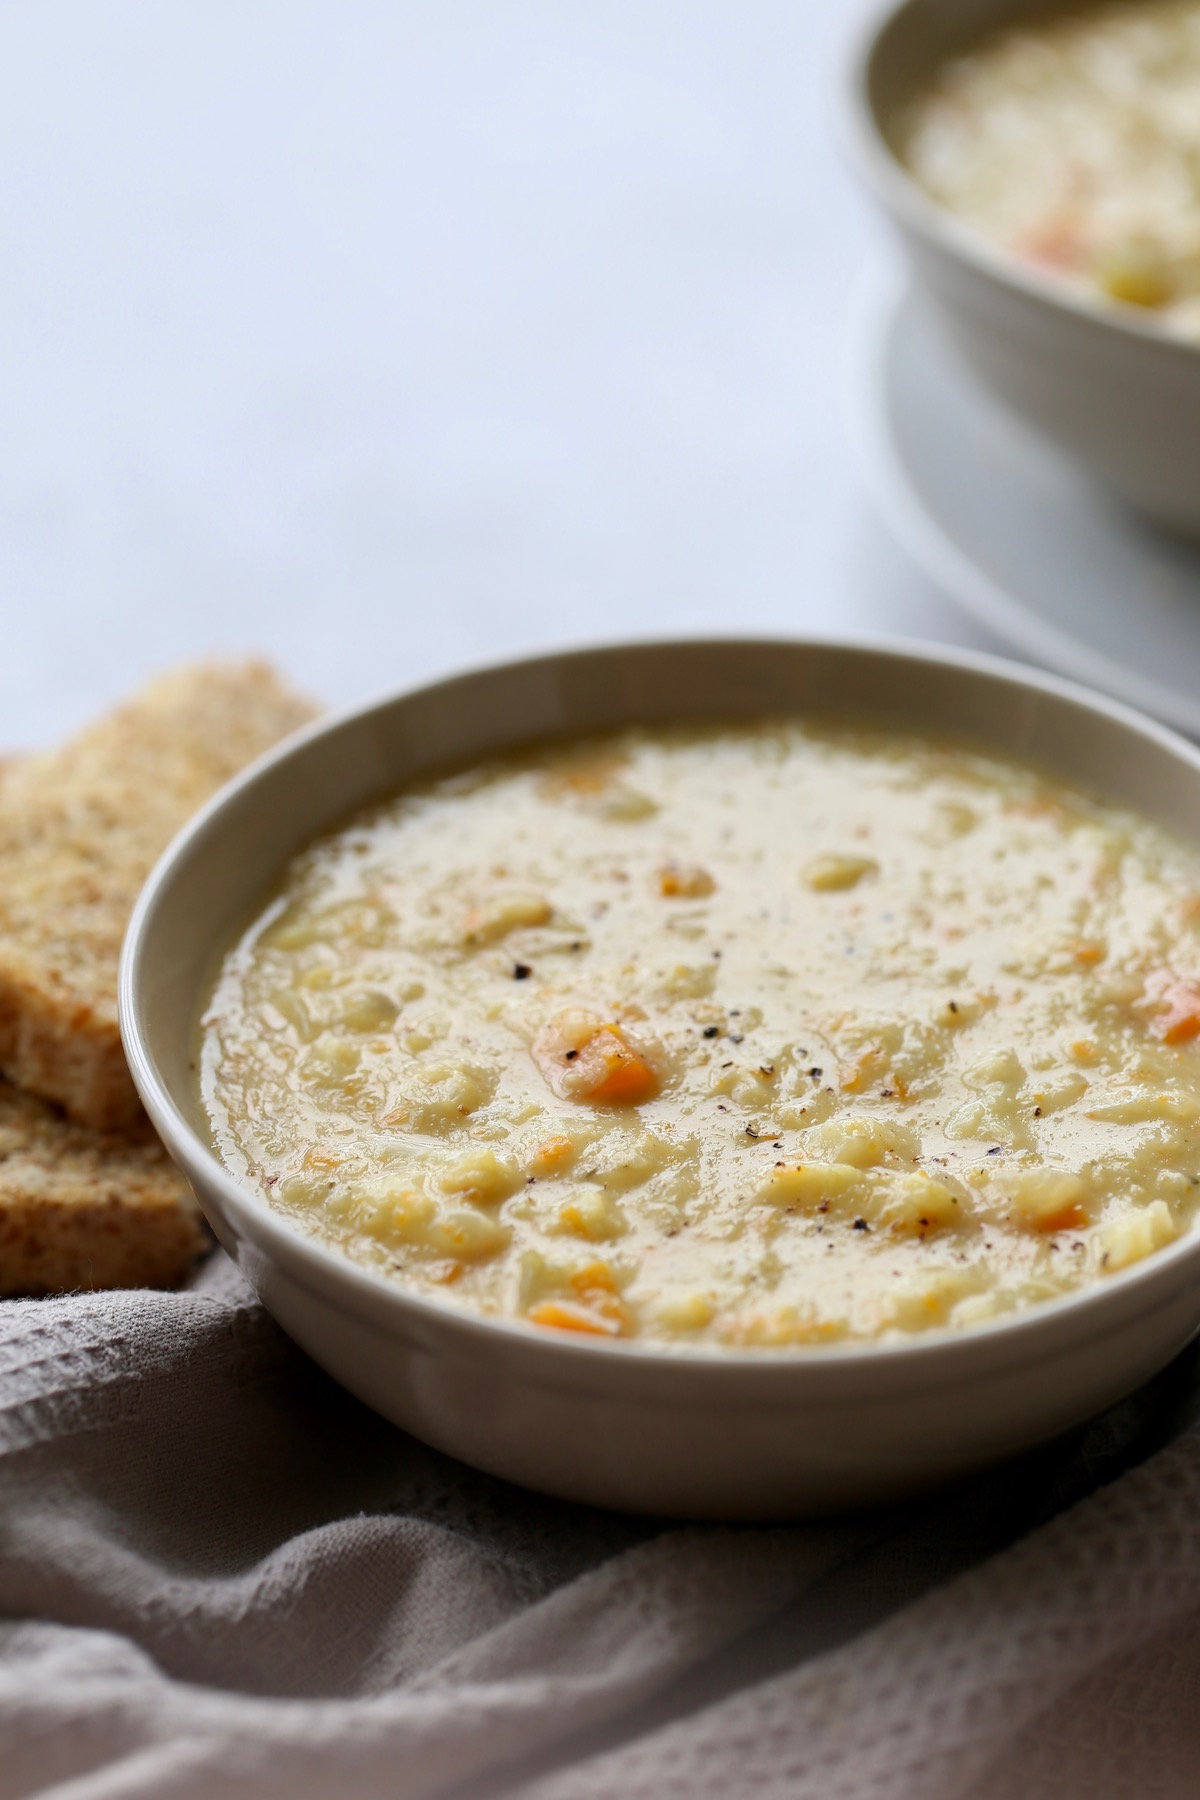
📖 Recipe

Roasted Cauliflower Chowder
Full of hearty veggies and soothing broth, this vegan Roasted Cauliflower Chowder recipe will be sure to keep you warm and satisfied this winter season!
Ingredients
- 1 head cauliflower
- 3 cloves garlic
- 1 tablespoon olive oil
- 3 tablespoons vegan butter
- 1 onion chopped
- 2 carrots chopped
- 2 celery stalks chopped
- ½ teaspoon thyme
- 1 bay leaf
- ¼ cup flour gluten-free if necessary
- 4 cups vegetable broth
- 1 ½ cup unsweetened non-dairy milk
- ½ cup nutritional yeast
- Salt and pepper
Instructions
- Start by preheating your oven to 400 °F and lining a baking sheet with a silicone baking mat or parchment paper or greasing it with cooking spray.
- Roughly chop up the head of cauliflower into florets and spread them onto your baking sheet. Add on the cloves of garlic and drizzle everything with about a tablespoon of olive oil. Stir to coat. Roast the cauliflower and garlic for about 20-25 minutes, stirring halfway through, or until soft and slightly charred.
- While the cauliflower is roasting, place a large pot over medium heat. Melt the vegan butter and sauté the onion until soft and translucent, about 2-3 minutes.
- Add in the chopped up carrots and celery and cook for another 5 minutes, stirring occasionally.
- Once the cauliflower and garlic are done roasting, roughly chop up the cauliflower and mince the roasted garlic cloves. Add them, along with the bay leaf and dried thyme, to the pot.
- Sprinkle the flour over top of the vegetables and cook until the flour disappears. Pour in the vegetable broth and stir everything together. Bring the mixture to a simmer and allow everything to simmer for 10 minutes.
- Lastly stir in the non-dairy milk and nutritional yeast and season liberally with salt and freshly ground black pepper. I've found this soup can use a good bit of salt so don't be shy!
- If desired, you can use an immersion blender to blend part of the soup so that it's more creamy and smooth.
Notes
Serve warm with freshly ground black pepper and some crusty bread if desired!
Nutrition
Calories: 171kcalCarbohydrates: 19gProtein: 6gFat: 9gSaturated Fat: 2gPolyunsaturated Fat: 2gMonounsaturated Fat: 4gTrans Fat: 0.03gSodium: 746mgPotassium: 553mgFiber: 4gSugar: 6gVitamin A: 4245IUVitamin C: 54mgCalcium: 119mgIron: 1mg
Tried this recipe?Let me know how it was!
Homemade Vegan Nutella (5 Ingredients + Easy!)
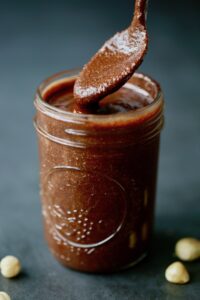
Dairy-free and sweetened with coconut sugar, you're going to want this Homemade Vegan Nutella on hand at all times! It's rich, creamy and only requires 5 ingredients to make!
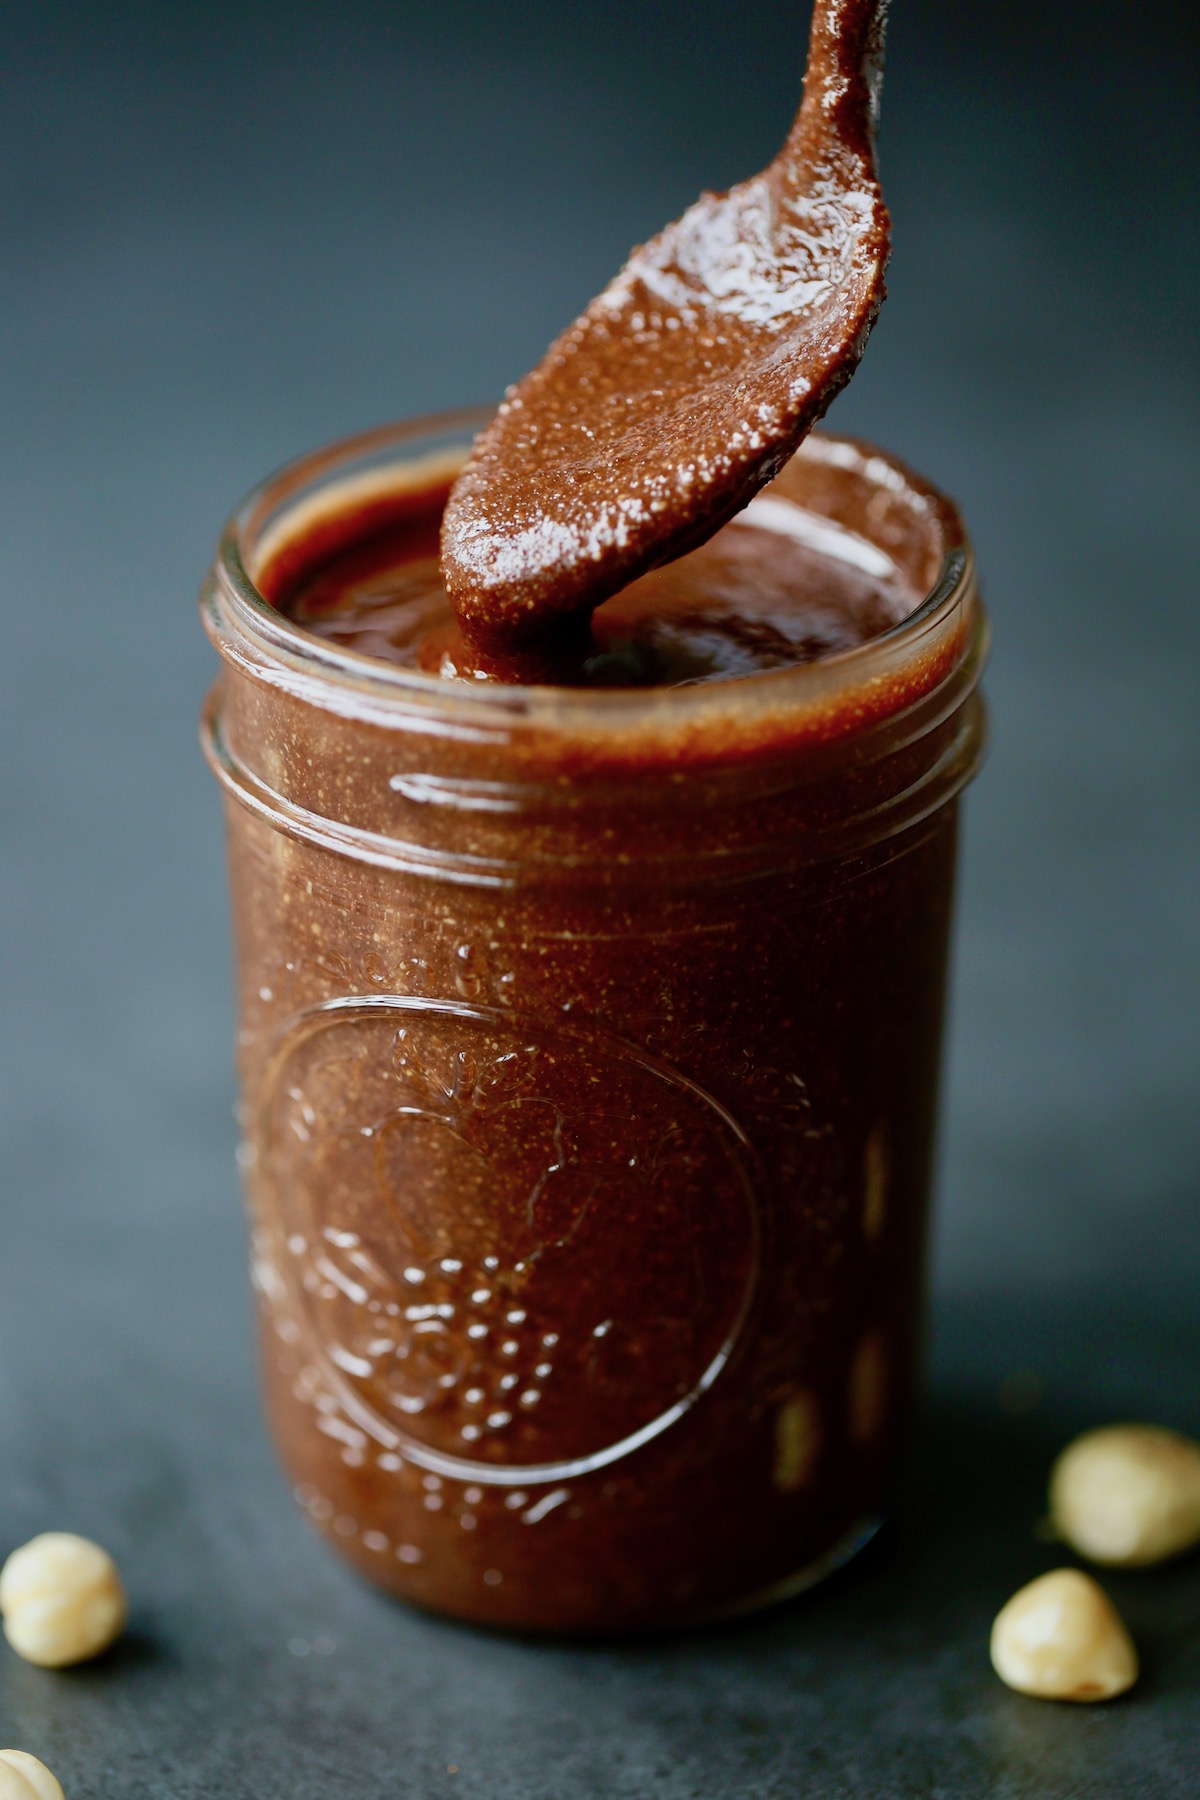
Also Featured In
This recipe is also featured in the following vegan recipe roundups:
If you've haven't already figured it out, our family is OBSESSED with homemade nut butter.
Store-bought nut butters are good too, but homemade, drippy nut butter is one of my favorite things in the to make and eat! We are currently obsessed with this decadent pecan butter.
I've shared a fairly detailed post on How to Make Homemade Peanut Butter, including three different flavor variations (classic, cinnamon and chocolate).
But today I'm sharing with you how to make homemade vegan Nutella.
It couldn't be easier to make, so let's jump right in!
Ingredients You'll Need for Homemade Nutella
This Homemade Vegan Nutella recipe requires only 4 (sometimes 5) ingredients to make and is ready to be enjoyed in under a half an hour. Yay!
All you'll need to make this Nutella are the following 5 ingredients:
- Raw hazelnuts, no skin
- Sea salt
- Coconut sugar (or any dry sugar you desire)
- Cocoa powder (or cacao powder)
- Coconut oil (optional!)
How to Make Homemade Nutella with Step-by-Step Instructions
You'll could be enjoying this Homemade Vegan Nutella in under 30 minutes if you follow these simple, step-by-step instructions!
- Step 1: Preheat your oven to 350F/175C and spread the raw hazelnuts onto a baking sheet.
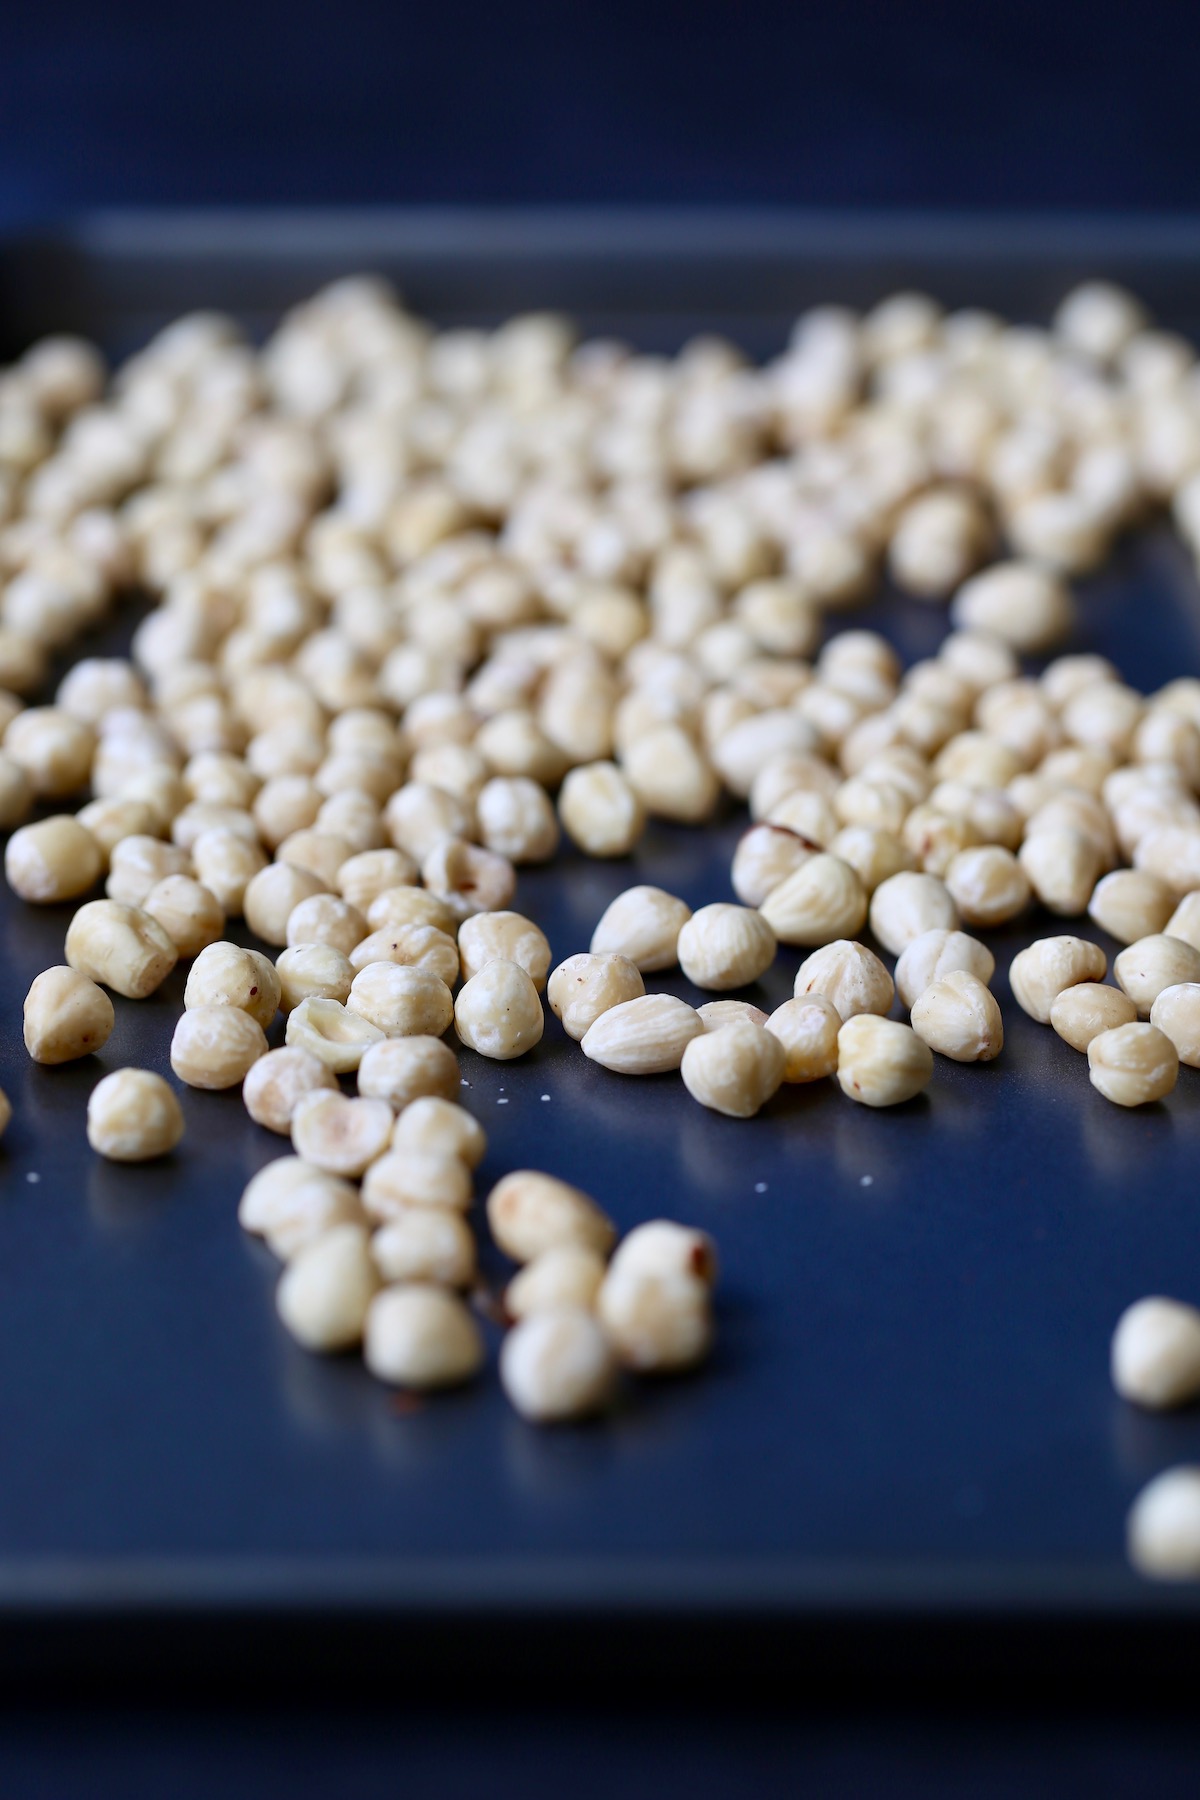
- Step 2: Roast the hazelnuts for 7-15 minutes or until golden brown and fragrant. Remove them from the oven and allow them to cool for a few minutes.
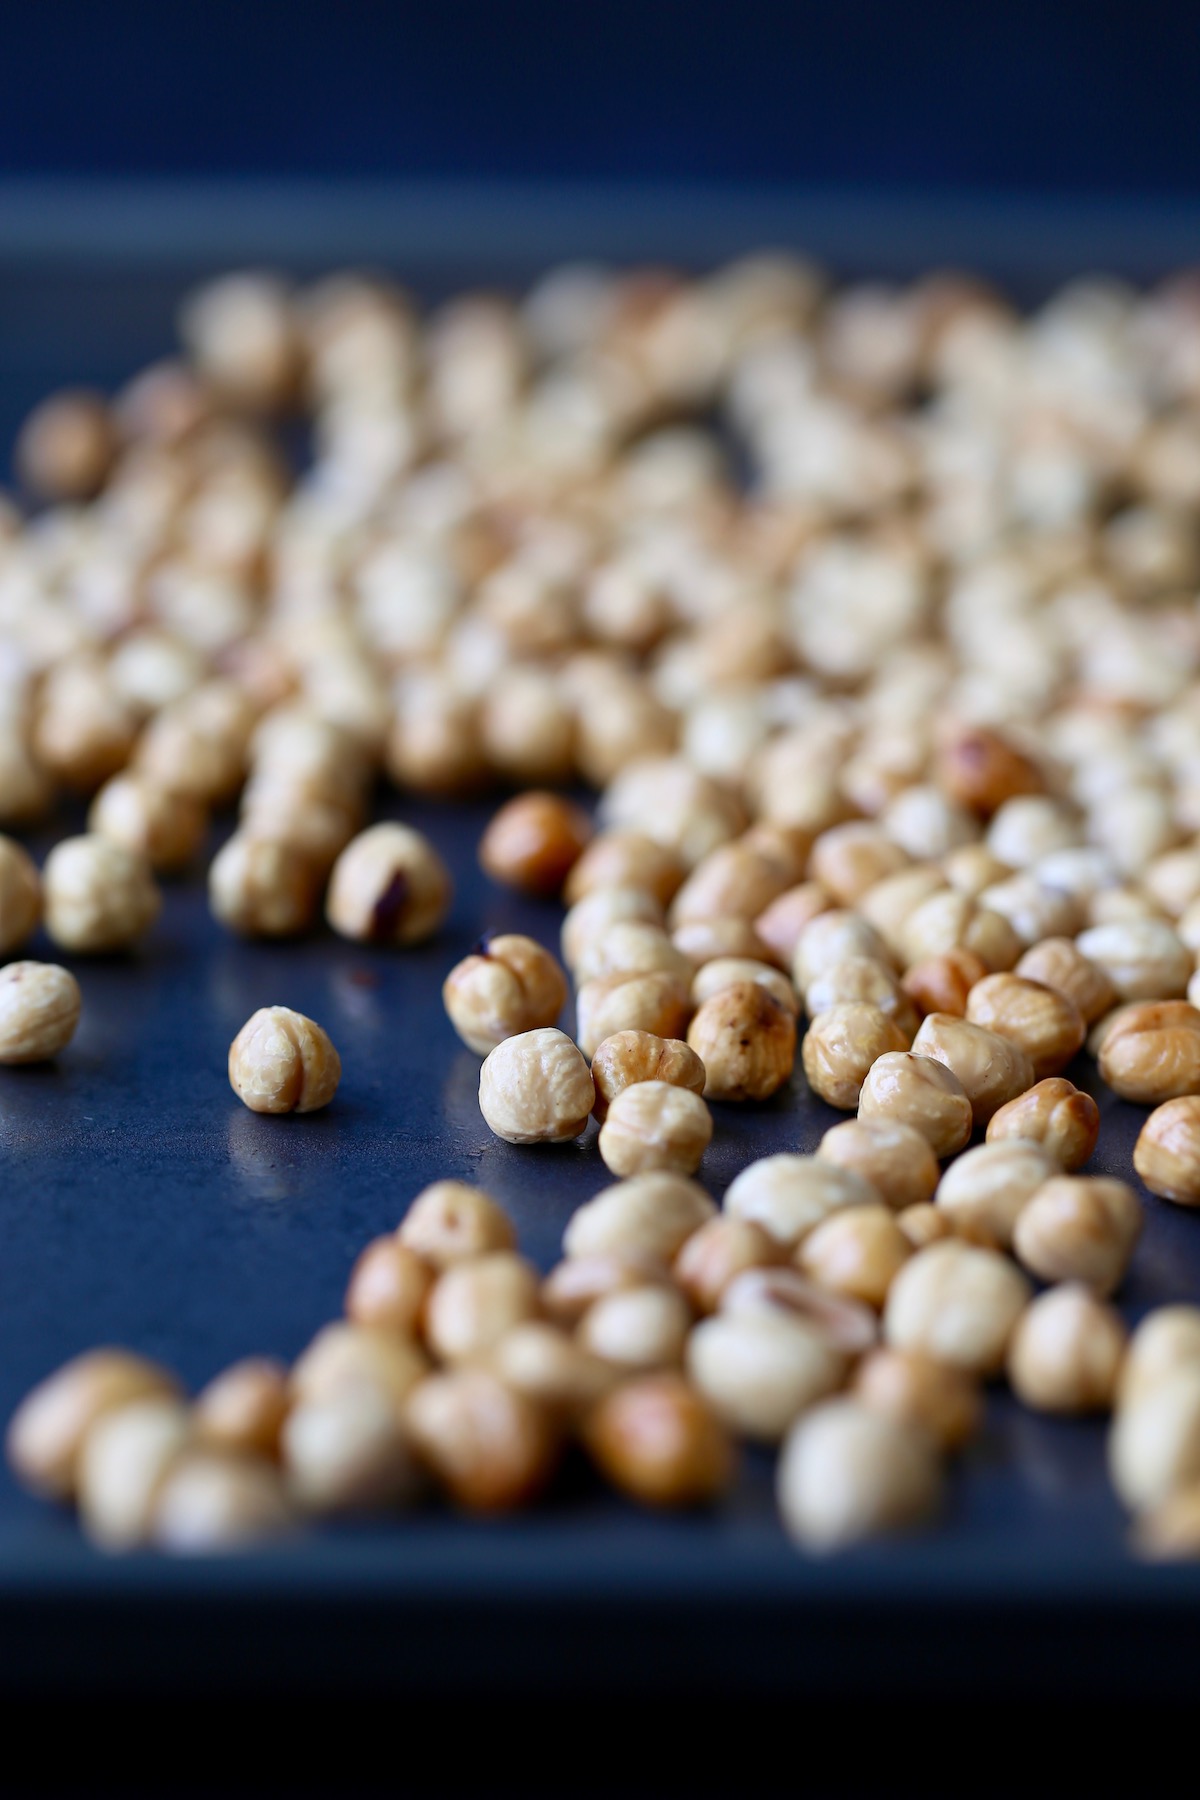
- Step 3: Place the roasted hazelnuts into your food processor and process them until a smooth nut butter forms.
- Step 4: Add in the coconut sugar and cacao powder and process again until everything is smooth and well combined.
- Step 5: If the Nutella is a little thick, you can stream in 1-2 teaspoons of coconut oil to make it extra smooth and runny.
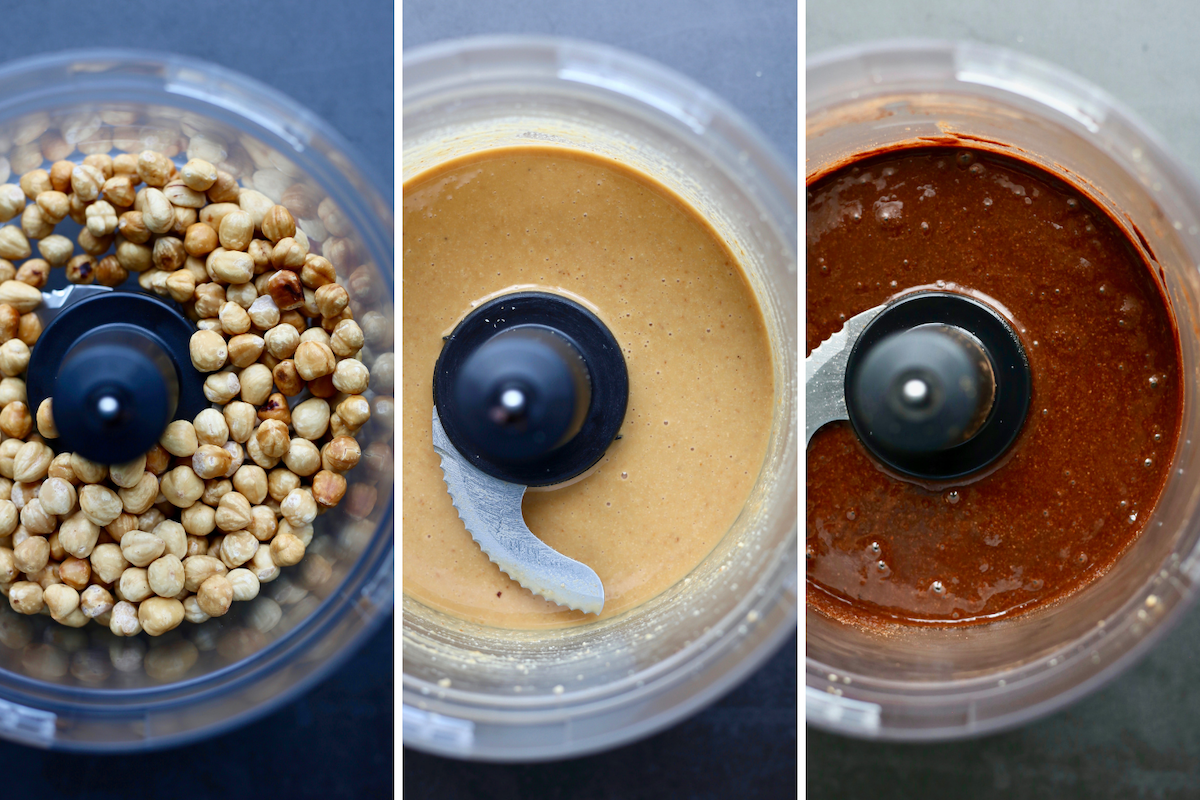
- Step 6: Pour the Nutella into a sealable jar, allow it to cool and then seal it and store it in the fridge for 1-2 weeks...if it lasts that long!
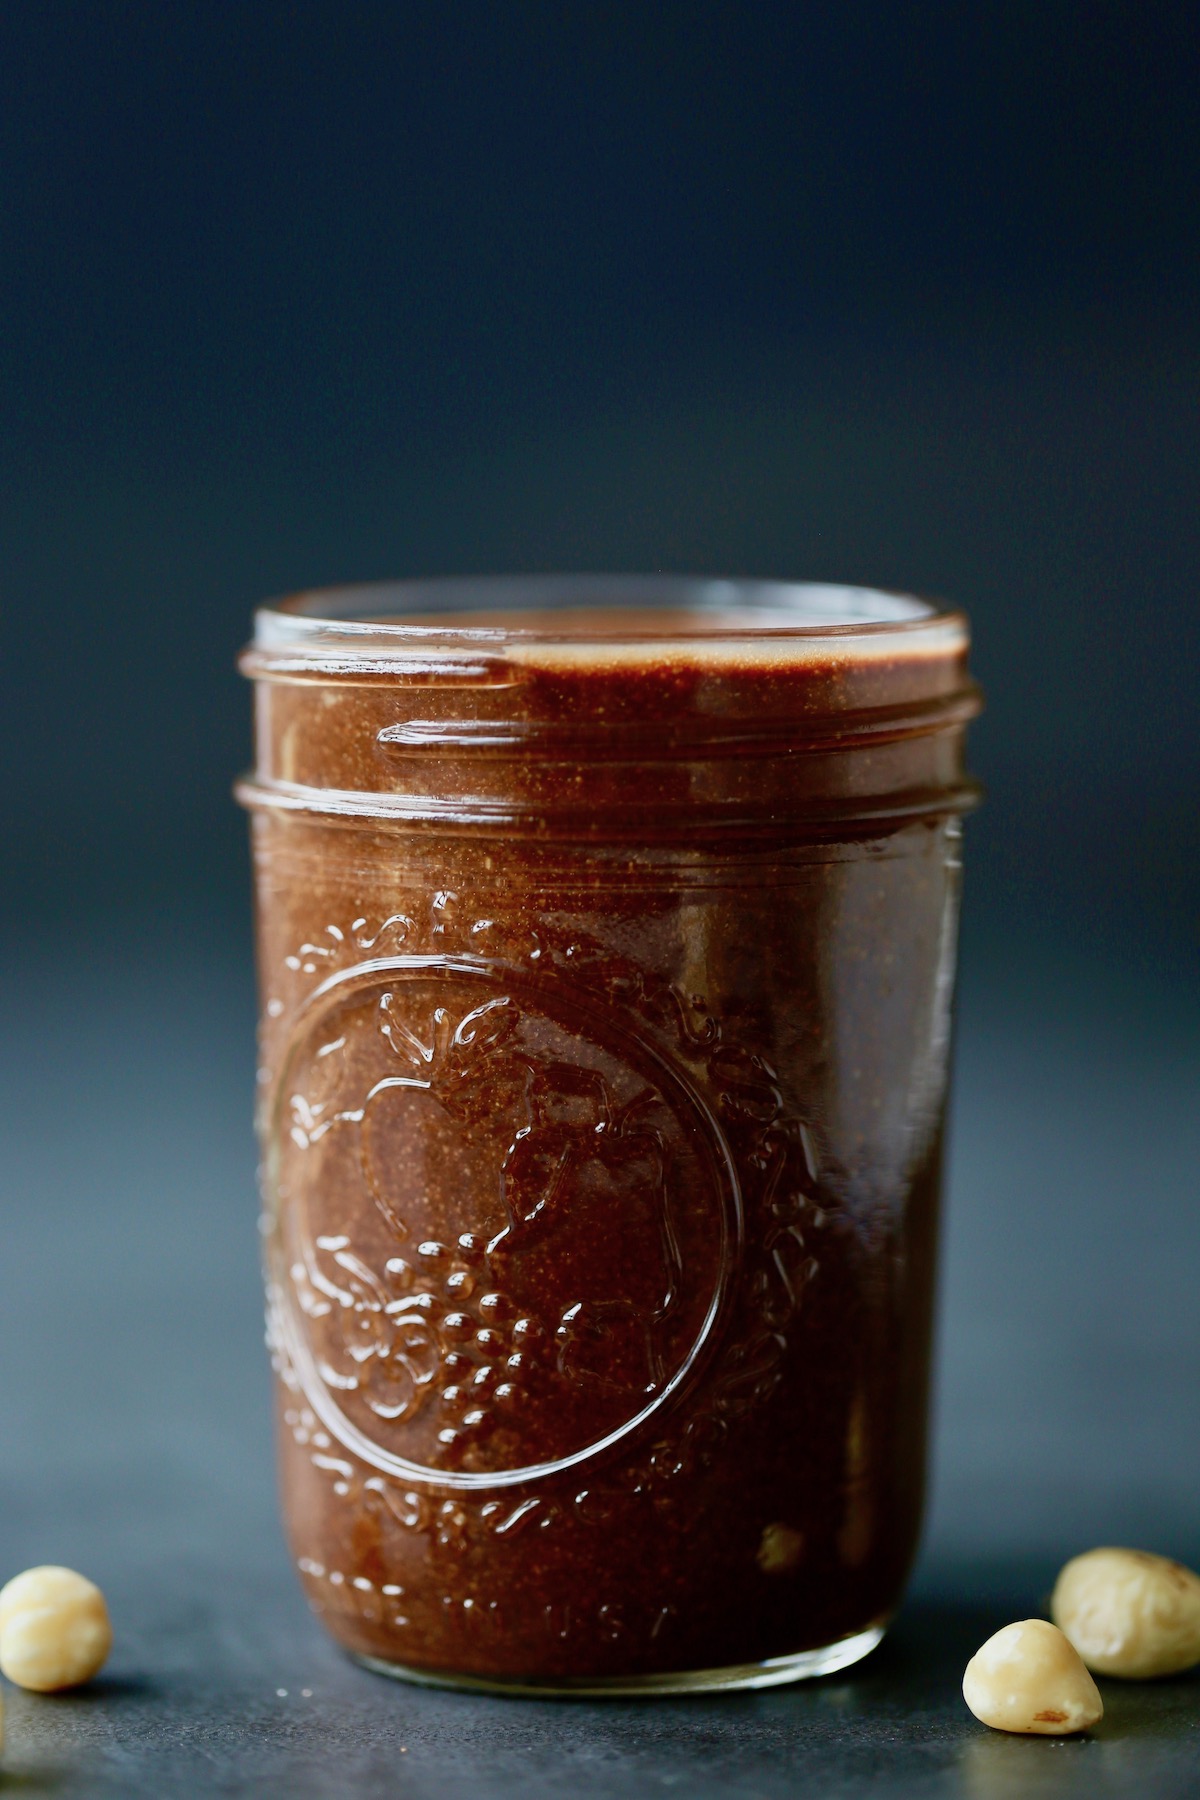
Is Nutella Vegan?
Classic, store-bought Nutella is not vegan as it contains milk.
However, today's homemade Nutella recipe is in fact vegan, dairy-free and super easy to make!
If you're looking for some store-bought dairy-free and vegan Nutella, then check out Justin's Chocolate Hazelnut and Almond Butter or Nutiva's Vegan Hazelnut Spread.
Is Nutella Gluten Free?
Thankfully for everyone who is allergic to gluten or gluten intolerant, Nutella is gluten-free!
How to Store Homemade Nutella
While I doubt your homemade Nutella will last long enough to go bad, I recommend storing it in an airtight container or jar in the fridge for up to 2 weeks, if not longer.
If you store it at room temperature, the nuts could go rancid, so refrigerating it is your best option!
Equipment You'll Need to Make Homemade Nutella (or Any Nut Butters!)
When it comes to making homemade nut butters, you'll need a few key kitchen appliances and some basic kitchen equipment.
I'll list out what I use to make homemade nut butter below:
- Oven: An oven is how you'll roast the nuts to bring out more of their natural oils and flavor!
- Baking sheet: You'll need to place the nuts onto a baking sheet in order to roast them in the oven.
- Food processor (or high speed blender): While I high speed blender can work, I definitely like to use a food processor when it comes to making homemade nut butters.
- Measuring cups and spoons: In order to get the perfect taste, I recommend using measuring cups and spoons to measure out the ingredients.
- Rubber spatula: A rubber spatula works best when trying to get all of the nut butter out of your food processor.
- Sealable jar or container: You'll need a jar or Tupperware with a lid to store the Nutella in once it's made.
I'd love to know if you give this Homemade Vegan Nutella recipe a try and what you think! If you enjoy it, you'll also love my Healthy Nutella Energy Bites!
Please let me know in the comments below and by leaving a 5 star review. You can do that by clicking on the stars in the recipe card.
Be sure to share the recipe with your friends and family as well! OR you can give it as a gift this holiday season to any nut butter lovers you know.
📖 Recipe
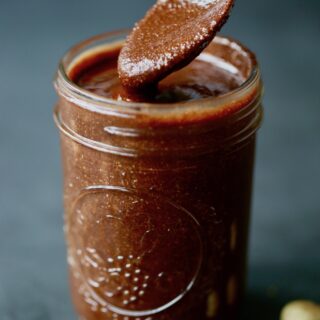
Homemade Vegan Nutella
Dairy-free and sweetened with coconut sugar, you're going to want this Homemade Vegan Nutella on hand at all times! It's rich, creamy and only requires 5 ingredients to make!
Equipment
Ingredients
- 2 cups raw hazelnuts no skin
- ½ teaspoon fine sea salt
- ½ cup coconut sugar
- ⅓ cup cocoa powder
Optional
- 1-2 teaspoons coconut oil
Instructions
- Preheat the oven to 350 °F and spread the raw hazelnuts onto a baking sheet.
- Roast the hazelnuts for 7-15 minutes or until fragrant and slightly golden. Watch them carefully towards the end to make sure they don't burn. Allow the roasted hazelnuts to cool for a few minutes.
- Place the roasted hazelnuts and sea salt into your food processor and process on high until smooth, 5-10 minutes.
- Add in the coconut sugar and cocoa powder and process again until well combined and smooth.
- If necessary, stream in the coconut oil to achieve an even smoother Nutella.
- Pour the Nutella into a jar with a lid and allow it to cool before sealing it and storing it in the fridge for 1-2 weeks.
Notes
While I doubt your homemade Nutella will last long enough to go bad, I recommend storing it in an airtight container or jar in the fridge for up to 2 weeks, if not longer.
If you store it at room temperature, the nuts could go rancid, so refrigerating it is your best option!
Nutrition
Calories: 123kcalCarbohydrates: 10gProtein: 3gFat: 9gSaturated Fat: 1gPolyunsaturated Fat: 8gSodium: 71mgFiber: 2gSugar: 7g
Tried this recipe?Let me know how it was!
5 Ingredient Apple Dump Cake (Vegan!)

Made with only 5 ingredients--many of which of pantry staples--this simple and delicious vegan Apple Dump Cake will be your go-to recipe whenever you're in need of a quick dessert.
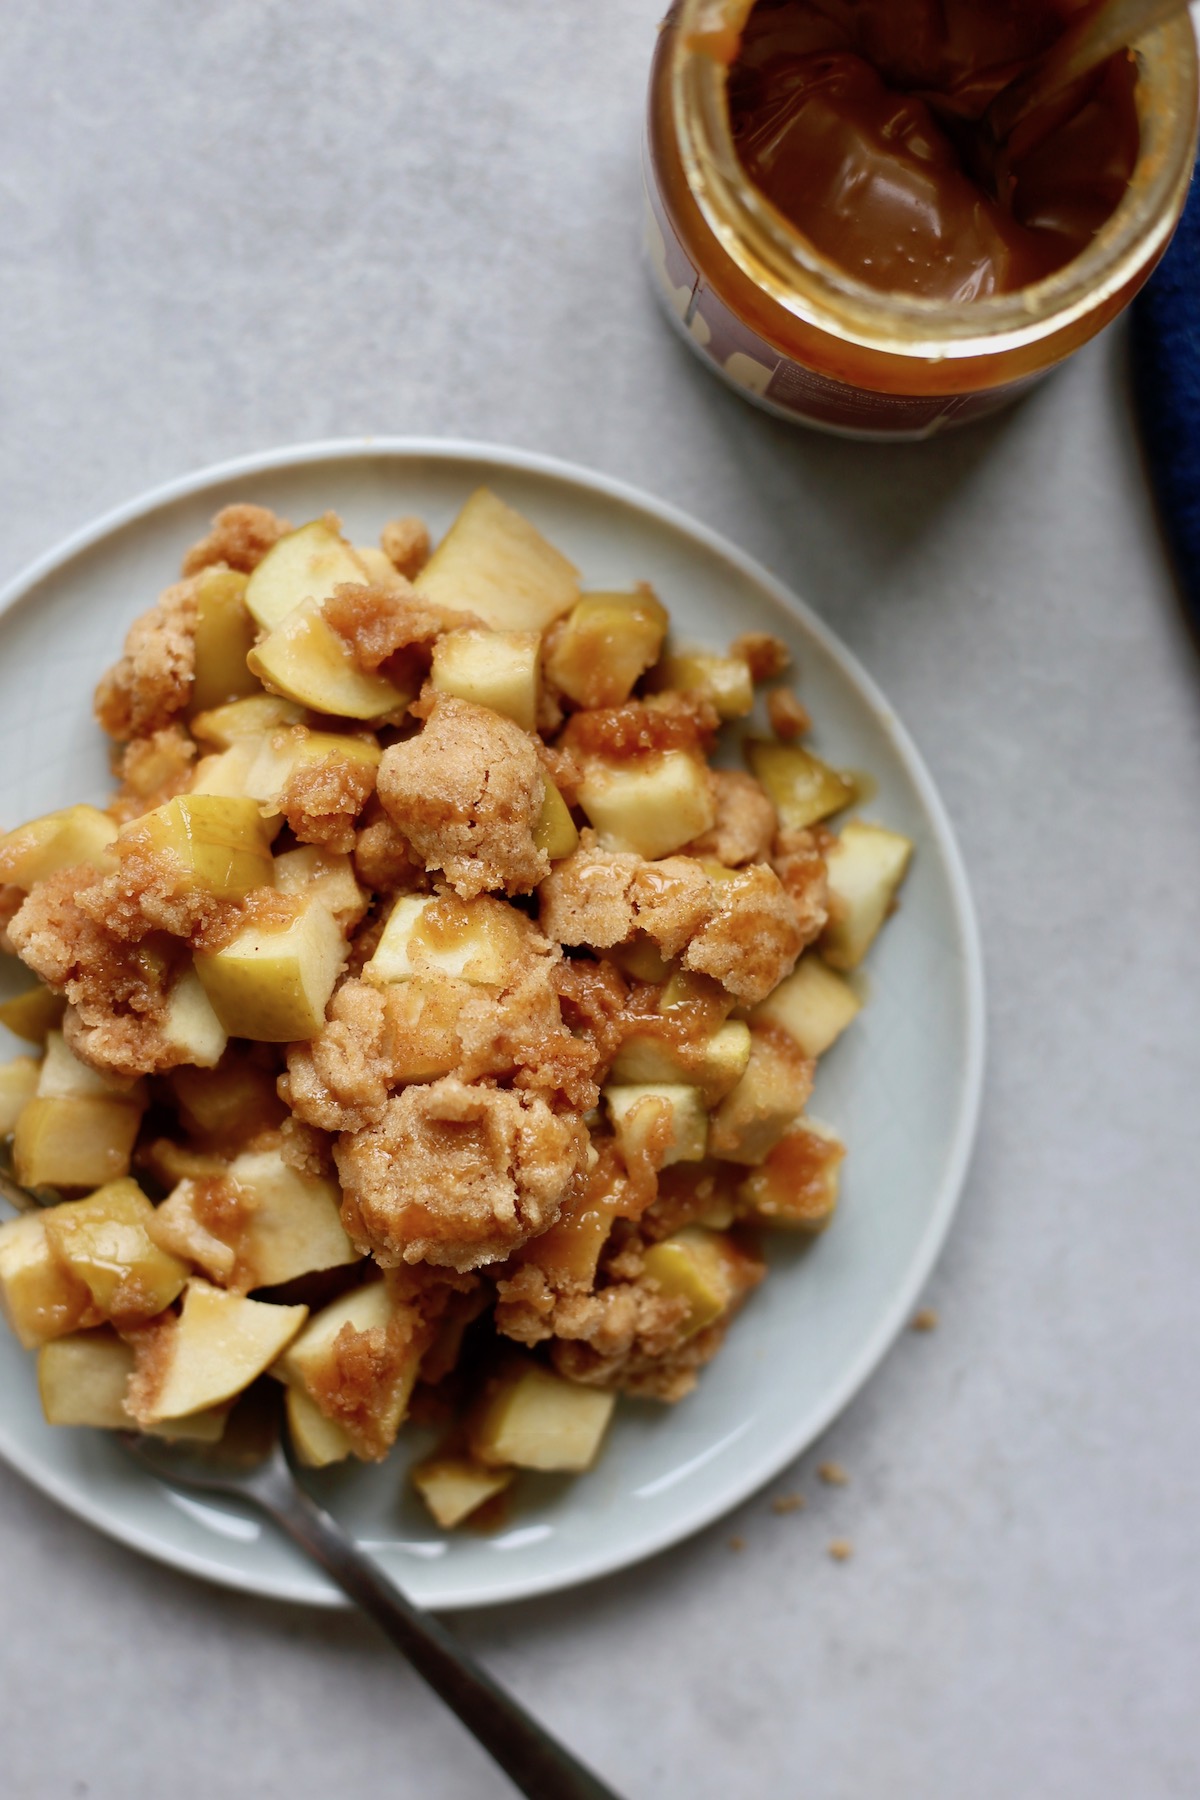
We all wish we could whip up completely homemade desserts where every element is made from scratch. Yet, oftentimes that's not realistic.
That's why I want to share more simple recipes like this vegan Apple Dump Cake.
I've shared a few other simple apple dessert recipes on the blog including these Easy Vegan Apple Turnovers and this healthy Vegan Apple Crisp.
But the main thing I love about this apple dump cake is that is uses a store-bought cake mix, making it incredibly simple to put together.
If you're ever in a pinch and need a quick dessert, definitely give this 5 ingredient vegan apple dump cake a shot! Every time I've served it to my friends and family, the entire batch is gobbled up in minutes!
Ingredients You'll Need for Apple Dump Cake
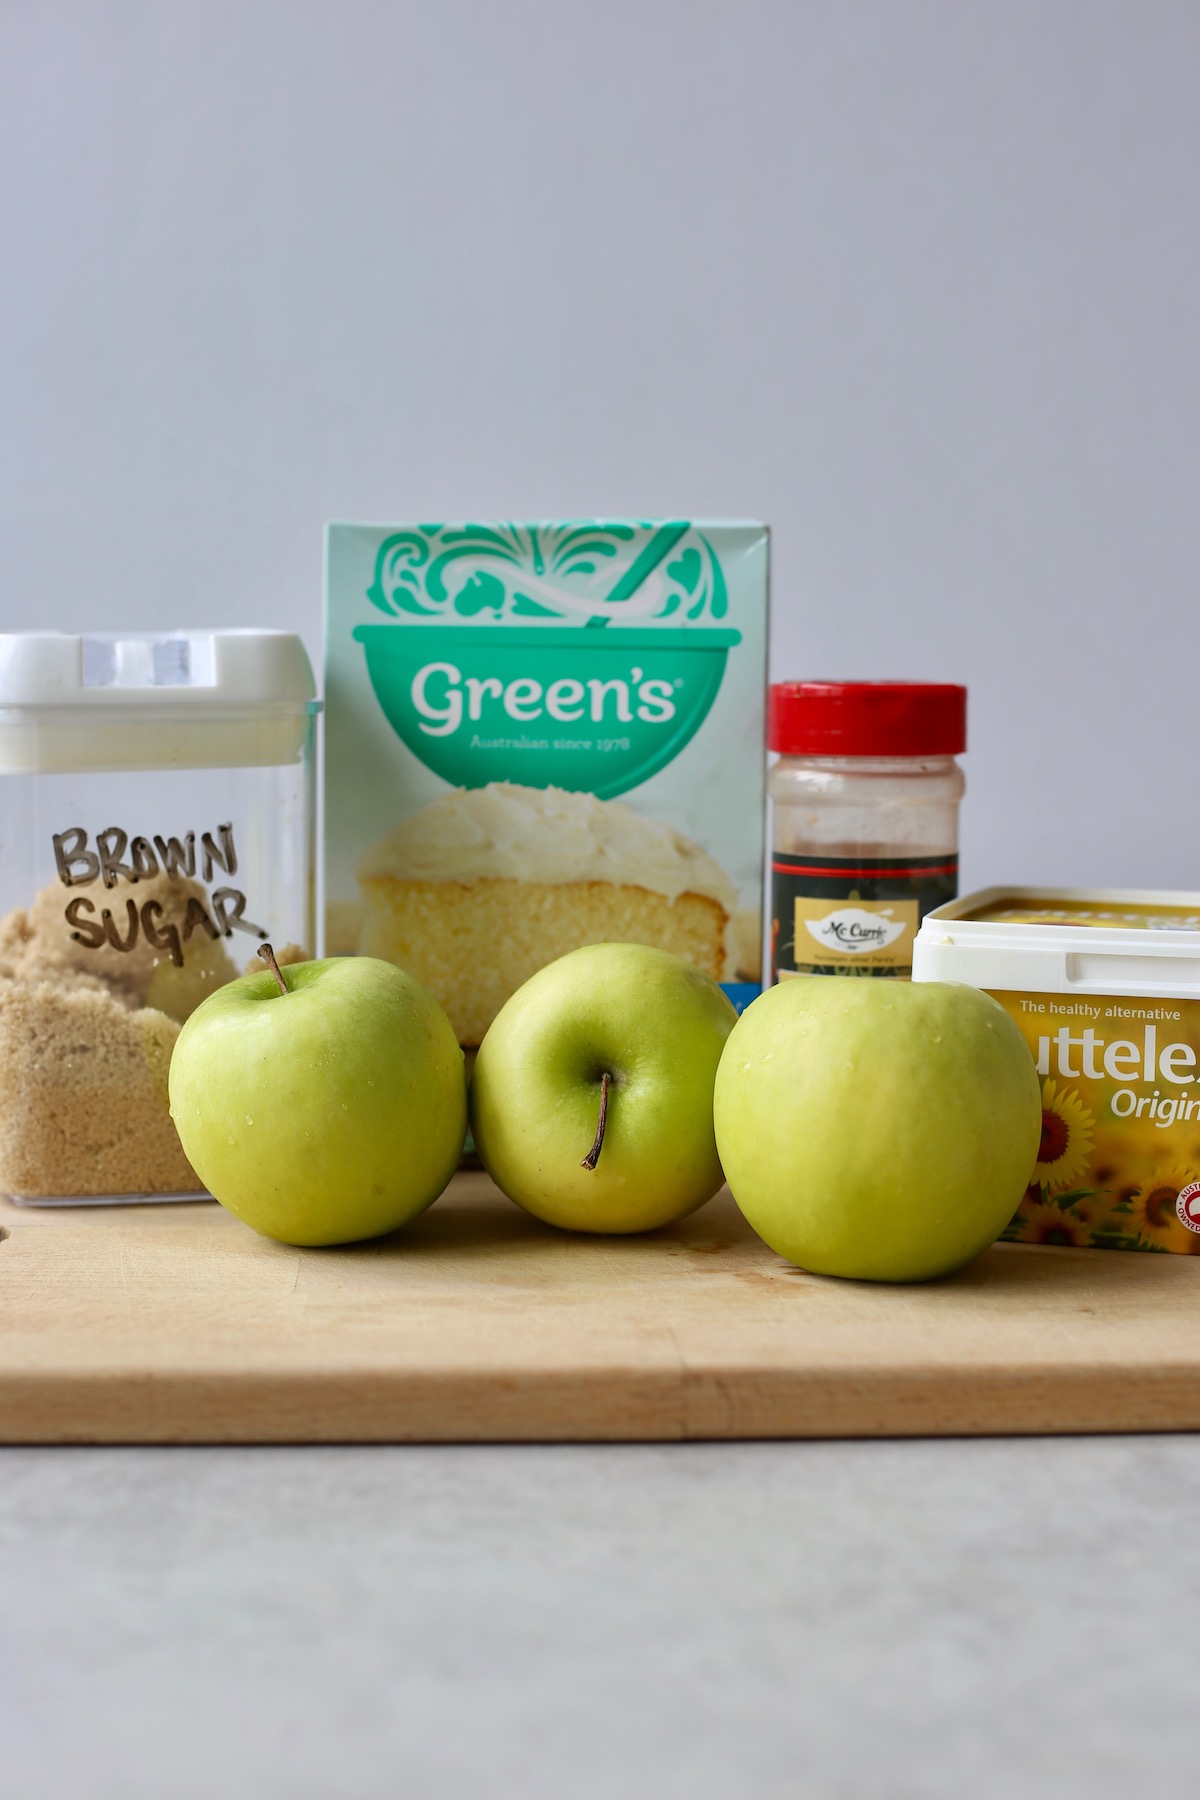
Like the title of this recipe already states, you only need 5 ingredients to make this apple dump cake. What's even better is that most of the ingredients are pantry staples! Below are listed out the five ingredients you'll need to make this apple dump cake.
- Green apples (or whatever apples you desire)
- Brown sugar
- Cinnamon
- 1 box yellow/vanilla cake mix
- Vegan butter
How to Make Apple Dump Cake (with Step-by-Step Instructions)
It couldn't be easier to make apple dump cake. Simply follow the steps listed out below:
- Step 1: Preheat your oven to 350F and grease a 9x13 inch baking dish with cooking spray. Set it aside.
- Step 2: If desired, peel your apples. I like to leave the skin on mine! Once peeled, core and chop up the apples into bite-size pieces.
- Step 3: Place the chopped apples into your greased baking dish, sprinkle over the brown sugar and cinnamon and stir everything well to combine. Spread the apples out into an even layer.
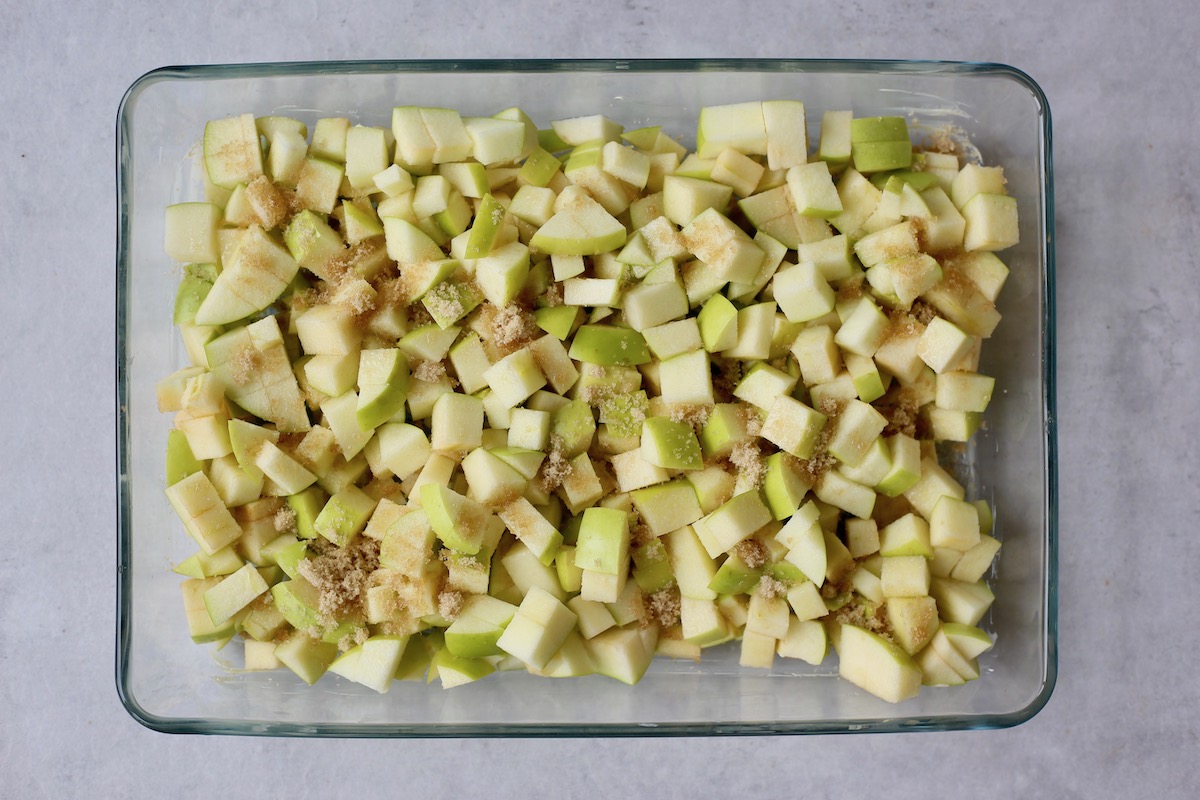
- Step 4: Pour out the cake mix into a separate mixing bowl and add in the vegan butter. Use your hands to combine the cake mix and butter until a wet, crumbly mixture forms. See the picture below.
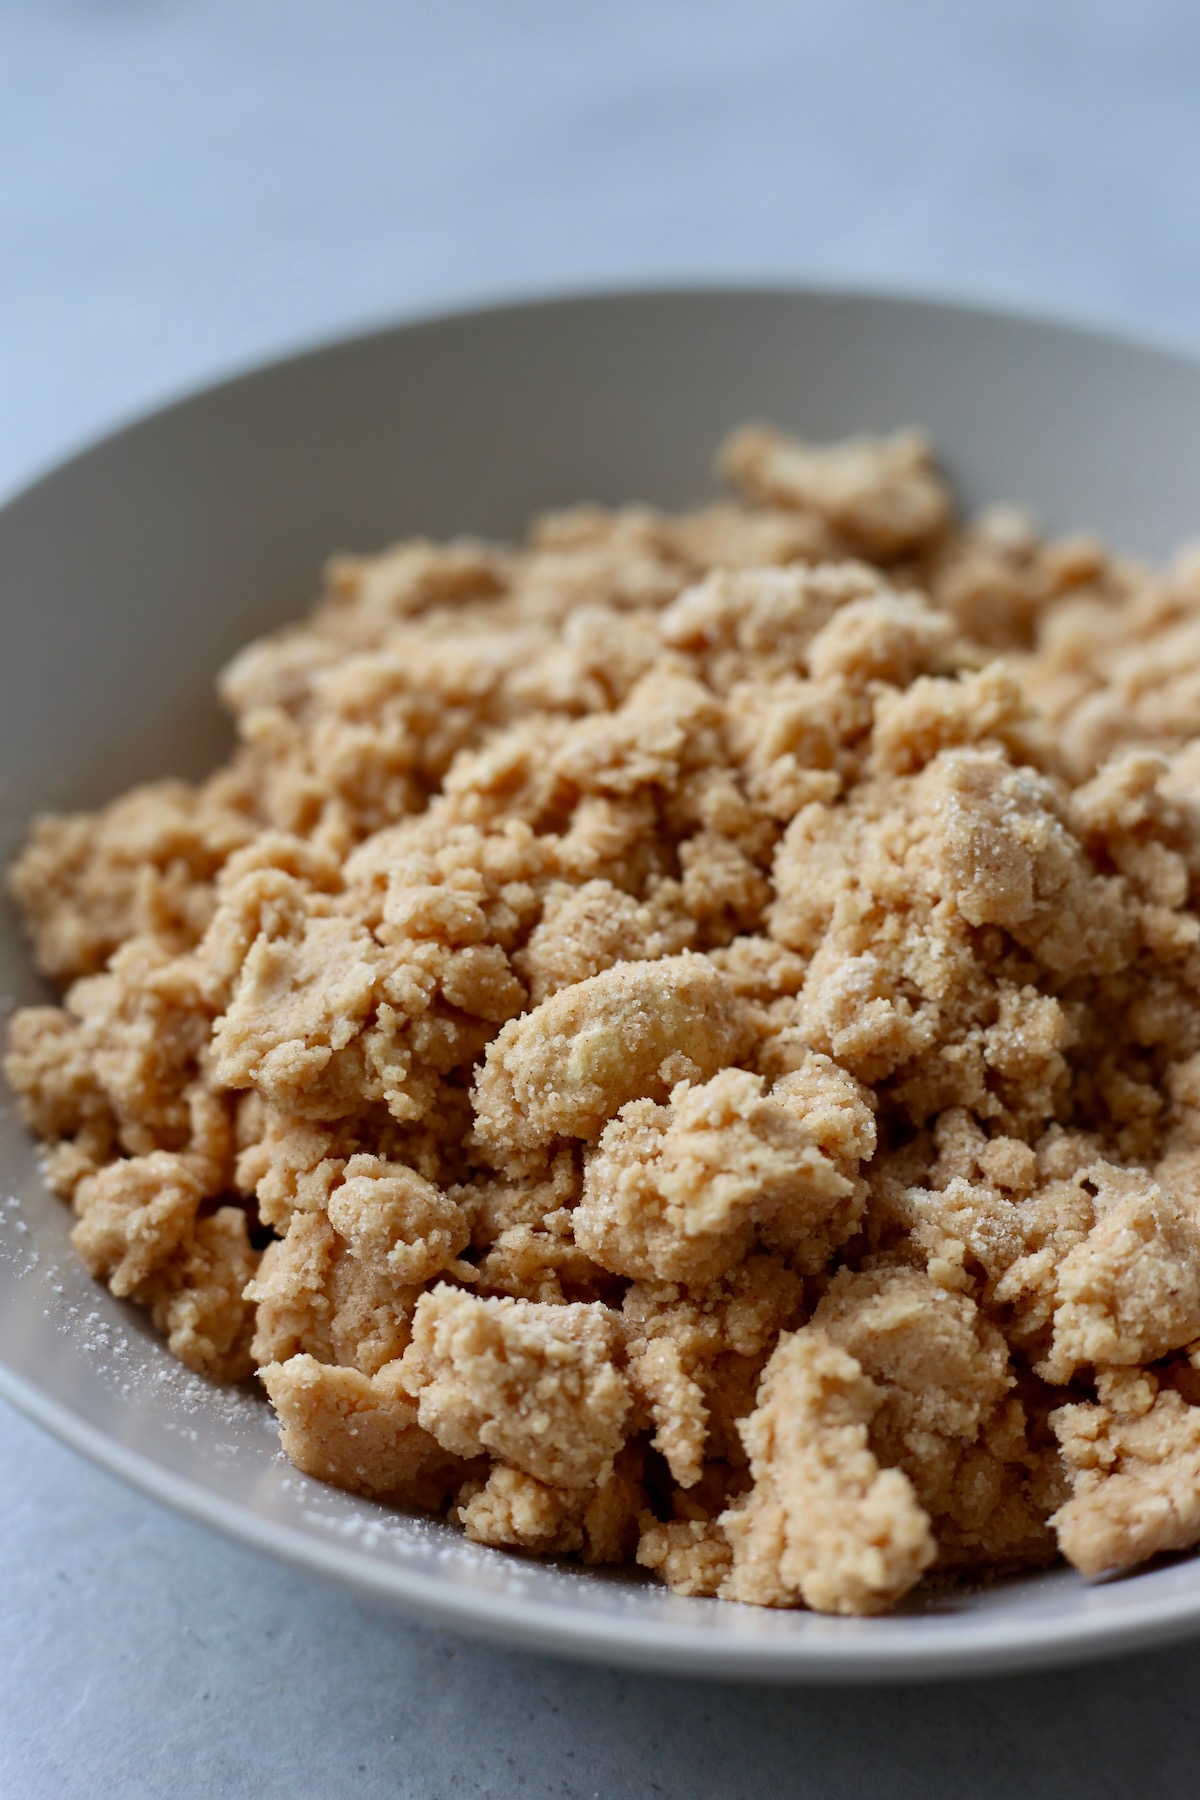
- Step 5: Sprinkle the buttery cake mix mixture over top of the apples.
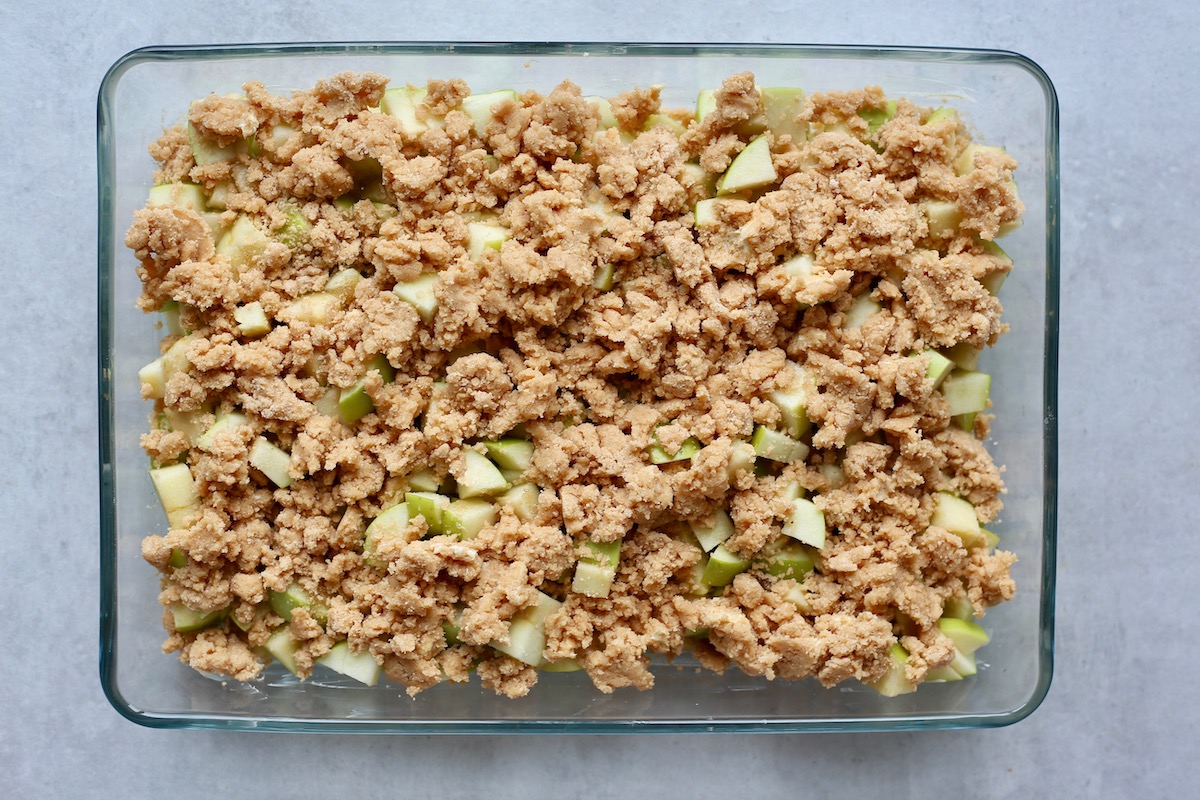
- Step 6: Bake the apple dump cake for 35-45 minutes or until golden brown and bubbly.
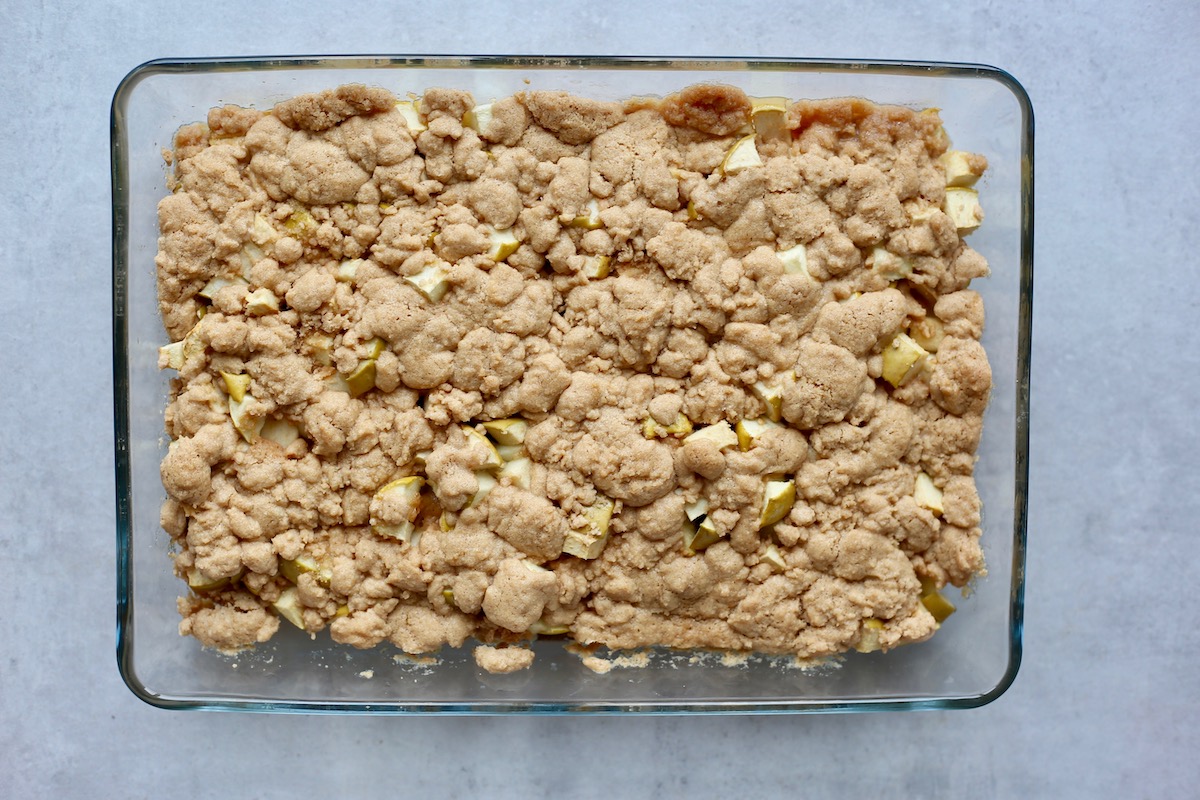
- Step 7: Serve warm with vegan coconut caramel sauce or your favorite non-dairy ice cream!
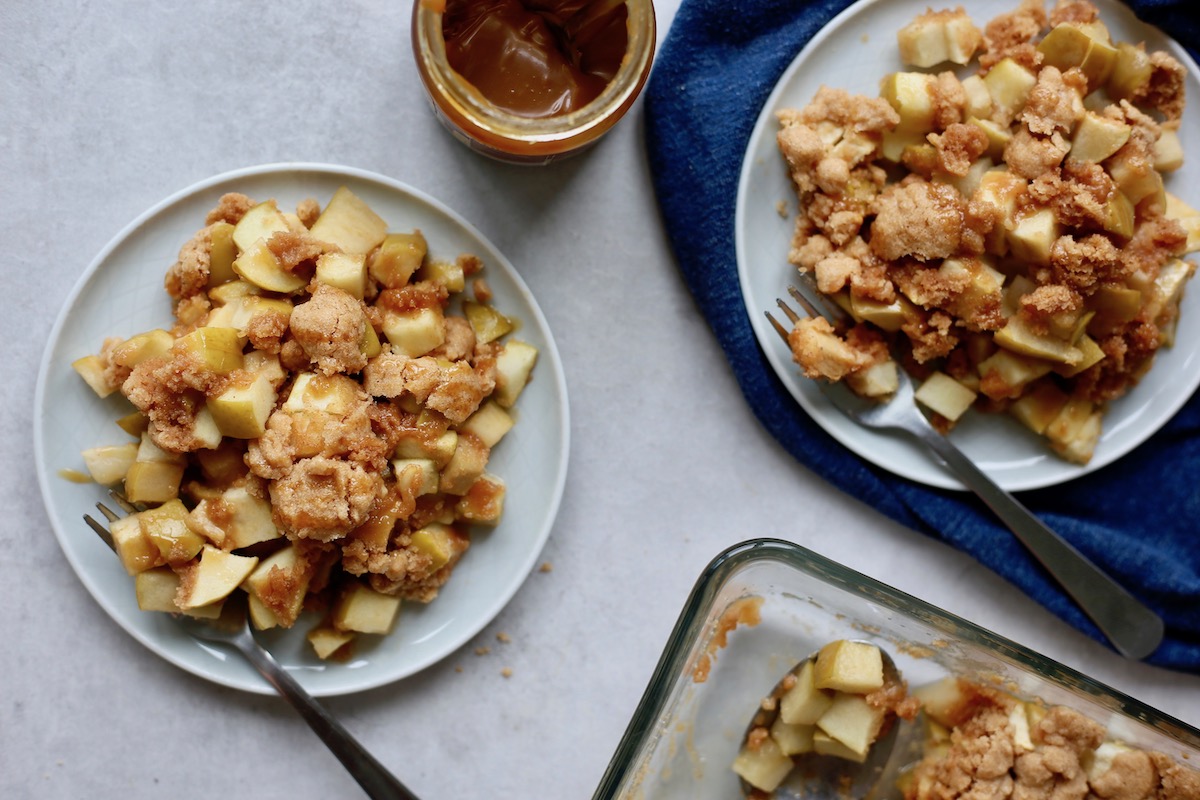
Is Apple Dump Cake Gluten Free?
Apple dump cake can easily be made gluten free! The only ingredient you'll need to watch out for is the cake mix.
To make a gluten-free apple dump cake, simply make sure you purchase a gluten-free cake mix. The rest of the ingredients are already gluten-free so you can continue with the recipe as written!
Tips for Storing Apple Dump Cake
While I'll honestly be surprised if you have any leftovers of this cake after serving it, you can definitely save any leftovers for later. I recommend storing it in an airtight container in the fridge for up to a few days.
To reheat, simply scoop out the amount you want to enjoy and heat it in the microwave for about 30 seconds or until warmed through.
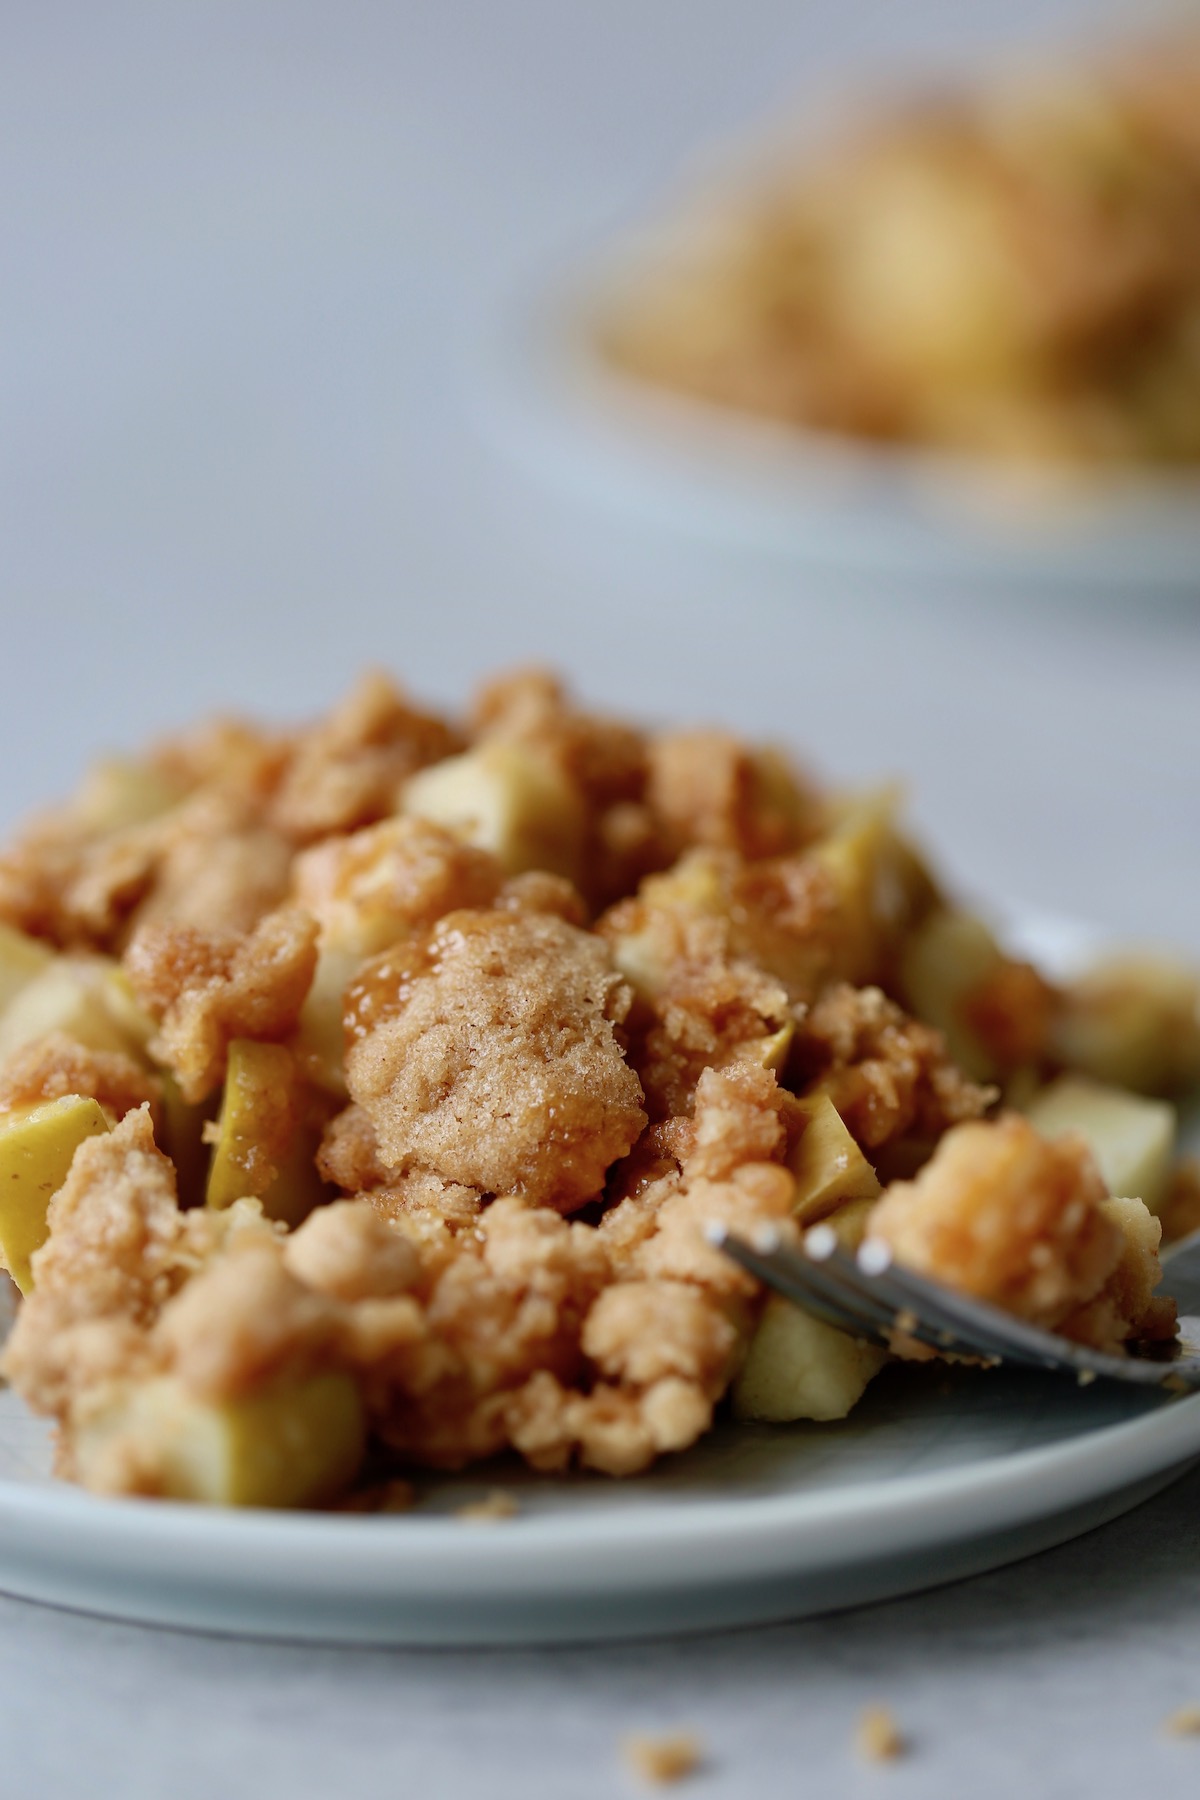
If you make and enjoy this recipe, please let me know by leaving a comment down below or rating the recipe by clicking on the stars in the recipe card. Also be sure to share this recipe with your friends and family!
📖 Recipe
Apple Dump Cake
Made with only 5 ingredients--many of which of pantry staples--this simple and delicious vegan Apple Dump Cake will be your go-to recipe whenever you're in need of a quick dessert.
Equipment
Ingredients
- 6 green apples peeled if desired, cored and chopped
- ¼ cup brown sugar
- 1 tablespoon cinnamon
- 1 box yellow or vanilla cake mix around 350 grams
- 8 tablespoons vegan butter
Instructions
- Preheat your oven to 350 °F and grease a 9x13 inch baking dish. Set it aside.
- Peel, if desired, core and chop up the apples into bite size pieces.
- Place the apples into the baking dish and sprinkle over the brown sugar and cinnamon. Stir to combine and then spread the apples back out into an even layer.
- In a mixing bowl, cut the vegan butter into the cake mix. I like to do this with my hands until a crumbly mixture forms. Sprinkle this evenly over top of the apples.
- Bake for 35-45 minutes or until golden brown and bubbly.
- Serve warm with dairy-free ice cream if desired!
Notes
While I'll honestly be surprised if you have any leftovers of this cake after serving it, you can definitely save any leftovers for later. I recommend storing it in an airtight container in the fridge for up to a few days.
To reheat, simply scoop out the amount you want to enjoy and heat it in the microwave for about 30 seconds or until warmed through.
Nutrition
Calories: 422kcalCarbohydrates: 79gProtein: 3gFat: 12gSaturated Fat: 4gPolyunsaturated Fat: 3gMonounsaturated Fat: 4gTrans Fat: 0.3gSodium: 542mgPotassium: 203mgFiber: 5gSugar: 48gVitamin A: 611IUVitamin C: 6mgCalcium: 165mgIron: 2mg
Tried this recipe?Let me know how it was!
Chickpea and Broccoli Sheet Pan Dinner
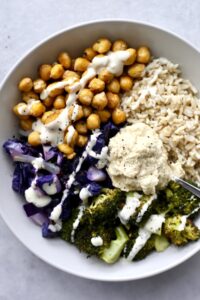
This quick-to-prepare, colorful and nourishing Chickpea and Broccoli Sheet Pan Dinner will become a weekly staple in no time. It's easy to prepare, requires little clean up and is loaded with plant-based flavor and nutrition!

As a mom of two little kiddos, I'm all about easy dinners.
If you're a parent, then you know about the witching hour. It's the time of the night when you're trying to make dinner and all the kids are fussy and crazy.
That's why I'm starting to come up with more one-pot dinners (like my One-Pot Creamy Marinara Pasta) and sheet pan dinners (like this Peanut Butter Tempeh and Broccoli Sheet Pan Dinner).
They're quick and easy and require minimal clean up!
Today I'm sharing with you a sheet pan dinner recipe that combines all of my favorite foods.
This Chickpea and Broccoli Sheet Pan Dinner is easy to throw together and pairs well with so many different kinds of grains and sauces.
Let me show you how to make it!
Ingredients for this Sheet Pan Dinner
This simple sheet pan dinner requires just a handful of ingredients. A few hearty vegetables and chickpeas are drizzled with some olive oil, salt and spices and roasted to perfection.
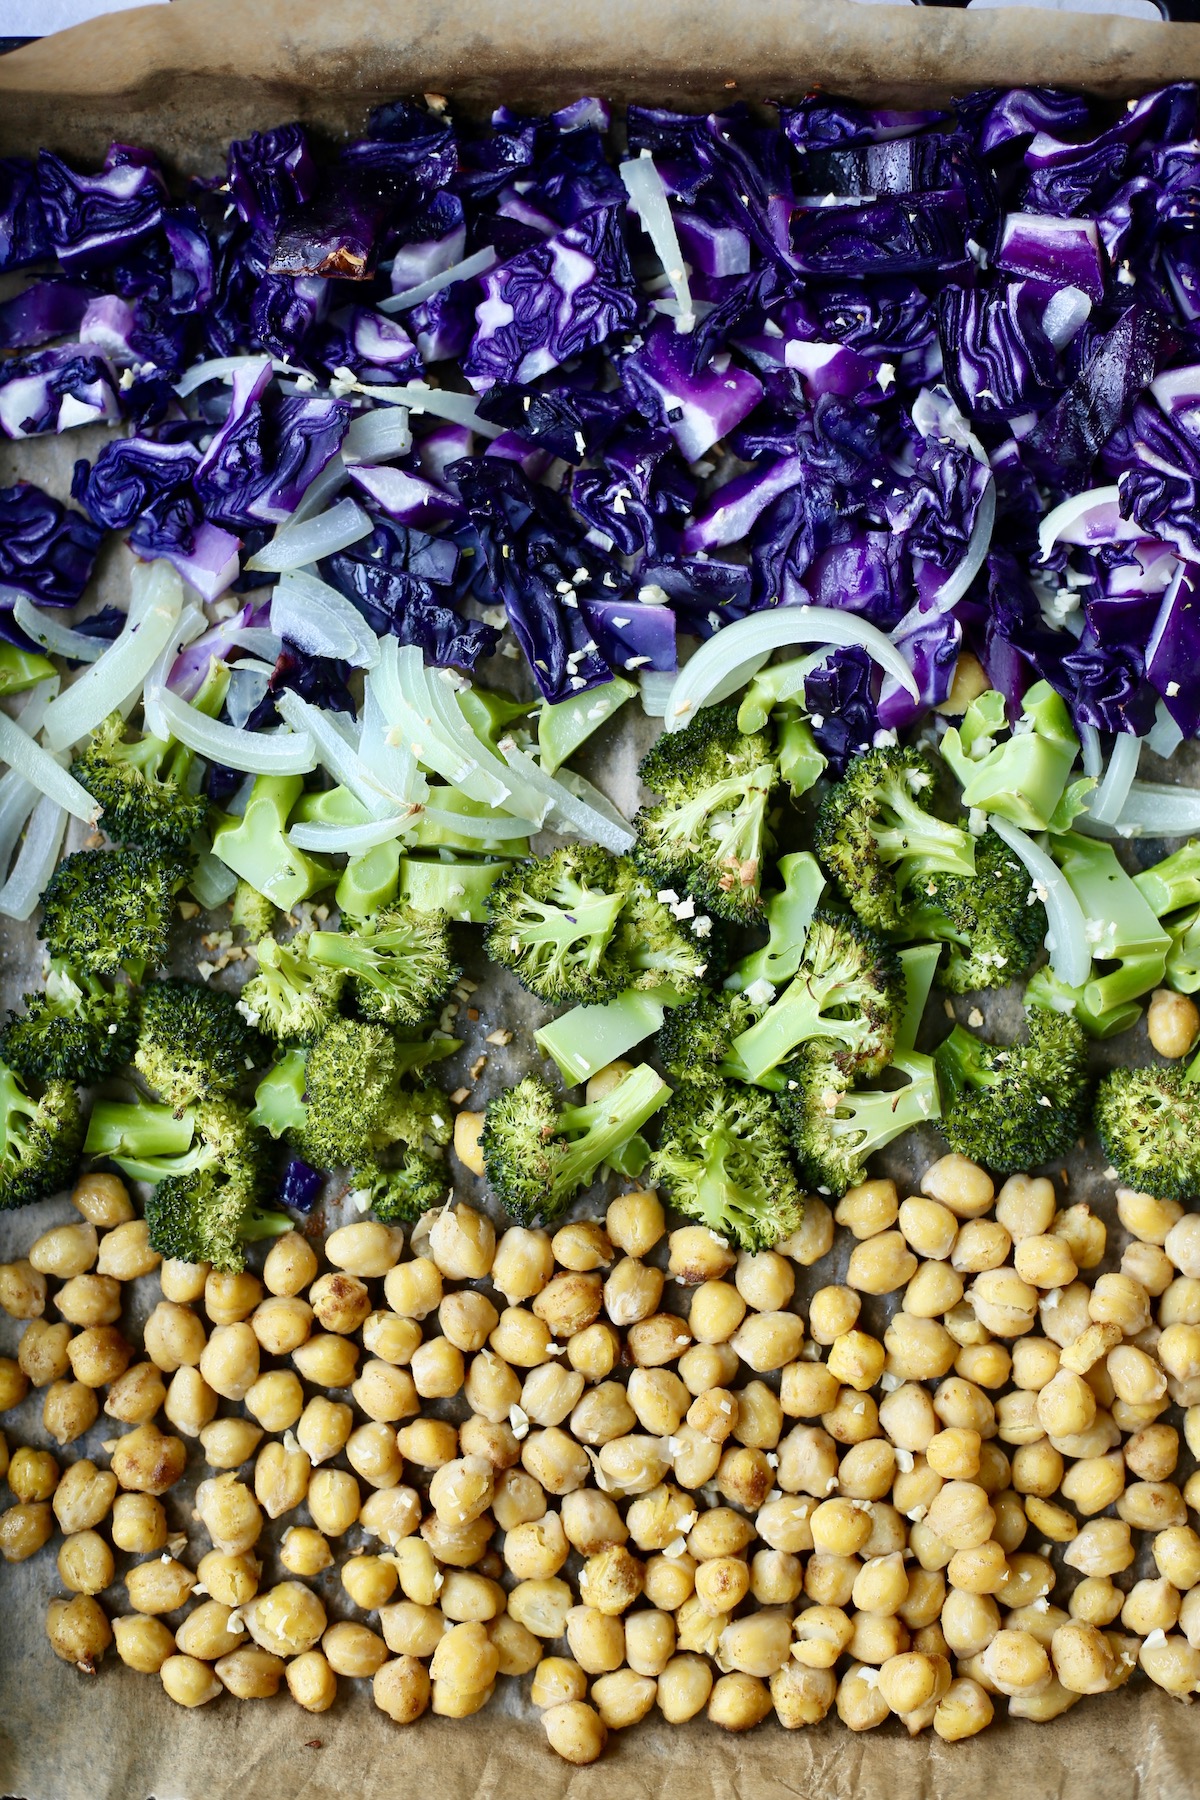
To serve, simply pair them with a hearty grain like brown rice, quinoa or couscous and drizzle them with Lemon Tahini Dressing or a dollop of the BEST Hummus (trust me!).
The ingredients you'll need to make this recipe are listed below:
See?! Such a simple list of ingredients!
Thankfully, other than the red cabbage and broccoli, the remaining ingredients are all pantry-friendly ingredients. I'm guessing you already have most of them on hand.
Tips for Making Sheet Pan Dinners
I have a few tips to share with you when it comes to making sheet pan dinners.
- You may need to use two sheet pans. In Asia, where I usually live, the ovens are considerably smaller than most ovens you'd find in America. If that's also the case for you, you may need to use two sheet pans as opposed to one larger sheet pan. This will allow the vegetables and protein to have more space to cook evenly.
- Use vegetables and proteins that have similar cooking times. If you're planning to cook an entire meal on one sheet pan at the same temperature, then you'll want to use vegetables and proteins that cook at the same rate. Otherwise you'll risk some foods burning and others being under-cooked. If you do want to cook foods that cook at different rates, then be sure to keep them separate so that you can remove the individual ingredients when they've finished cooking.
- Add oil, salt and spices for flavor. Usually sheet pan dinners use simple ingredients, so adding a little fat, salt and spices makes them more exciting!
- Serve with a carb and sauce. Sheet pan dinner usually provide a veggie and protein, so it's good to pair them with a hearty grain and/or sauce to round out the meal. While the veggies and protein are cooking, prepare a whole grain and sauce to finish off the meal!
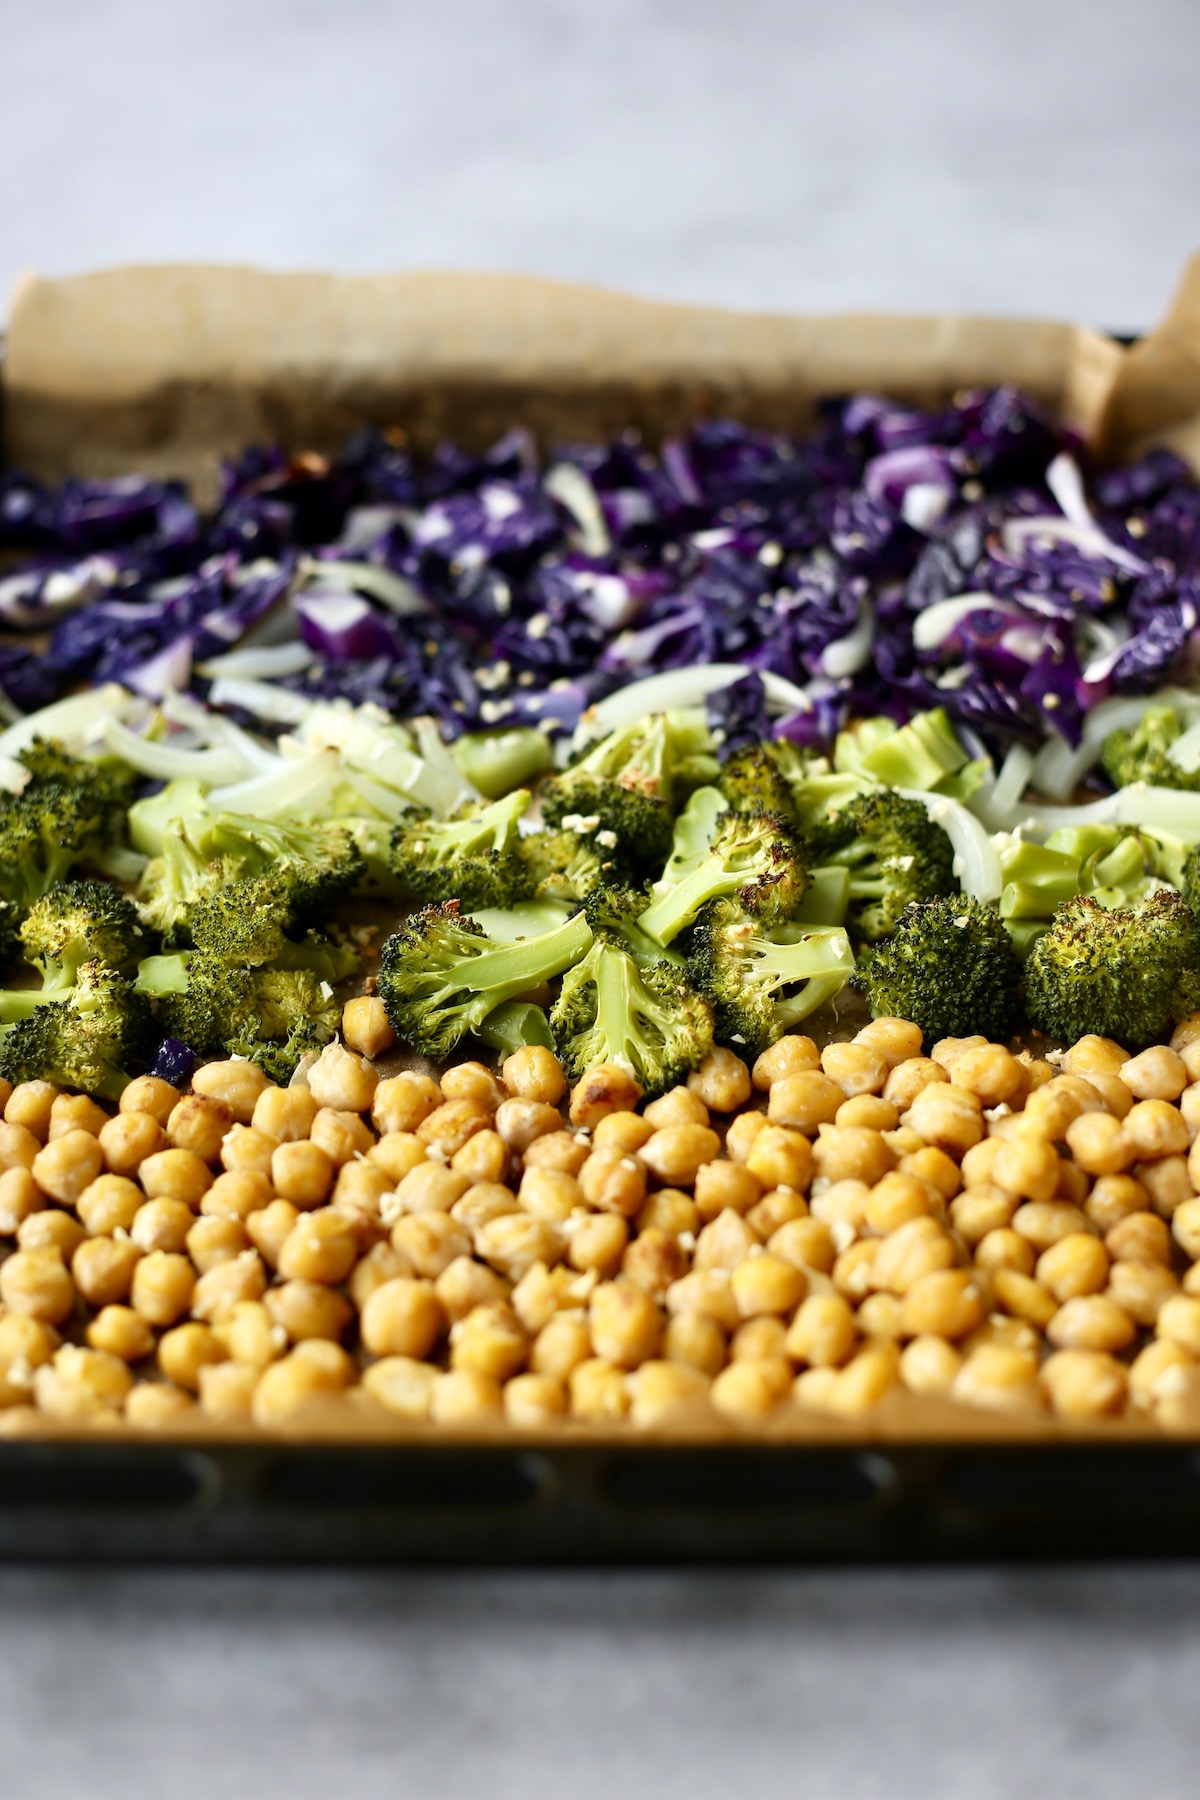
How to Make Crispy Chickpeas in the Oven
The star of this meal, in my opinion, are the crispy chickpeas! Once you cook your chickpeas this way, you'll never want to cook them any other way.
But to make the chickpeas crispy, you need to follow these important steps:
- Use dry chickpeas. In order for the chickpeas to get crispy, they need to be dry. Start by draining and rinsing your can of chickpeas and then place them on a tea towel. Pat and rub them with the tea towel until they are as dry as possible. Place them in a bowl. If you try to roast wet chickpeas, they will just steam and not get crispy.
- Add a little oil. Once the chickpeas are dry, you'll need to add a little oil. Adding oil to the dry chickpeas will allow them to crisp up in the oven. It's kind of like deep frying foods, but you're using a LOT less oil.
- Add salt and spices for flavor. Once the dried chickpeas have been coated in a little oil, sprinkle on some salt and spices for flavor. My favorite go-to seasoning is garlic salt, but a combination of fine sea salt and different ground spices works great as well.
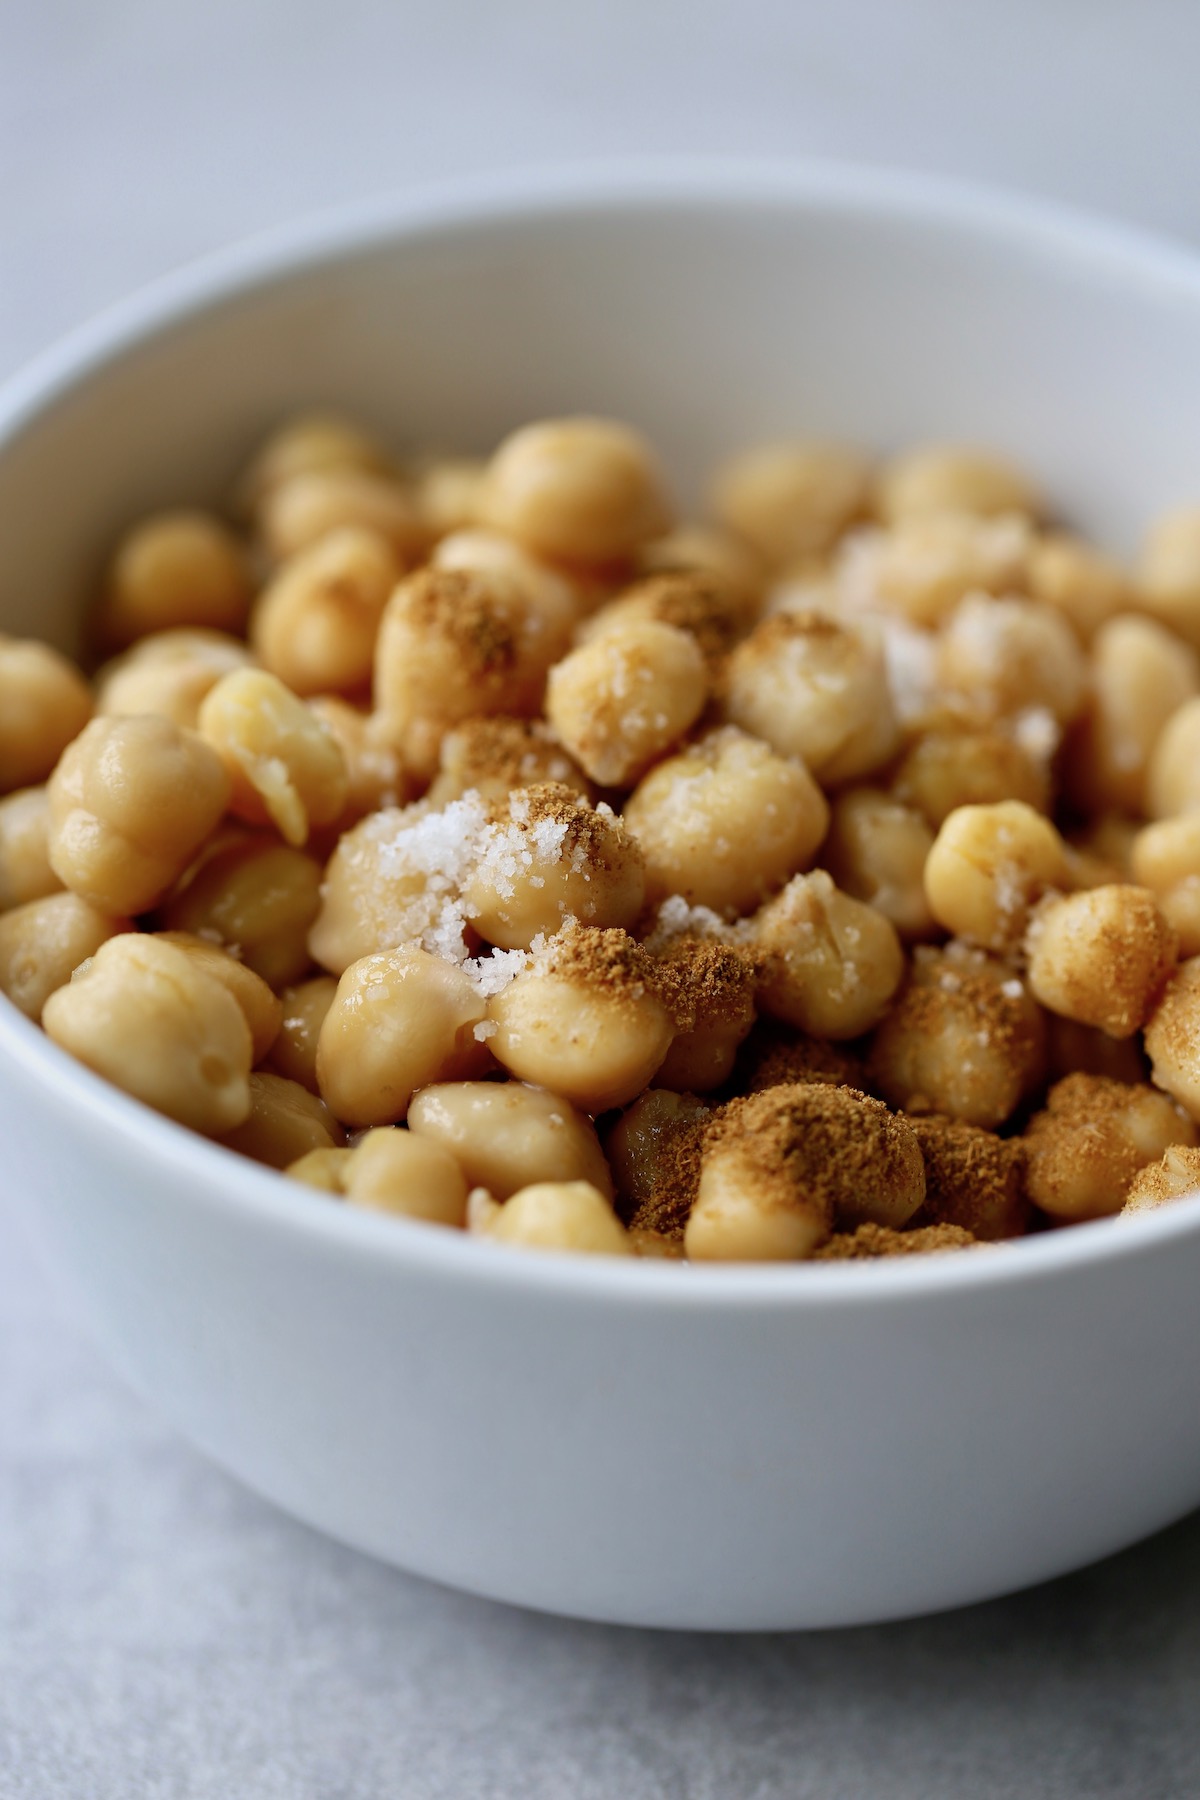
- Roast at high heat. Lastly, you'll want to spread the oiled and seasoned chickpeas onto a baking sheet in a single layer. Roast them in the oven at a high heat, such as 425°F / 220°C, for 30-40 minutes, stirring half way through. You'll know they're done when they're golden brown and crispy!
Serving Suggestions
This sheet pan dinner only covers veggies and a plant-based protein source, so you'll need to think through what else to serve with the veggies and chickpeas.
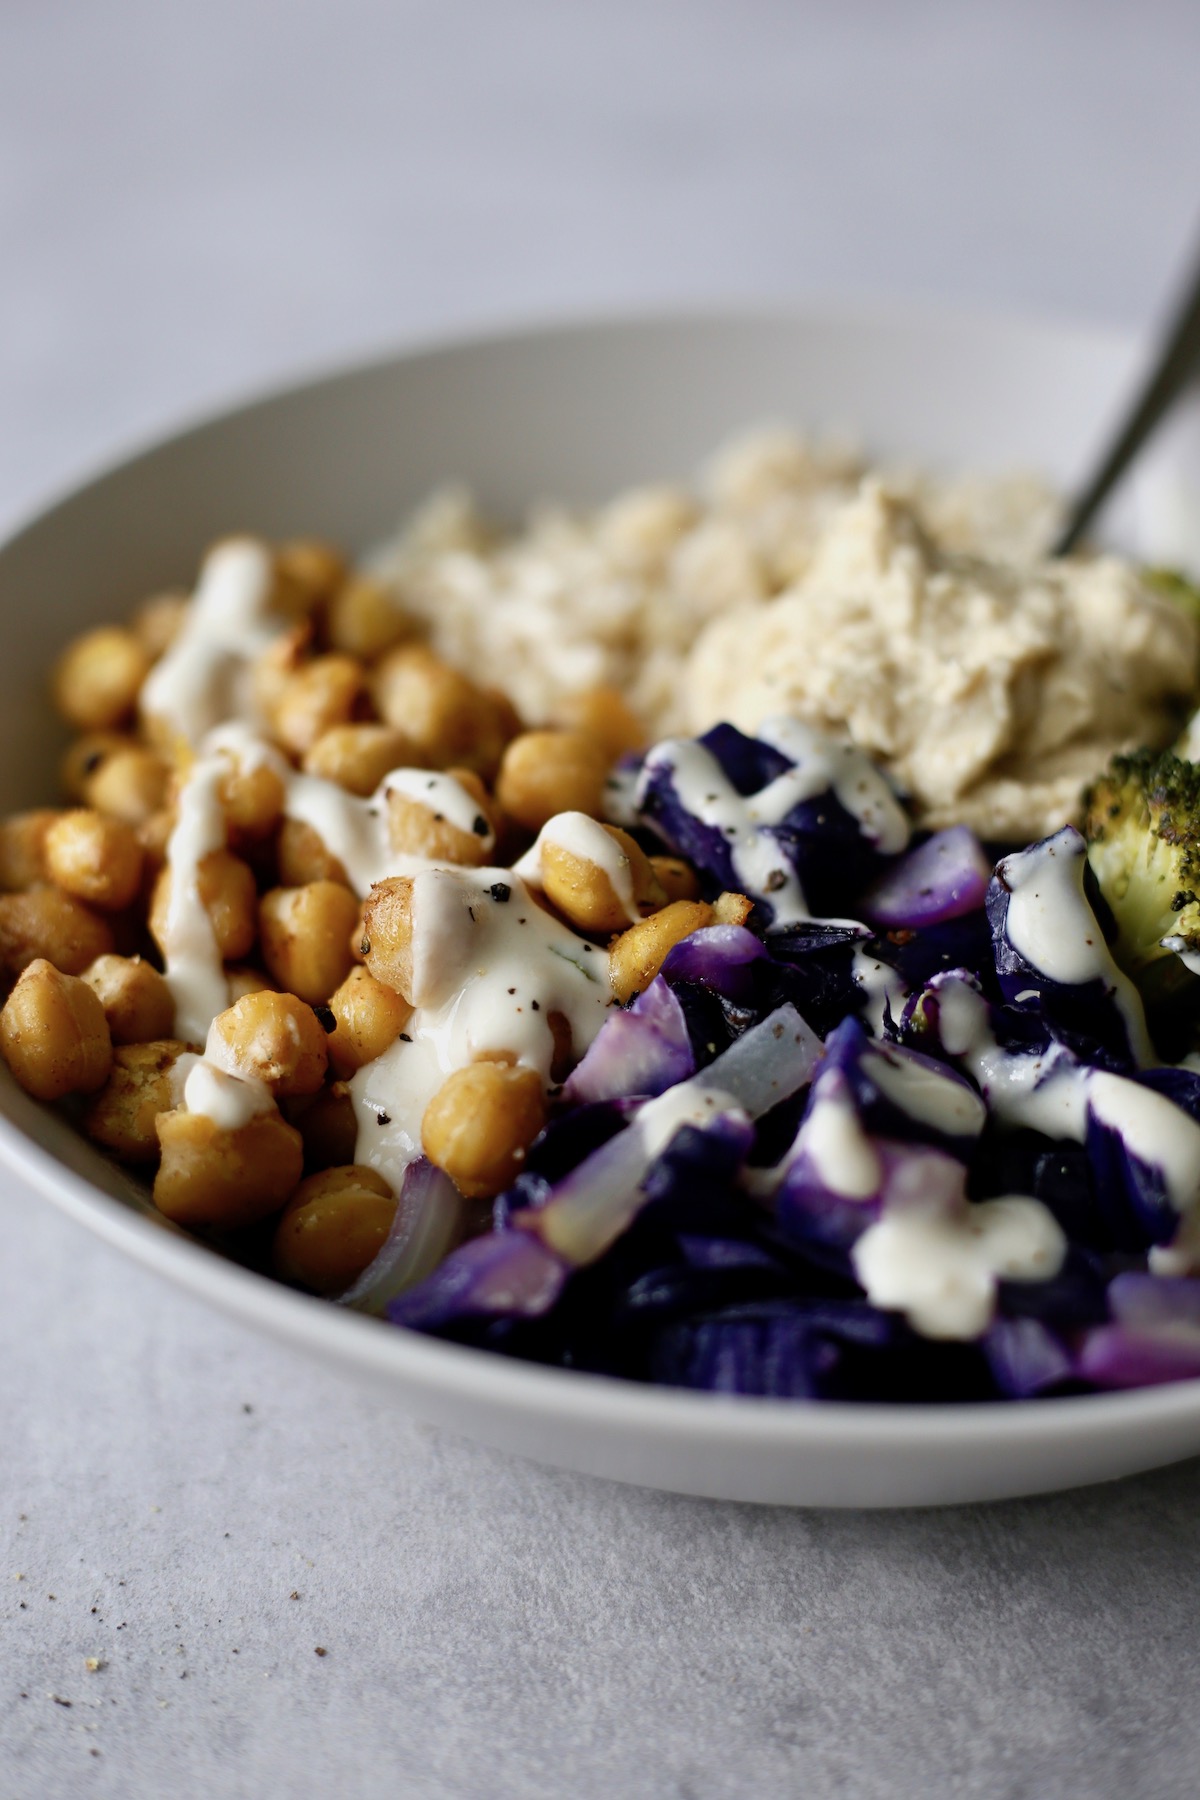
Here are some of my favorite foods to pair with this sheet pan recipe to round out the meal:
- A grain: Brown rice, quinoa, couscous, etc.
- A sauce: Lemon Miso Tahini Dressing, Vegan Caesar Dressing, balsamic glaze, vinaigrette dressing, etc.
- Hummus: either the BEST Hummus recipe, Curried Carrot White Bean Hummus, Oil-Free Beetroot Hummus, or any store-bought hummus.
Alternatively, you could even serve the veggies and chickpeas in a wrap with some hummus and crispy lettuce.
I'd love to know if you give this simple, vegan sheet pan dinner a try and what you think. Leave a comment down below or rate the recipe by clicking on the stars in the recipe card.
If you enjoy the recipe be sure to share it with your friends as well!
PS If you like this kind of light and healthy meal, you'll love my 11 vegan Mediterranean recipes roundup!
📖 Recipe
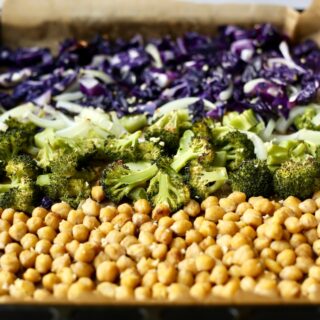
Chickpea and Broccoli Sheet Pan Dinner
Let your oven do most of the work with this quick and easy Chickpea and Broccoli Sheet Pan Dinner!
Ingredients
CHICKPEAS
VEGETABLES
- ½ red cabbage sliced
- 1 large head broccoli, cut into florets or 2 small
- ½ onion sliced
- 2 tablespoons olive oil
- 1 tablespoon minced garlic
- ½ - 1 teaspoon sea salt
Instructions
- Preheat your oven to 410 °F and line 1-2 baking sheets with silicone baking mats, parchment paper or alternatively, spray them with cooking spray. Whether you use one or two sheet pans depends on the size of your oven and how crispy you want your chickpeas and veggies.
- Drain and rinse your chickpeas. Pour them into a clean tea towel and pat them dry. The dryer they are the crispier they will be after baking.
- In a large mixing bowl, or directly on your sheet pan, drizzle the broccoli, cabbage and onion with olive oil and sprinkle over the fresh garlic and sea salt. I like to keep the broccoli and cabbage separate incase they cook at different rates. Spread the veggies out into a single layer on the sheet pan with the chickpeas or a second sheet pan.
- Roast the chickpea and veggies for 15 minutes. Toss everything separately and return the pans to the oven to bake for another 10-20 minutes or until everything is cooked through and the chickpeas are crispy.
- Be sure to watch everything towards the end as the baking times may vary.
- Serve the chickpeas and veggies over brown rice, couscous, or quinoa and top with my favorite hummus, lemon miso tahini dressing and fresh herbs!
Notes
This sheet pan dinner only covers veggies and a plant-based protein source, so you'll need to think through what else to serve with the veggies and chickpeas. I like to add a grain and a sauce or hummus.
Nutrition
Calories: 165kcalCarbohydrates: 20gProtein: 6gFat: 9gSaturated Fat: 1gPolyunsaturated Fat: 1gMonounsaturated Fat: 6gSodium: 1243mgPotassium: 769mgFiber: 6gSugar: 7gVitamin A: 2121IUVitamin C: 197mgCalcium: 129mgIron: 2mg
Tried this recipe?Let me know how it was!
Cinnamon Raisin Seed Bread (Vegan, Gluten-Free & Easy!)

Full of hearty pumpkin and sunflower seeds and sweet, juicy raisins, this Cinnamon Raisin Seed Bread makes for a delicious breakfast or hearty snack. If you're new to gluten-free baking, this is an easy recipe to start with!
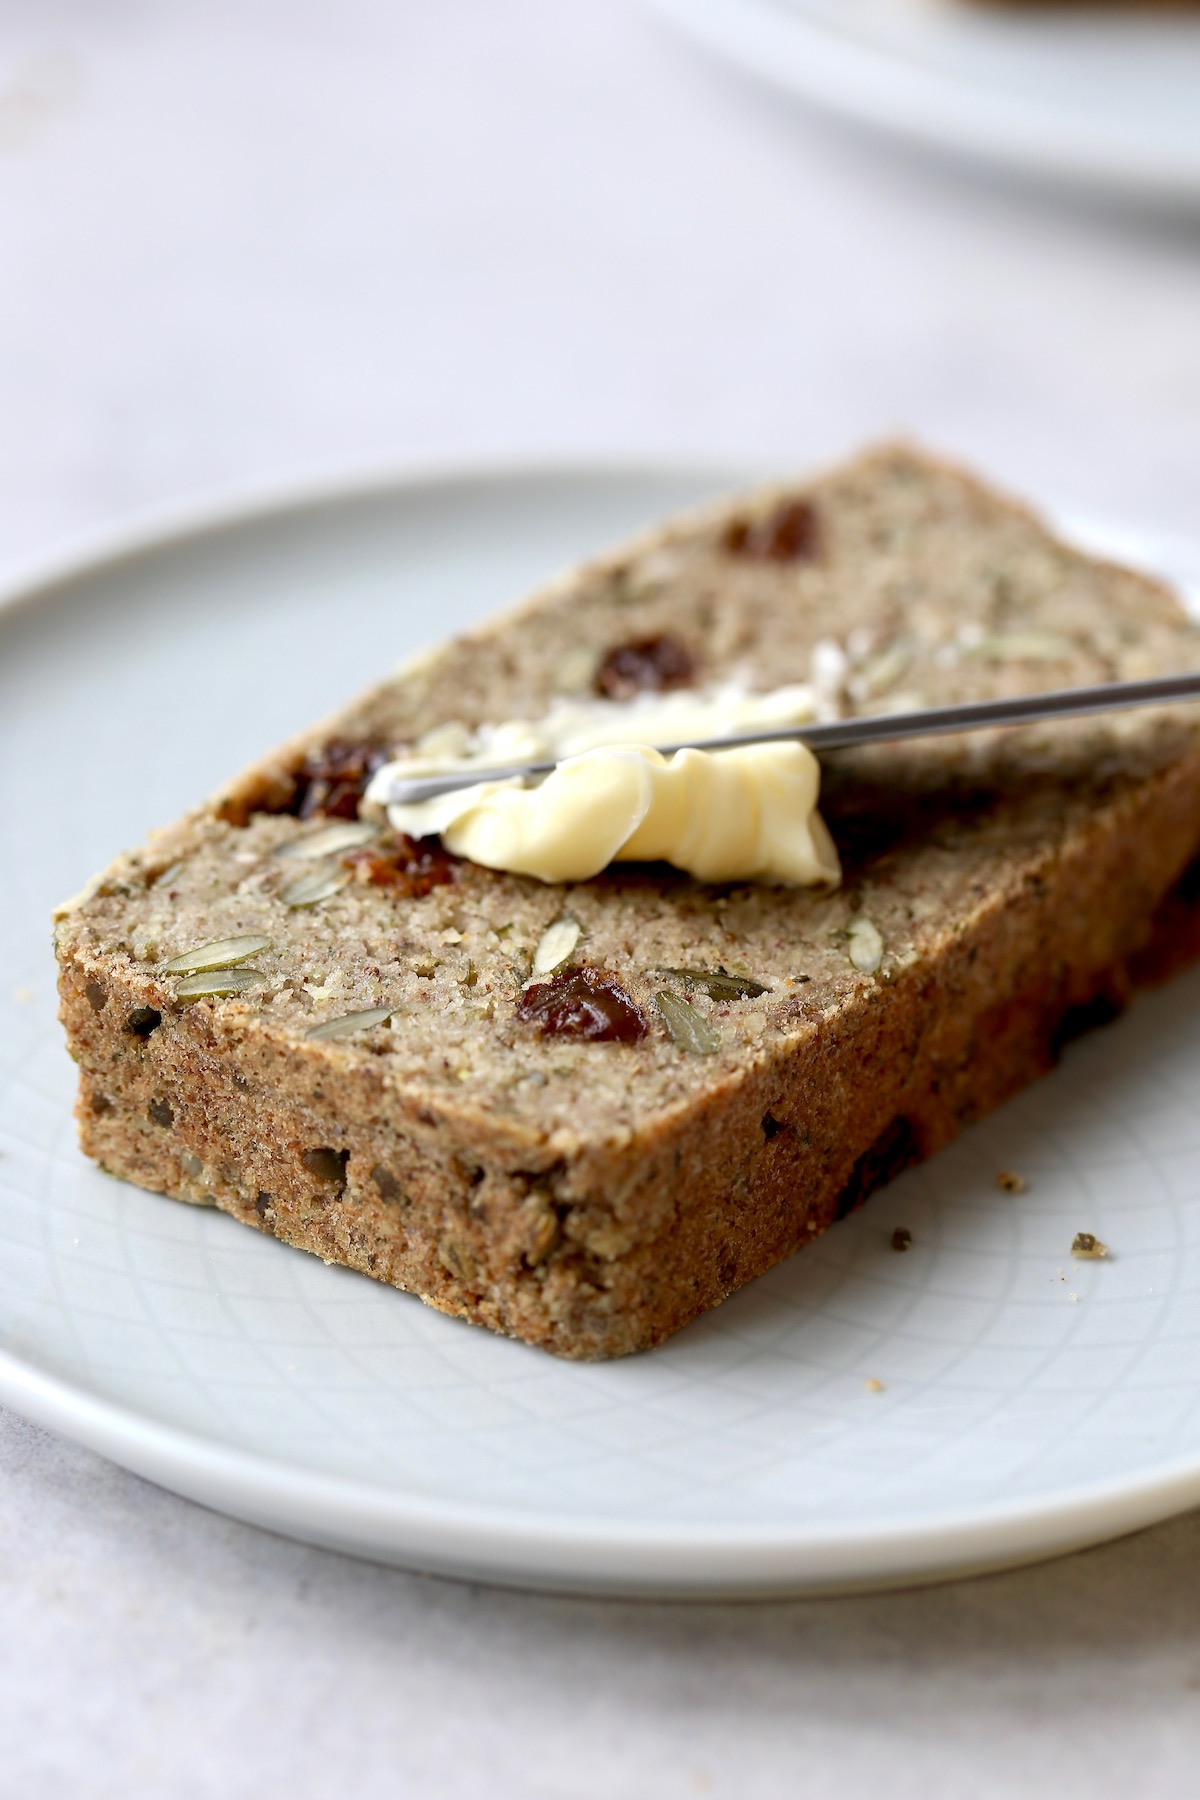
We all know 2020 was the year of homemade bread baking.
Hopefully being forced to bake bread at home reminded us all of how easy and amazing homemade bread can be!
We're still obsessed with my Whole Wheat Artisan Bread, this No Knead Whole Wheat Vegan Sandwich Bread and my 5 ingredient Irish Soda Bread.
But whenever I want healthy bread with some added texture and flavor, I always opt for this Cinnamon Raisin Seed Bread!
Did I mention it's gluten-free, vegan and SUPER EASY to make?!
Yep, you guys are going to love it.
I'm positive.
Ingredients You'll Need for Cinnamon Raisin Seed Bread
This bread isn't made using just one flour, but instead combines a few different flours, one of which you'll make yourself!
Apart from psyllium husk powder, you should be familiar with all of these ingredients. Let me explain what it is before sharing the rest of the ingredients you'll need to make this bread.
What is Psyllium Husk Powder?
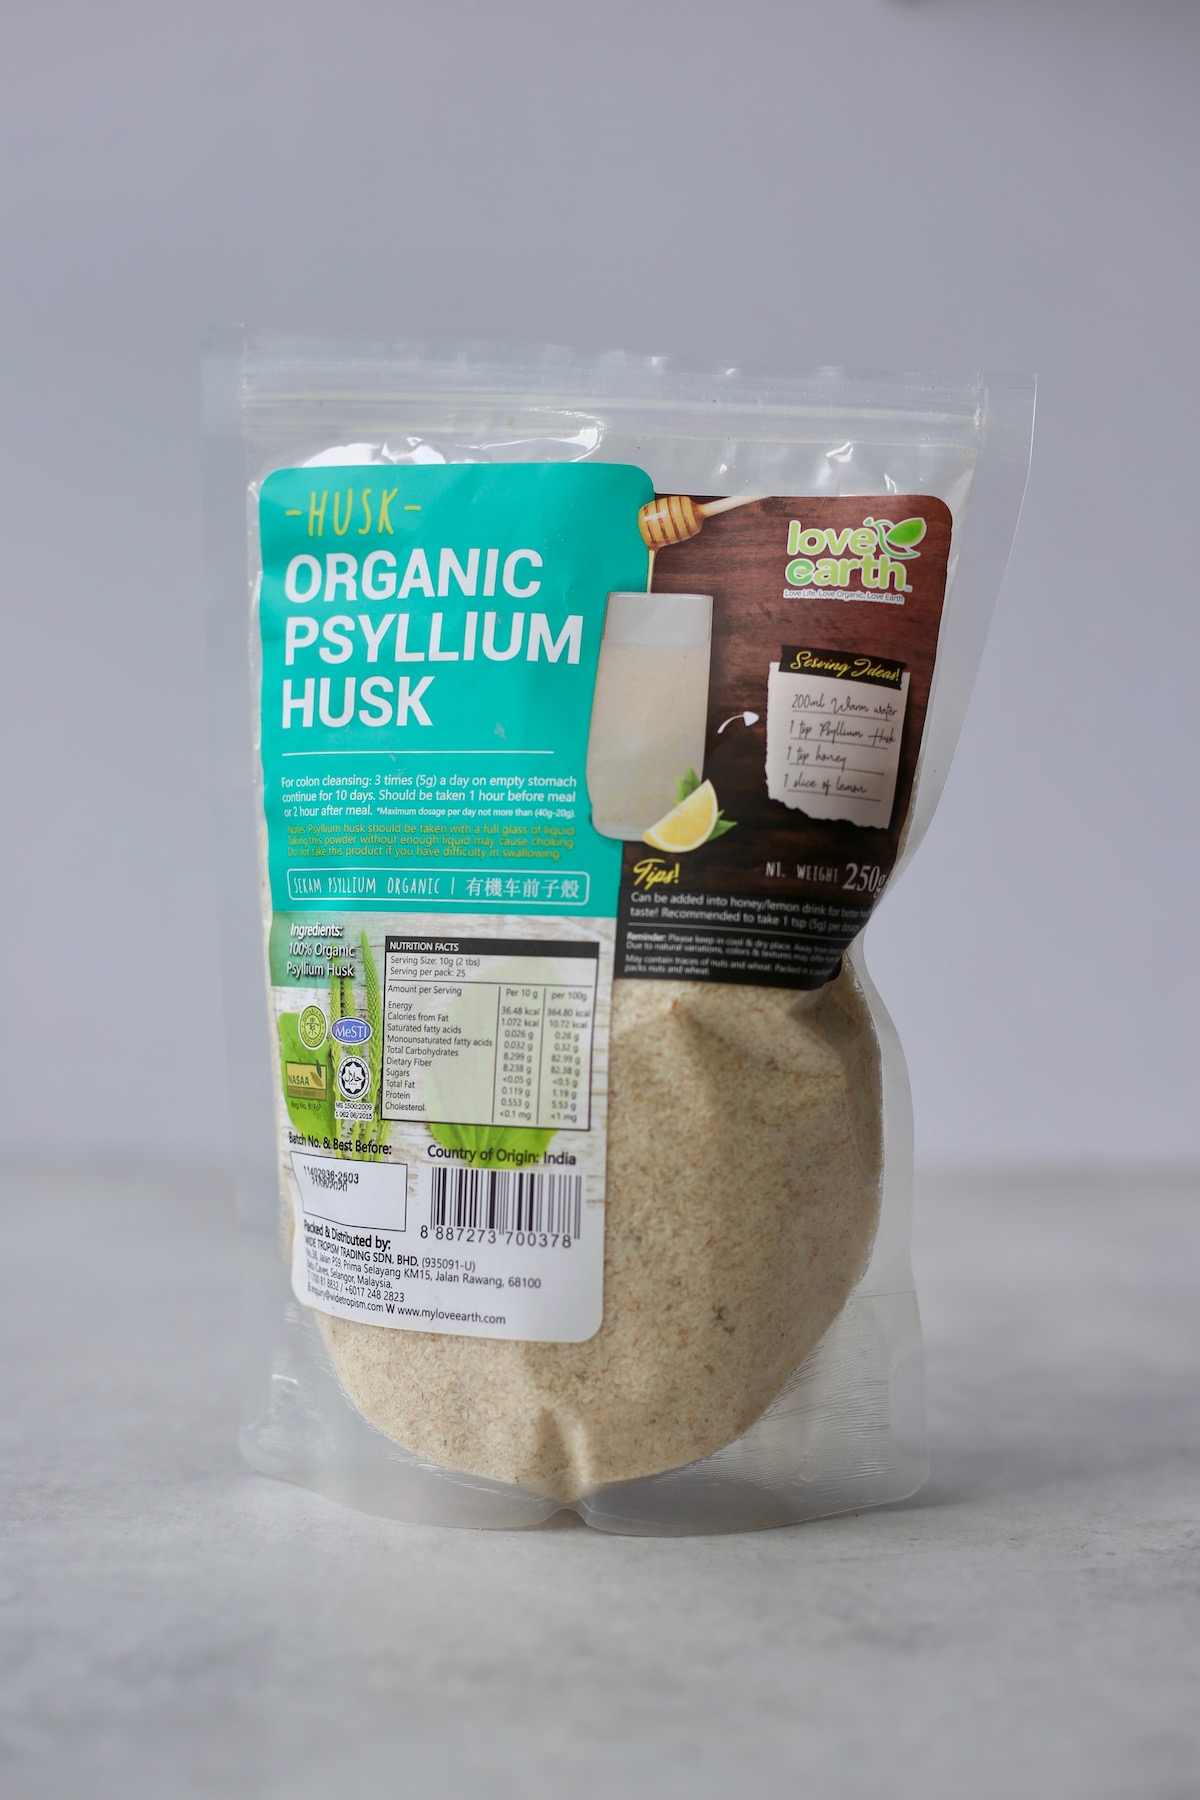
If you've ever had issues with constipation, then you've probably heard of psyllium husk powder.
Psyllium husk is a soluble fiber that is often used to bulk up stools and can be used to treat intestinal problems. Psyllium husk is commonly found in India and looks like a shrub-like herb.
Psyllium husk powder is simply psyllium husk that has been ground into flour.
Due to its water absorbing abilities, psyllium husk powder is a great ingredient to use in gluten-free baking as it helps bind ingredients together, keeping you from ending up with a crumbly mess.
I find it easiest to buy psyllium husk powder online or at health food stores, but it is becoming more readily available in traditional grocery stores as well!
List of Ingredients Needed for Homemade Cinnamon Raisin Seed Bread
In addition to psyllium husk powder, you'll need the following ingredients:
- Pumpkin seeds
- Brown rice flour
- Almond flour
- Sunflower seeds
- Psyllium husk powder
- Chia seeds
- Ground cinnamon
- Salt
- Raisins
- Water
- Maple syrup
How to Make Cinnamon Raisin Seed Bread
Below I'll share step-by-step instructions on how to make this easy, gluten-free seed bread.
Step 1: Grind 1 cup of pumpkin seeds into flour. You can do this using a food processor or blender. Just be sure to stop grinding once the seeds reach a flour-like consistency. If you continue to grind them for too long, they will start to turn into pumpkin seed butter!
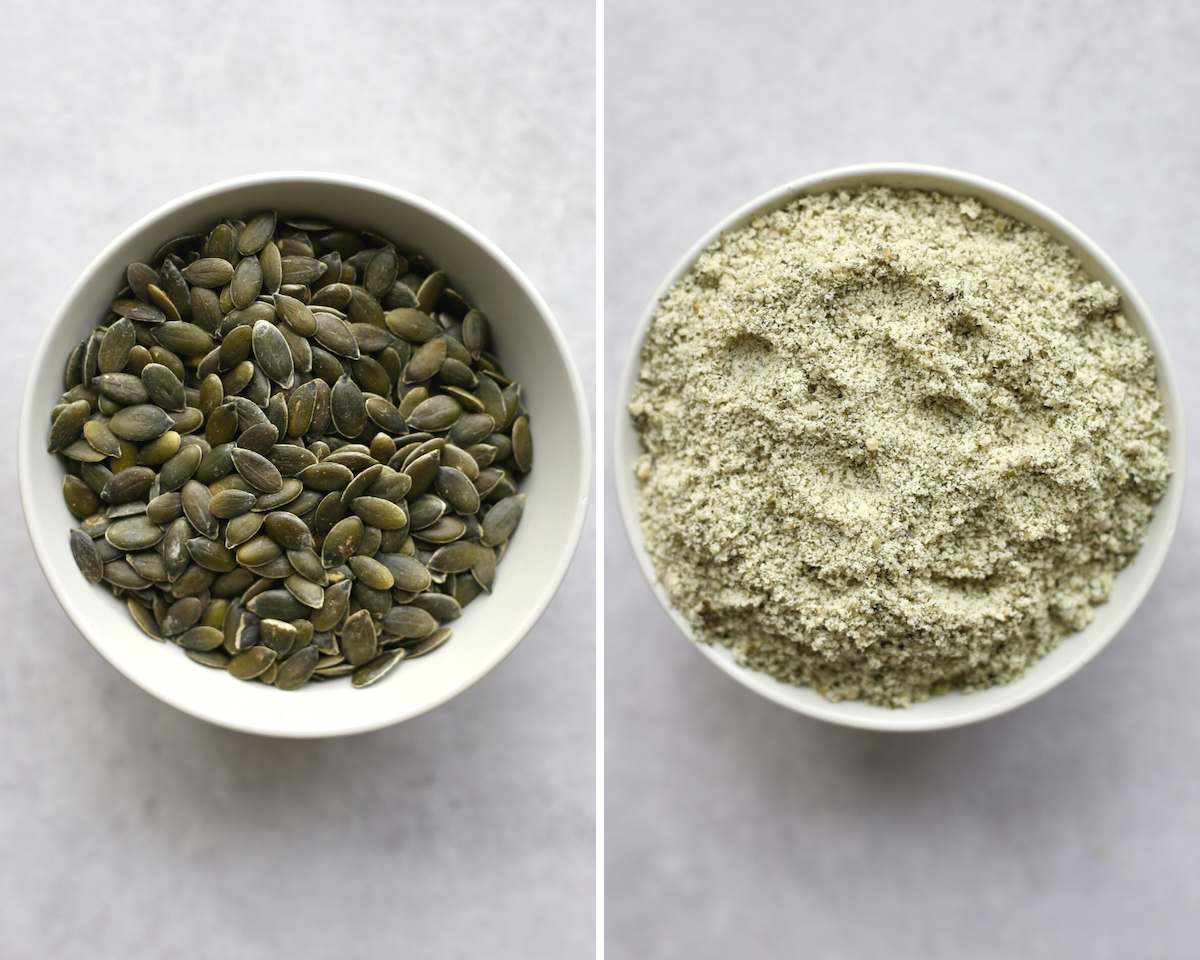
Step 2: Combine all of the dry ingredients together in a large mixing bowl and stir to combine.
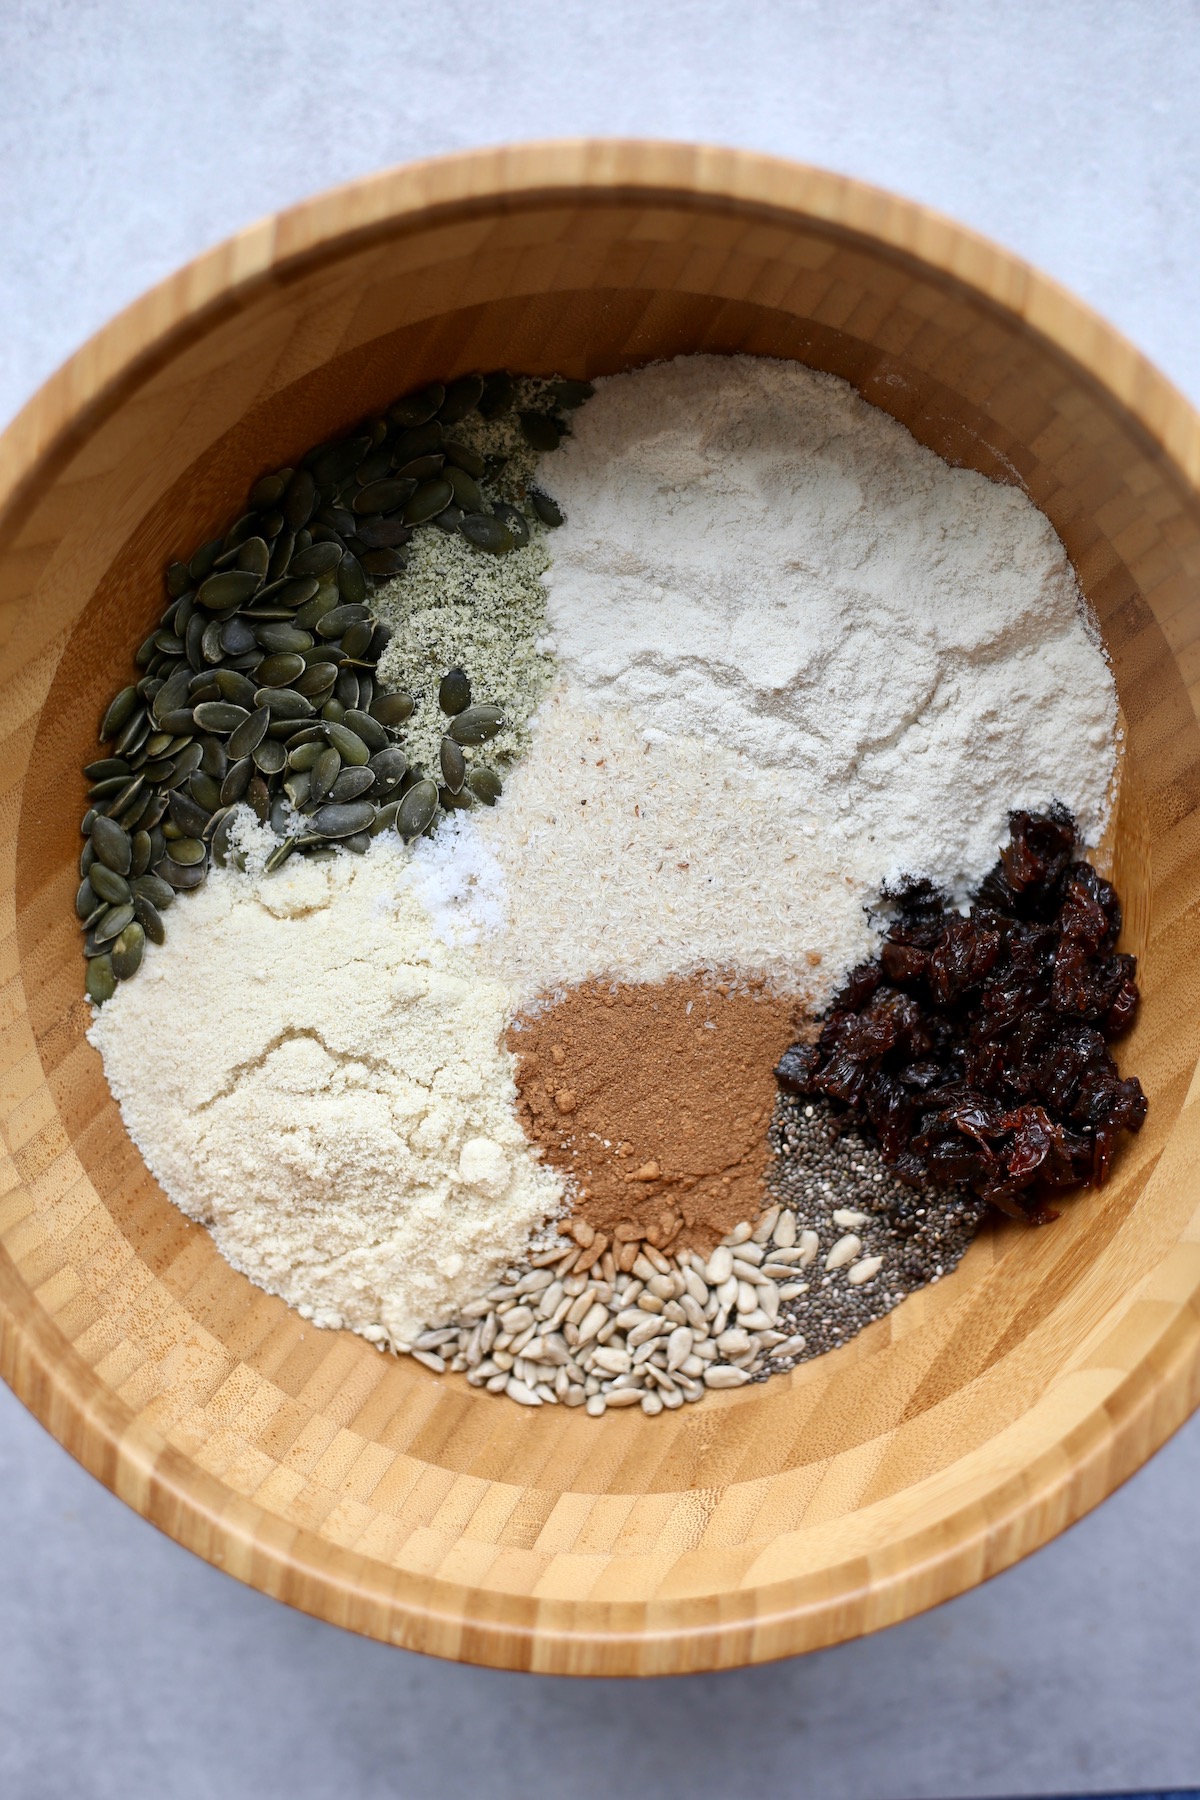
Step 3: Add in the wet ingredients: maple syrup and water.
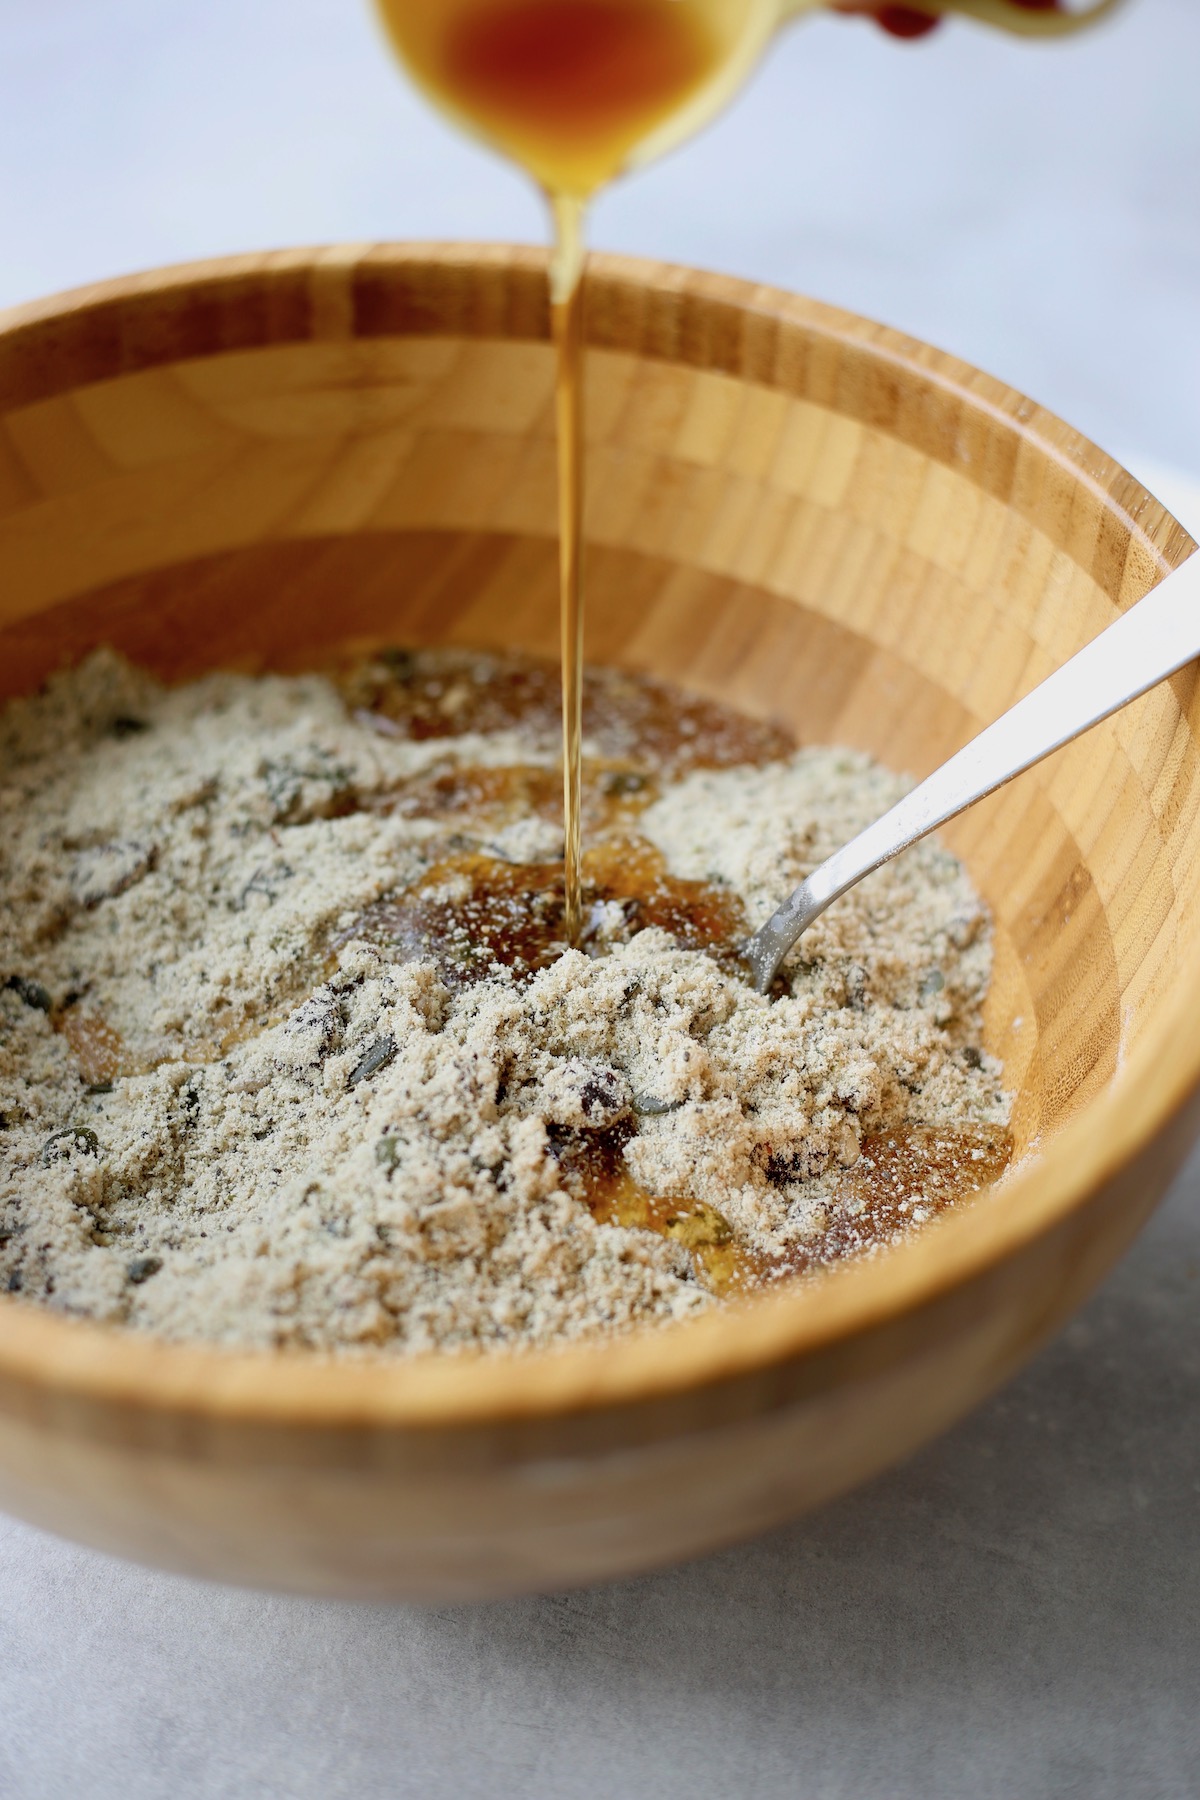
Step 4: Stir the wet and dry ingredients together until a thick batter forms. Allow the batter to sit for about 20-30 minutes until it thickens and most of the water has been absorbed.
While the batter thickens, preheat your oven to 375F/190C degrees and line a loaf pan with baking paper.
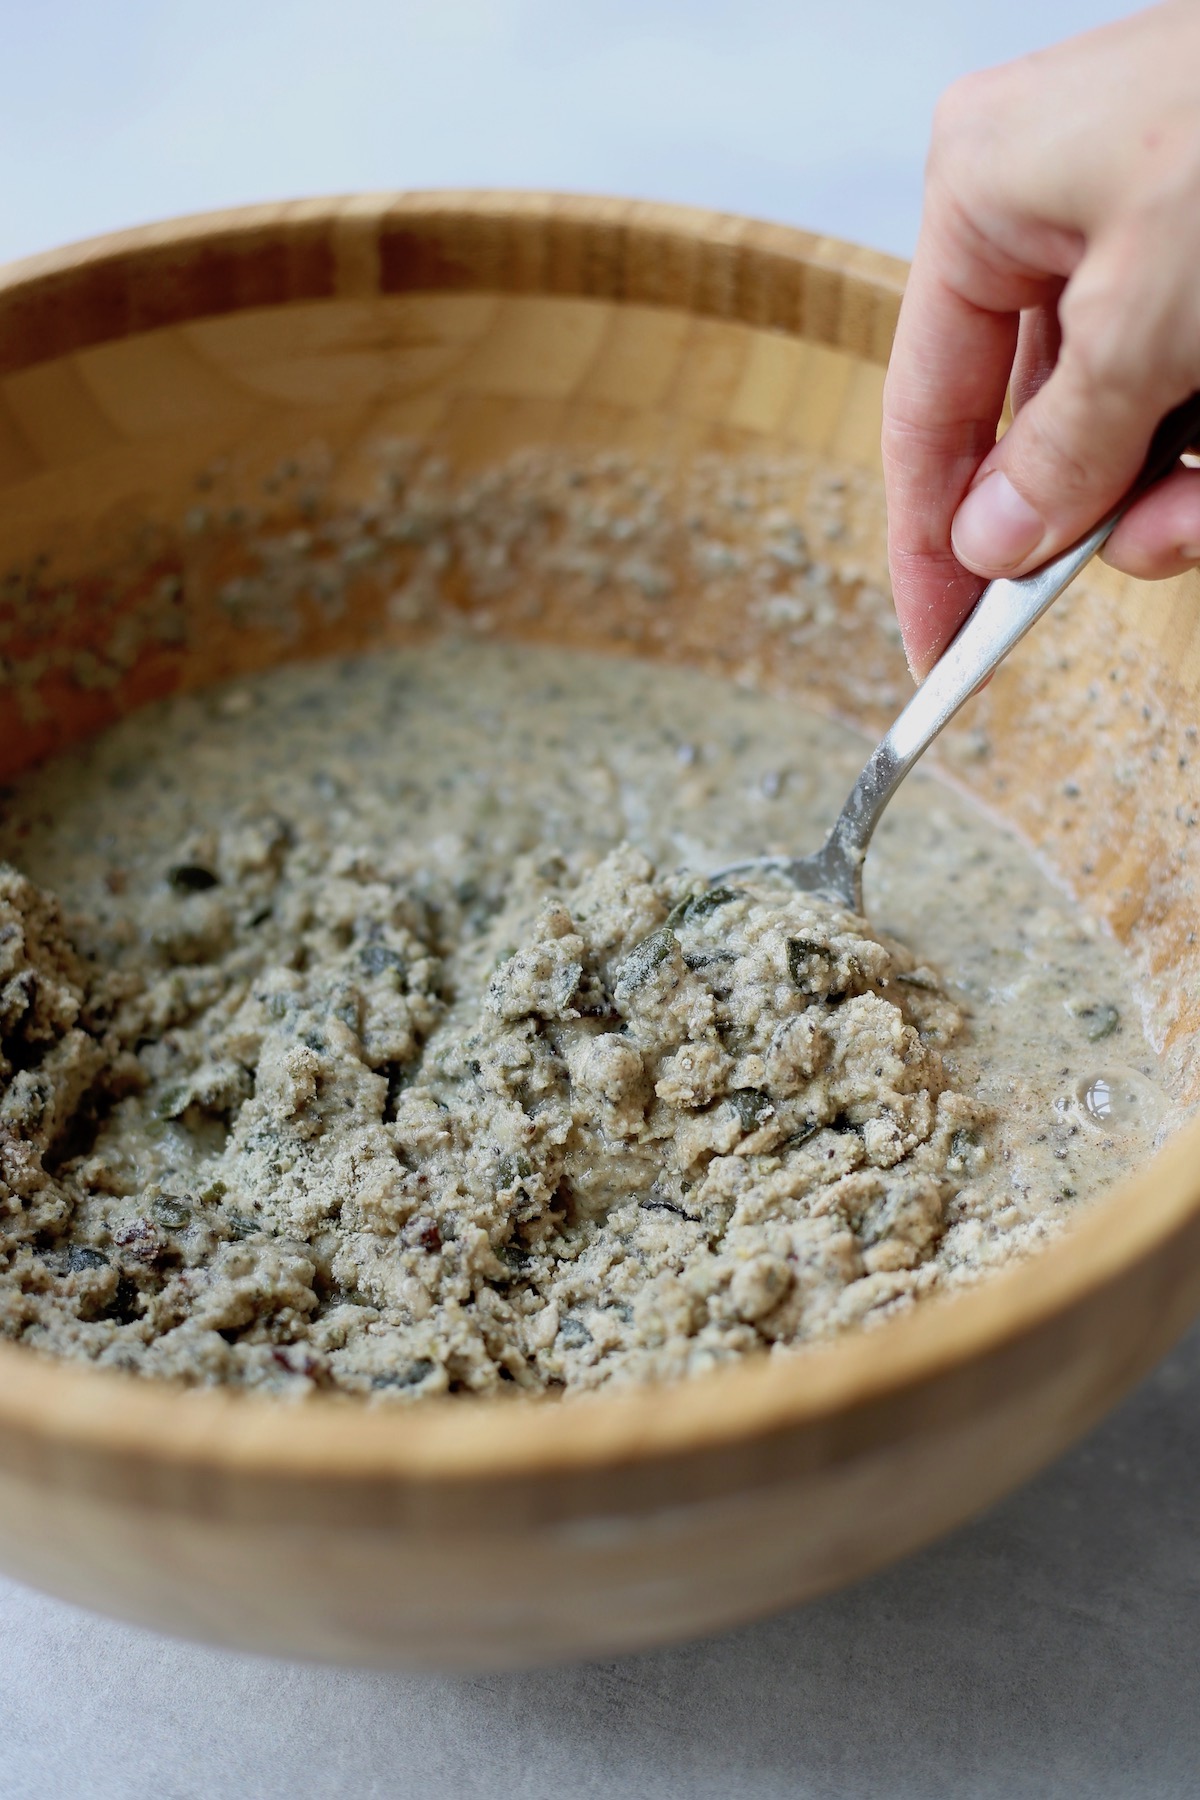
Step 5: Once the batter has thickened, pour it into your lined loaf pan and press it down until compact and level. I find damp hands or a damp spatula work best for this.
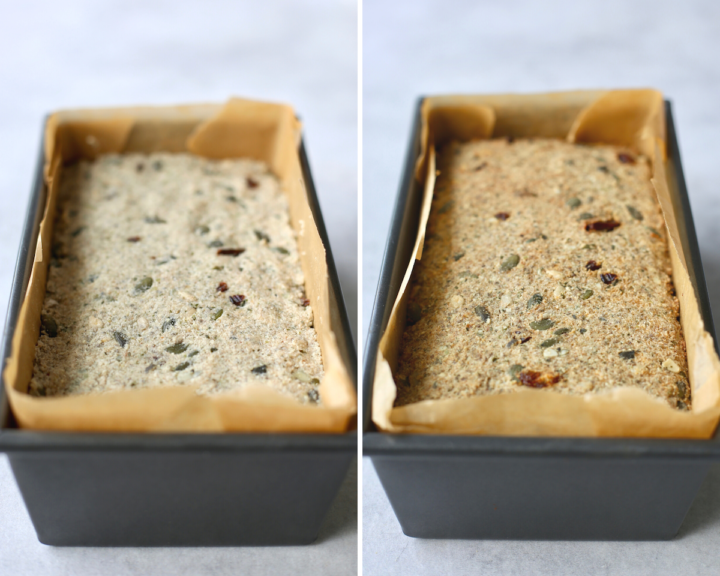
Step 6: Bake the loaf for 40 minutes. Then remove the loaf and cover it with aluminum foil before placing it back in the oven to bake for another 5-15 minutes or until a knife inserted into the center comes out clean.
Step 7: Allow the loaf to cool completely before slicing and enjoying with your favorite spreads!
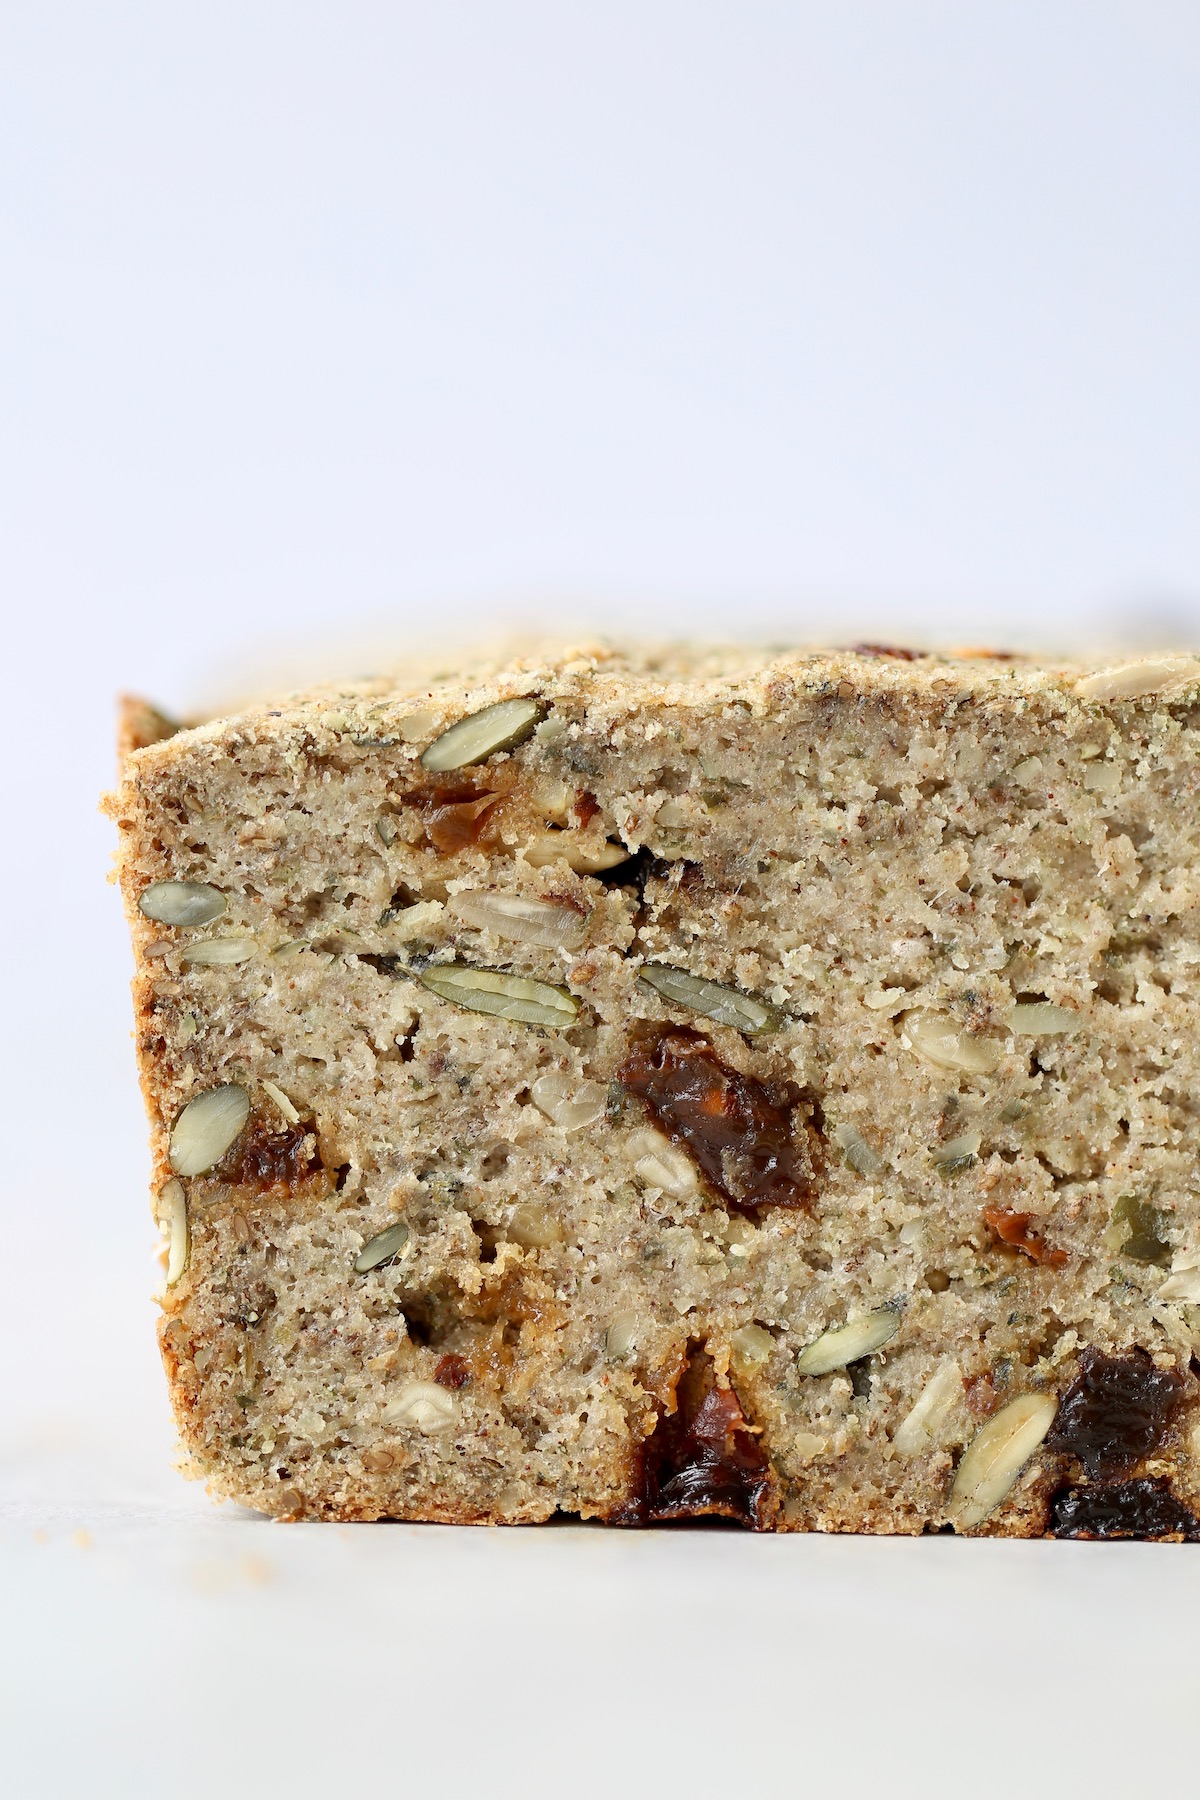
How to Store Cinnamon Raisin Seed Bread:
I doubt you'll have many leftovers of this seed bread once it is baked, but in case you do, there are a couple different ways you can store it.
Fridge: This bread can be stored in the fridge for 4-5 days.
Freezer: You can also slice the entire loaf once it's cooled and store it in the freezer for 1-2 months. Simply remove a slice from the freezer and reheat it in the microwave or toaster oven.
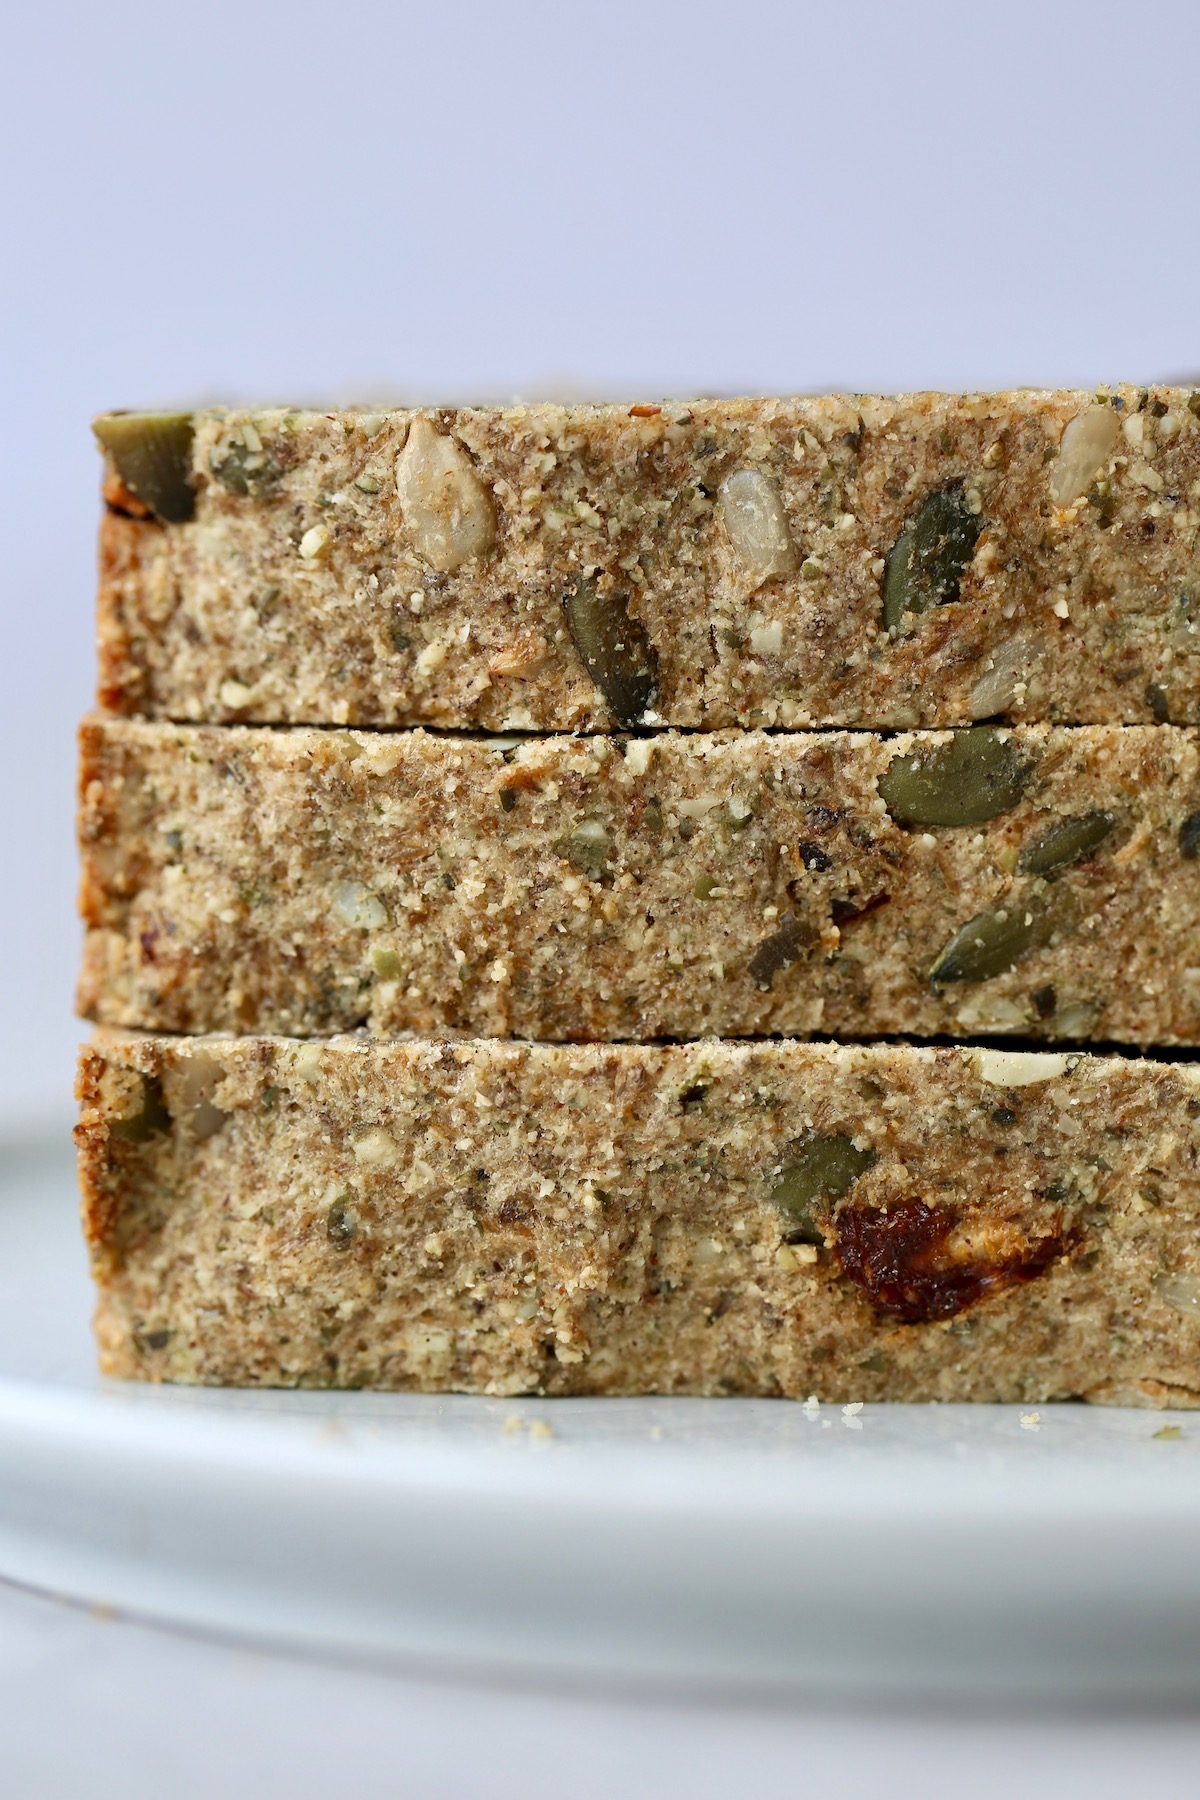
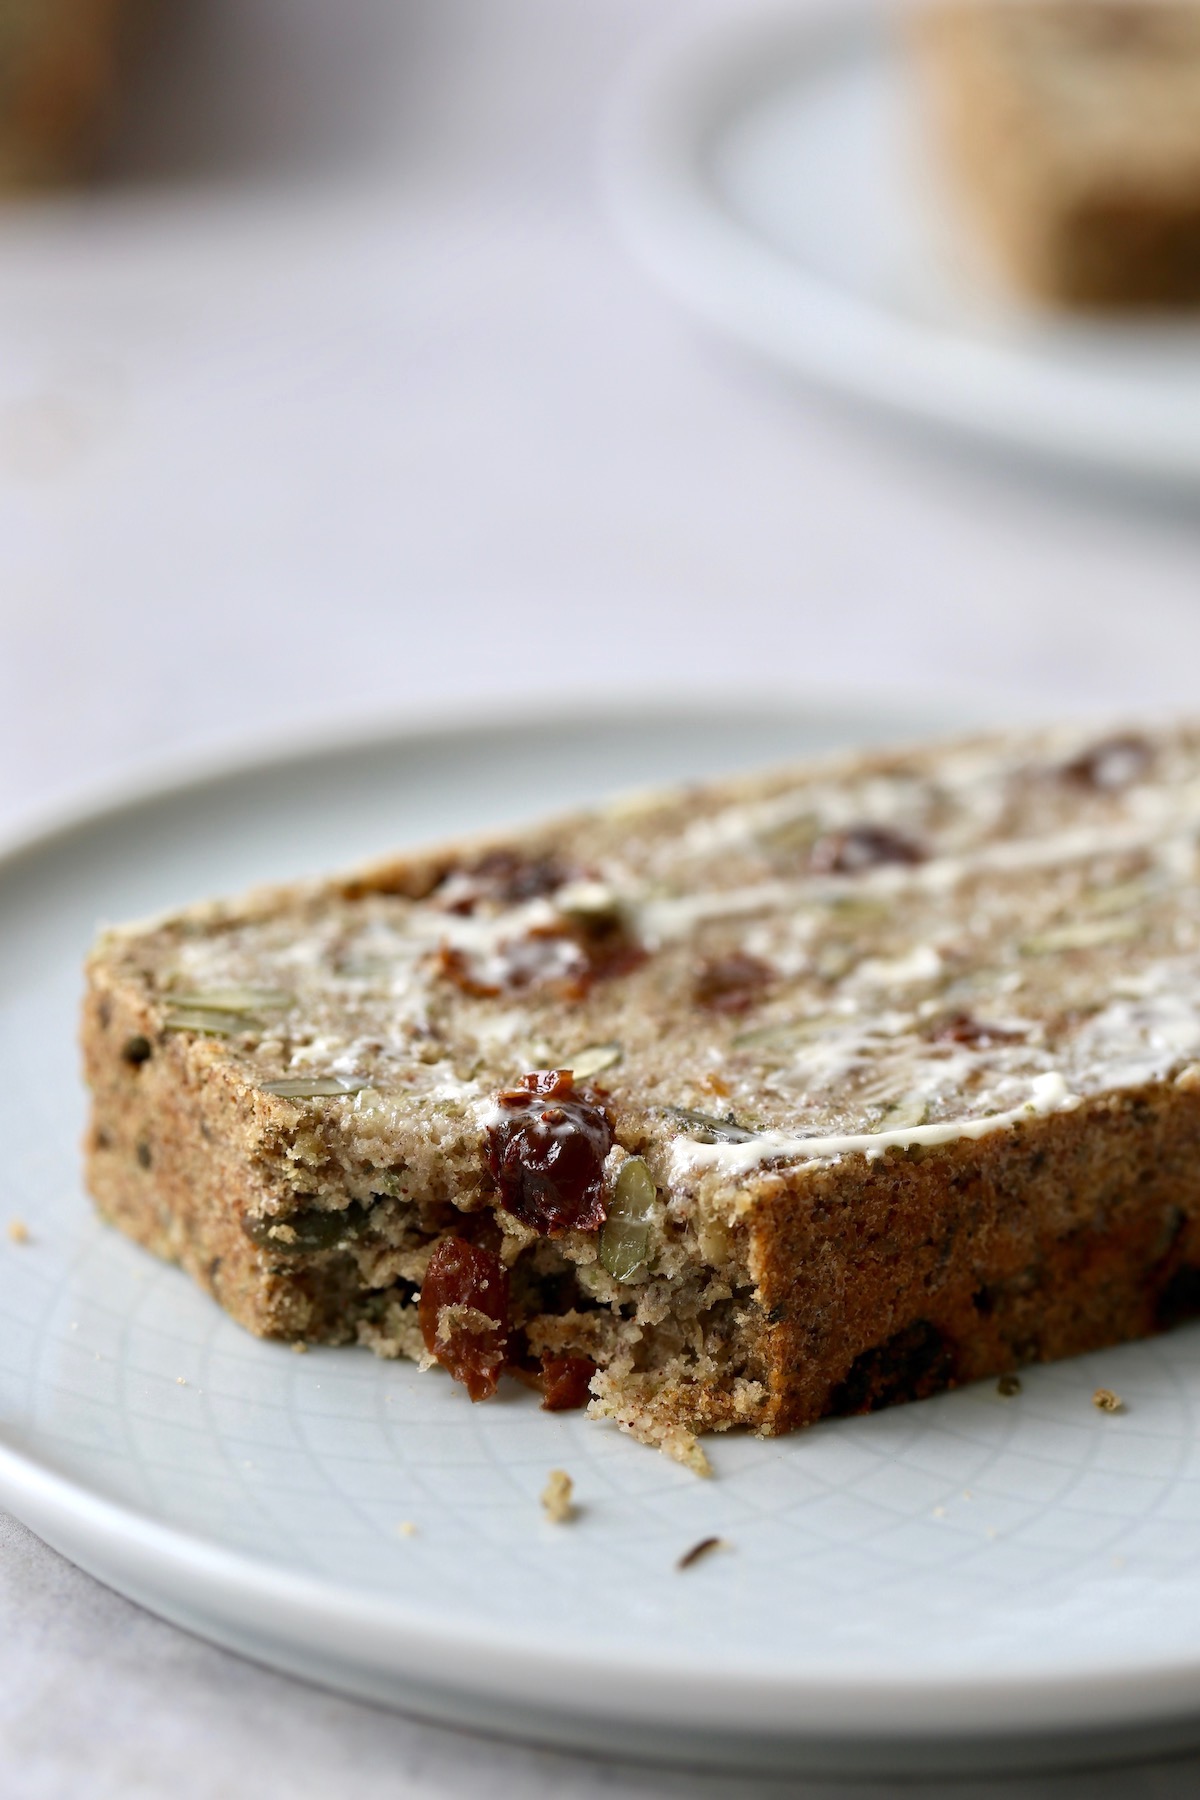
I'd love to know if you give this Cinnamon Raisin Seed Bread a try and what you think! Was it your first time baking gluten-free bread? What spread do you like to spread on it the most?
Be sure to leave a star rating by clicking on the stars in the recipe card. If you enjoyed the recipe share it with your friends!
📖 Recipe
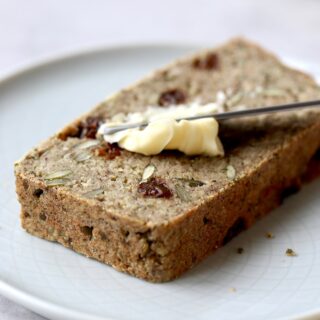
Gluten Free Cinnamon Raisin Seed Bread
Full of hearty pumpkin and sunflower seeds and sweet, juicy raisins, this Cinnamon Raisin Seed Bread makes for a delicious breakfast or hearty snack!
Equipment
Ingredients
- 1 ½ cups pumpkin seeds divided
- 1 cup brown rice flour
- 1 cup almond flour
- ¼ cup sunflower seeds
- 3 tablespoons + 1 teaspoon psyllium husk powder*
- 2 tablespoons chia seeds
- 4 teaspoons ground cinnamon
- Pinch of salt
- ½ cup raisins coarsely chopped
- 1 ¾ cups water
- ¼ cup maple syrup
Instructions
- In a high speed blender or food processor, grind one cup of pumpkin seeds into a fine flour. Set aside the other ½ cup.
- Pour the pumpkin seed flour into a large mixing bowl and add the remaining dry ingredients, from the ½ cup remaining whole pumpkin seeds to the raisins. Stir to combine.
- Add in the water and maple syrup and stir until a damp dough forms. Allow the mixture to sit until the water gets soaked up and the dough is thick and dense, about 20-30 minutes.
- While the mixture thickens, preheat your oven to 375 °F and grease a loaf pan well with cooking spray or coconut oil. Or you can line the pan with parchment paper. Pour the thickened dough into your prepared loaf pan and firmly press it down with damp hands or a damp spatula until compact and flat.
- Bake the loaf for 40 minutes then cover with aluminum and bake another 5-15 minutes or until a knife inserted into the center comes out clean.
- Allow the loaf to cool before going around the edges with a knife and carefully removing the loaf onto a wire rack. Continue to allow the loaf to cool completely before slicing.
- Store the loaf in the fridge or slice and freeze it for later. This bread tastes amazing toasted with vegan butter!
Notes
Psyllium husk is a soluble fiber that is often used to bulk up stools and can be used to treat intestinal problems. Psyllium husk is commonly found in India and looks like a shrub-like herb.
Psyllium husk powder is simply psyllium husk that has been ground into flour.
Due to its water absorbing abilities, psyllium husk powder is a great ingredient to use in gluten-free baking as it helps bind ingredients together, keeping you from ending up with a crumbly mess.
Nutrition
Serving: 1sliceCalories: 216kcalCarbohydrates: 26gProtein: 6gFat: 11gSaturated Fat: 1gPolyunsaturated Fat: 3gMonounsaturated Fat: 2gTrans Fat: 0.01gSodium: 6mgPotassium: 197mgFiber: 6gSugar: 5gVitamin A: 6IUVitamin C: 1mgCalcium: 56mgIron: 2mg
Tried this recipe?Let me know how it was!
Healthy Peanut Butter Chocolate Chunk Granola (8 Ingredients!)
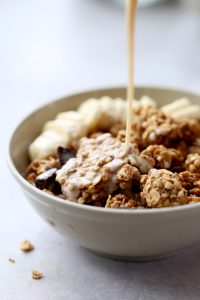
This oil-free, cluster-filled Peanut Butter Chocolate Chunk Granola is easy to make, requires just 8 ingredients and is sure to impress your friends and family!
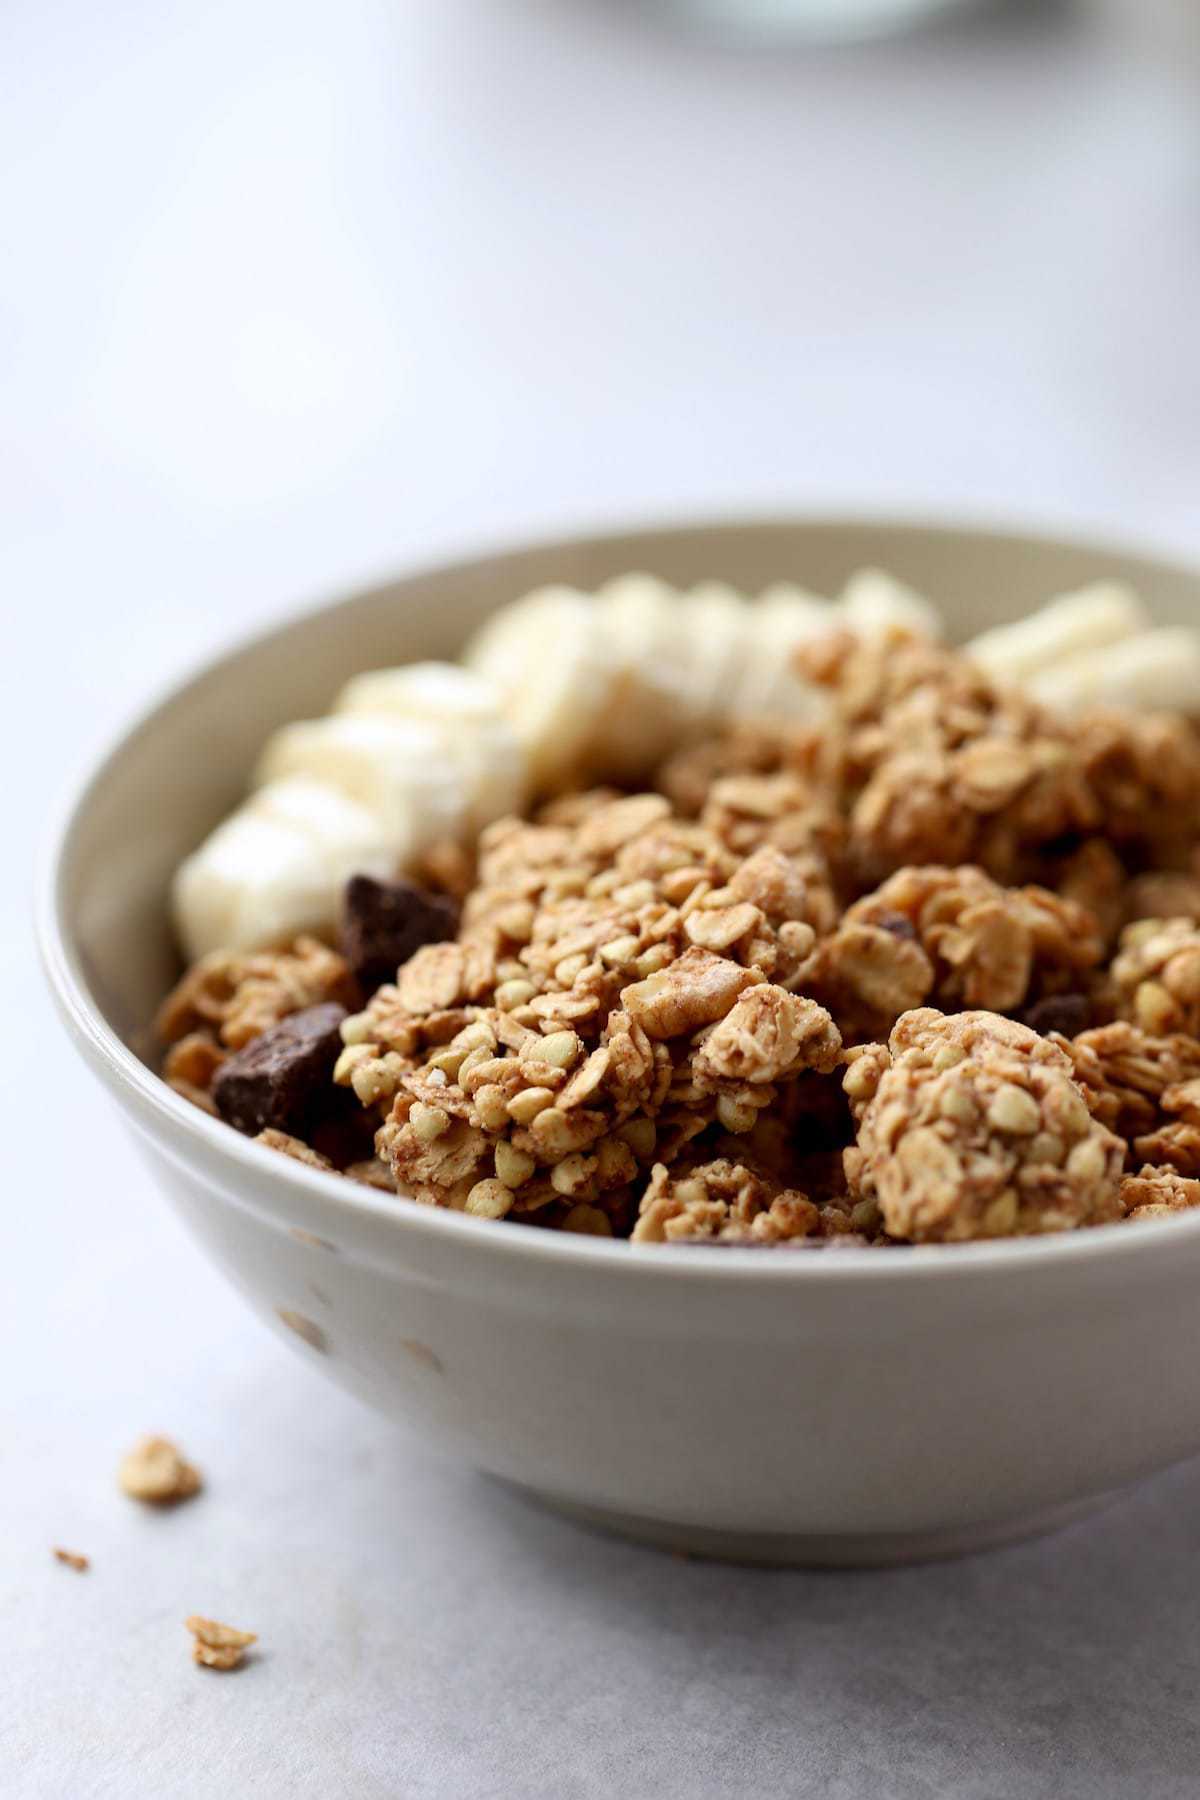
Also Featured In
This recipe is also featured in the following vegan recipe roundups:
I've always had a love/hate relationship with granola.
I LOVE the taste and texture--give me all the crunchy, oat-y, sweet things!
However, usually when I have store-bought granola for breakfast I get a stomach ache or sugar crash afterwards. That's why I started making granola at home. I can control how it's sweetened, how much oil it contains and of course, the flavor!
I've got a number of delicious granola recipes on the blog, including this Chocolate Quinoa Cluster Granola, this Easy Tahini Granola recipe and The Best Homemade Granola Recipe that my sister-in-law shared with me.
But when it comes to my favorite flavor of granola, we all know I'm obsessed with nut butter and chocolate. So for this recipe I figured I would combine the two into one clustery granola package!
This healthy peanut butter granola only requires 8 ingredients, one bowl and less 30 minutes to make! Plus it's oil free and sweetened with maple syrup, so I feel good after eating it.
If you're not a fan of chocolate (but seriously, who isn't?!) then you can swap the chocolate chunks out for dried fruit such as raisins or chopped up dates. Get creative with your mix-ins!
We love serving this granola with fresh fruit (especially banana), chilly almond milk and homemade coconut yogurt.
Before we jump into this simple, easy recipe, let's clarify a few more things about granola!
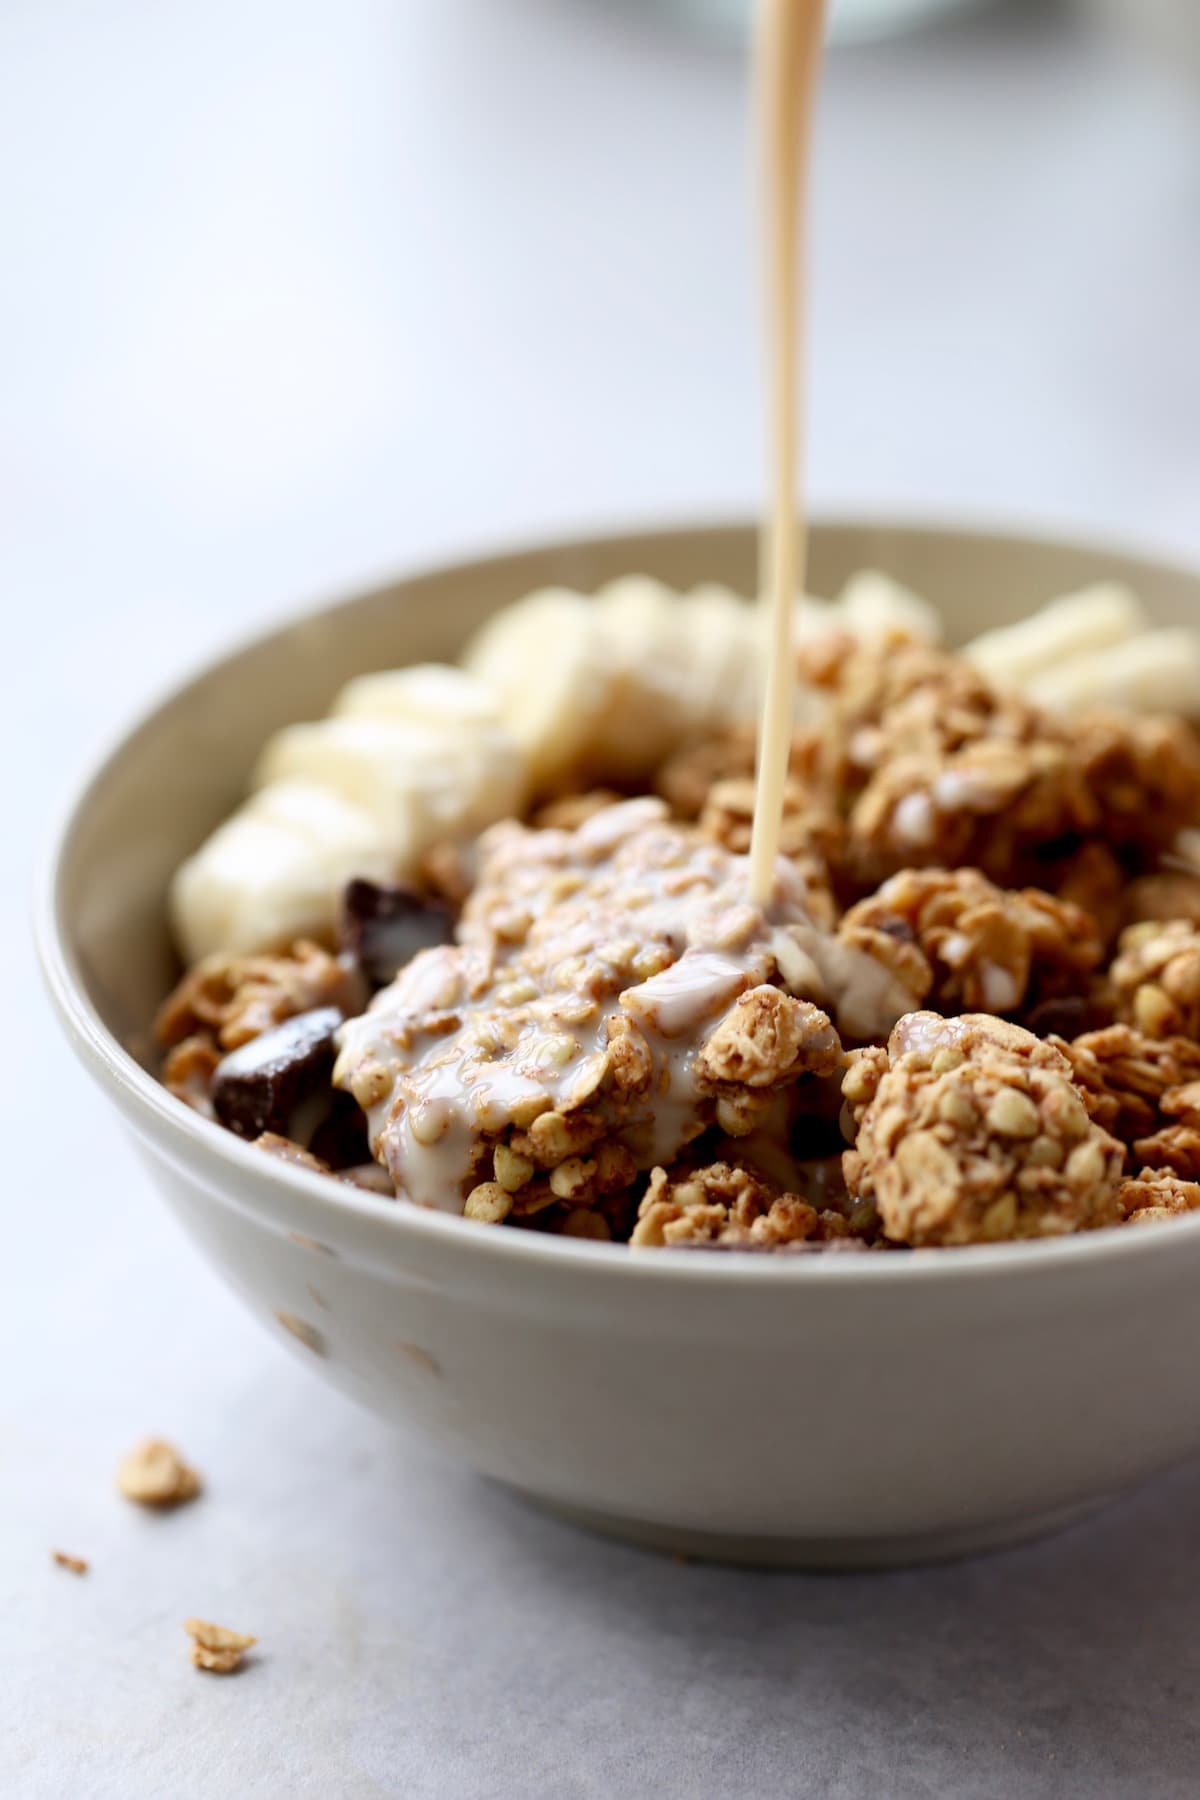
What's the Difference Between Granola and Muesli?
Muesli and granola are similar in a lot of ways in that they both often contain a combination of oats, nuts, seeds and dried fruit.
However, muesli is often unbaked while granola is made from coating all the ingredients in oil and sweetener and baked until golden and crunchy. I always thought I liked granola better than muesli, but now I love both equally.
Why is Granola so Unhealthy?
This was actually a question that popped up on the internet as a commonly searched question.
Yes, granola can be unhealthy.
While granola sounds like it should always be healthy (you know the saying "crunchy granola"?), you should look at the ingredients to see what your store-bought granola is made out of. Sometimes packaged granola has more sugar and oil than you'd care for!
With that said, granola really can be a part of a healthy diet. Either make your own at home so you can control the ingredients or find a brand that aligns with your diet goals.
Is it Cheaper to Make Your Own Granola?

When it comes to whether homemade or store-bought granola is cheaper, it will always depend on what ingredients you're using and how much each ingredients costs.
If you can buy your oats, nuts, seeds and dried fruit in bulk, then homemade granola can easily be cheaper than store-bought.
Either way, I love to make my own granola because I can control the sugar and oil content. I often switch up which ingredients I use depending on what I have on hand. Since I've recently started making my own peanut butter, this peanut butter granola is very affordable!
What is the Healthiest Granola?
I don't think you can ever answer the question of which food is the healthiest. We all have different opinions on what is healthy and also have different health goals.
However, some of the more popular granola brands are listed below in case you are unable to make your own granola and want to know where to start in purchasing store-bought granola.
Healthy Granola Recipes
I have quite a few other granola and granola bar recipes on the blog, so if you're still looking for more options, be sure to check out the recipes listed below:
Chocolate Quinoa Cluster Granola
The Best Homemade Granola Recipe
Family Size Basic Vegan Granola Recipe
Chewy Almond Butter Date Granola Bars
Peanut Butter Coconut Granola Bars
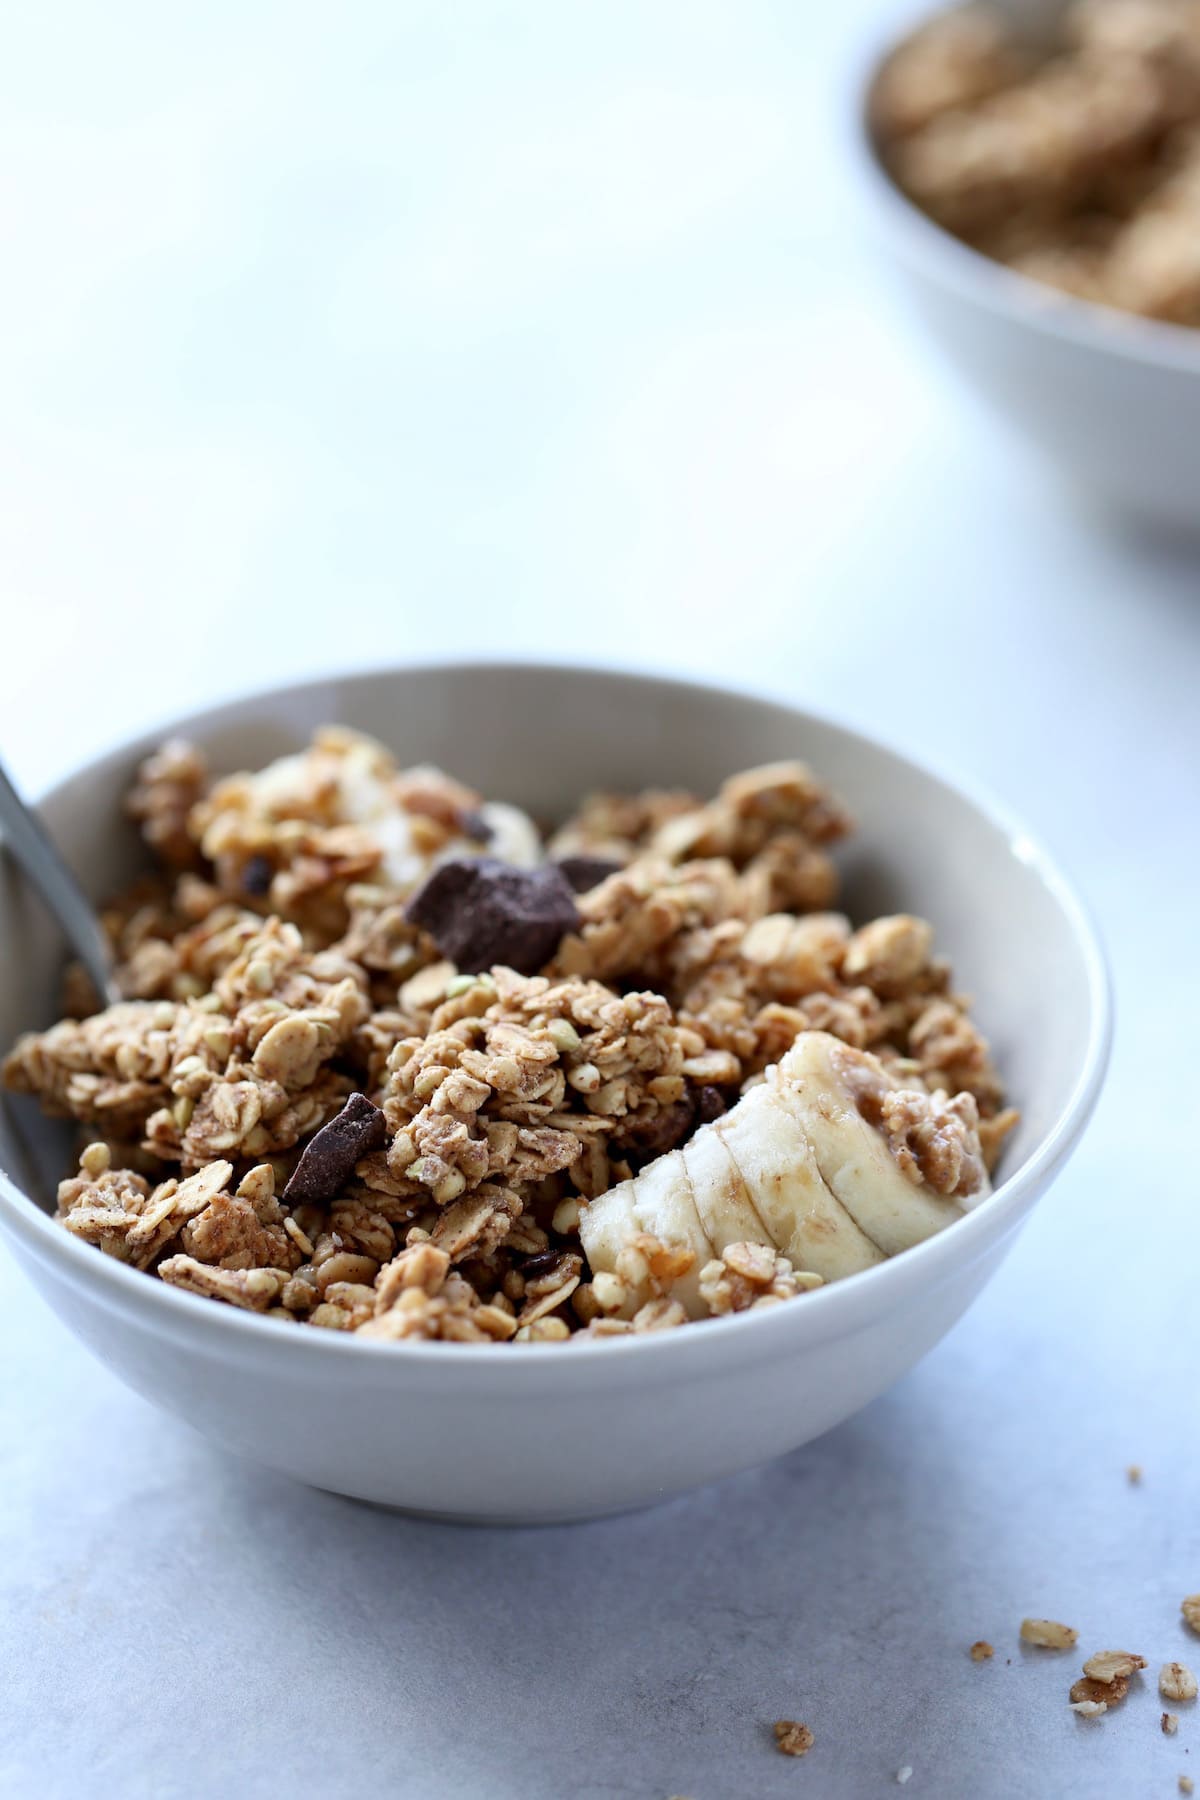
Okay, let's jump into this amazing granola recipe! If you make it, let me know what you think by leaving a comment below and giving the recipe a star rating.
If you enjoy this granola recipe, be sure to share it with your friends and family!
📖 Recipe

Healthy Peanut Butter Chocolate Chunk Granola
This cluster-filled Peanut Butter Chocolate Chunk Granola is easy to make, requires just 8 ingredients and is sure to impress your friends and family!
Ingredients
- 3 cups old-fashioned rolled oats
- 1 cup raw buckwheat groats
- 1 cup raw mixed nuts chopped
- 2 teaspoons cinnamon
- 1 teaspoon sea salt
- ½ cup natural peanut butter
- ½ cup maple syrup
- ½ cup dairy-free chocolate cut into chunks
Instructions
- Preheat your oven to 350 °F and line a baking tray with a silicone baking mat or parchment paper. Set it aside.
- In a large bowl, mix together the dry ingredients, from the rolled oats to the sea salt.
- Add in the peanut butter and liquid sweetener and stir until all the dry ingredients have been coated in the sweet, peanut butter mixture.
- Pour the mixture onto your prepared baking dish and press it down firmly into an even, fairly thin layer.
- Bake the granola for 20 minutes on the lowest rack. Remove the granola and carefully flip it over in large sections. Place the granola back in the oven on the lowest rack and bake it for another 7 minutes.
- You can either add the chocolate chunks to the granola while it's still cooling so that the chocolate melts a little and coats the granola, or you can allow the granola to cool completely before adding in the chocolate. Serve the granola with non-dairy milk and fruit or use it as a topping for smoothie and yogurt bowls.
Notes
Store the granola in an airtight container for a couple weeks...if it lasts that long!
Nutrition
Calories: 403kcalCarbohydrates: 52gProtein: 11gFat: 19gSaturated Fat: 5gPolyunsaturated Fat: 4gMonounsaturated Fat: 9gSodium: 240mgPotassium: 362mgFiber: 7gSugar: 15gVitamin A: 3IUVitamin C: 0.1mgCalcium: 65mgIron: 3mg
Tried this recipe?Let me know how it was!
Vegan Caesar Dressing

Made from a base of creamy cashews, zesty lemon juice and rich Dijon mustard, you'll want this Vegan Caesar Dressing in your fridge at all times! It makes for an amazing dressing for leafy green salads or a dip for raw vegetables.
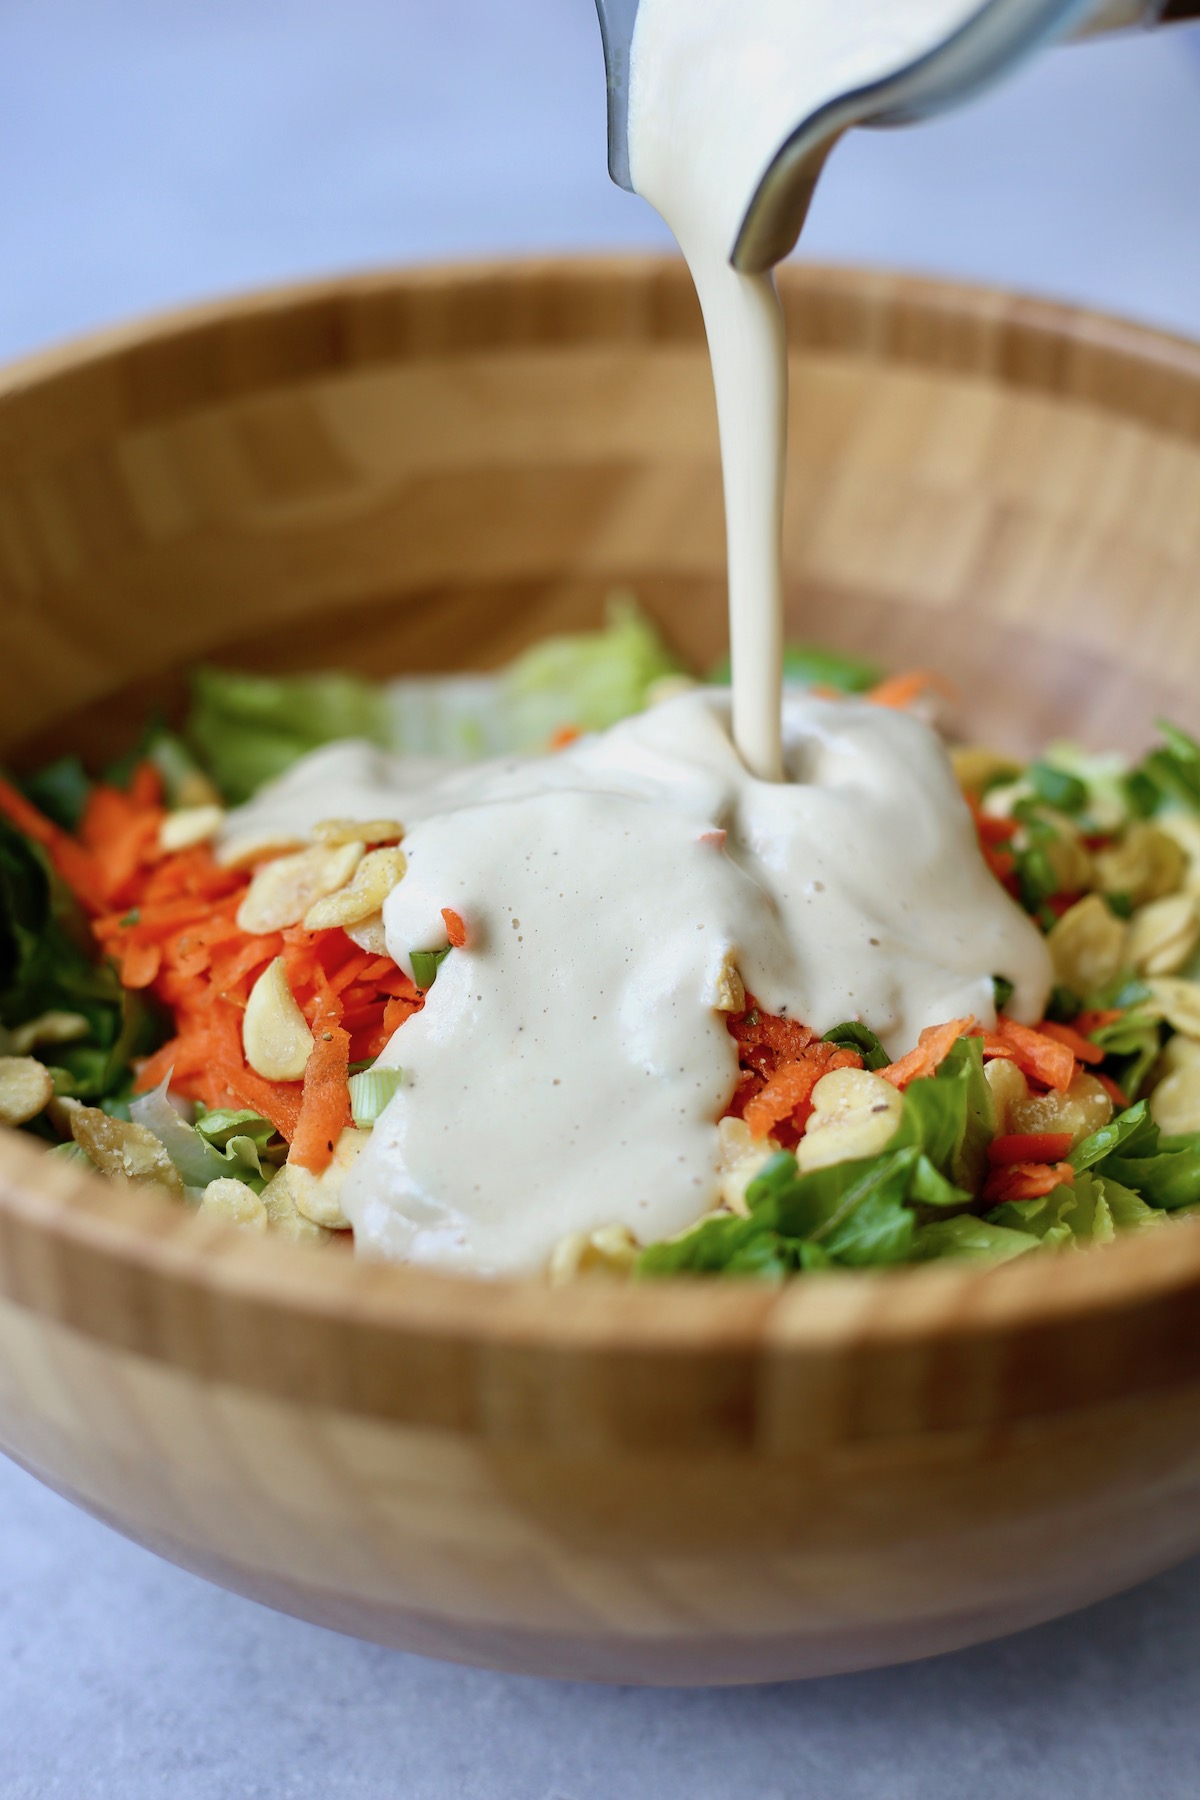
Also Featured In
This recipe is also featured in the following vegan recipe roundups:
It's been ages since I bought Caesar salad dressing at the grocery store.
Once I discovered how easy and amazing homemade salad dressings can be, I've been making them at home ever since!
We are obsessed with my Lemon Tahini Dressing as well as the simple vinaigrette that I use in my Aunt Carol's Crunch Salad.
But most of all, we LOVE this Vegan Caesar Dressing! It's rich, creamy and made with less than 10 ingredients, all of which you probably have on hand already.
Ingredients You'll Need for Vegan Caesar Dressing
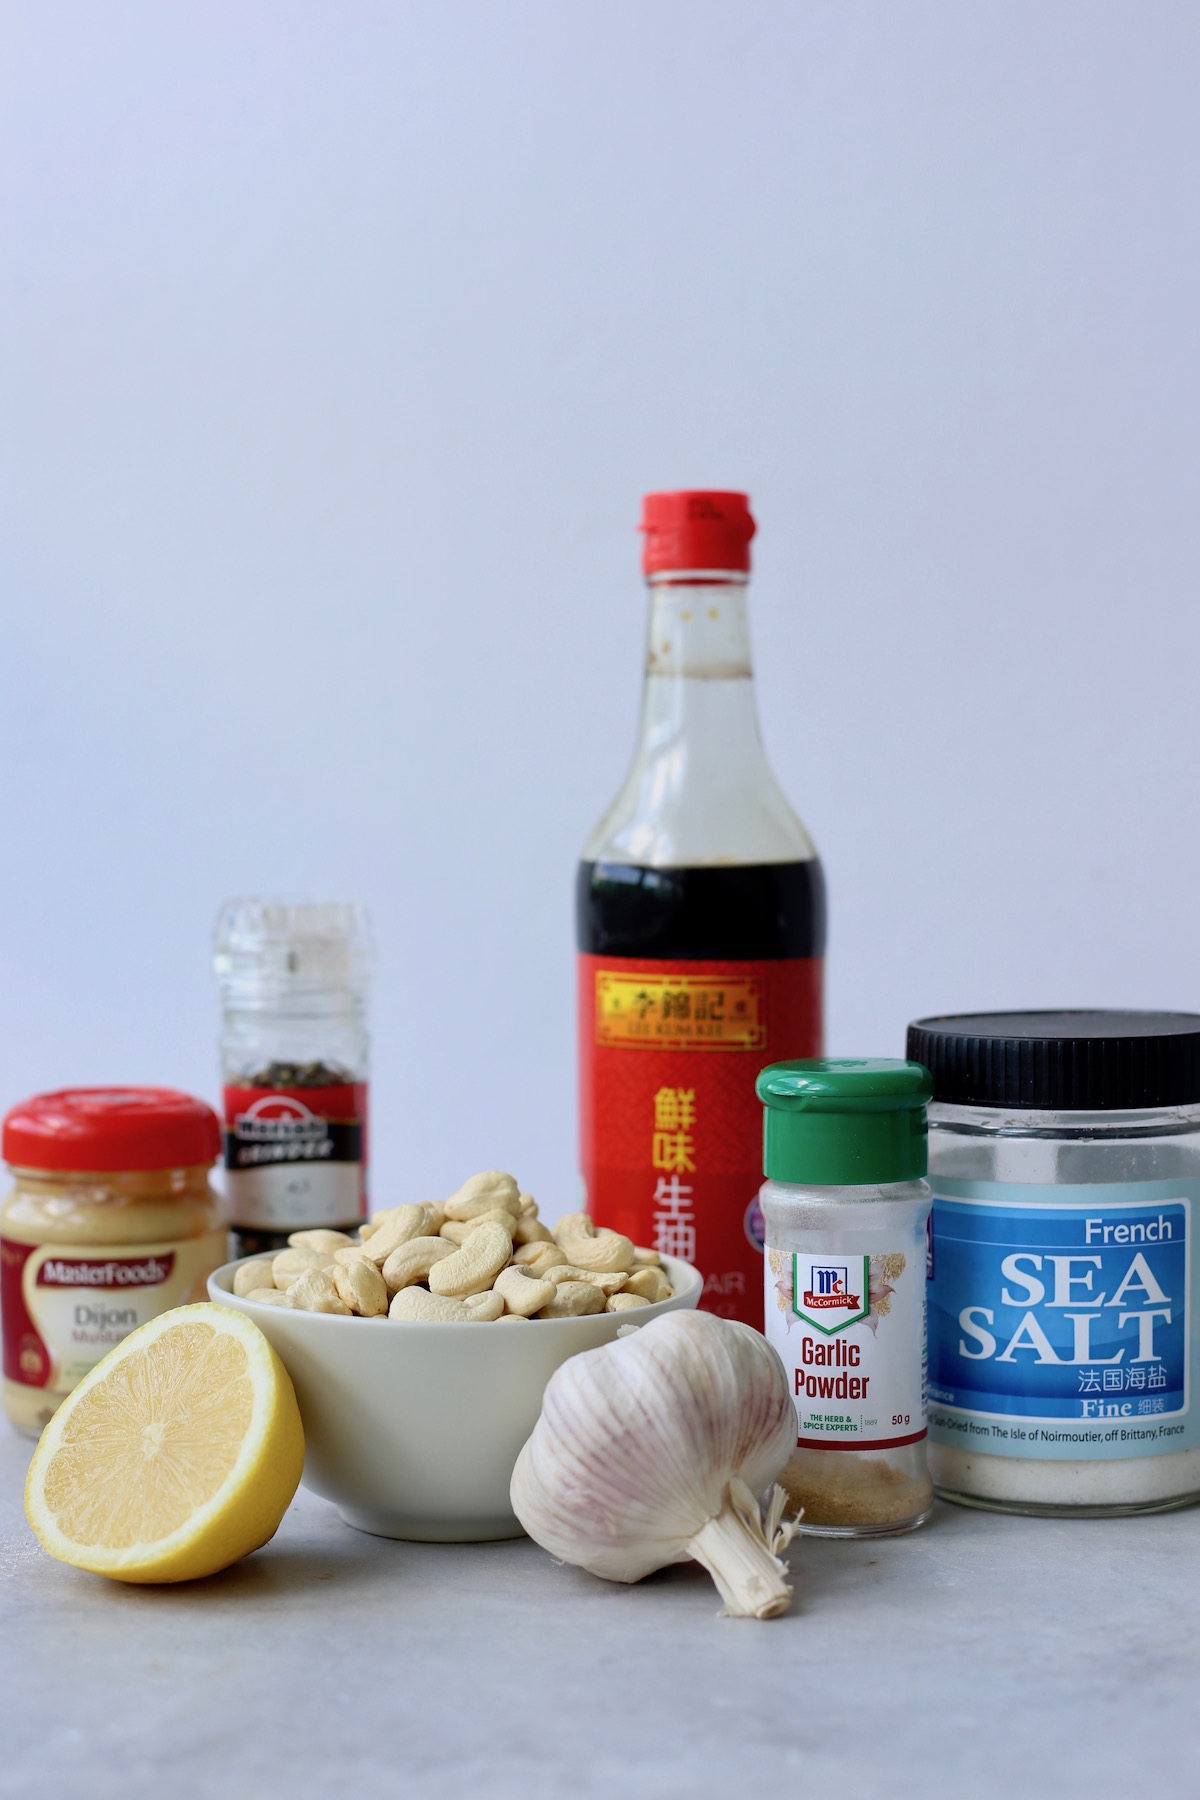
One of the main reasons that I like making my Caesar salad dressings at home is because it allows me to control all of the ingredients. Instead of buying one full of hard-to-read, unnecessary ingredients, I can make a delicious, creamy dressing at home using just a handful of simple ingredients!
To make this vegan Caesar dressing you'll need the following ingredients:
- Raw cashews
- Lemon juice
- Dijon mustard
- Garlic powder
- Garlic
- Soy sauce (or another gluten-free alternative)
- Sea salt
- Freshly ground black pepper
- Water
I'm sure you already have most of these ingredients on hand!
How to Make Vegan Caesar Dressing at Home
Thankfully, this vegan Caesar salad dressing is really easy to make.
- First, you'll need to soak some raw cashews. Place the cashews in a bowl and cover them with water overnight. If you forget to soak them the night before, you can also soak them in boiling water for 30 minutes to and hour. OR if you have a high speed blender, you can always skip the soaking processes, although it makes for a smoother, creamier salad dressing.
- Second, drain and rinse your soaked cashews and place them in a blender, along with the remaining dressing ingredients.
- Lastly, blend until smooth!

Always taste your salad dressing before using it or storing it the fridge.
If you want it to be saltier, add more salt. If you want more rich, umami flavor, add a dash more soy sauce. If you want it zestier, add more lemon juice!
How to Make Gluten-Free Caesar Dressing
Almost all of the ingredients in this Caesar dressing are gluten-free, except for the soy sauce.
To make this gluten-free, simply use a gluten-free soy sauce, tamari or another gluten-free soy sauce substitute instead of the regular soy sauce. Something such as Coconut Aminos would work great!
Helpful Kitchen Gadgets to have to Make Homemade Salad Dressings
Most of these homemade recipes can be made simply using a bowl and a spoon. Like my favorite Lemon Miso Tahini Dressing! However, occasionally you'll find that a few other kitchen gadgets will come in handy when making more elaborate recipes.
I love my Zulay Lemon and Lime Squeezer as it allows me to use ALL of the juice and keeps out all of the seeds.
If you're making a dressing with raw nuts, like this Caesar dressing recipe, then using a high speed blender makes a big difference as it is able to blend the nuts into a super smooth, creamy texture. I absolutely love my Vitamix blender and use it most days!
Sometimes a grater comes in handy if you want to grate in some fresh ginger or garlic.
Also, you can never go wrong with a garlic press! It allows you to mince garlic with just one squeeze of your hand.
Lastly, some simple measure cups and spoons allow you to get the perfect taste, especially when first starting out making your own homemade dressings.
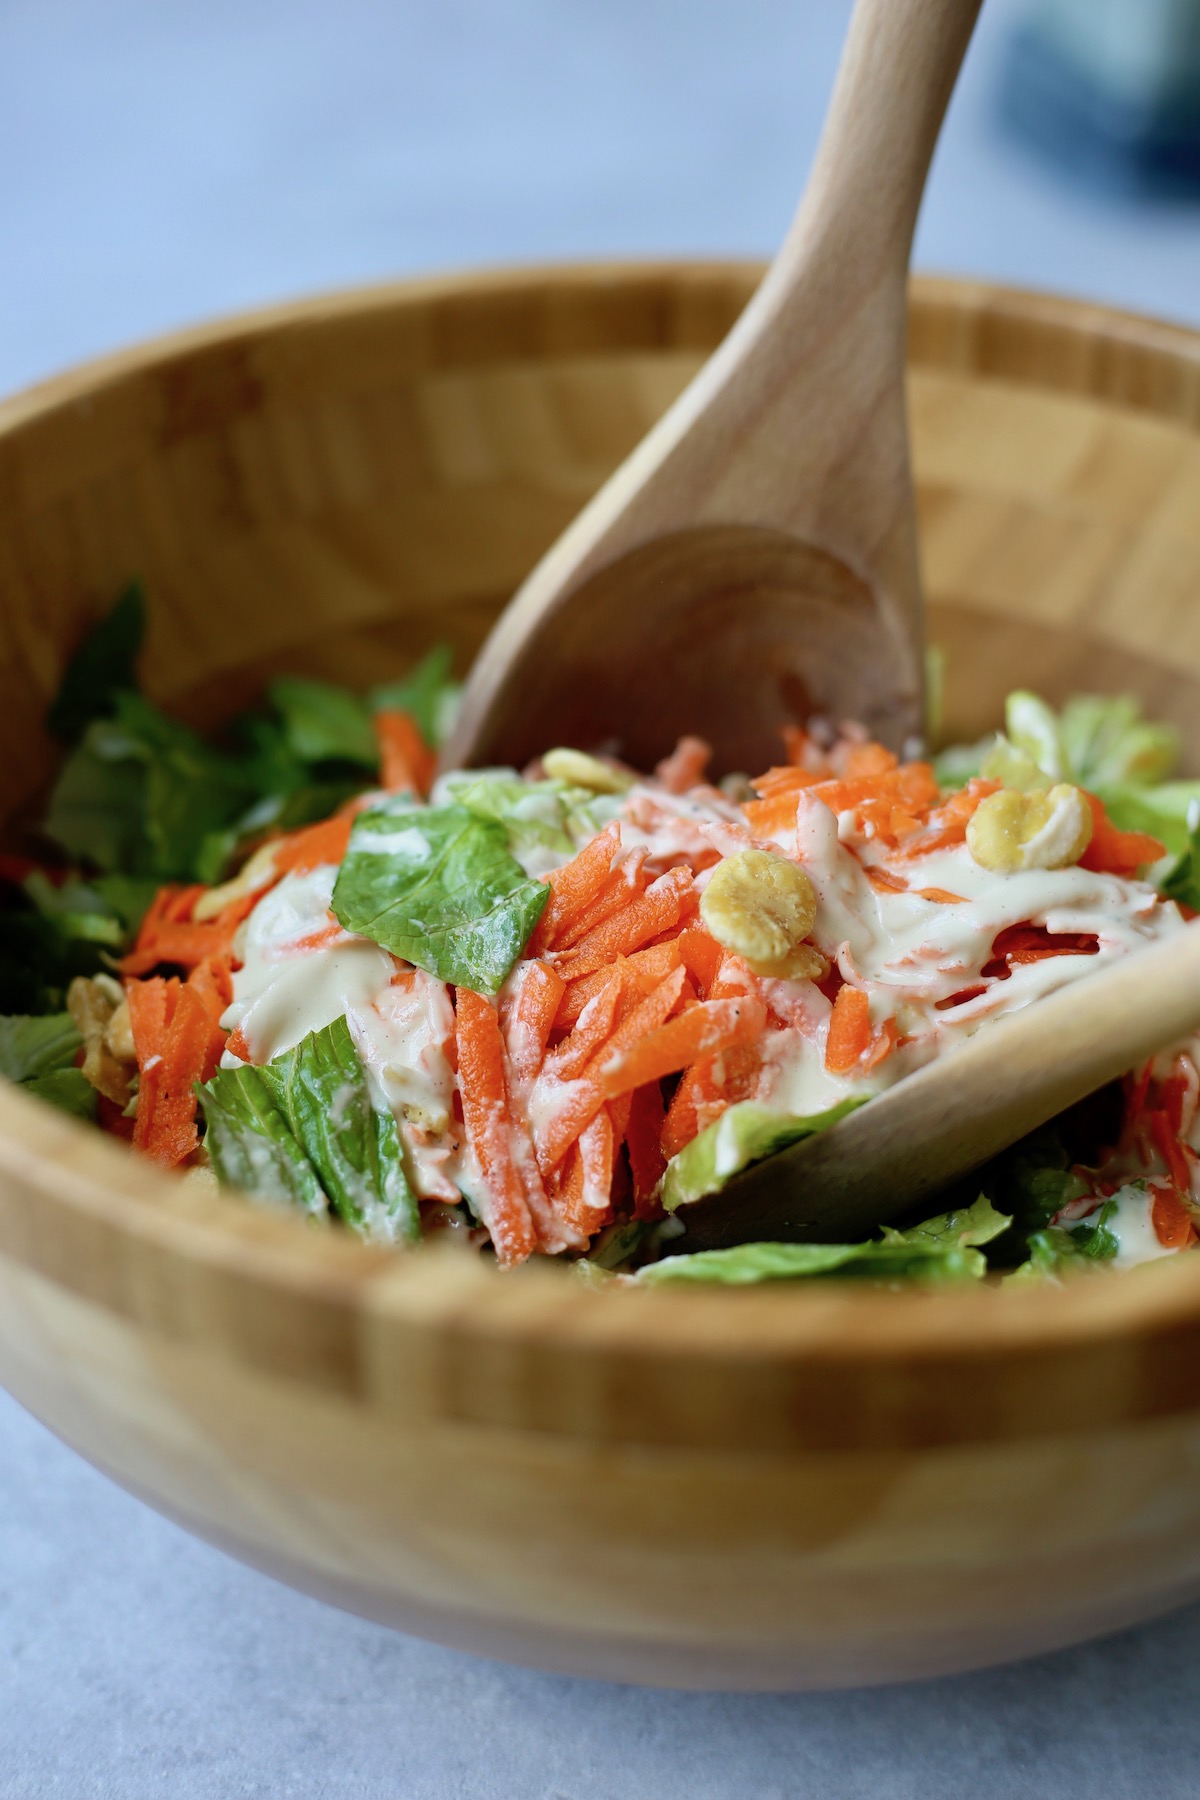
If you give this recipe a try, I'd love to know what you think! Leave a star rating by clicking on the stars in the recipe card and/or leave a comment down below!
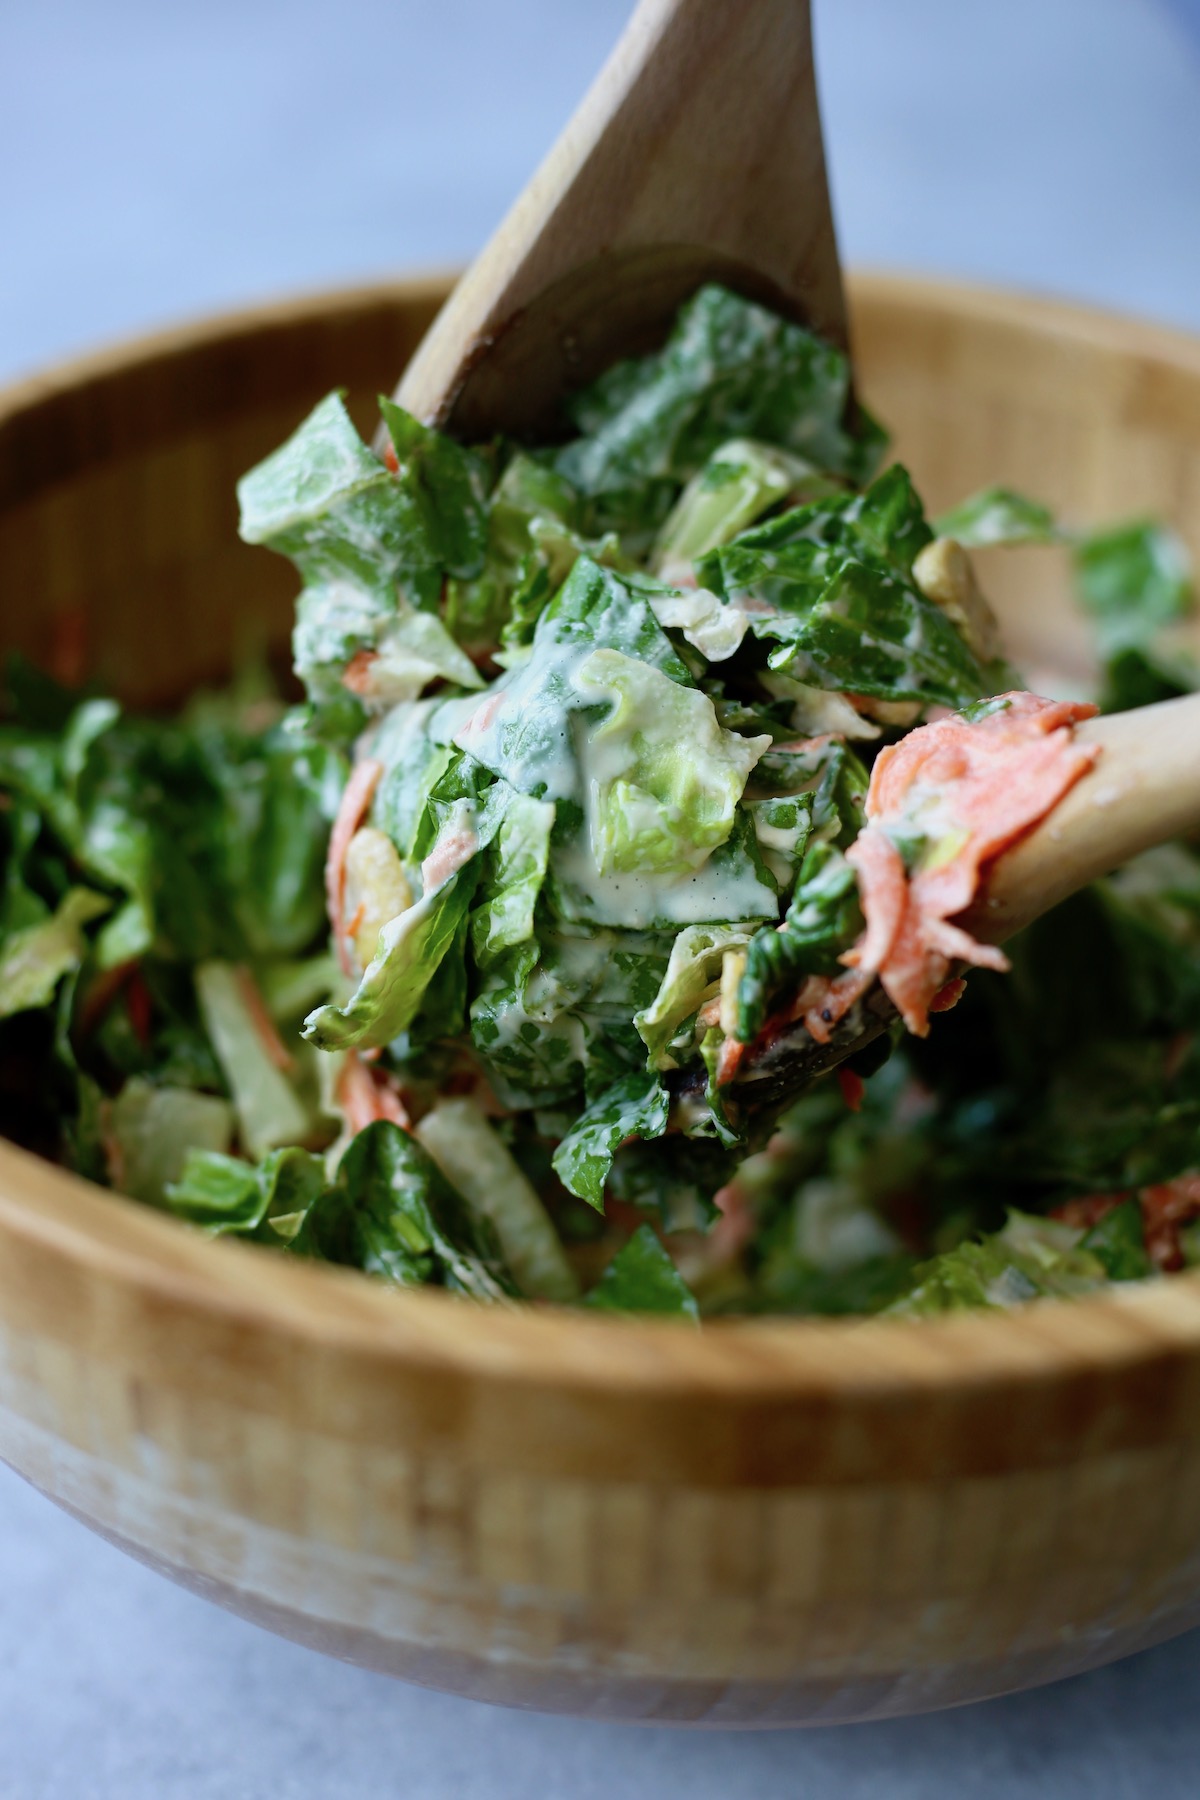
📖 Recipe
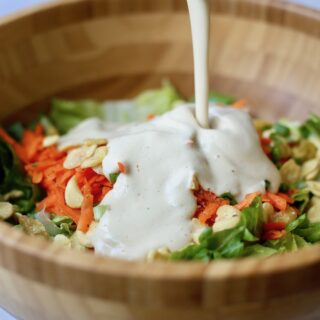
Vegan Caesar Dressing
Creamy, rich and zesty, this Vegan Caesar Dressing is something you'll want in your fridge all year round!
Ingredients
- ½ cup cashews soaked
- 6 tablespoons water
- 1 tablespoon lemon juice
- ½ tablespoon Dijon mustard
- ½ tablespoon soy sauce use gluten-free if necessary!
- 1 small garlic clove
- ½ teaspoon garlic powder
- ½ teaspoon fine grain sea salt
- Freshly ground black pepper to taste
Instructions
- Drain the cashews and add them to a high speed blender.
- Add in the remaining ingredients and blend until smooth
- Taste and adjust seasonings as desired. Add more lemon juice for zest, soy sauce for umami, and salt for saltiness.
- Pour over a green salad, dip veggies into it or use it as a dressing for pasta salad!
Notes
This dressing should last for 4-5 days in the fridge.
This recipe can easily be doubled.
Nutrition
Calories: 47kcalCarbohydrates: 3gProtein: 2gFat: 4gSaturated Fat: 1gPolyunsaturated Fat: 1gMonounsaturated Fat: 2gSodium: 220mgPotassium: 63mgFiber: 0.3gSugar: 1gVitamin A: 1IUVitamin C: 1mgCalcium: 5mgIron: 1mg
Tried this recipe?Let me know how it was!
Creamy Vegan Tomato Zucchini Soup
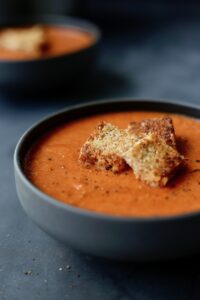
This Creamy Vegan Tomato and Zucchini Soup packs a nutritious punch without sacrificing flavor! Cashews and zucchini make this soup super creamy and flavorful without all the dairy!
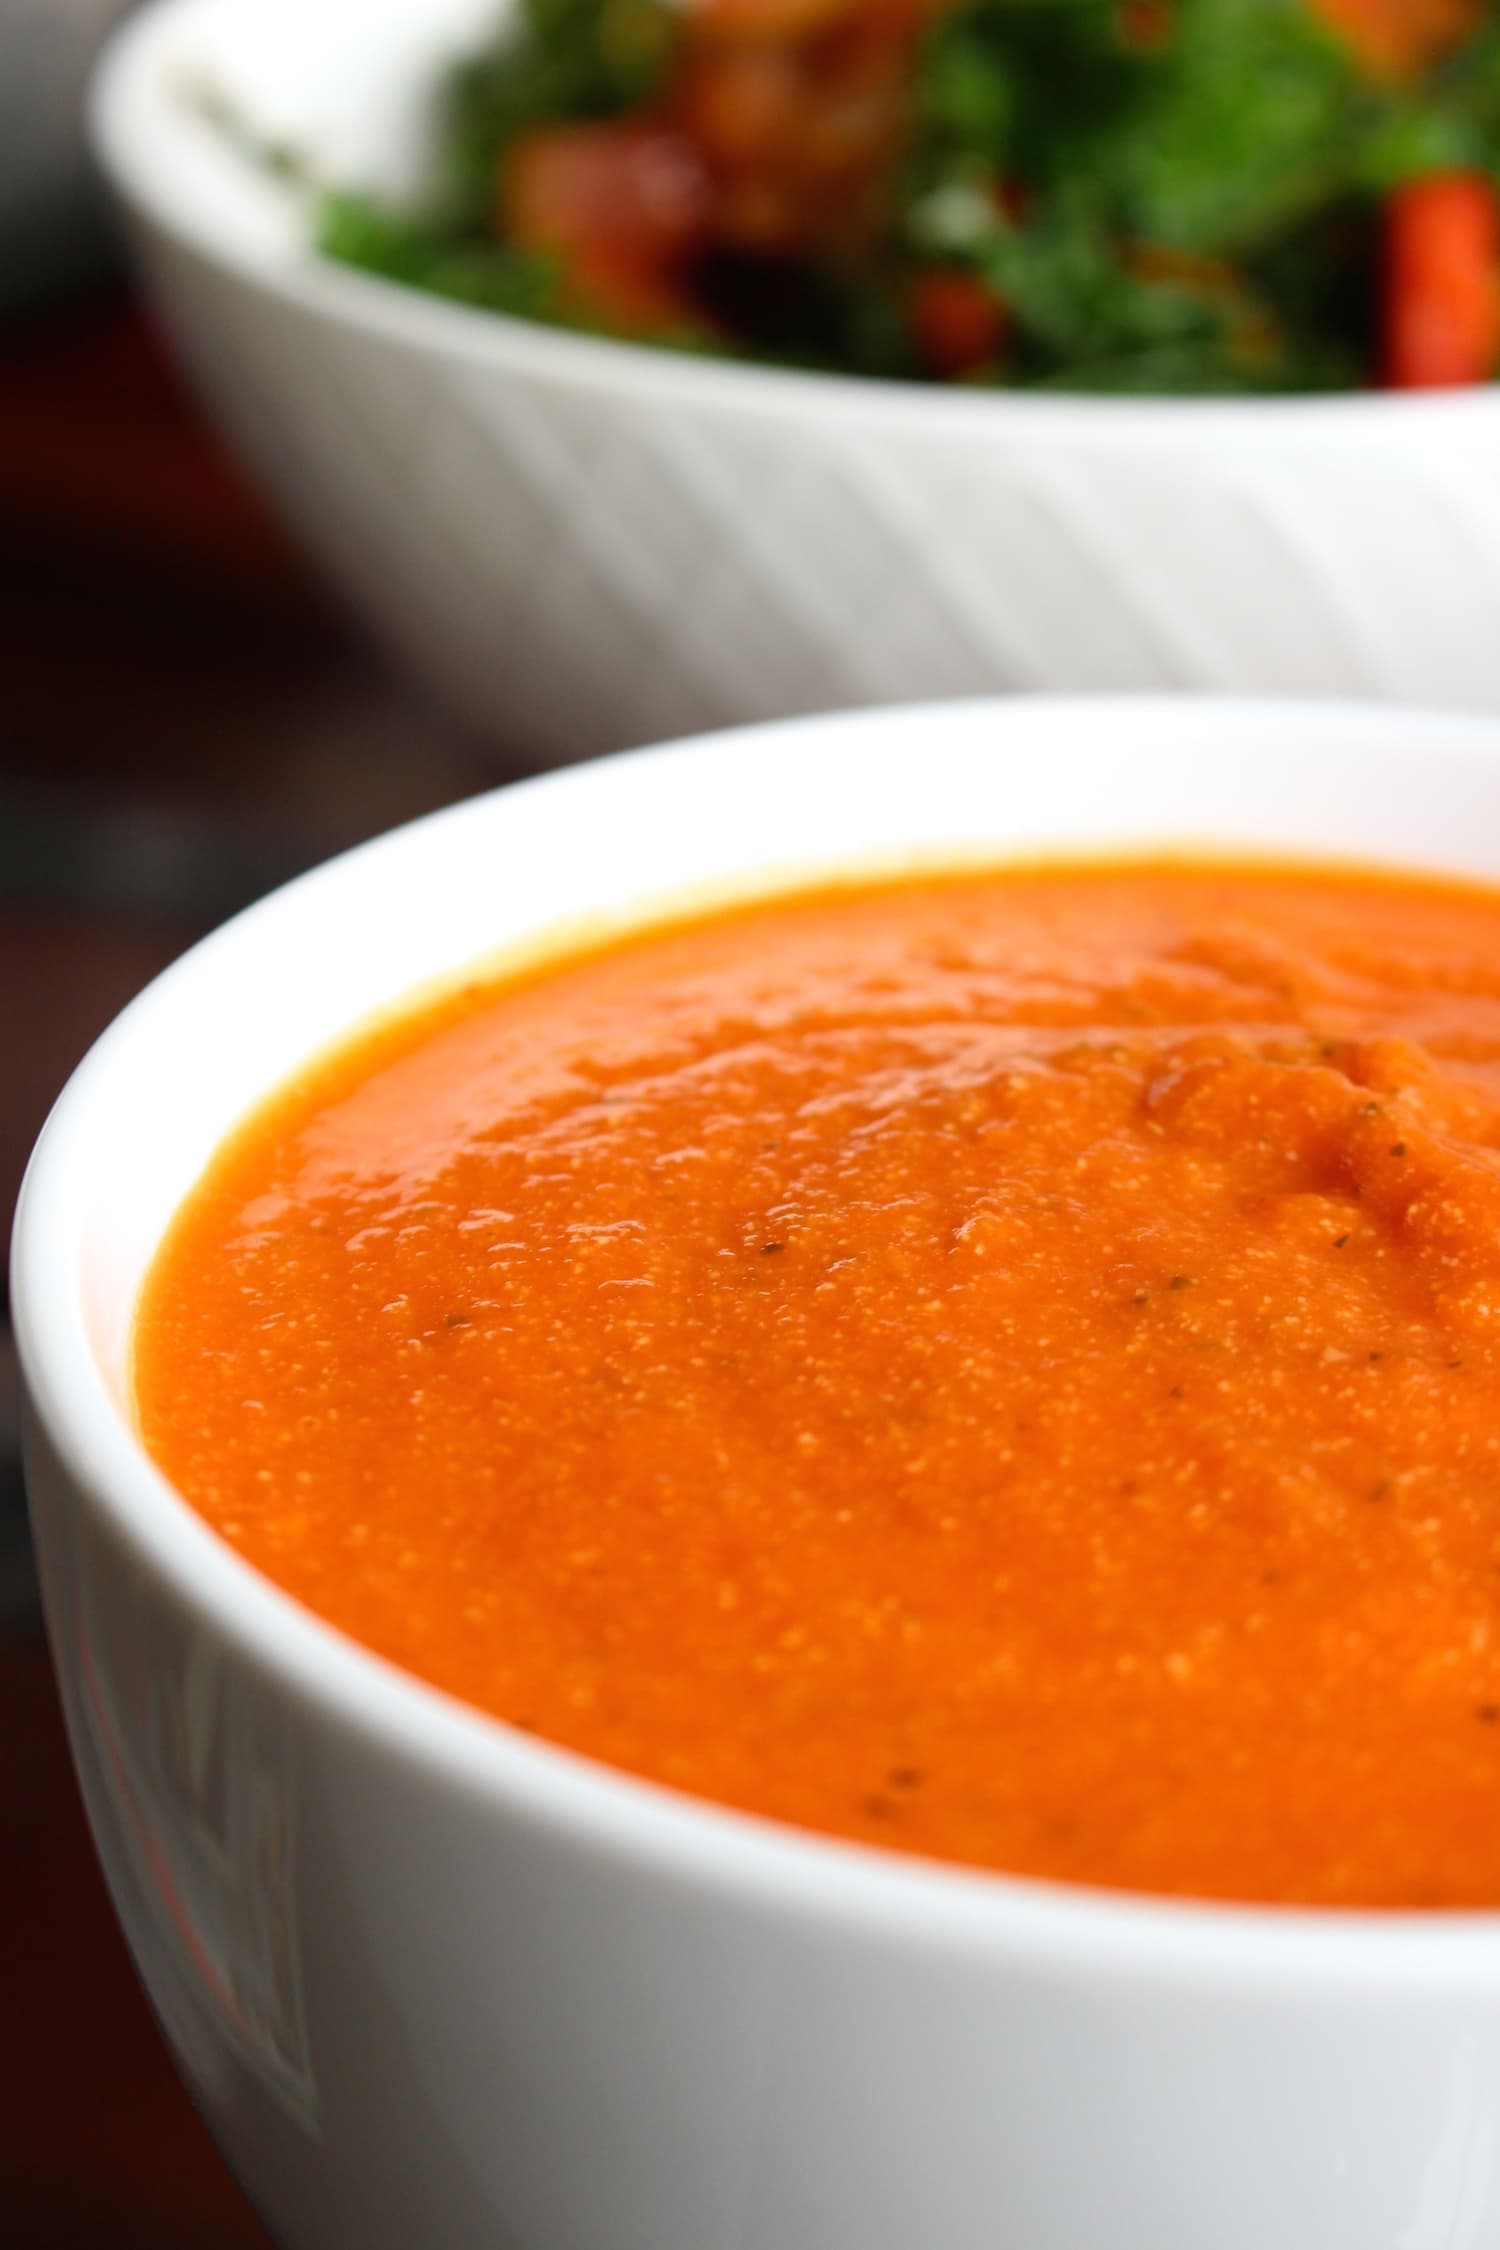
We love soup at our house. Soup is so warming, comforting AND you can easily sneak in lots of veggies! Even when it's summer time, we love a good bowl of soup. Some of our favorites vegan soups are Creamy Zuppa Toscana, Red Lentil Pumpkin Soup, Vegan Pizza Soup and this Creamy Tomato Zucchini Soup of course!
[feast_advanced_jump_to]Why You'll Love This Recipe!
- You'll never know you're eating tons of zucchini when you enjoy this tomato zucchini soup. The zucchini blends right in and makes this soup super creamy.
- If you can't do dairy, then this soup is perfect for you. While this soup is a creamy tomato soup, the "cream" aspect comes from cashews instead of dairy milk or cream. Eat up!
- This soup freezes beautifully. Make a double batch and enjoy it in future weeks and months.
- You'll feel like a vegan chef making homemade cashew cream. There really is nothing more satisfying than making something incredibly rich and creamy with cashews for the first time.
Ingredients
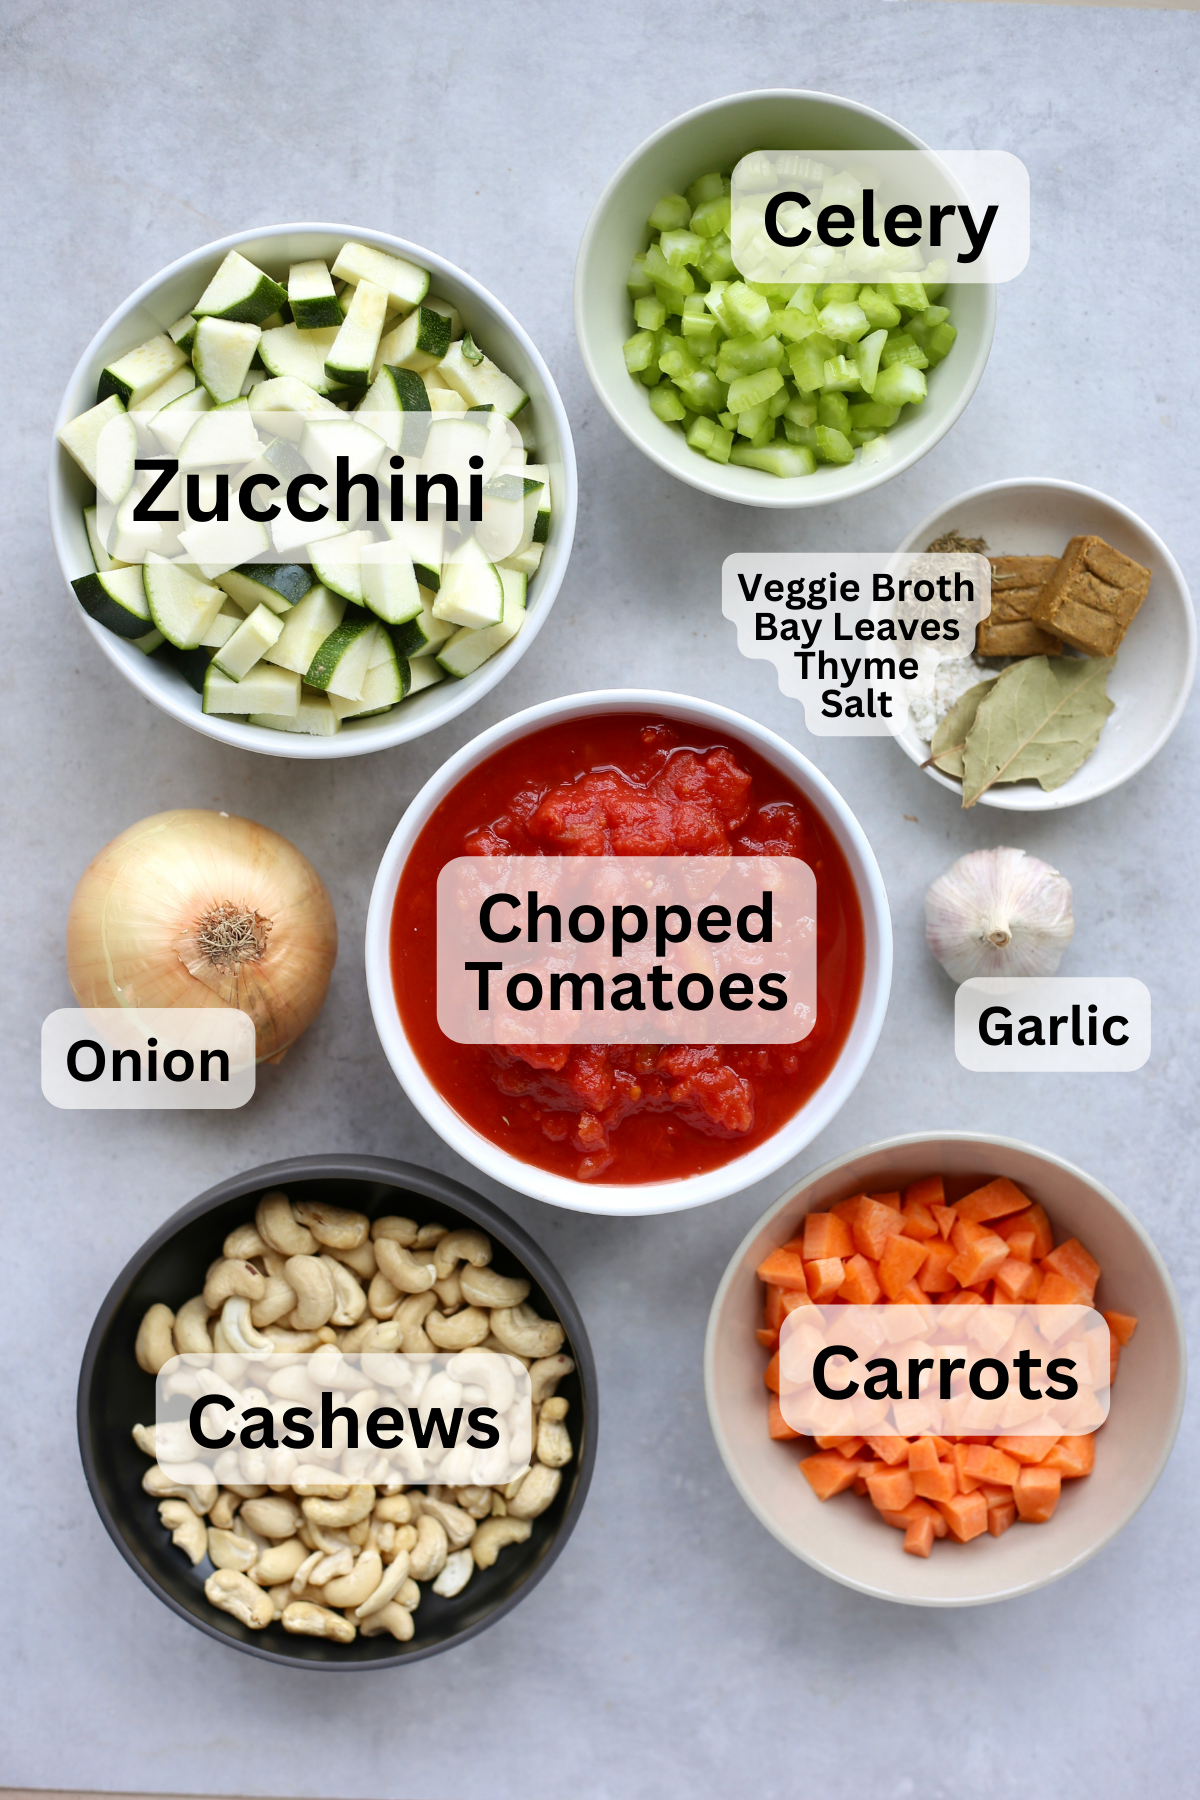
This tomato soup is loaded with veggies, many of which you can find all year round. Apart from the veggies, this recipe mainly calls for pantry staples, making it an easy meal for any night of the week!
- Crushed tomatoes - Obviously, tomatoes make up a large portion of this tomato zucchini soup. I love to have a bunch of canned tomatoes on hand, not only for this soup, but simply as a classic pantry staple.
- Vegetable broth - Using veggie stock cubes instead of vegetable broth from a carton will save you money and space in your pantry.
- Cashews - Use raw cashews in this recipe. Whether you have a high speed blender or not, you'll want to soak your cashews before making cashew cream.
See recipe card below for a full list of ingredients and measurements.
Substitutions & Variations
- Tomatoes - If you can't find crushed tomatoes, simply use canned whole or chopped tomatoes. They'll cook down and in the end will be blended until smooth.
- Vegetables - I love when I have all of the vegetable listed in this soup, but if you're missing one then this soup will still be delicious. Don't get hung up on exact amounts and ingredients.
- Vegetable Broth - I like to use veggie stock cubes, but you can also use homemade vegetable broth or broth from a carton.
How to Make Creamy Vegan Tomato Zucchini Soup
Step 1: Start by soaking some raw cashews in boiling water. Set them aside.
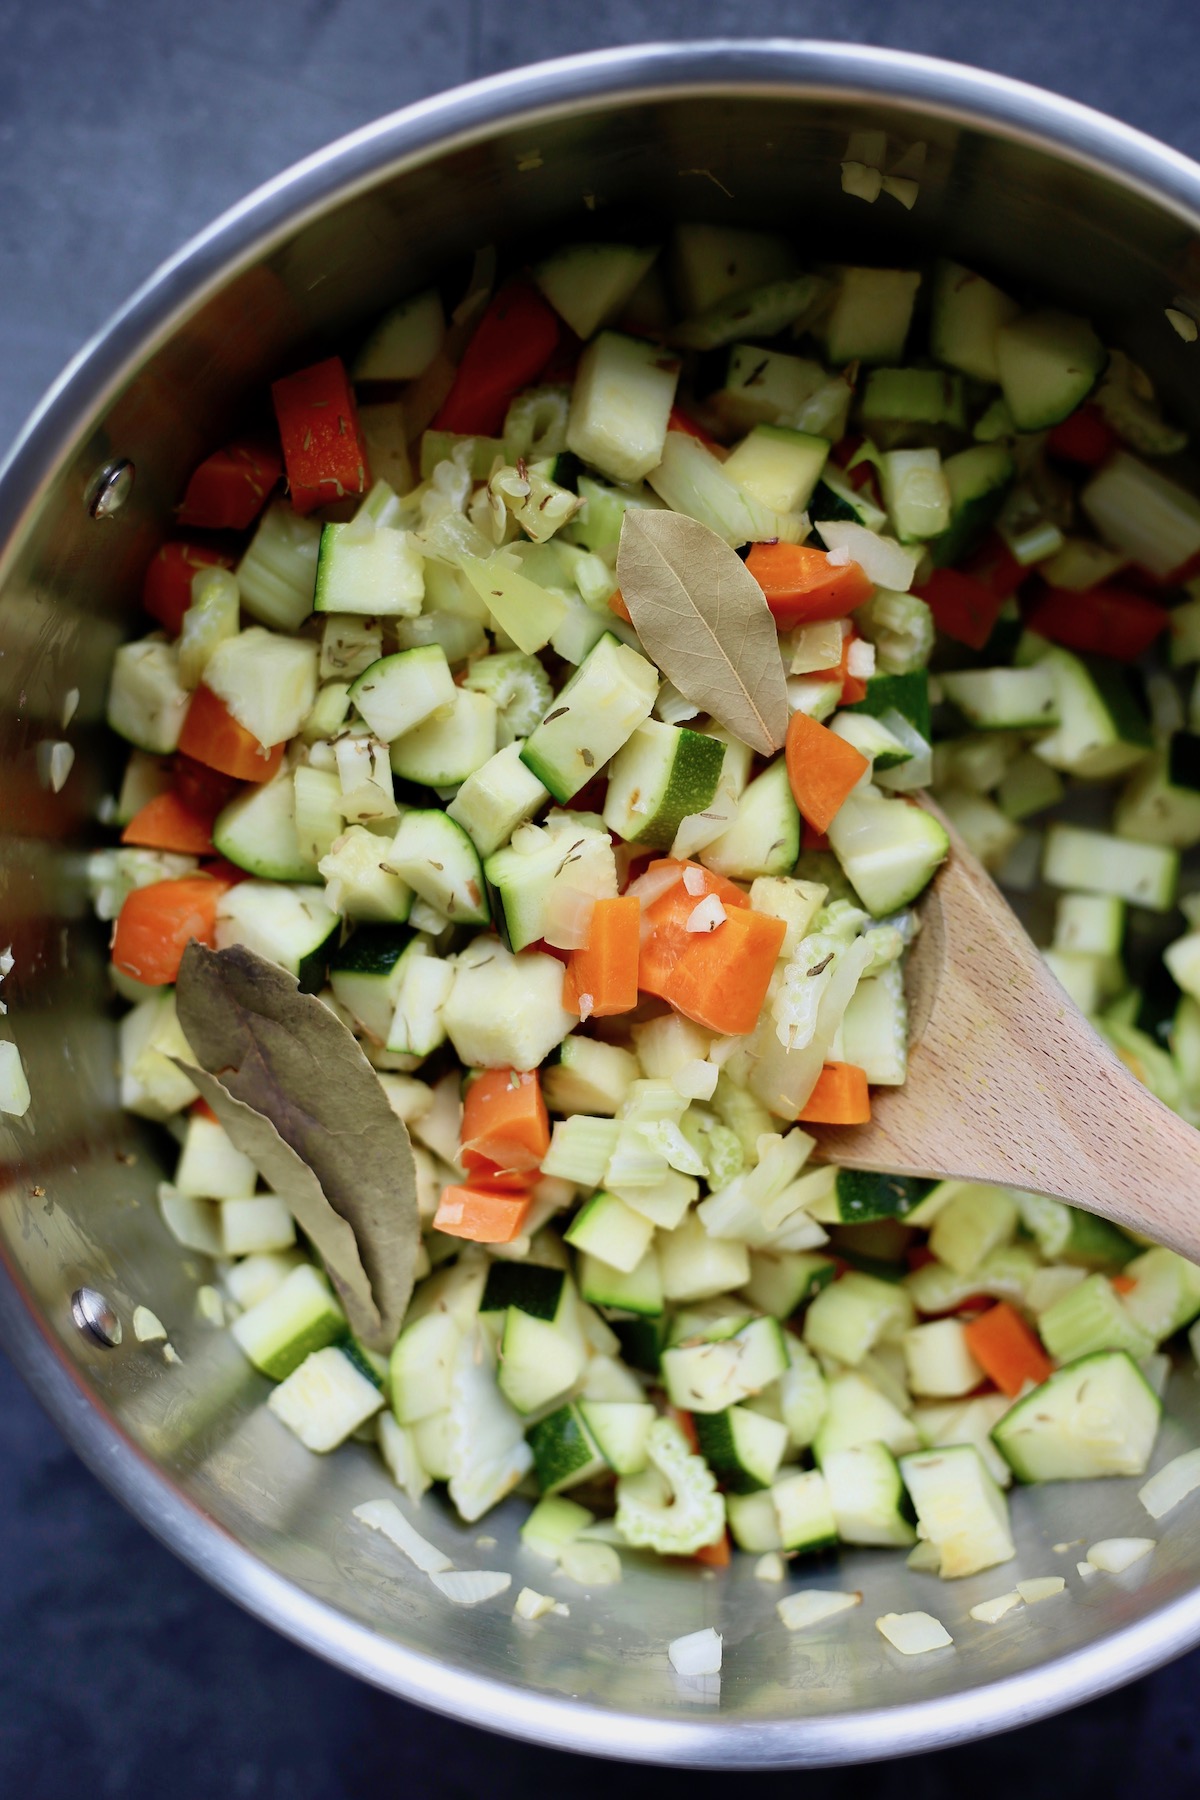
Step 2: Heat some olive oil or water in a large saucepan or pot over medium heat. Add in the carrots, celery, zucchini and onion and sauté until soft. Stir in the garlic, thyme, bay leaves, and a pinch of salt and red pepper flakes and stir well. Let cook 1-2 more minutes.
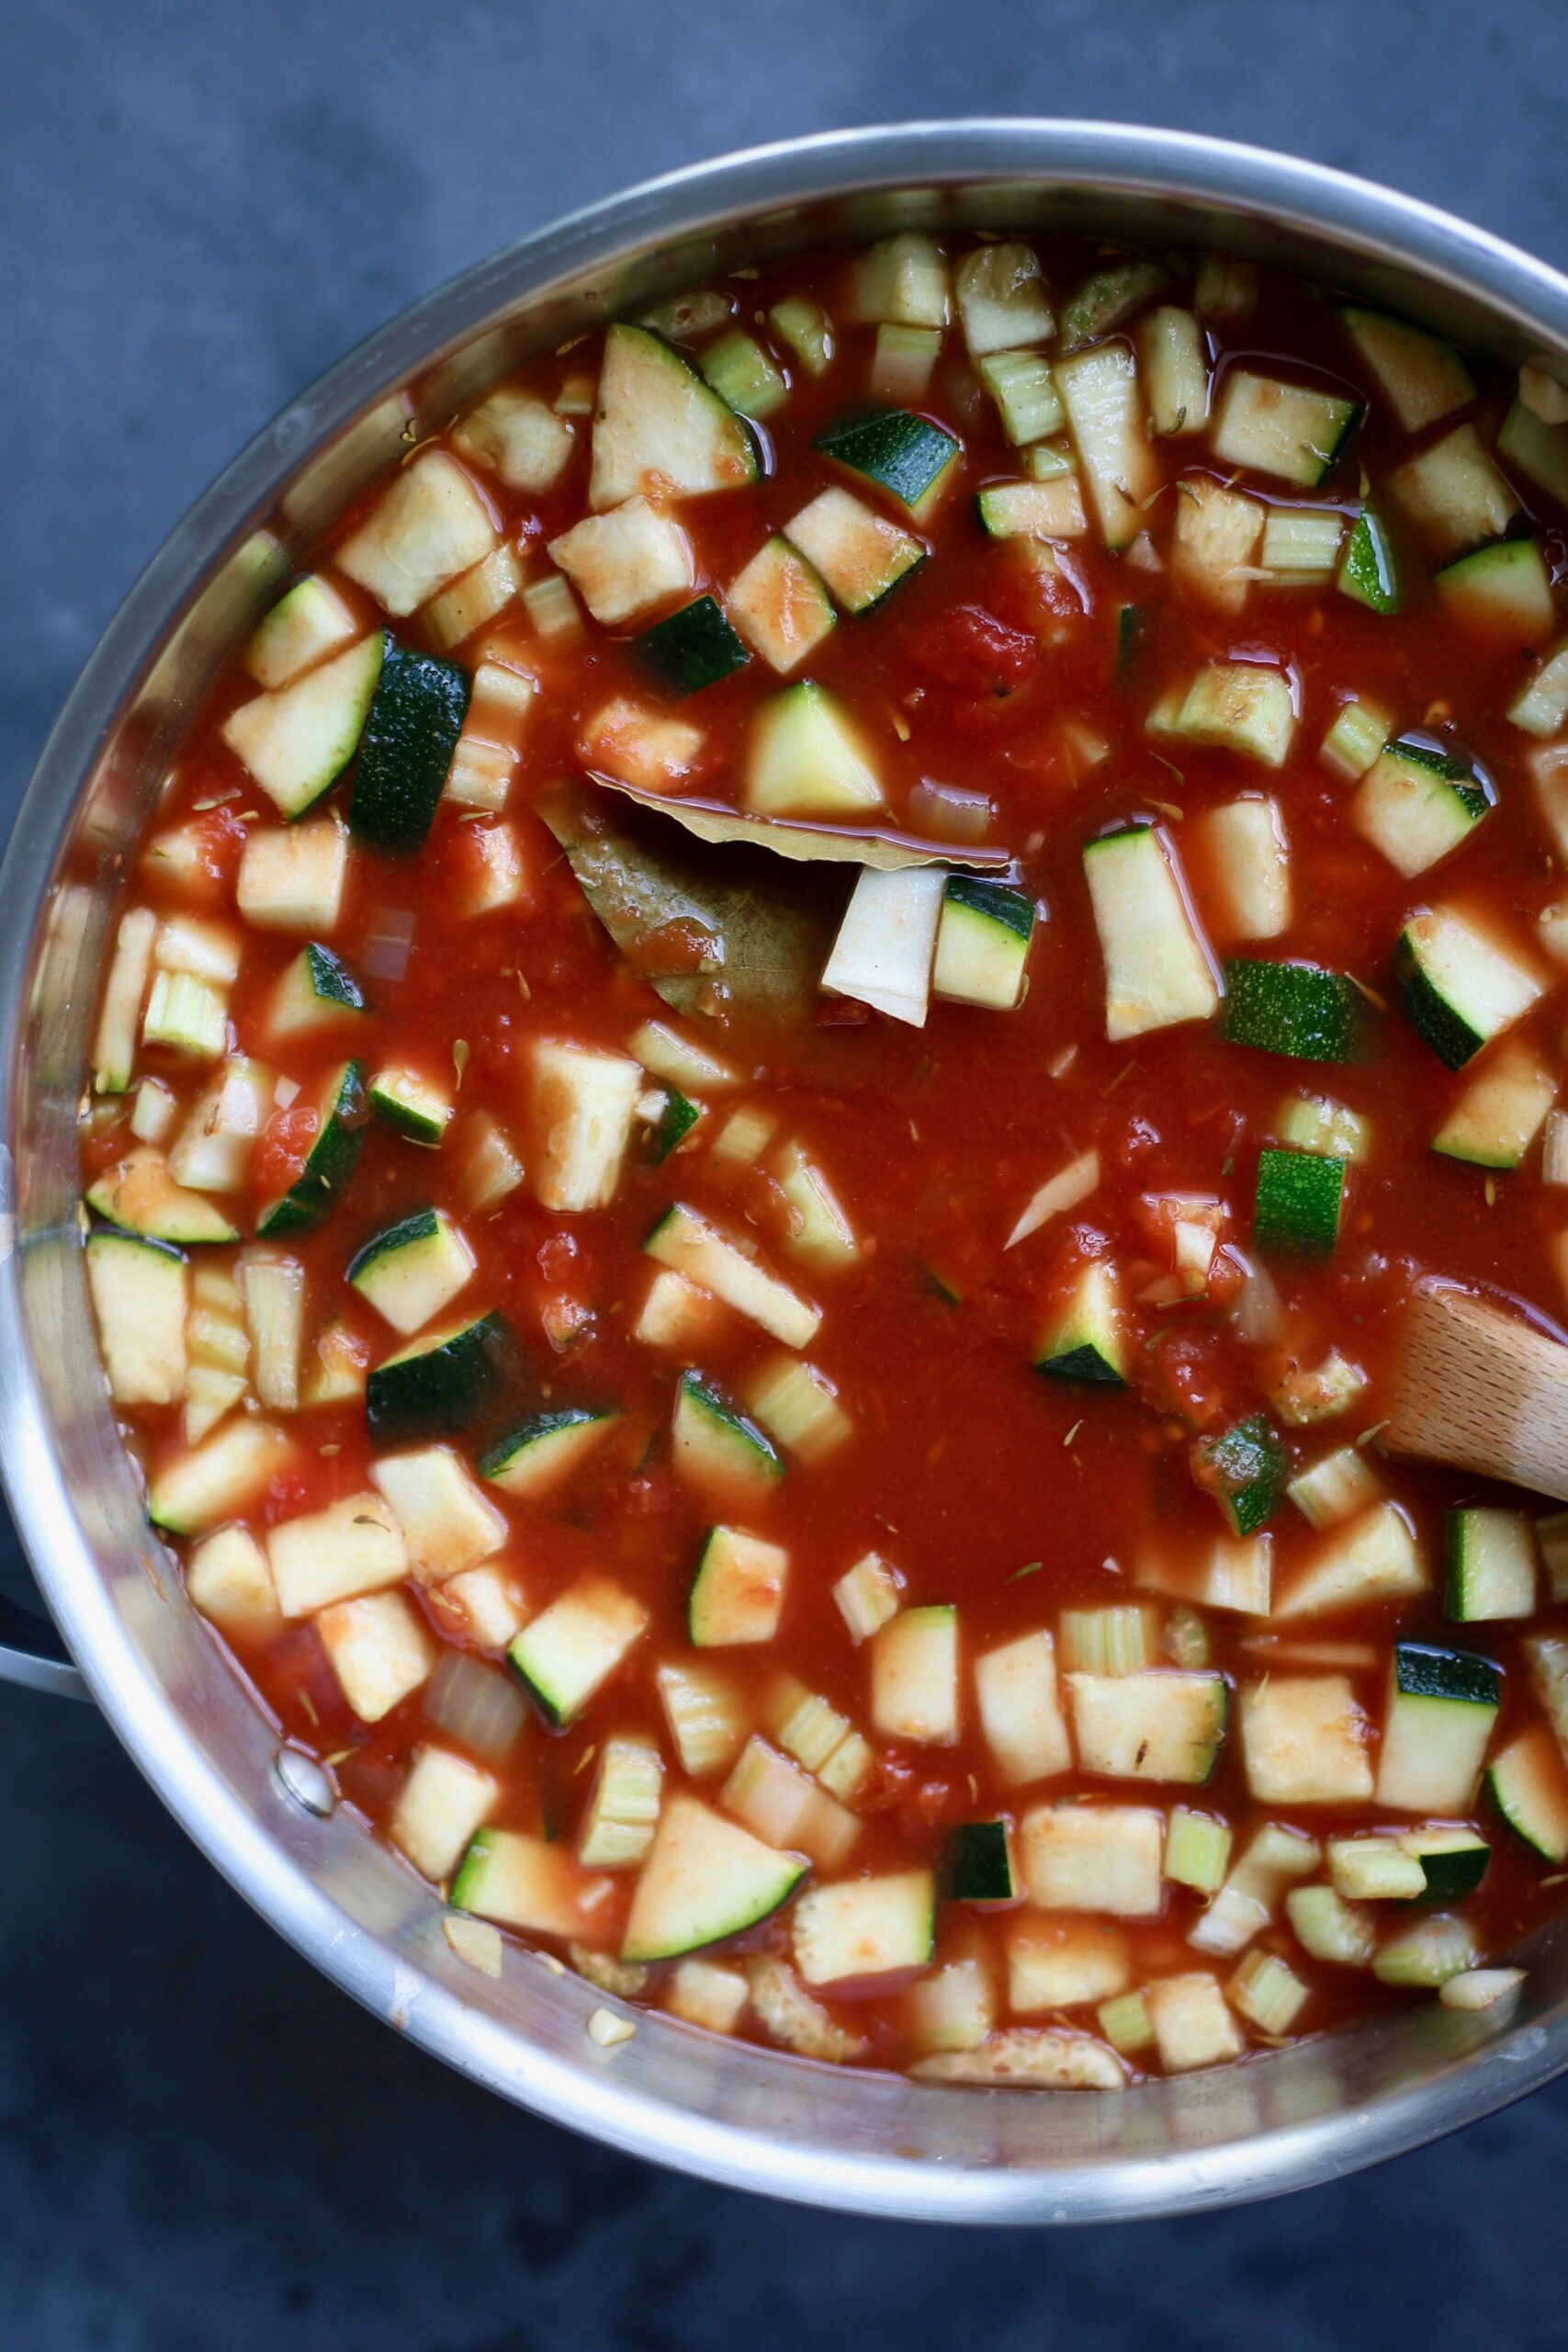
Step 3: Once the veggies are tender, add in the tomatoes and vegetable broth and stir everything well. Bring everything to a boil and then reduce the heat to a simmer and allow the soup to cook for about 30 minutes. You want all of the vegetables to be very soft and tender.
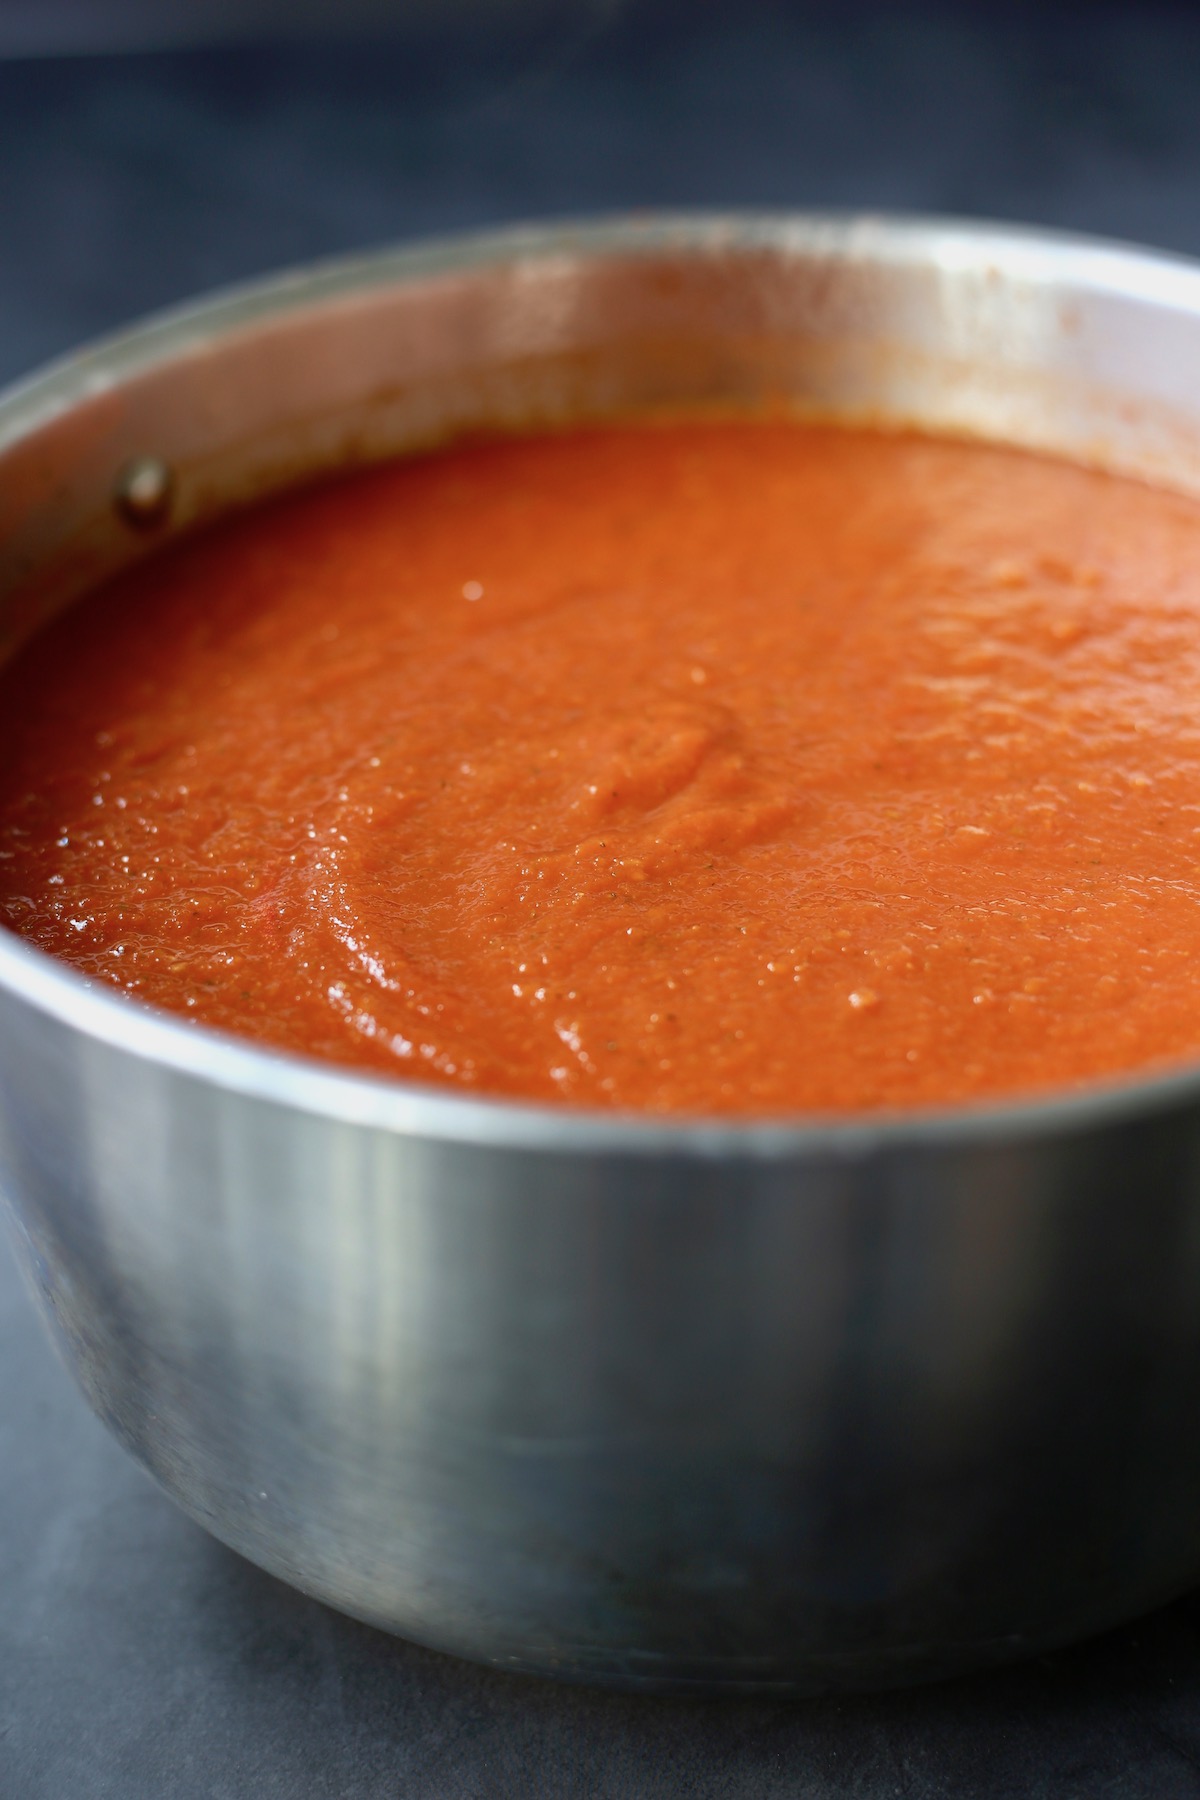
Step 4: Remove the bay leaves and then with an immersion blender, or in batches in a regular blender, puree the soup until smooth. Pour the pureed soup back into the large saucepan.
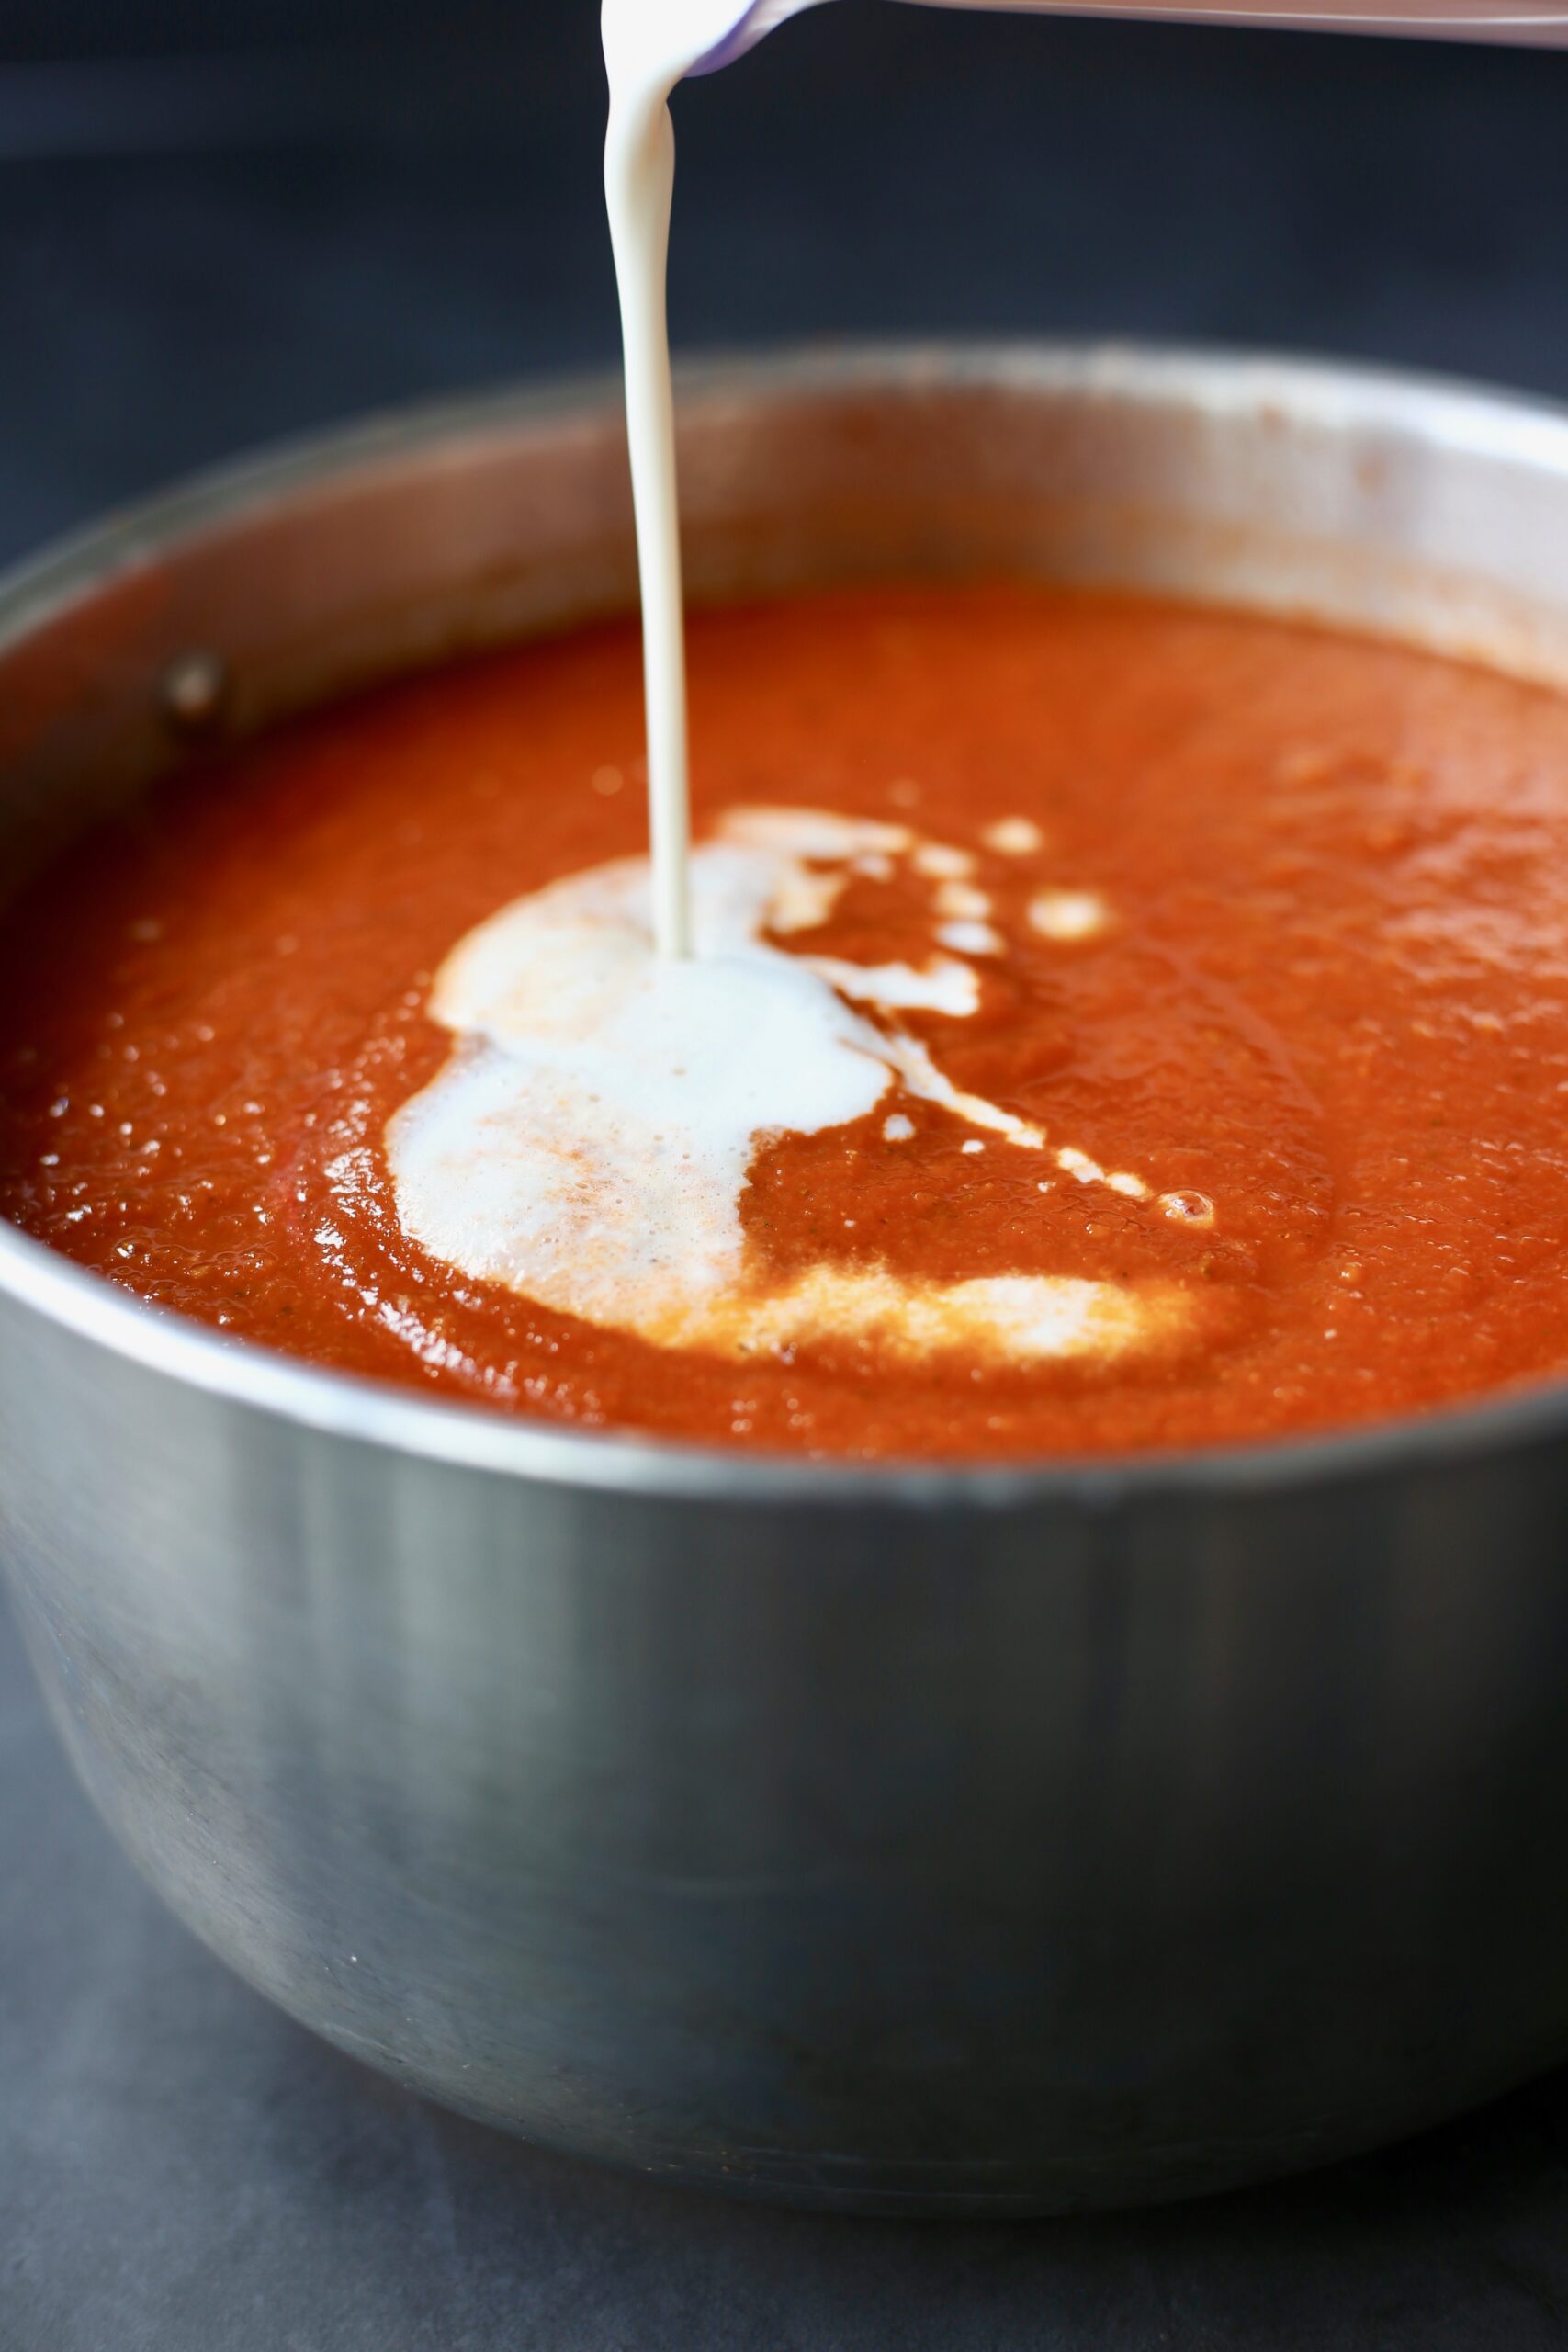
Step 5: Rinse out your blender and drain and rinse your cashews. Place the cashews and 1 cup of water into your blender and blend until smooth and creamy. Pour the cashew cream into the pureed soup and stir well.
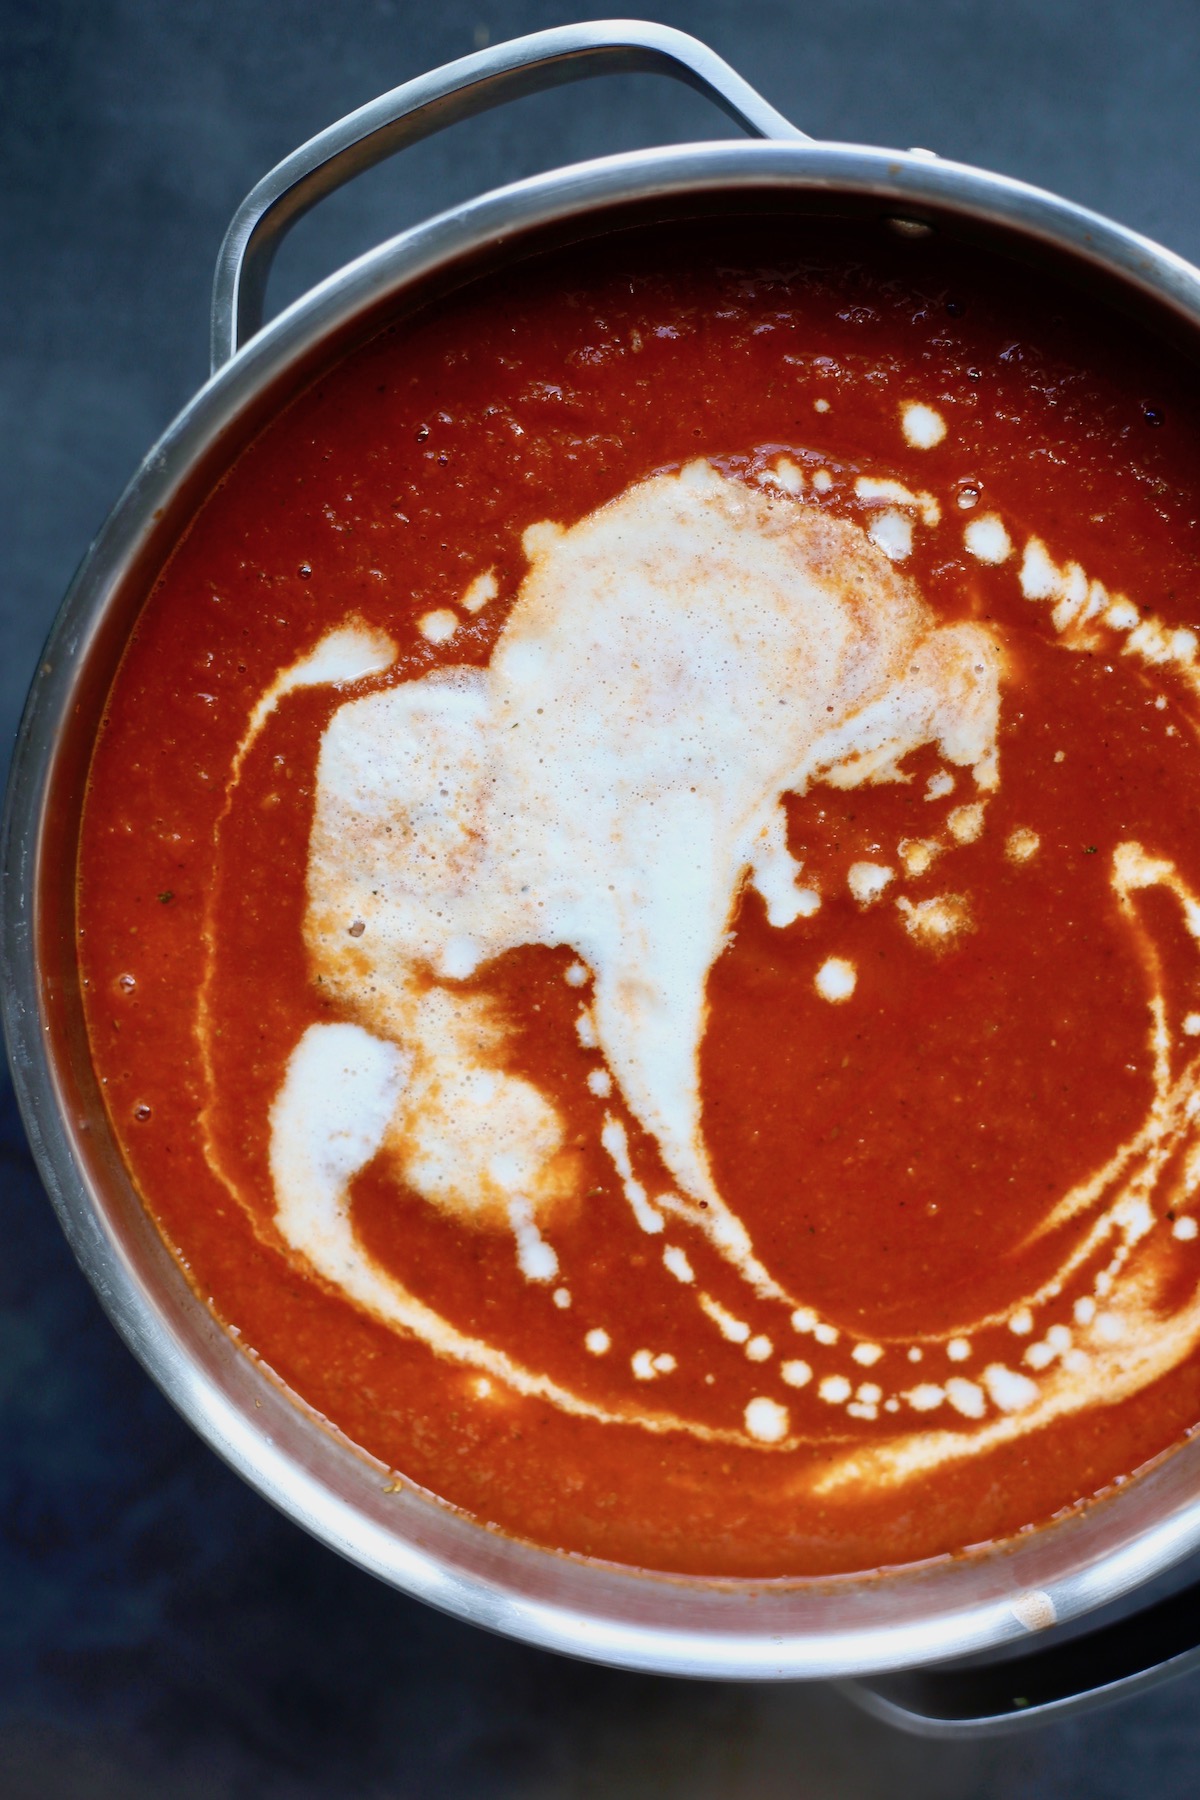
Step 6: Heat this tomato zucchini soup until warm and serve with crusty grilled cheese croutons, Whole Wheat Artisan Bread or slices of soft, Easy Italian Bread!
Expert Tips
- I like to buy my cashews in bulk and store them in the freezer. This not only saves me money, but it also ensures that I always have cashews on hand for things such as cashew cream.
- Save the scraps and ends of your veggies and use them to make homemade veggie broth for your next batch of soup!
- To make this soup one-pot, add your raw cashews into the soup when you add in the vegetable broth and allow them to simmer for a while. Then use an immersion blender to blend the soup until smooth. Using an immersion blender might not give you the smoothest consistency, but it saves you from having to wash a blender!
Recipe FAQs
How do you make soup creamy without dairy?
There are a number of ways to achieve a creamy soup without adding actual dairy cream. Cashews blended with water make a rich and creamy cashew cream. Other options are coconut milk, white beans, zucchini, cauliflower or vegan cheese. You can also use a fat and flour to make a roux and then whisk in non-dairy milk to a creamy, dairy-free sauce.
How should I store soup?
Soup is the perfect meal prep food because it stores beautifully in both the fridge and the freezer. To store leftover soup in the fridge, simply place it in an airtight container in the fridge for up to a week. To freeze soup, you can pour the leftover soup into a freezer safe container or zip-lock bag and freeze it for up to 3 months.
What should I eat with tomato soup?
The next time you enjoy a bowl of tomato soup, pair it with some homemade bread, a grilled cheese sandwich, croutons or even crispy oven-roasted chickpeas and a salad.
More Vegan Soup Recipes!
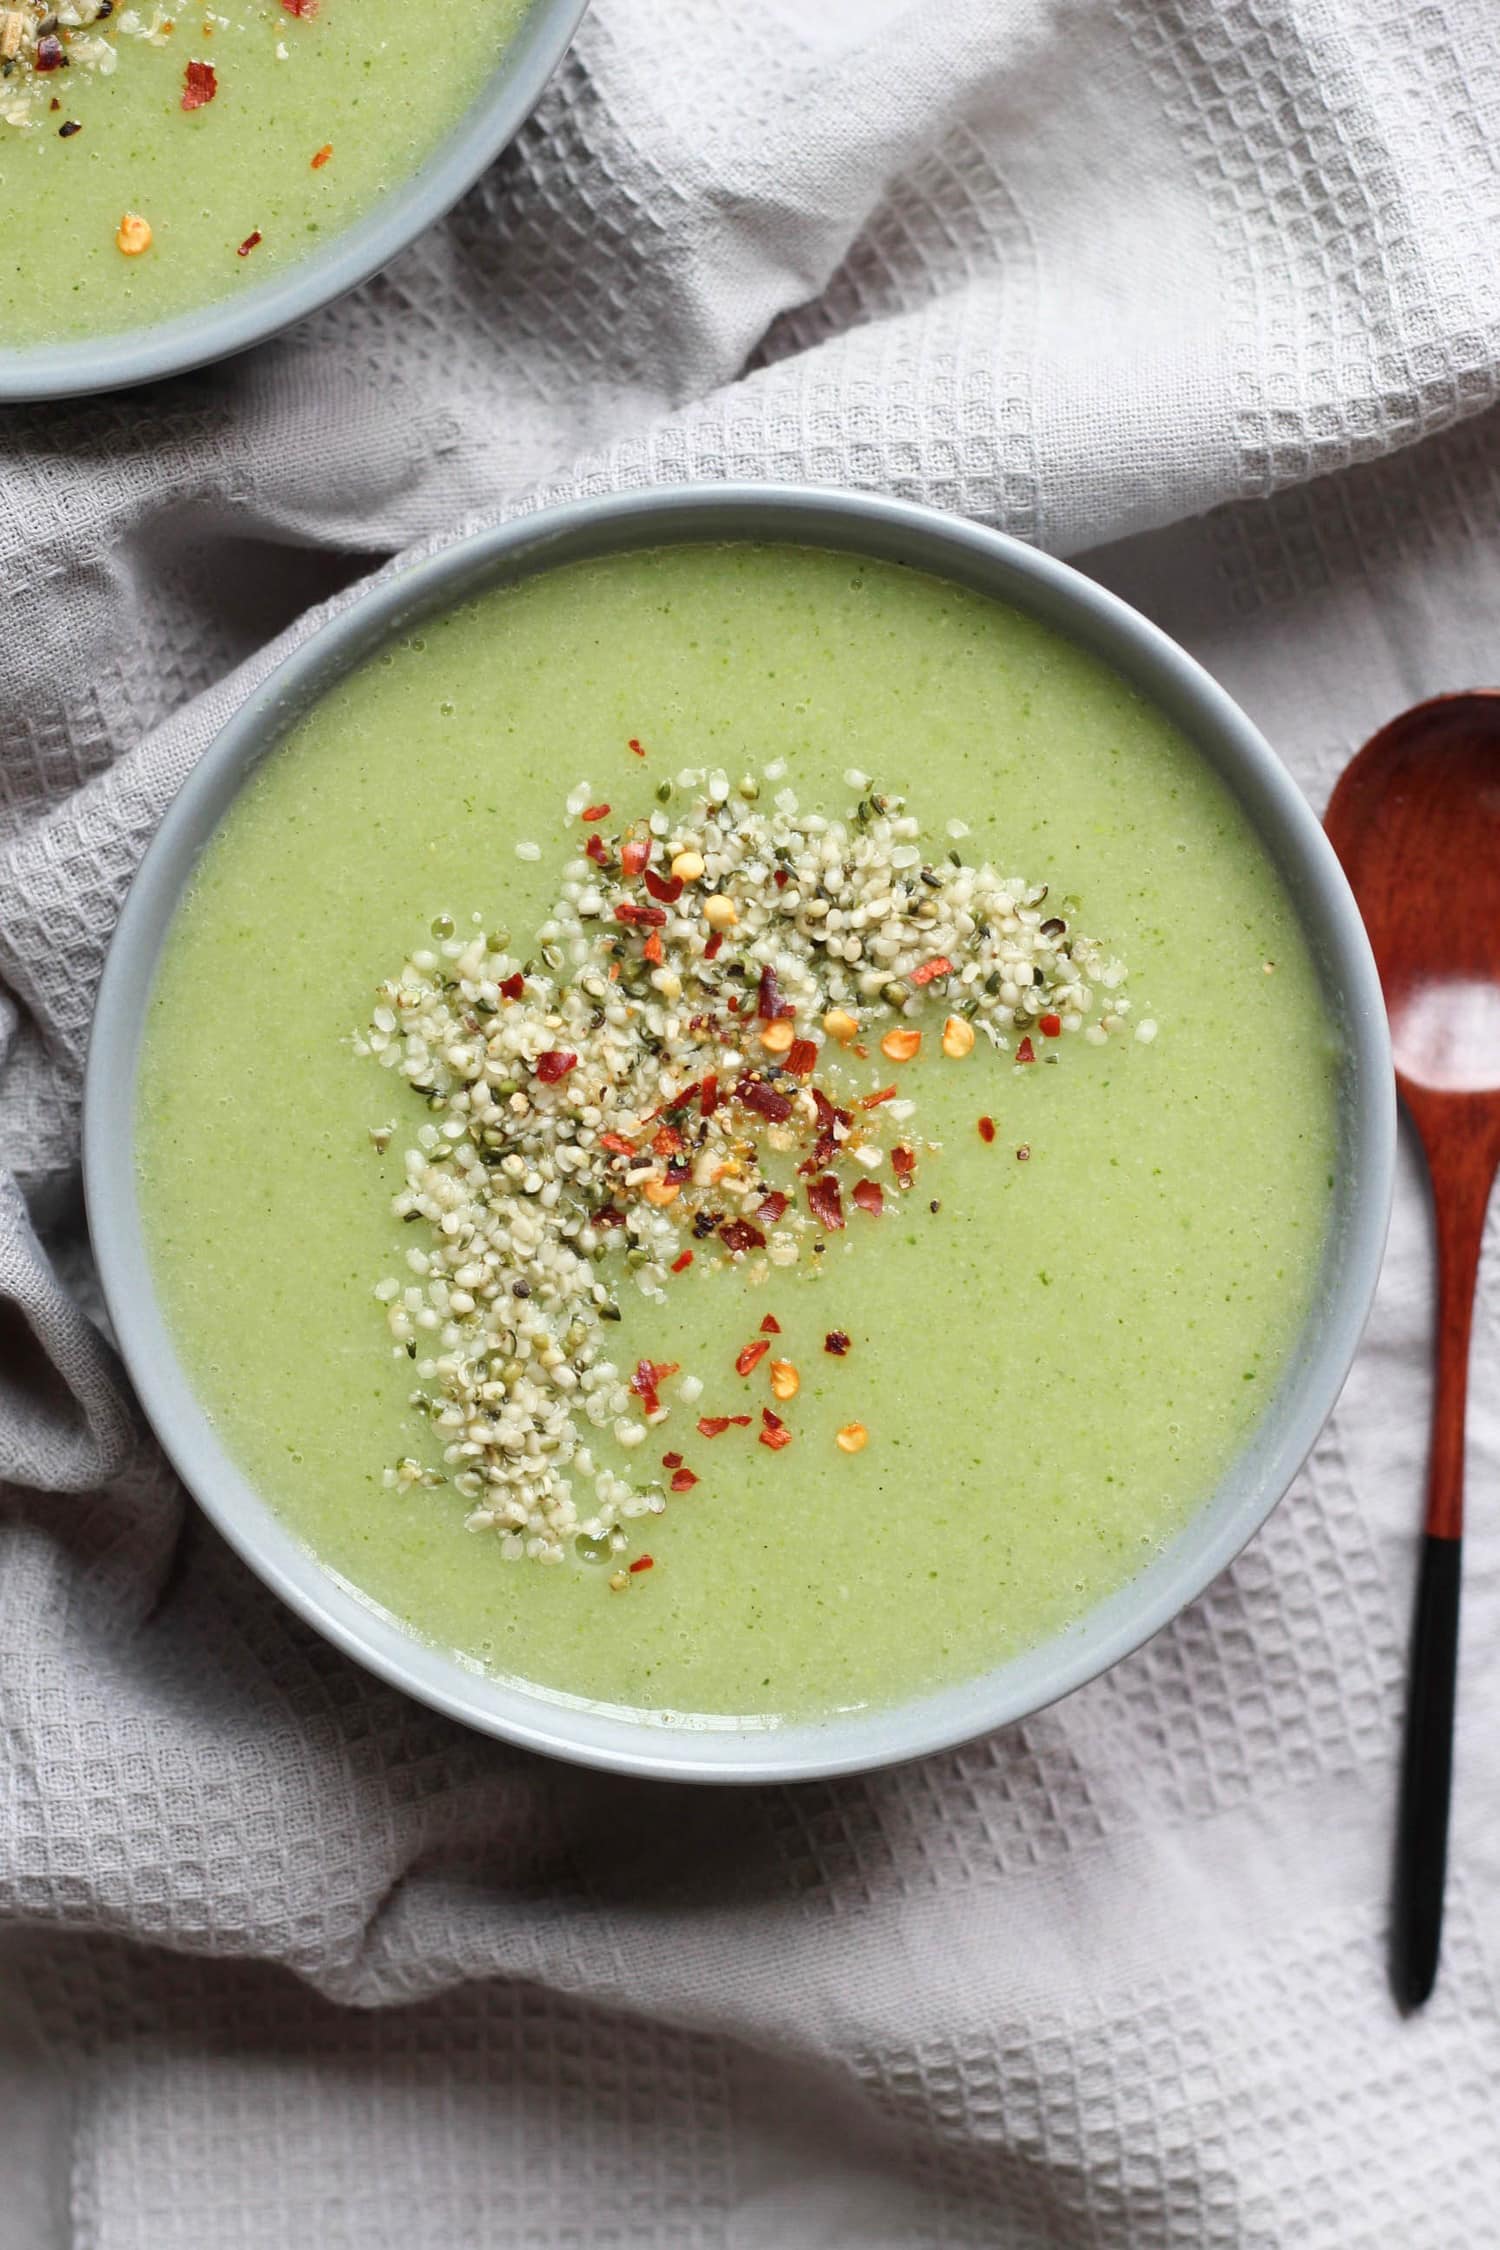
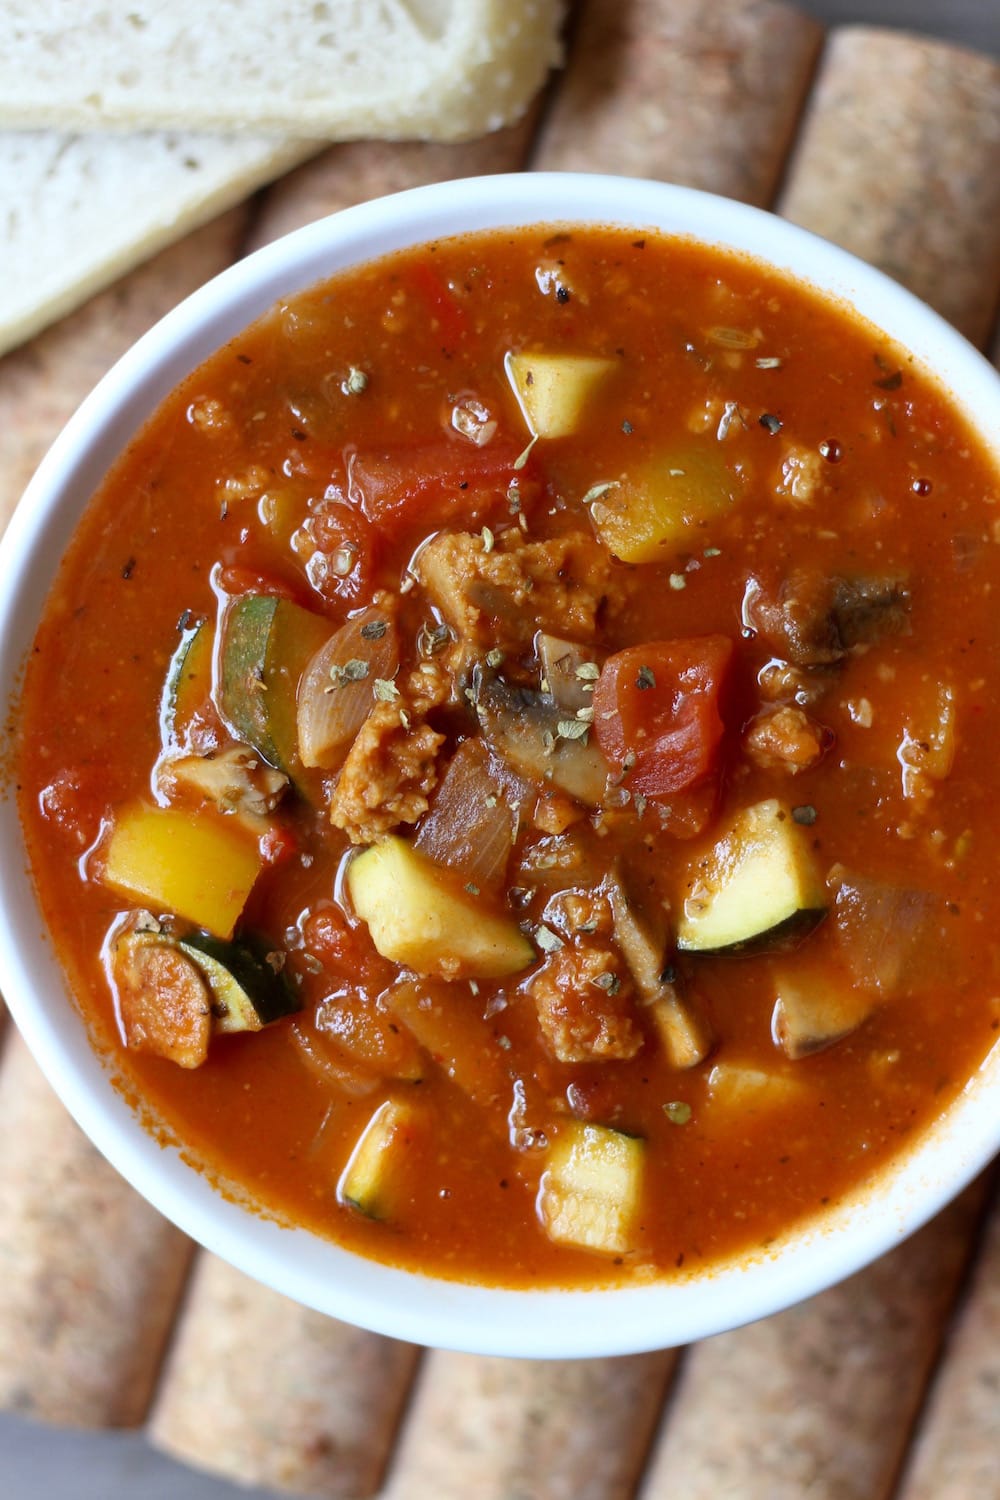
-14.jpg)
📖 Recipe
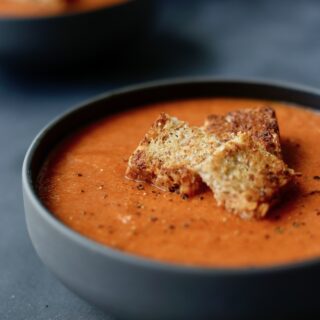
Creamy Vegan Tomato Zucchini Soup Recipe
This Creamy Vegan Tomato and Zucchini Soup packs a nutritious punch without sacrificing flavor!
Ingredients
- 1 cup diced carrots
- 1 cup diced celery
- 4 cups diced zucchini
- 1 large onion diced
- 5 cloves garlic minced
- 1 teaspoon dried thyme
- 2 bay leaves
- Pinch of salt
- Pinch red pepper flakes
- 56 ounce crushed tomatoes 2 large cans
- 4 cups vegetable broth
- ¾ cup cashews soaked
- 1 cup water
Instructions
- Before making this soup, cover your cashews with water in a bowl and let them soak for a few hours.
- In a large saucepan, sauté the carrots, celery, zucchini and onion for about 10 minutes, until the onion is translucent and the vegetables are soft. Stir in the garlic, thyme, bay leaves, and a pinch of salt and red pepper flakes and stir well. Let cook 1-2 more minutes.
- Add in the tomatoes and vegetable broth and stir everything well. Bring everything to a boil and then reduce the heat to a simmer and allow the soup to cook for about 30 minutes. You want all of the vegetables to be very soft and tender.
- Remove the bay leaves and then with an immersion blender, or in batches in a regular blender, puree the soup until smooth. Pour the pureed soup back into the large saucepan.
- Rinse out your blender and drain and rinse your cashews. Place the cashews and 1 cup of water in your blender and blend until smooth and creamy. Pour the cashew cream into the pureed soup and stir well.
- Heat until warm and serve!
Notes
- Even though I have a high speed blender, I still soak my cashews in hot water before blending them into cashew cream.
- Don't worry too much about getting the cup measurements exact for the diced veggies. This soup will taste good even if you have a little bit more or less of a vegetables than the recipe states.
Nutrition
Calories: 166kcalCarbohydrates: 26gProtein: 7gFat: 6gSaturated Fat: 1gPolyunsaturated Fat: 1gMonounsaturated Fat: 3gSodium: 762mgPotassium: 943mgFiber: 6gSugar: 14gVitamin A: 3537IUVitamin C: 33mgCalcium: 103mgIron: 4mg
Tried this recipe?Let me know how it was!
Peanut Butter Banana Baked Oatmeal
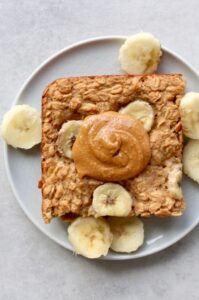
Combining two classic ingredients and hearty rolled oats, this Peanut Butter Banana Baked Oatmeal recipe is perfect to meal prep and enjoy throughout the week!
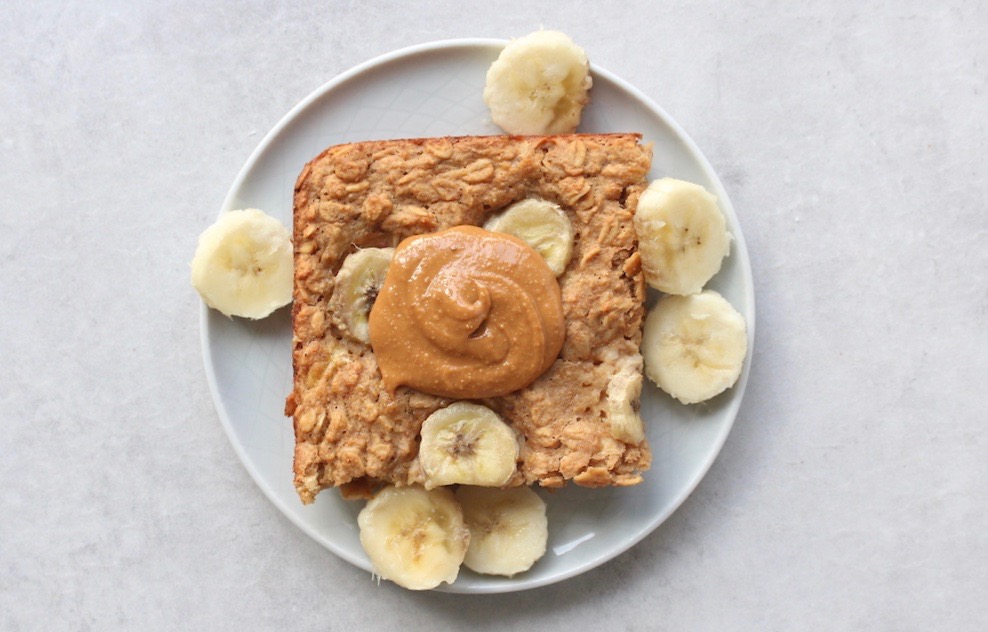
Also Featured In
This recipe is also featured in the following vegan recipe roundups:
It's safe to say my family is obsessed with peanut butter, bananas, and oatmeal.
We consume all three of these ingredients most mornings for breakfast in some form and still aren't sick of them.
They seriously are the best food combination! For example:
- Sometimes we eat my Healthy Peanut Butter Chocolate Chunk Granola with bananas and chilly almond milk.
- Sometimes we top these Healthy Chocolate Breakfast Muffins with more bananas and peanut butter.
- Sometimes I meal prep a batch of my Low-Fat Peanut Butter Overnight Oats.
And sometimes we enjoy this Peanut Butter Banana Baked Oatmeal...with more peanut butter and banana of course!
How to Make Baked Oatmeal
While I don’t make it every morning, baked oatmeal is my favorite way to eat oatmeal. If you like cake or any item that comes out of an oven, then I know you’ll love this oatmeal.
Instead of a creamy, soupy texture like oatmeal cooked on the stove top, baked oatmeal is denser and chewy.

You can slice it and serve it like a piece of cake, topped with all your favorite spreads and fruit.
Yum!
Steps for Making Baked Oatmeal
The process for making a good baked oatmeal recipe looks like this:
- Step 1: Start by whisking together the wet ingredients in a large mixing bowl, including any sugars, spices and salt.
- Step 2: Then add in rolled oats and any mix-ins you desire, such as shredded vegetables, sliced or chopped frozen, fresh or dried fruit as well as any nuts or seeds.
- Step 3: Pour the batter into a greased baking dish and use a spoon to make the batter nice and level. You want to make sure the oats and liquid are evenly distributed.
- Step 4: Bake the oatmeal until it’s firm and set.
- Step 5: Slice and serve with your favorite toppings!
Ingredients You'll Need for Peanut Butter Banana Baked Oatmeal:
Get excited! I'm pretty sure you already have all of the ingredients needed for this Peanut Butter Banana Baked Oatmeal recipe. That means you can make this delicious recipe ASAP!
Here are the ingredients you'll need:
- Ground flaxseed
- Bananas
- Creamy peanut butter
- Maple syrup
- Non-dairy milk
As for oat flour, here's a quick tip...don't buy it!
It's way too expensive when you buy it from the store and it's so easy to make.
How to Make Your Own Oat Flour
Making oat flour at home is incredibly simple. Here's a quick make-at-home recipe to follow:
- Step 1: Grab some quick or old-fashioned rolled oats.
- Step 2: Pour 2-3 cups into your blender or food processor.
- Step 3: Process/blend the oats until they turn into a flour.
- Step 4: Store the oat flour in a sealed container for a few weeks!
I make and use oat flour all the time in my baking. Some of my favorite recipes that call for it are these Healthy Chocolate Breakfast Muffins, Vegan Chocolate Oat Flour Waffles and these Zucchini Carrot Oatmeal Breakfast Muffins.
Best Toppings for Peanut Butter Banana Baked Oatmeal
Even though some of my favorite ingredients are already inside of this peanut butter and banana baked oatmeal, I still love to add toppings.
I'll give you a list of some of my favorite baked oatmeal toppings that you can try out on this pb and banana baked oatmeal below:
- More peanut butter (can you ever have enough?!)
- Other nut/seed butter
- More banana (again, is there ever enough?)
- Jelly
- Healthy Peanut Butter Chocolate Chunk Granola
- Other fresh fruit
- Instant Pot Berry Compote
- Chocolate Chips
- Cacao chips
- Coconut flakes
Or you can just eat this oatmeal as is!
It's delicious!
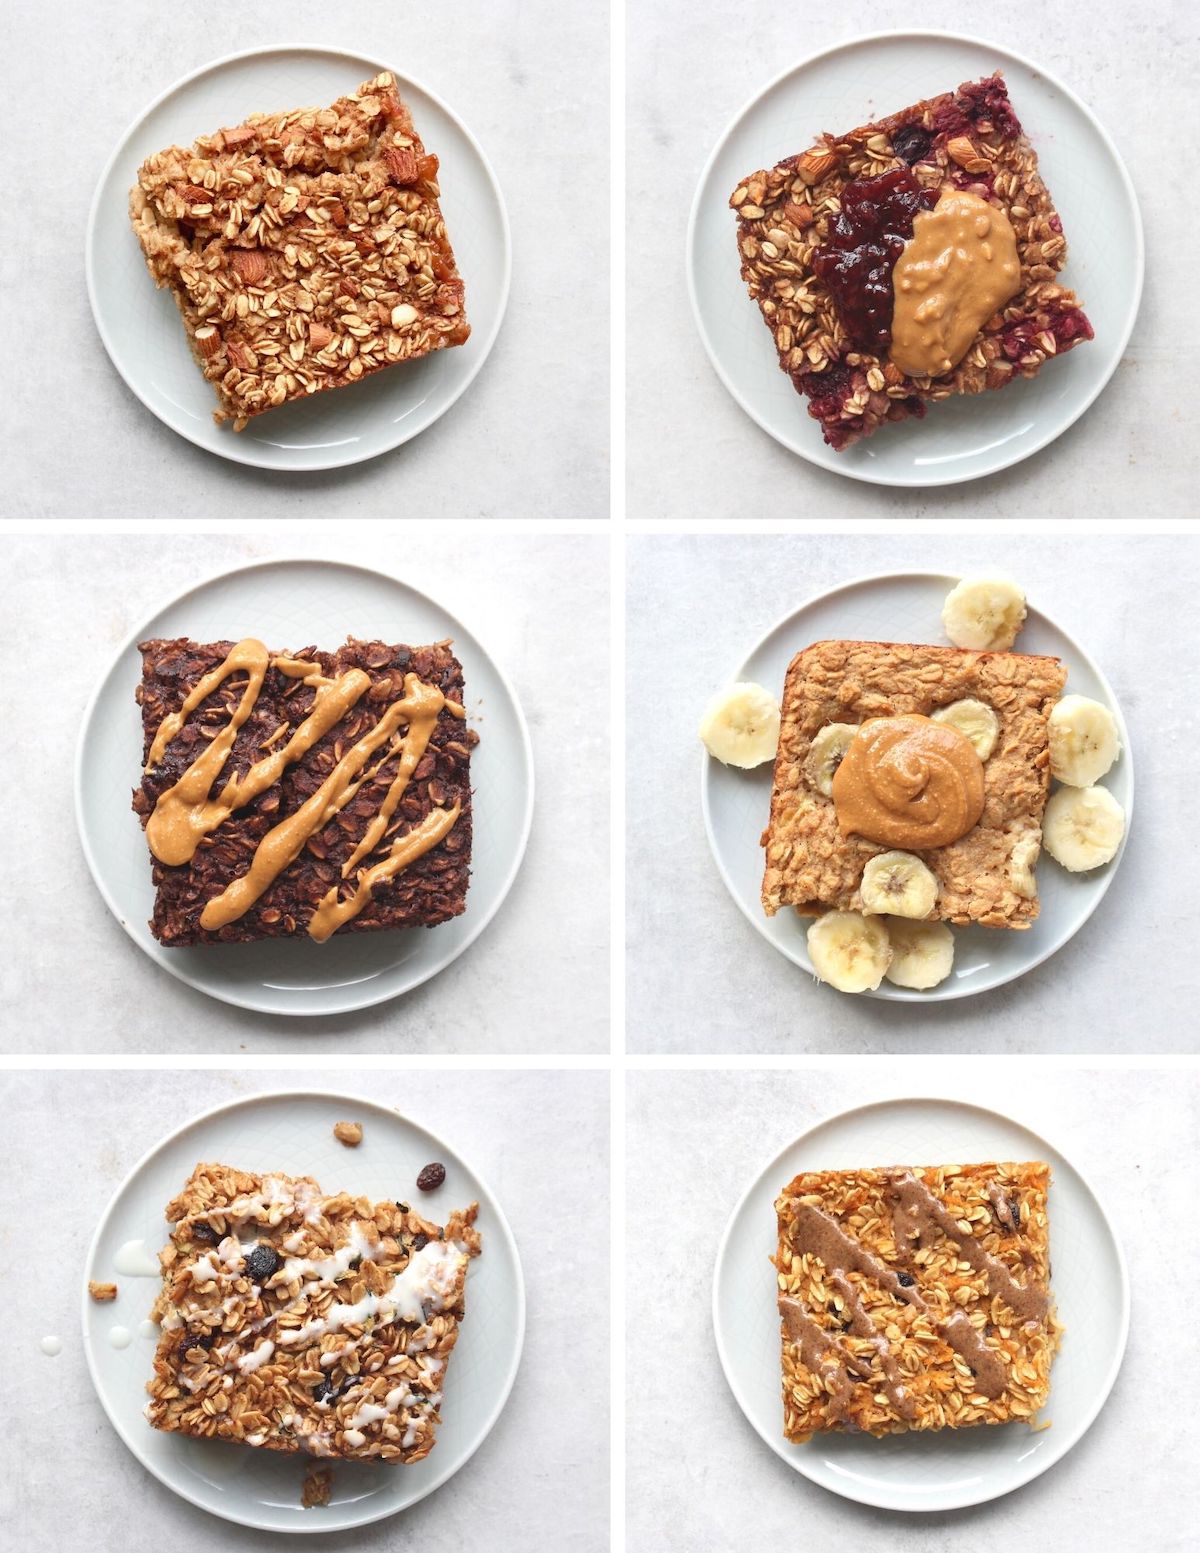
More Baked Oatmeal Flavors
When it comes to baked oatmeal, the flavor possibilities are truly endless. I have a number of different baked oatmeal recipes on the blog that you can try out.
However, don't limit yourself to these flavors. Think about your favorite ingredients or flavor combinations and get creative with your own family recipe!
- Maple Pecan Baked Oatmeal
- Make-Ahead Carrot Cake Baked Oatmeal
- Zucchini Bread Baked Oatmeal
- Berry Baked Oatmeal
- Brownie Batter Baked Oatmeal
📖 Recipe

Peanut Butter Banana Baked Oatmeal
Combining two of the best ingredients and hearty rolled oats, this Peanut Butter Banana Baked Oatmeal is going to be your go-to breakfast!
Ingredients
- 2 flax eggs 6 tablespoons water + 2 tablespoons ground flaxseed
- 1 ripe banana mashed
- ⅓ cup creamy peanut butter
- 2 tablespoon maple syrup
- ½ cup non-dairy milk
- 1 ½ cups rolled oats
- ¼ cup oat flour
- 1 teaspoon baking powder
- Pinch of sea salt
Instructions
- Preheat your oven to 375 °F and grease an 8x8 inch baking dish.
- In a large bowl, prepare your two flax eggs by whisking together 2 tablespoons of ground flaxseed and 6 tablespoons of water. Allow the "eggs" to thicken.
- Once the eggs have thickened, add in your mashed banana, peanut butter, maple syrup and non-dairy milk and whisk until smooth.
- Add in the remaining dry ingredients and stir until combined.
- Pour the batter into your prepared baking dish and even out the top. Top with more ripe banana slices if desired.
- Bake for about 30-40 minutes or until set.
Notes
Slice and enjoy with more peanut butter and banana!
Nutrition
Serving: 1sliceCalories: 368kcalCarbohydrates: 46gProtein: 12gFat: 16gSaturated Fat: 3gPolyunsaturated Fat: 5gMonounsaturated Fat: 7gSodium: 219mgPotassium: 470mgFiber: 7gSugar: 13gVitamin A: 135IUVitamin C: 5mgCalcium: 156mgIron: 3mg
Tried this recipe?Let me know how it was!
Vegan Protein Overnight Oats
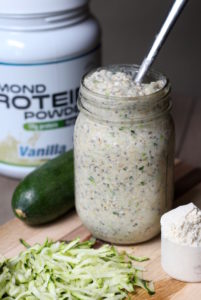
Packed with protein, healthy fats and whole grains, these Vegan Protein Overnight Oats are a sweet and delicious way to enjoy breakfast during the warm, summer months!

Also Featured In
This recipe is also featured in the following vegan recipe roundups:
We love overnight oats in our house.
There are so many reasons we love overnight oats.
You can make so many kind of overnight oats including Healthy Cookie Dough Oats, Key Lime Pie Overnight Oats and even Vegan Golden Milk Overnight Oats.
Plus, overnight oats are the perfect breakfast to meal prep
I often meal prep 5 different flavors of overnight oats at a time so that we have breakfast ready to go all week long.
Overnight oats are also the perfect vessel for protein powder as I'm going to show you in this recipe for Vegan Protein Overnight Oats!
Ingredients for Vegan Protein Overnight Oats
These protein overnight oats require just 5 ingredients to make.
- Quick oats
- Vegan protein powder
- Chia seeds
- Ground flaxseed
- Non-dairy milk
I personally love to add shredded zucchini to my overnight oats, but that's entirely optional!
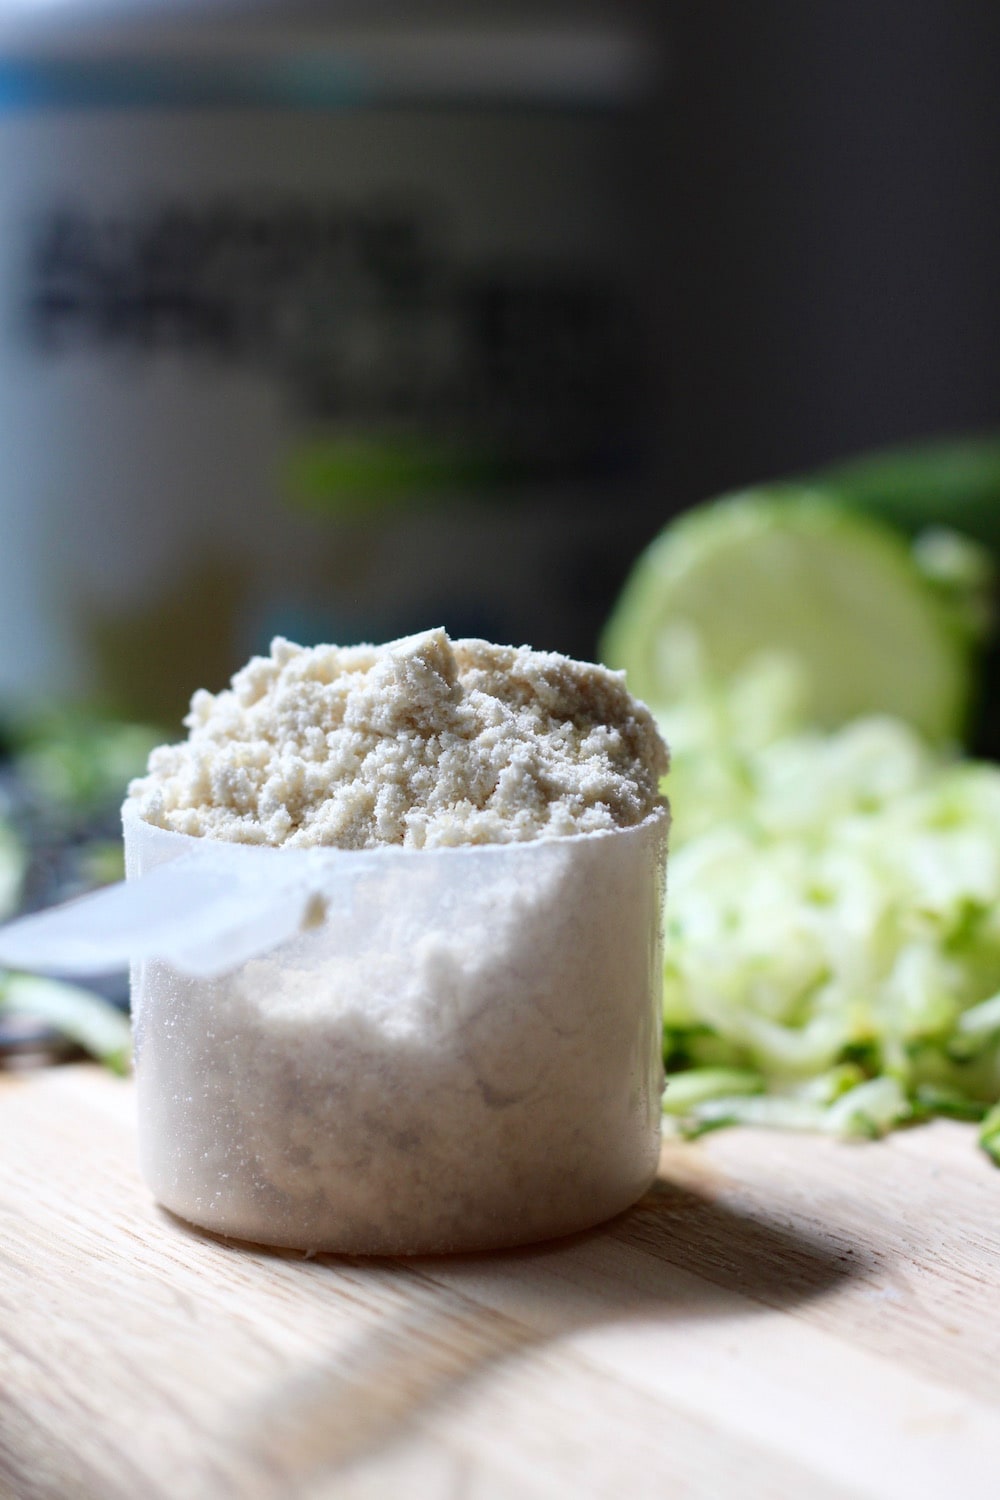
What is the Best Vegan Protein Powder
Obviously, vegan protein powder is a main ingredient in this recipe, so it's important to find a protein powder that you actually enjoy.
If you don't enjoy the protein powder mixed with just milk or water, you probably won't enjoy it in this overnight oats recipe.
I'm really picky when it comes to vegan protein powder.
There are only a handful that I've tried and enjoyed.
I'll list them out below:
- Women's Best Chocolate Vegan Protein Powder (I only buy this when it's on sale!)
- Orgain Vegan Protein Powder
- Almond Pro Protein Powder
There are so many other brands of vegan protein powder out on the market that I have yet to try, so definitely do your research and find the protein powder that YOU enjoy!
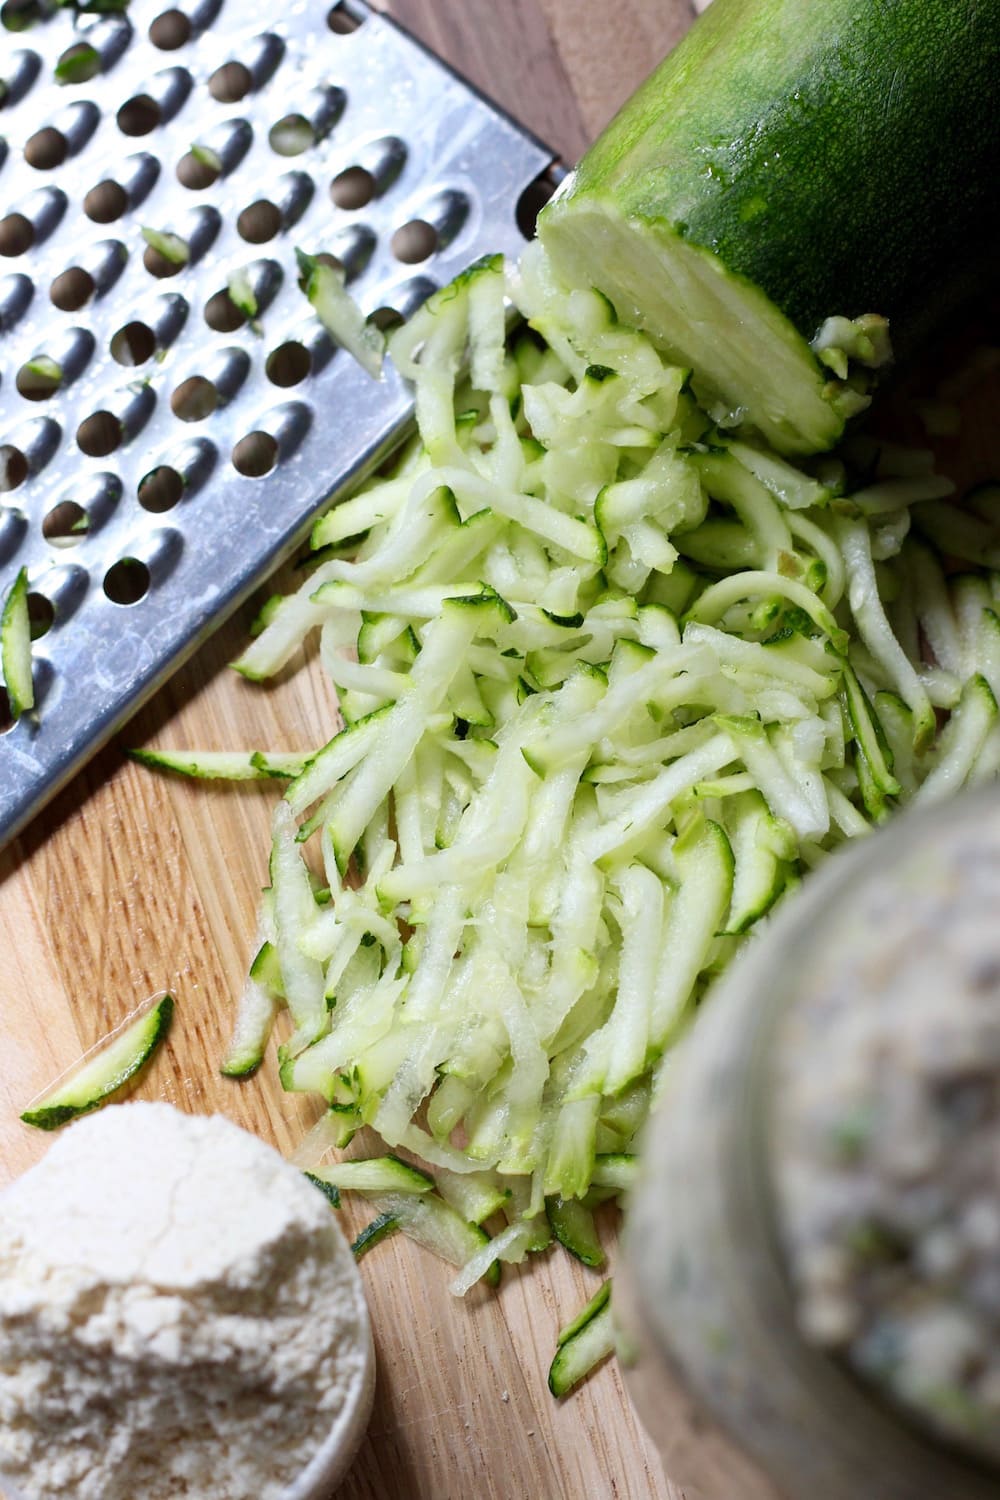
How to Add Zucchini to Overnight Oats
As I mentioned above, the zucchini is an optional ingredient in this recipe.
I personally love adding zucchini to both my hot and overnight oats as you can't taste it and it adds extra volume and nutrients.
To add zucchini to oatmeal:
- Start by shedding the zucchini until you have about ½ cups worth.
- Next, I like to chop up the shredded zucchini so that it mimics the size and shape of oats. This keeps you from having stringy oatmeal!
- Lastly, stir the shredded and minced zucchini into your jar of overnight oats and allow the oats and zucchini to soak overnight.
If you are added shredded zucchini to hot oatmeal, I like to stir the zucchini in towards the end of the cooking process.
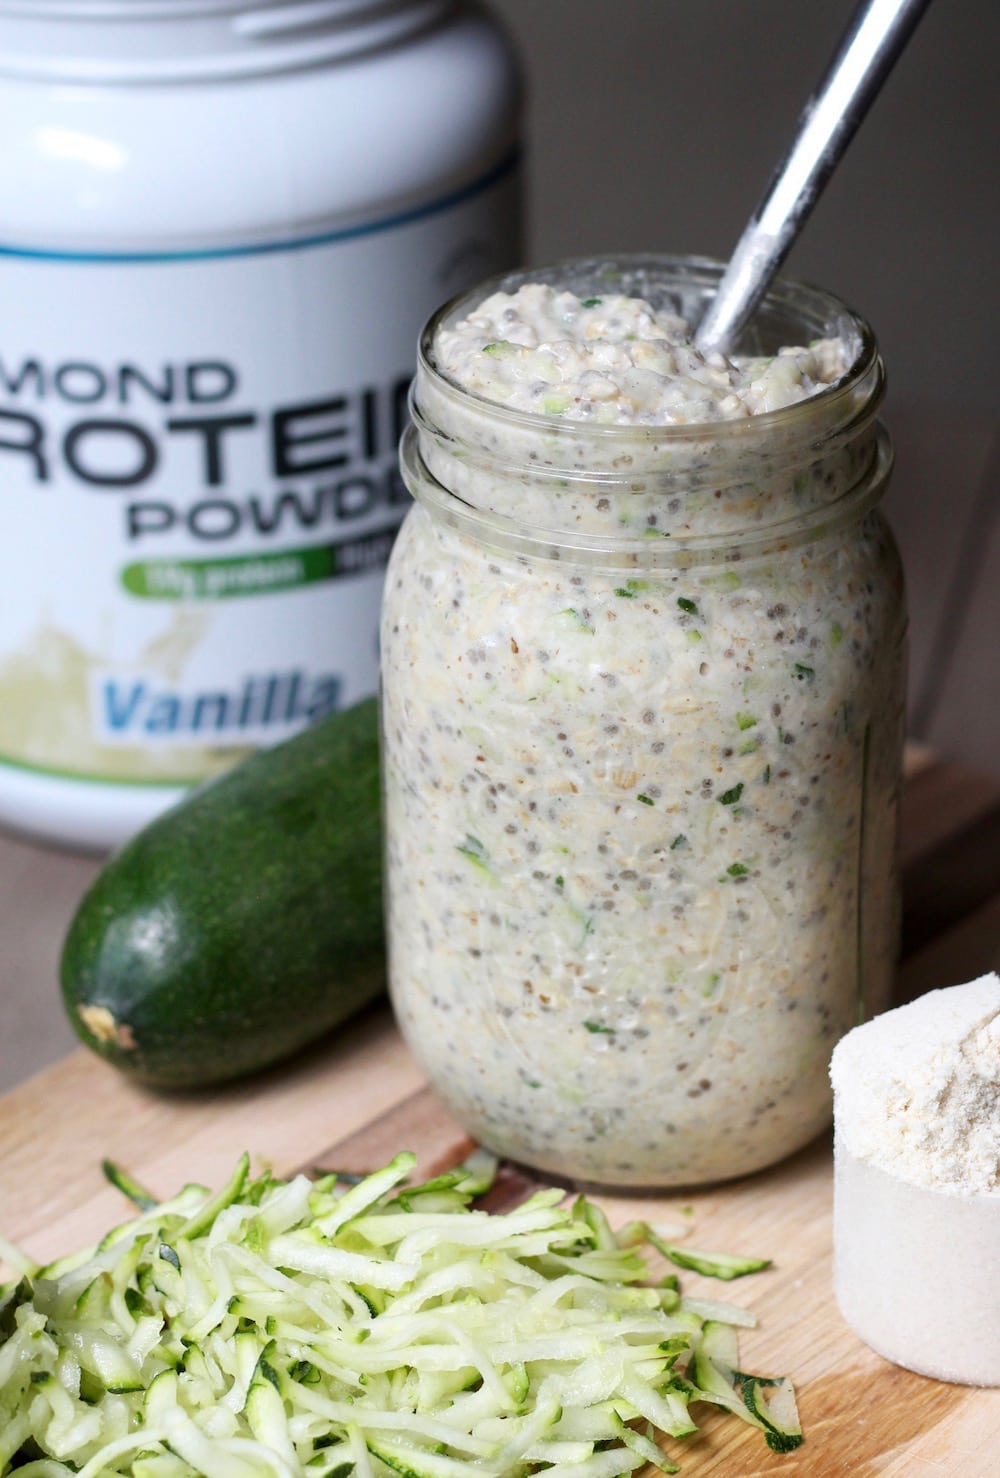
How Long Do You Have to Soak Overnight Oats?
As the name suggest, soaking your oats overnight or for about 8 hours is ideal.
This give the oats and chia seeds enough time to soak up all the liquid and flavors, leaving you with super flavorful, creamy overnight oats.
If you didn't think to soak your oats overnight, you can also make them first thing in the morning and just allow them soak for as long as possible, about 2-4 hours.
The longer you let your oats soak, the thicker and creamier the final product will be.
If they don't soak very long, you may end up with a runnier jar of overnight oats.
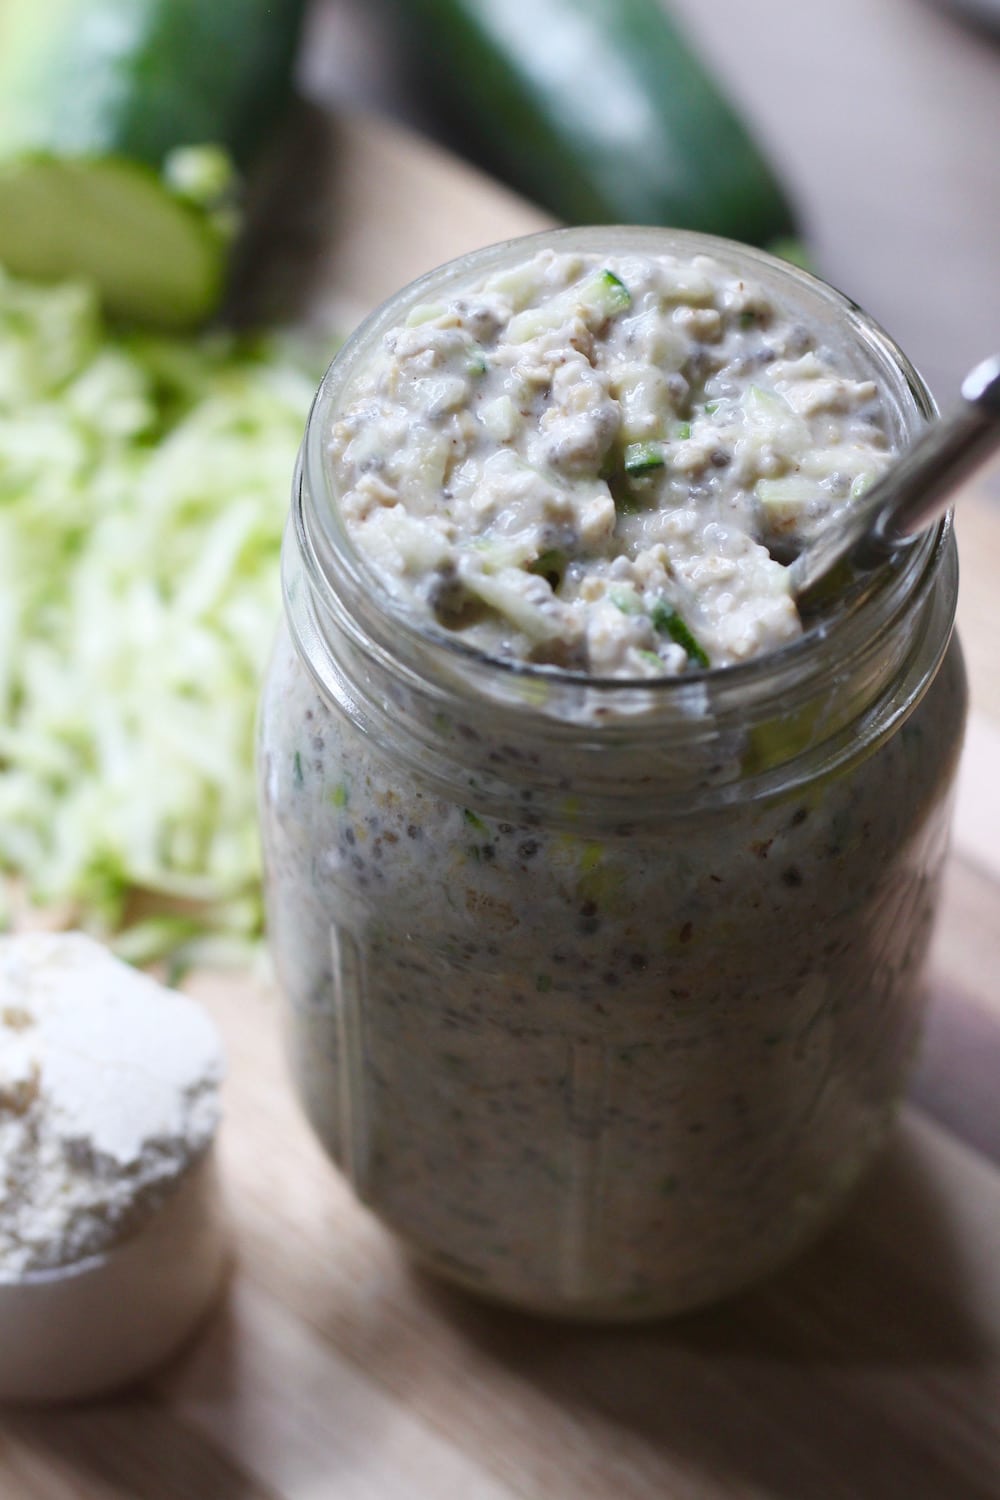
How Long Do Overnight Oats Last in the Fridge?
I love to make a few jars of overnight oats at a time because I find they keep fairly well in the fridge for 3-5 days, depending on what ingredients you use.
To make your overnight oats last longer, only make the base of the overnight oats (oats, optional protein powder, chia seeds, ground flaxseed, and non-dairy milk) and place that in sealable jars.
The morning you want to enjoy some overnight oats is when you can add in your fresh fruit and/or other toppings.
If you add fresh fruit, especially bananas, to your overnight oats, you'll want to eat them the next day.

Can You Freeze Overnight Oats?
Yes! But just like storing overnight oats in the fridge, you only want to freeze plain overnight oats. Simply make your basic overnight oats, place them in freezer-safe containers and freeze for up to 3 months.
How to Thaw Overnight Oats
To thaw the frozen overnight oats, remove them from the freezer the night before you want to enjoy them and allow them to thaw in the fridge overnight.
Right before you eat your frozen and thawed overnight oats is when you can add whatever toppings you desire, such as fresh fruit, nuts, nut butter, granola, etc.
📖 Recipe

Vegan Protein Overnight Oats
Packed with protein, healthy fats and whole grains, these Vegan Protein Overnight Oats are a sweet and delicious way to enjoy breakfast during the warm, summer months!
Ingredients
- ½ cup quick oats
- 1 scoop vegan protein powder* use your favorite brand!
- 1 tablespoon chia seeds
- 1 teaspoon ground flaxseed
- 1- 1 ¼ cup non-dairy milk
- Optional: ⅓-1/2 small zucchini shredded (and minced if desired)
Instructions
- In a jar or bowl, mix together the dry ingredients, from the oats to the ground flaxseed.
- If using, prepare your zucchini by washing and shredding ⅓-1/2 of a small zucchini. I like to chop the shredded pieces into smaller pieces which closer mimic the size of oats. You can also omit the zucchini if you don't want to include it, you will just need to reduce the non-dairy milk to about 1 cup.
- Mix the zucchini into the dry ingredients and then pour in the non-dairy milk. Mix everything together until combined.
- Store the mixture in the fridge overnight which will allow it to thicken.
- In the morning, enjoy the overnight oats straight from the jar/bowl you prepared it in. You can also pour the oats into a bowl and add extra toppings like nut butter, fruit, granola, etc.
Notes
*You can use any flavor or brand of protein powder you like!
Nutrition
Calories: 565kcalCarbohydrates: 52gProtein: 45gFat: 20gSaturated Fat: 2gPolyunsaturated Fat: 11gMonounsaturated Fat: 3gTrans Fat: 0.02gSodium: 569mgPotassium: 957mgFiber: 11gSugar: 14gVitamin A: 2093IUVitamin C: 38mgCalcium: 861mgIron: 11mg
Tried this recipe?Let me know how it was!
Vegan Pumpkin Cinnamon Rolls with Candied Pecans

Topped with a simple sugar glaze and crunchy candied pecans, these Vegan Pumpkin Cinnamon Rolls will be your go-to recipe for any holiday breakfast! They are easy to make, light and fluffy and full of pumpkin flavor. Your chilly, fall mornings just got sweeter!
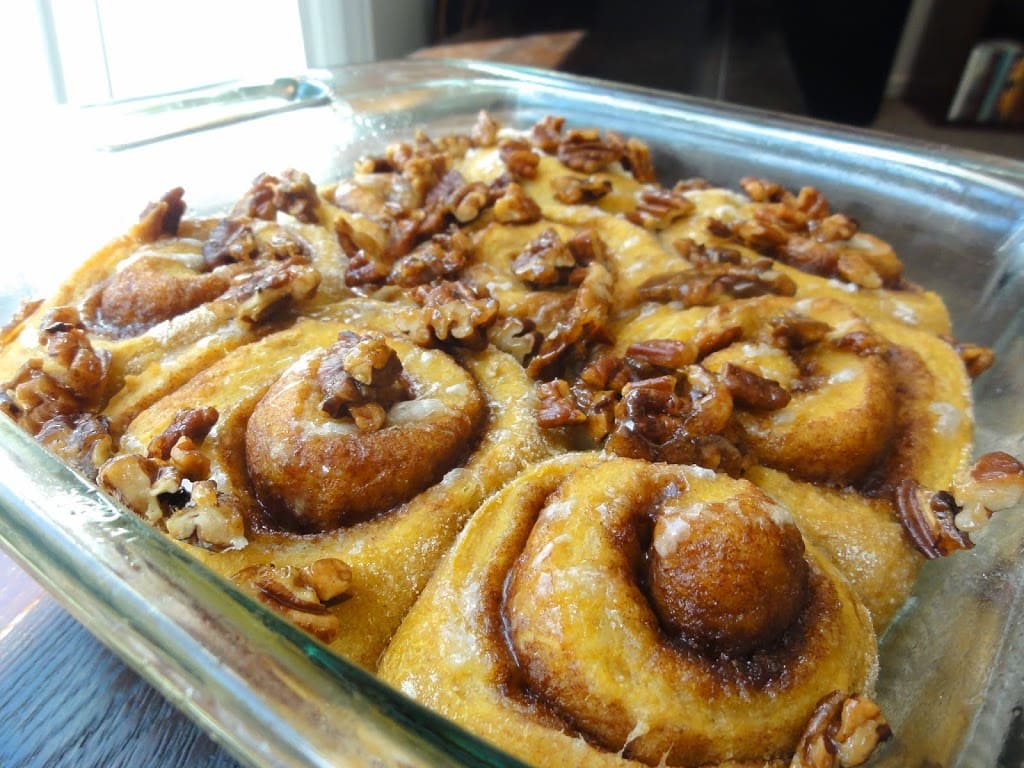
Whenever I think of a special fall or holiday breakfast, I always think of cinnamon rolls!
Yeah, you could do baked pumpkin donuts, vibrant vegan pumpkin bread, or orange chocolate chip scones, but seriously...how beautiful are these pumpkin cinnamon rolls?!
Who wouldn't want to wake up on Thanksgiving or Christmas morning to the smell of sweet, spiced pumpkin rolls wafting through the house?
Making homemade cinnamon rolls always intimidated me, but they really are so easy to make!
Let me show you...
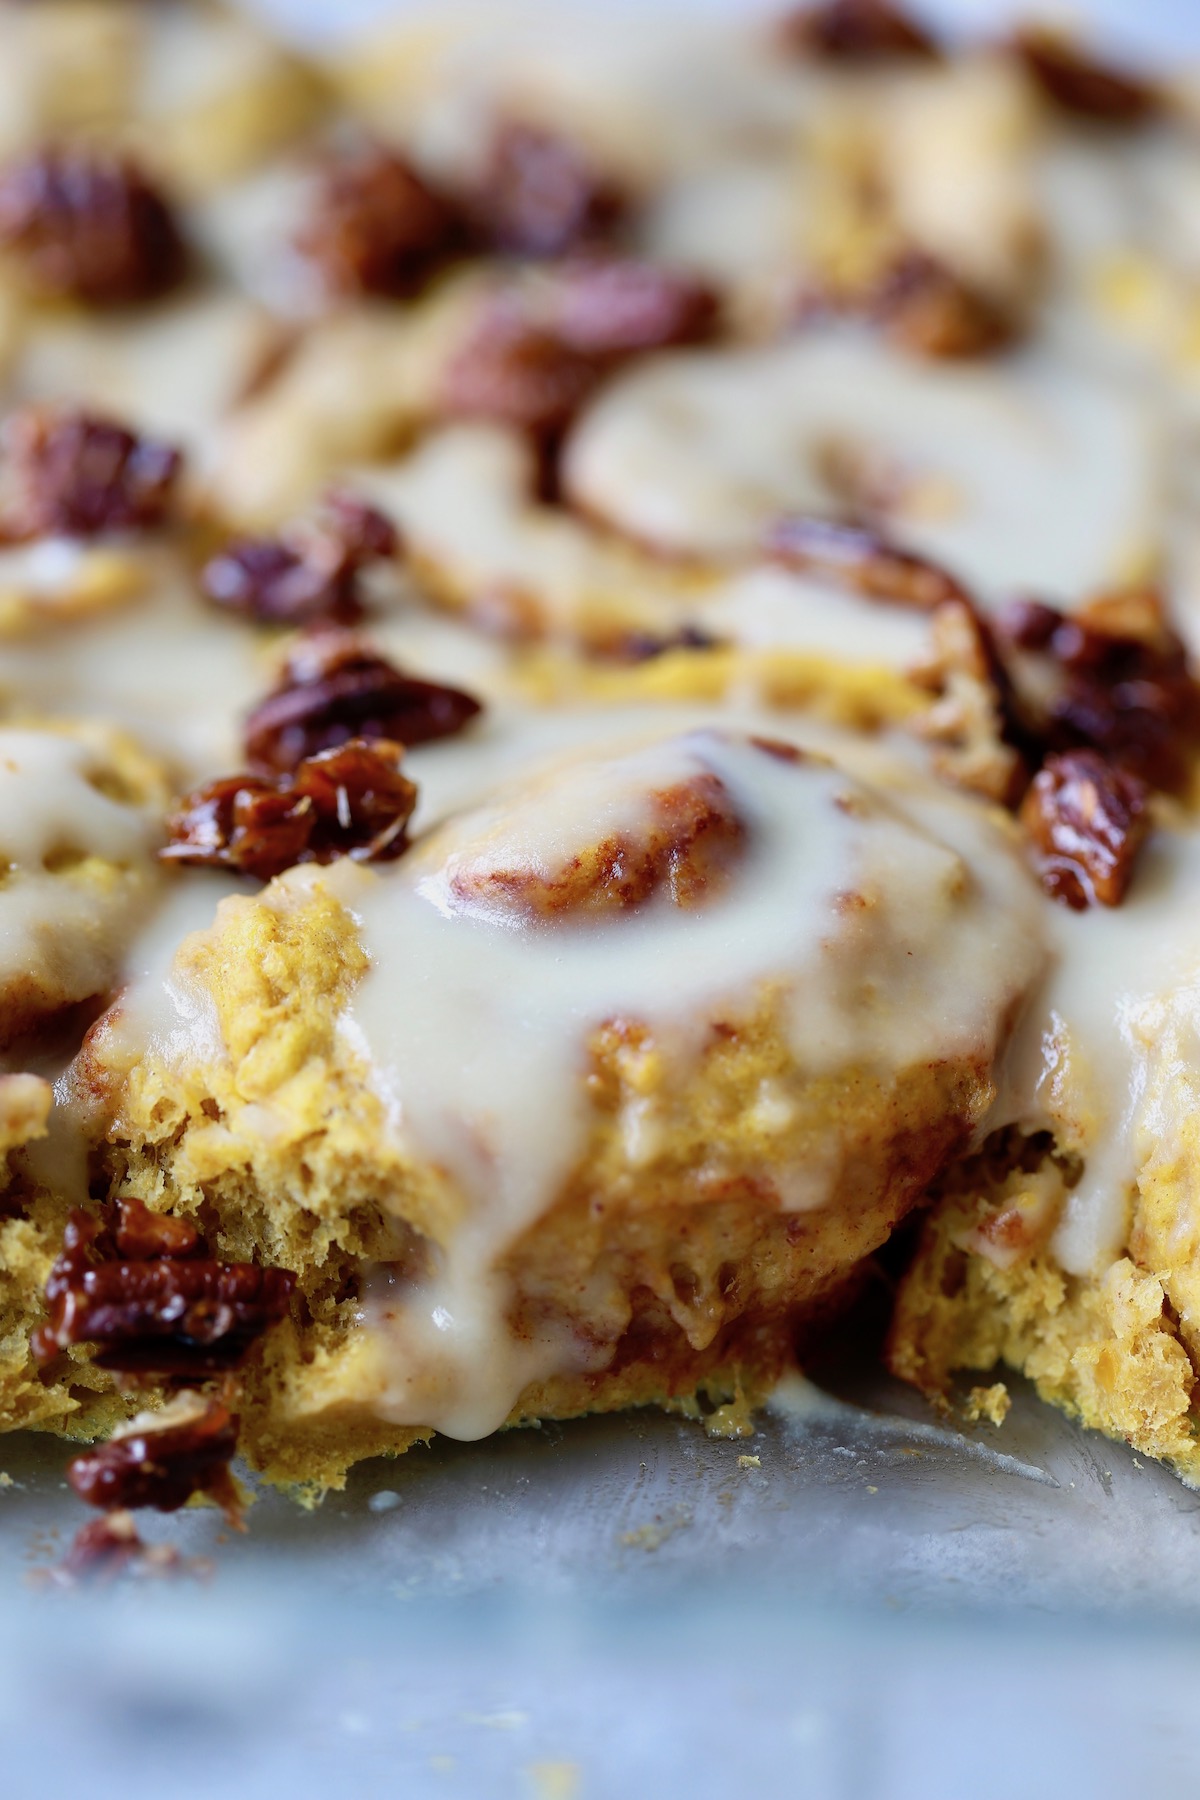
Ingredients for Vegan Pumpkin Cinnamon Rolls
If you bake on a regular basis, then you'll probably already have all of the ingredients for these vegan cinnamon rolls in your fridge and pantry. They don't require anything fancy!
Cinnamon Rolls
- Non-dairy milk
- Vegan butter
- Pumpkin puree
- Brown sugar
- Aquafaba (the liquid from a can of chickpeas)
- Active dry yeast
- Flour
- Ground cinnamon
- Ground nutmeg
- Ground cloves
- Sea salt
Glaze Ingredients
- Powdered sugar
- Non-dairy milk
Candied Pecans
- Pecans
- Vegan butter
- Sugar
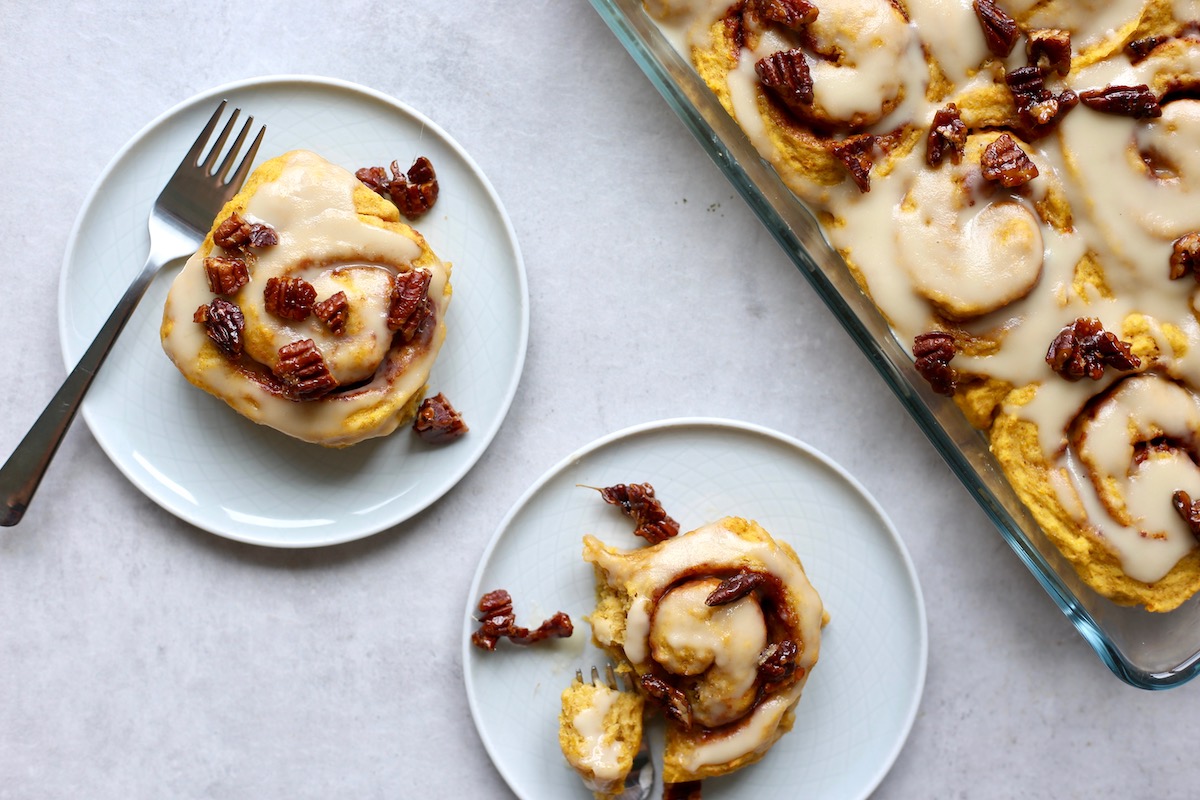
How to Make Vegan Pumpkin Cinnamon Rolls
Now that you've got the ingredients, here are the steps to make this delicious vegan pumpkin cinnamon roll recipe.
- Step 1: To make the dough, start by warming the milk and vegan butter together until warm and the butter has melted. You want the mixture lukewarm, not hot. You should be able to put your finger in the mixture without it feeling too hot. Set this mixture aside.
- Step 2: In a large mixing bowl, whisk together the pumpkin puree, brown sugar, salt and cinnamon until smooth. Add in the warm milk and butter mixture. Then whisk in the aquafaba and yeast. Next, using a wooden spoon, stir in 1 cup of flour. Lastly add in another 1 ¼ cup of flour until a soft dough forms. Place the dough into a greased bowl, cover it and allow it to rise in a warm place for 1-1 ½ hours until doubled in size.
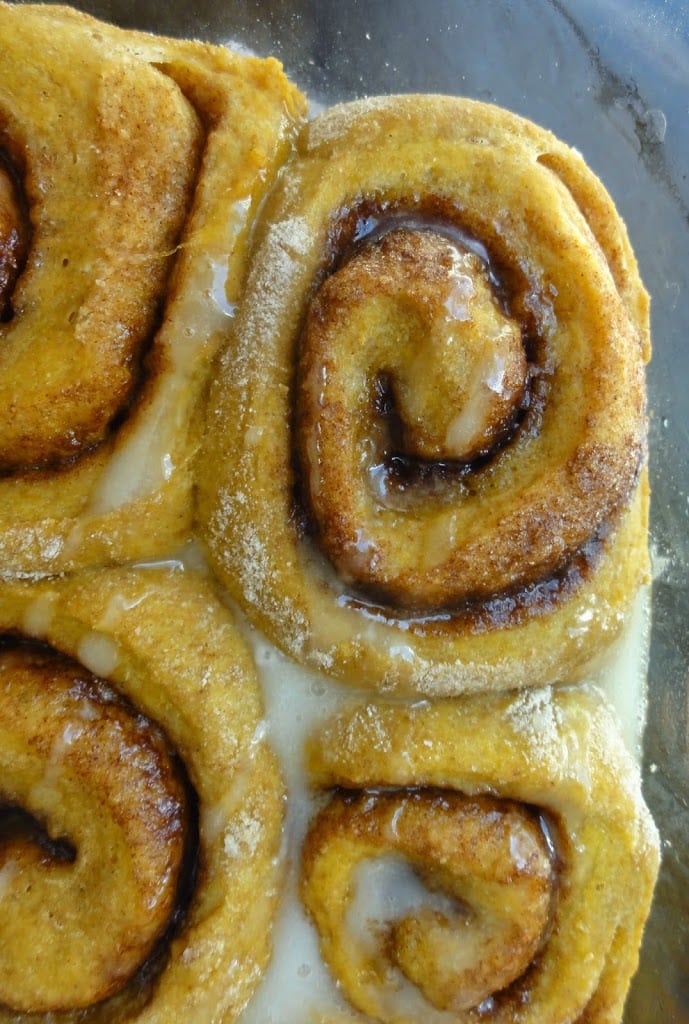
- Step 3: After the dough has risen, punch it down to deflate it. Pour it out onto a lightly floured surface and knead it a few times, adding more flour as needed until it's smooth and not sticky.
- Step 4: Roll the dough out into a large rectangle, about 18x10 inches. Spread 3 tablespoons of softened butter across the surface of the rectangle. Combine the brown sugar and spices in a small bowl and then sprinkle it evenly over the top of the butter. Roll the rectangle up tightly, sealing the edges. Using a sharp knife, cut the log into 12 even sections.
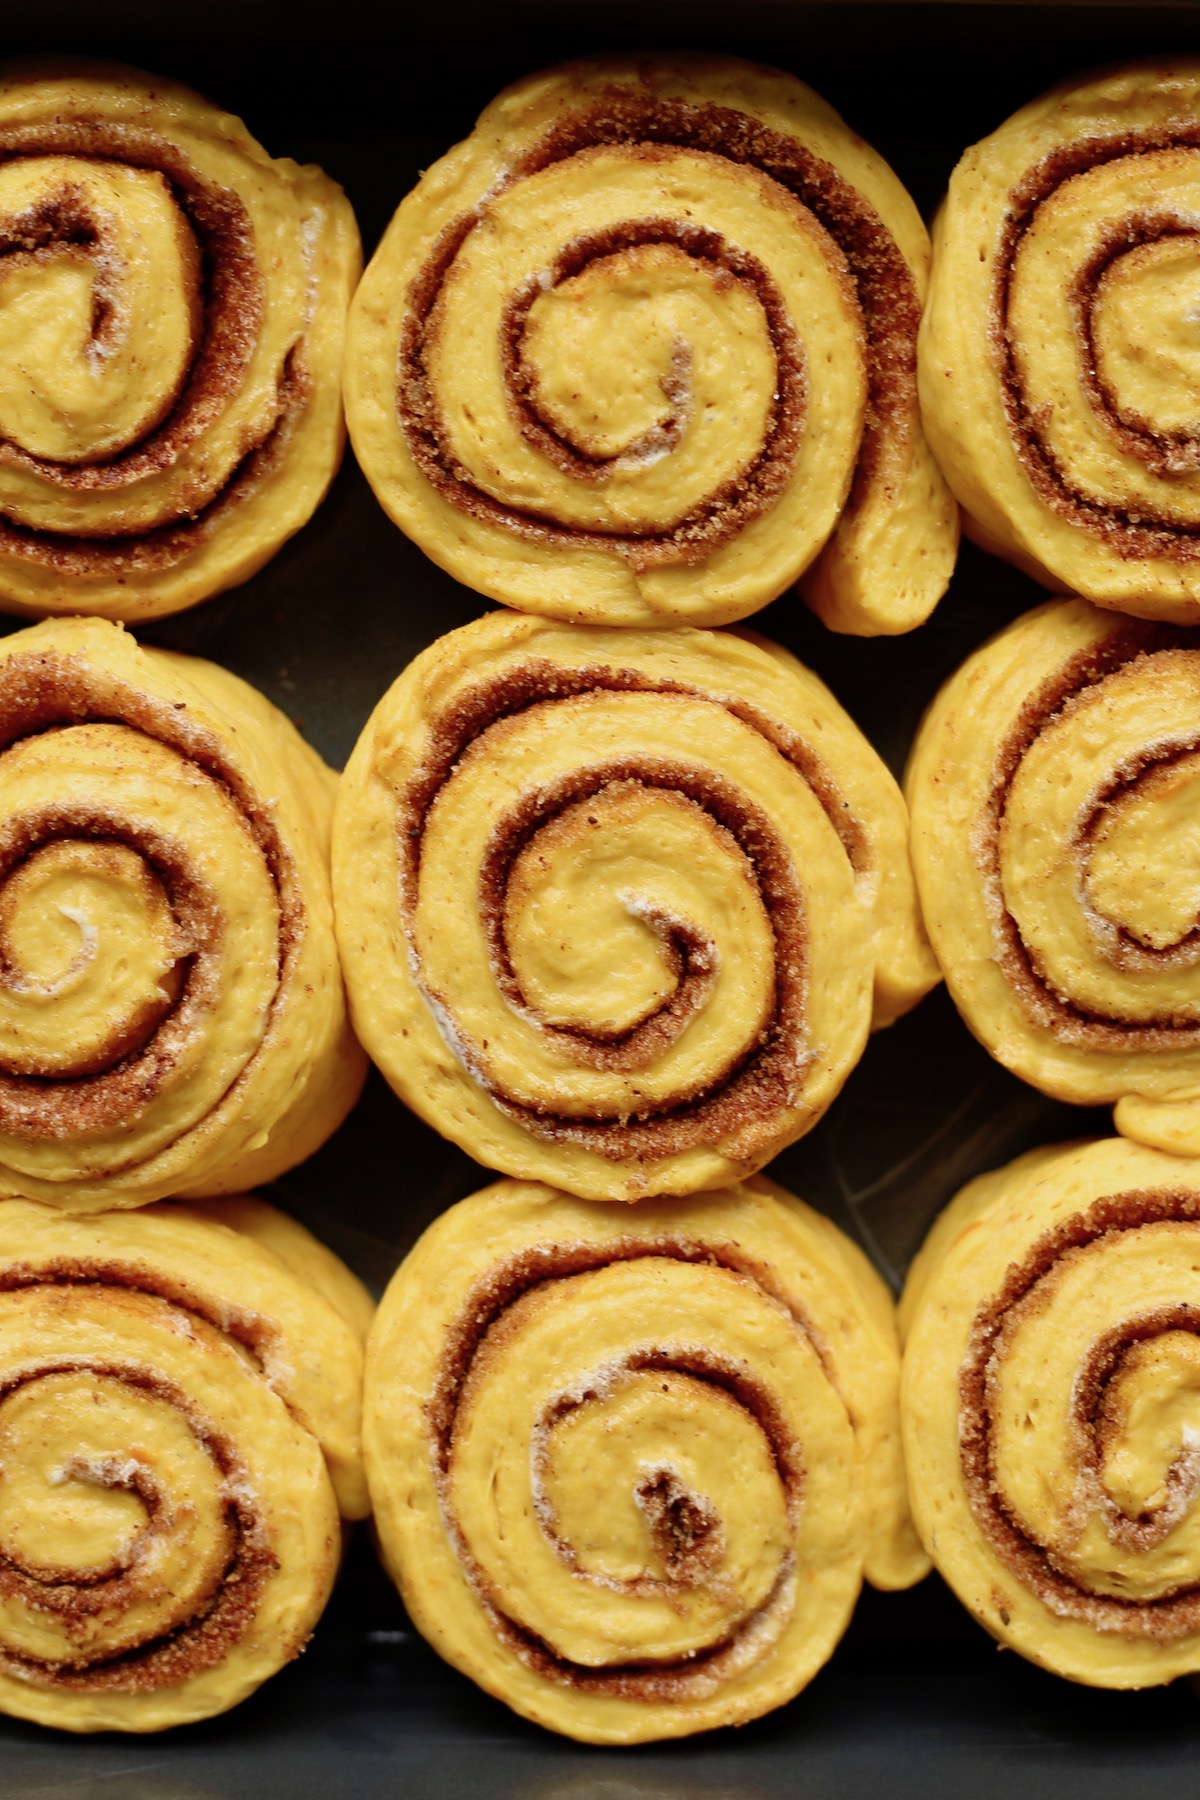
Step 5: Grease a 11x17 inch baking dish and arrange the rolls in the dish. Cover the baking dish and allow the rolls to rise again for about 30 more minutes while you preheat the oven to 350F/175C.
Step 6: Bake the rolls for 22-28 minutes, covering them with aluminum foil after 15 minutes to keep the tops from getting too brown. Remove them from the oven to cool.
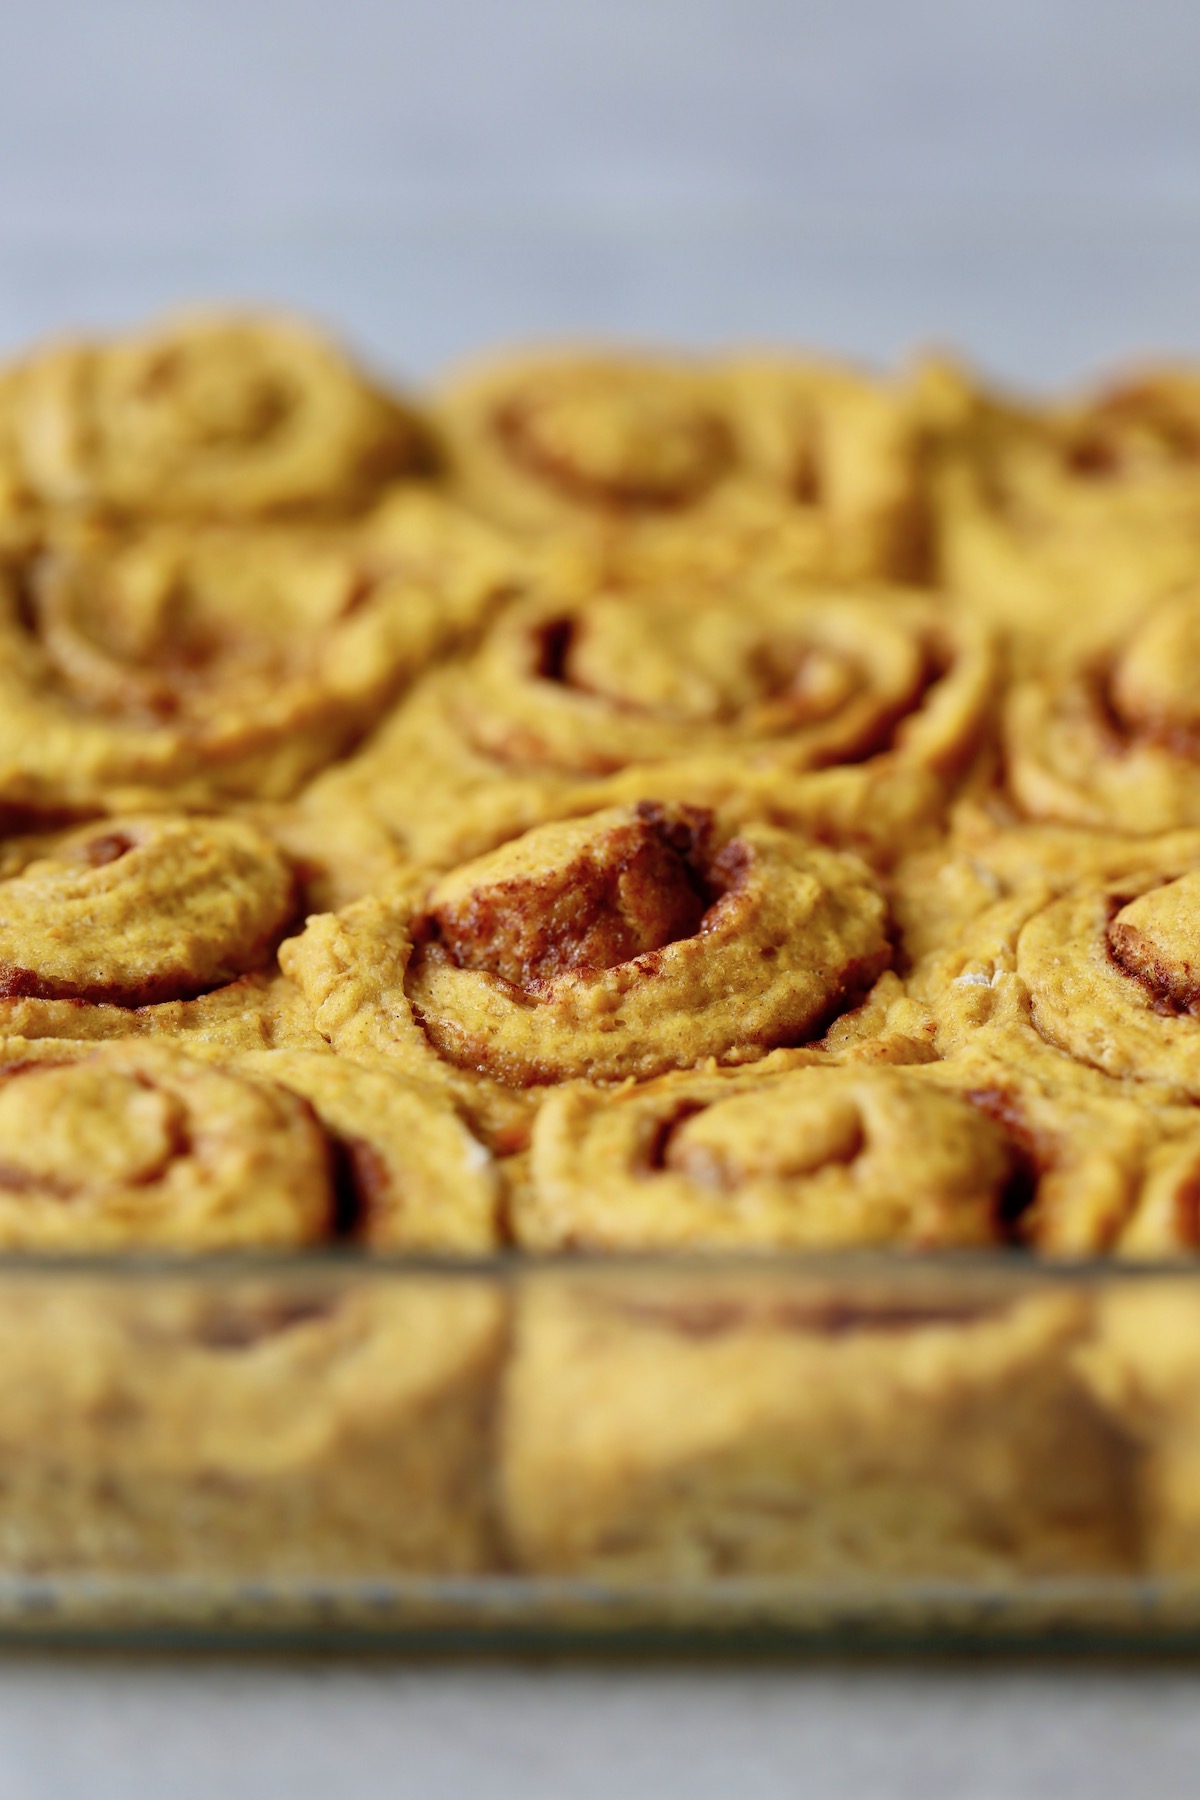
Making the Cinnamon Roll Glaze
While the rolls are baking, you'll want to start to prepare the glaze for the cinnamon rolls.
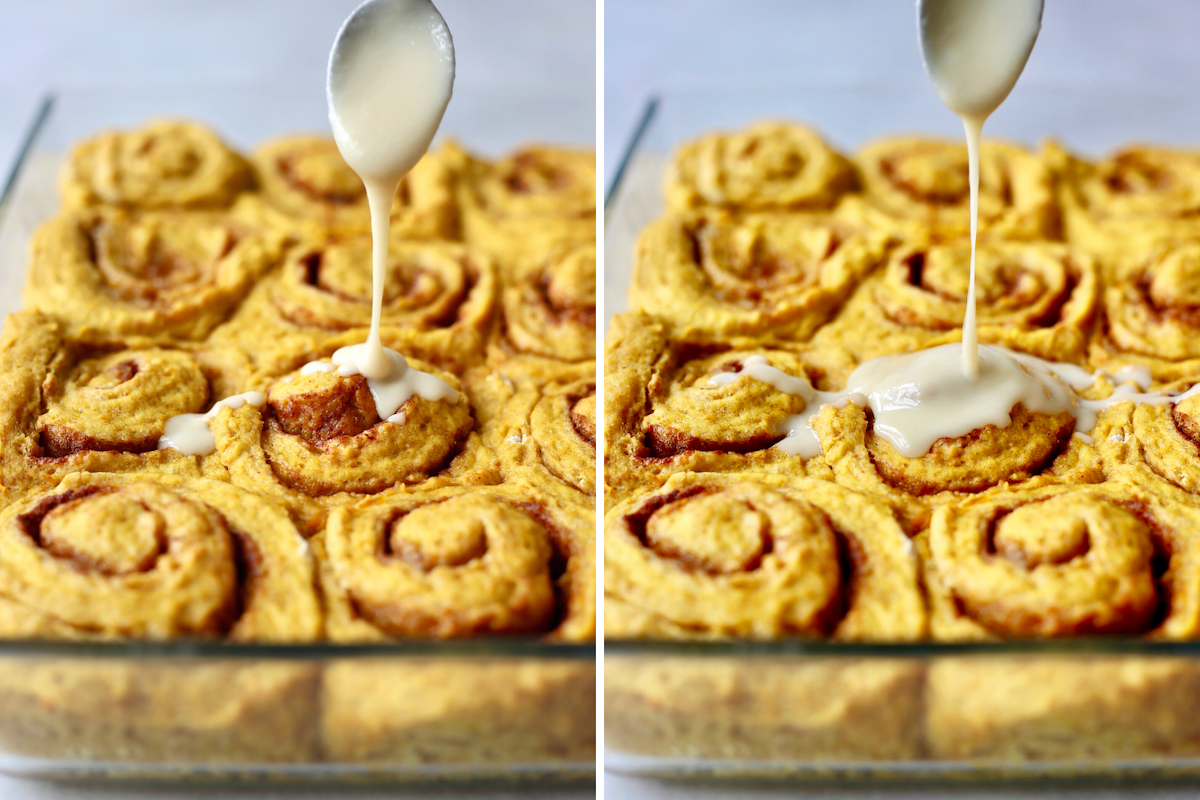
For the glaze, whisk 1 cup of powdered sugar with 1 tablespoon of milk. Add more milk as needed until a thick, but pourable glaze forms.
Pour this over the still-warm cinnamon rolls and watch it sink down into all those fluffy, brown sugar-packed cracks and crevices!
Healthier Version of Cinnamon Roll Glaze
I've discovered a new favorite glaze for things like cinnamon rolls and scones. Have you ever tried coconut butter? Think peanut butter, but with coconut.
Coconut butter is creamy, rich and sweet and it makes for an amazing healthy substitute for powdered sugar-based glazes.
To make a coconut butter glaze, simply stir 1-2 tablespoons of maple syrup into ⅓ cup of coconut butter until it's thick and combined. Then stir in some non-dairy milk a little bit at a time until a thick, but pourable glaze forms.
It's delicious and a lot lower in sugar in case that's something you're looking for!
Give it a try and let me know what you think!
How to Make Candied Pecans
Making vegan candied pecans couldn't be easier, and it adds so much wonderful texture to this vegan cinnamon roll recipe!
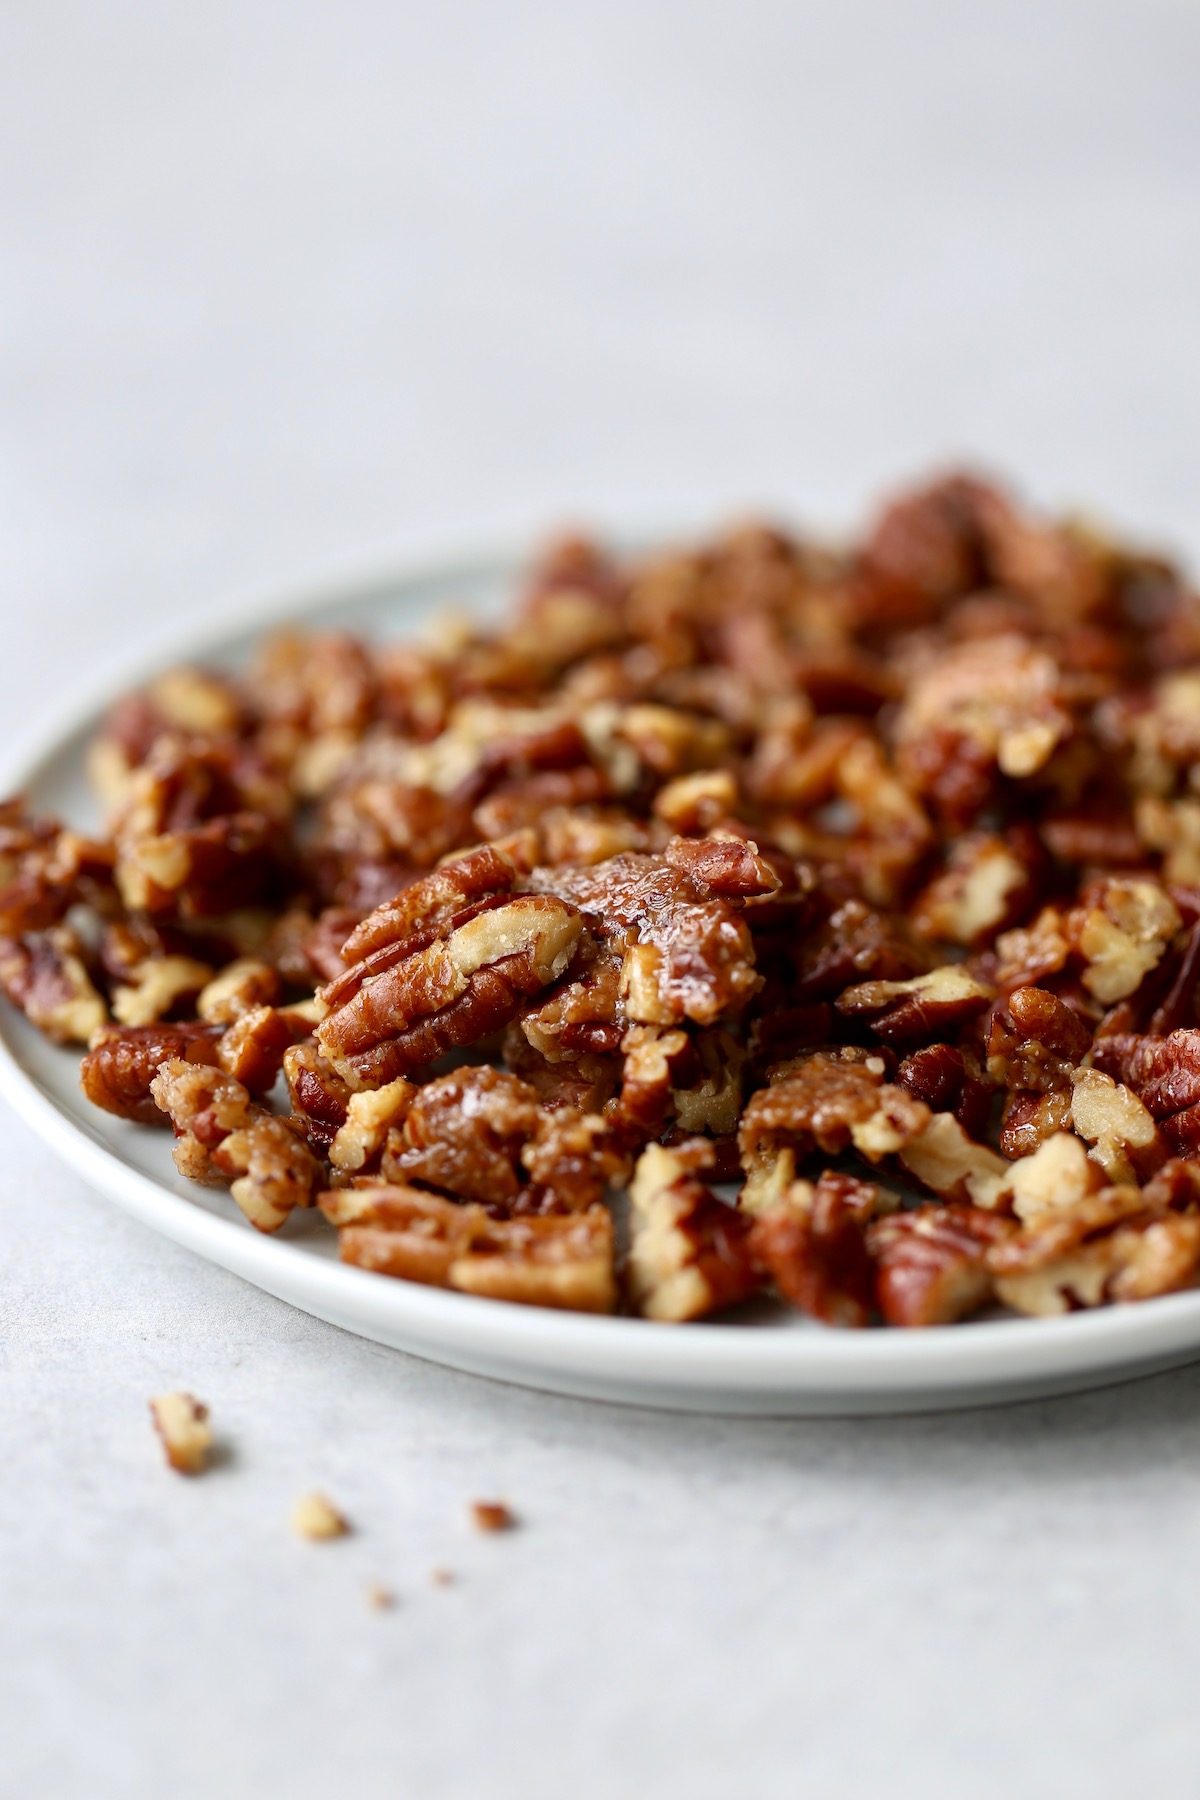
Start by melting 2 teaspoons of vegan butter in a skillet over medium heat.
Once melted, add in 2 tablespoons of sugar and ½ a cup of chopped pecans. Stir everything together. Cook the pecans, stirring constantly, until the sugar melts and the pecans start to toast.
Pour the pecans out onto a place and allow the sugar to harden.
Pour the glaze over the warm cinnamon rolls and top with the candied pecans. Serve and enjoy!
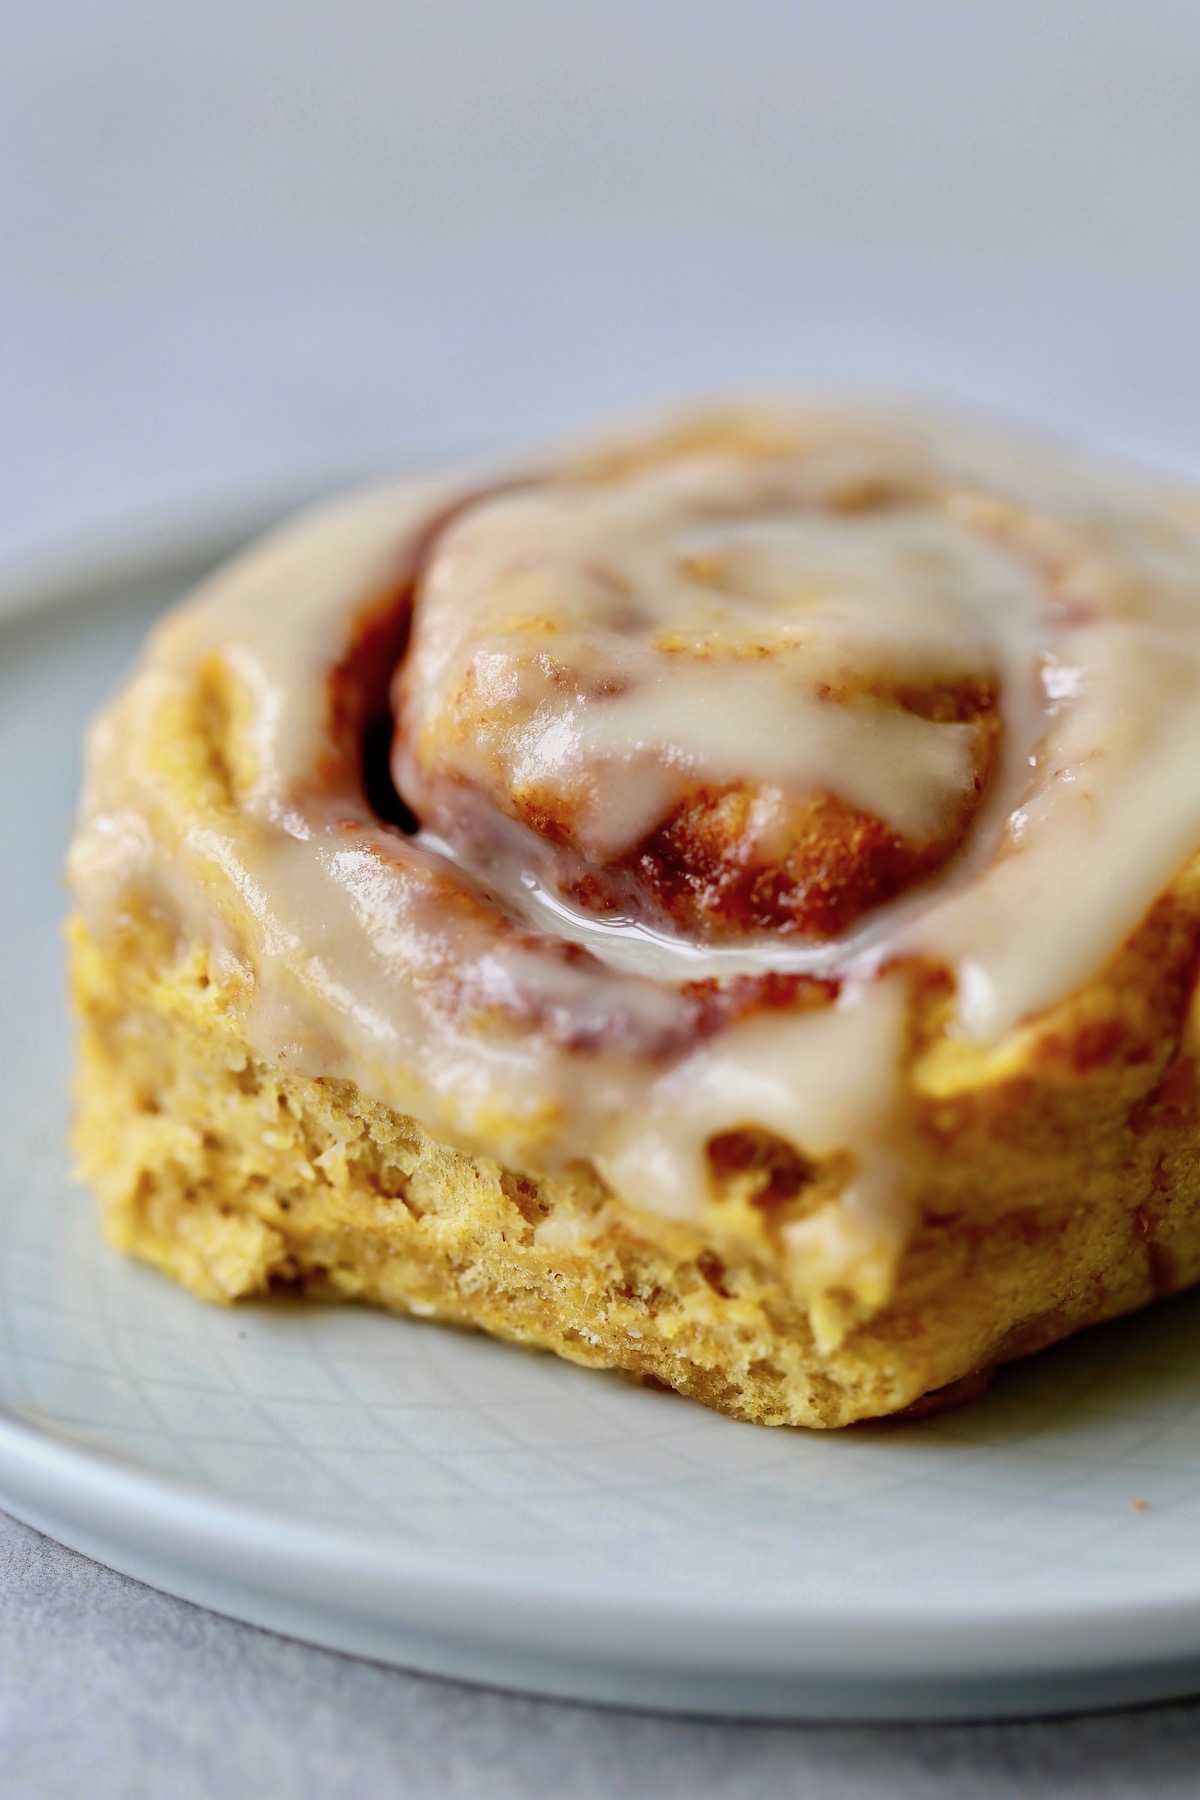
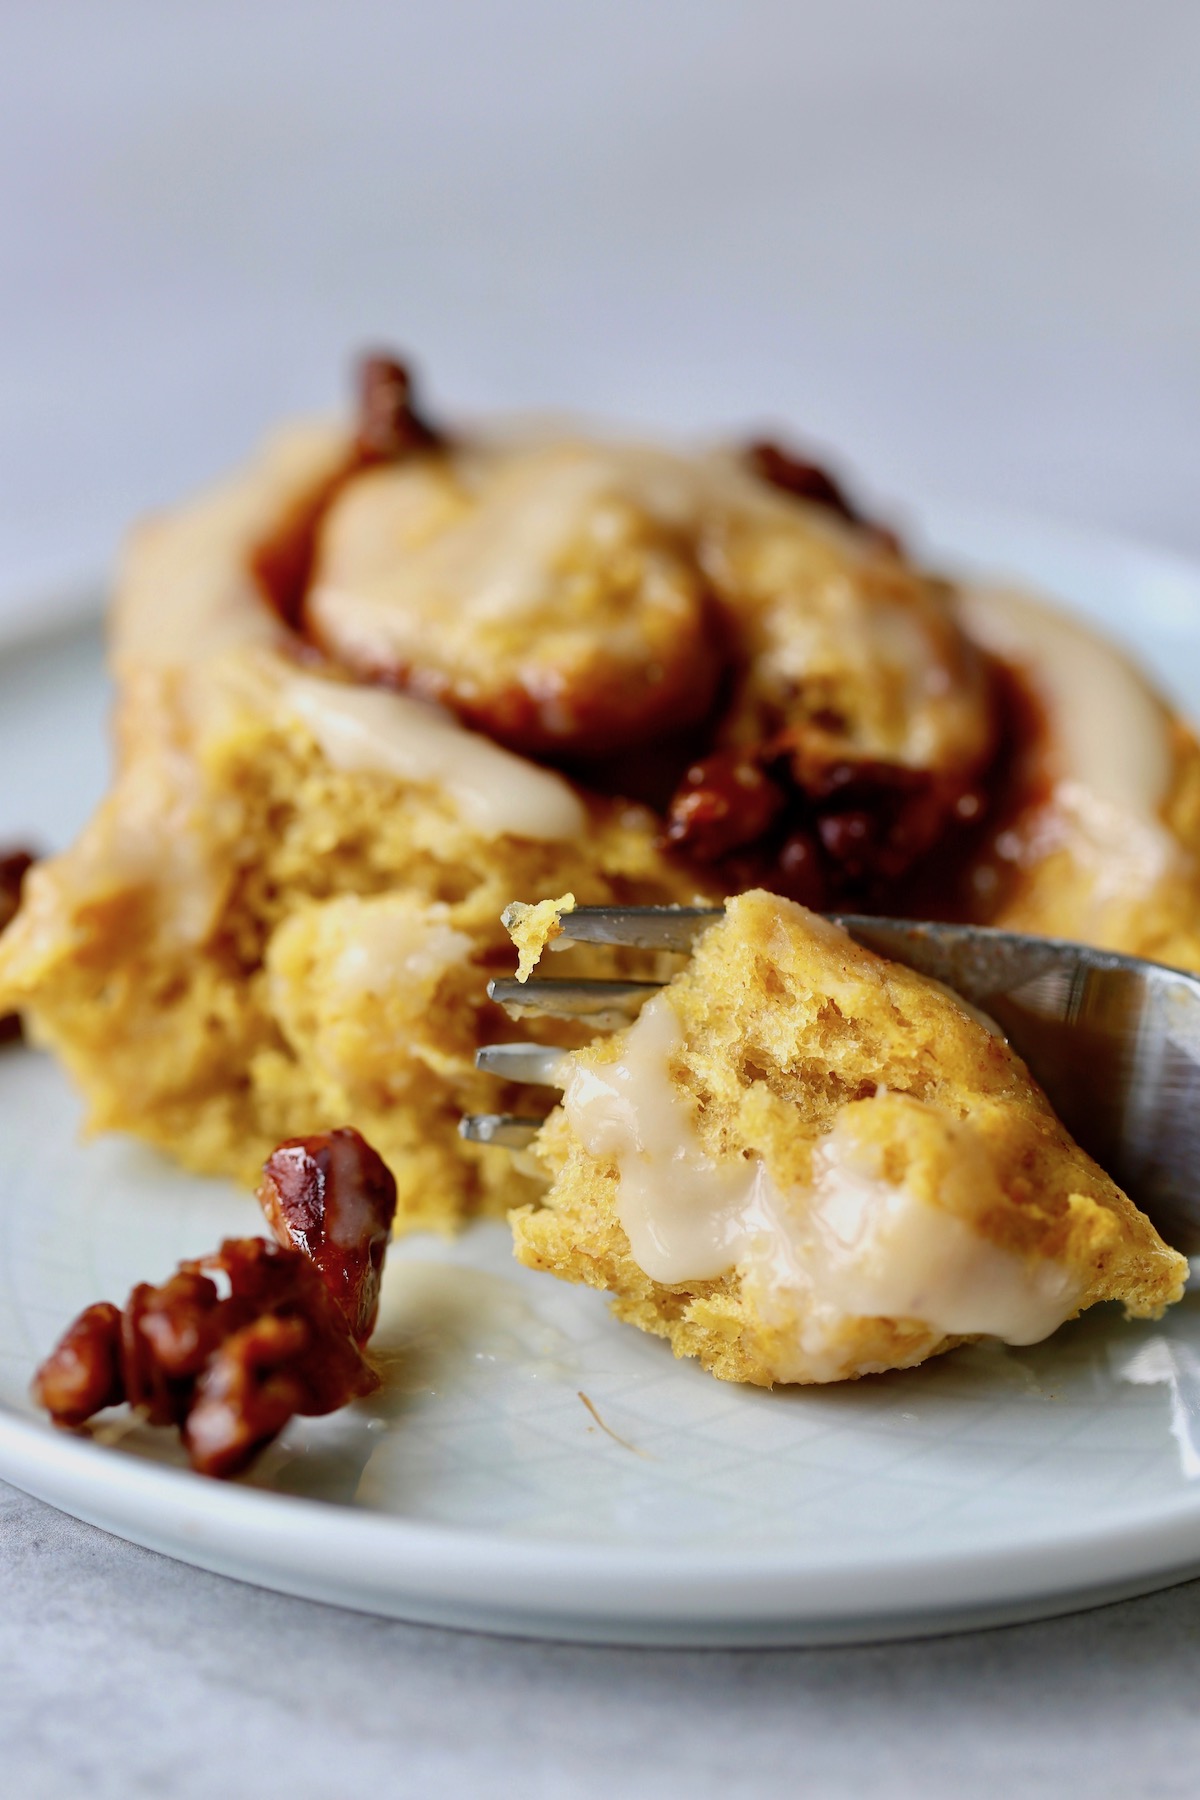
More Vegan Pumpkin Recipes
If you're a fan of pumpkin, then you need to check out these other recipes! Some are sweet, some are savory. They're all perfect for fall!
- Creamy Vegan Pumpkin Soup with a Peanut Butter Twist
- Vegan Pumpkin Scones (Starbucks Copycat Recipe)
- Vegan Pumpkin Chili Recipe
- Red Lentil Pumpkin Soup
- Pumpkin Chocolate Chip Layered Muffins
- The Fluffiest Pumpkin Sheet Pan Pancakes
- Baked Pumpkin Donuts!
📖 Recipe

Vegan Pumpkin Cinnamon Rolls with Candied Pecans
Fluffy, full of warming spices and creamy pumpkin puree, these vegan pumpkin cinnamon rolls topped with candied pecans will become a holiday family tradition!
Ingredients
DOUGH
- ⅓ cup non-dairy milk
- 2 tablespoons vegan butter
- ½ cup pumpkin puree
- ¼ cup brown sugar
- ½ teaspoon sea salt
- ¼ teaspoon cinnamon
- 3 tablespoons aquafaba
- 2 ¼ teaspoon active dry yeast
- 2 ⅔ cups flour divided
FILLING
- 3 tablespoons vegan butter softened
- ½ cup brown sugar
- 1 tablespoon ground cinnamon
- ½ teaspoon ground nutmeg
- ¼ teaspoon ground cloves
POWDERED SUGAR GLAZE
- 1 cup powdered sugar
- 1-3 tablespoon non-dairy milk
CANDIED PECANS
- 2 teaspoons vegan butter
- 2 tablespoon sugar
- ½ cup chopped pecans
Instructions
- To make the dough, start by warming the milk and vegan butter together until warm and the butter has melted. You want the mixture lukewarm, not hot. You should be able to put your finger in the mixture without it feeling too hot. Set this mixture aside.
- In a large mixing bowl, whisk together the pumpkin puree, brown sugar, salt and cinnamon until smooth. Add in the warm milk and butter mixture. Then whisk in the aquafaba and yeast. Next, using a wooden spoon, stir in 1 cup of flour. Lastly add in another 1 ¼ cup of flour until a soft dough forms. Place the dough into a greased bowl, cover it and allow it to rise in a warm place for 1-1 ½ hours until doubled in size.
- After the dough has risen, punch it down to deflate it. Pour it out onto a lightly floured surface and knead it a few times, adding more flour as needed until it's smooth and not sticky.
- Roll the dough out into a large rectangle, about 18x10 inches. Spread 3 tablespoons of softened butter across the surface of the rectangle. Combine the brown sugar and spices in a small bowl and then sprinkle it evenly over the top of the butter. Roll the rectangle up tightly, sealing the edges. Using a sharp knife, cut the log into 12 even sections.
- Grease a 11x17 inch baking dish and arrange the rolls in the dish. Cover the baking dish and allow the rolls to rise again for about 30 more minutes while you preheat the oven to 350 °F.
- Bake the rolls for 22-28 minutes, covering them with aluminum foil after 15 minutes to keep the tops from getting too brown. Remove them from the oven to cool.
- While the rolls are baking, prepare the glaze and candied pecans. For the glaze, whisk 1 cup of powdered sugar with 1 tablespoon of milk. Add more milk as needed until a thick, but pourable glaze forms.
- For the candied pecans, melt 2 teaspoons of butter in a skillet over medium heat. Once melted, add the sugar and pecans and stir everything together. Cook the pecans, stirring constantly, until the sugar melts and the pecans start to toast. Pour the pecans out onto a place and allow the sugar to harden.
- Pour the glaze over the warm cinnamon rolls and top with the pecans. Serve and enjoy!
Notes
Aquafaba is the liquid in a can of chickpeas.
Nutrition
Calories: 287kcalCarbohydrates: 50gProtein: 5gFat: 8gSaturated Fat: 2gPolyunsaturated Fat: 2gMonounsaturated Fat: 4gTrans Fat: 0.03gSodium: 150mgPotassium: 126mgFiber: 3gSugar: 26gVitamin A: 1878IUVitamin C: 1mgCalcium: 41mgIron: 2mg
Tried this recipe?Let me know how it was!
Easy Vegan Baked Ziti (Dairy-Free!)

Full of melty, vegan cheese, protein-packed tofu ricotta and flavorful marinara sauce, this Vegan Baked Ziti is a family approved recipe! It takes about 25 minutes of hands-on time and then your oven does the rest of the work, making it the perfect meal for any night of the week!
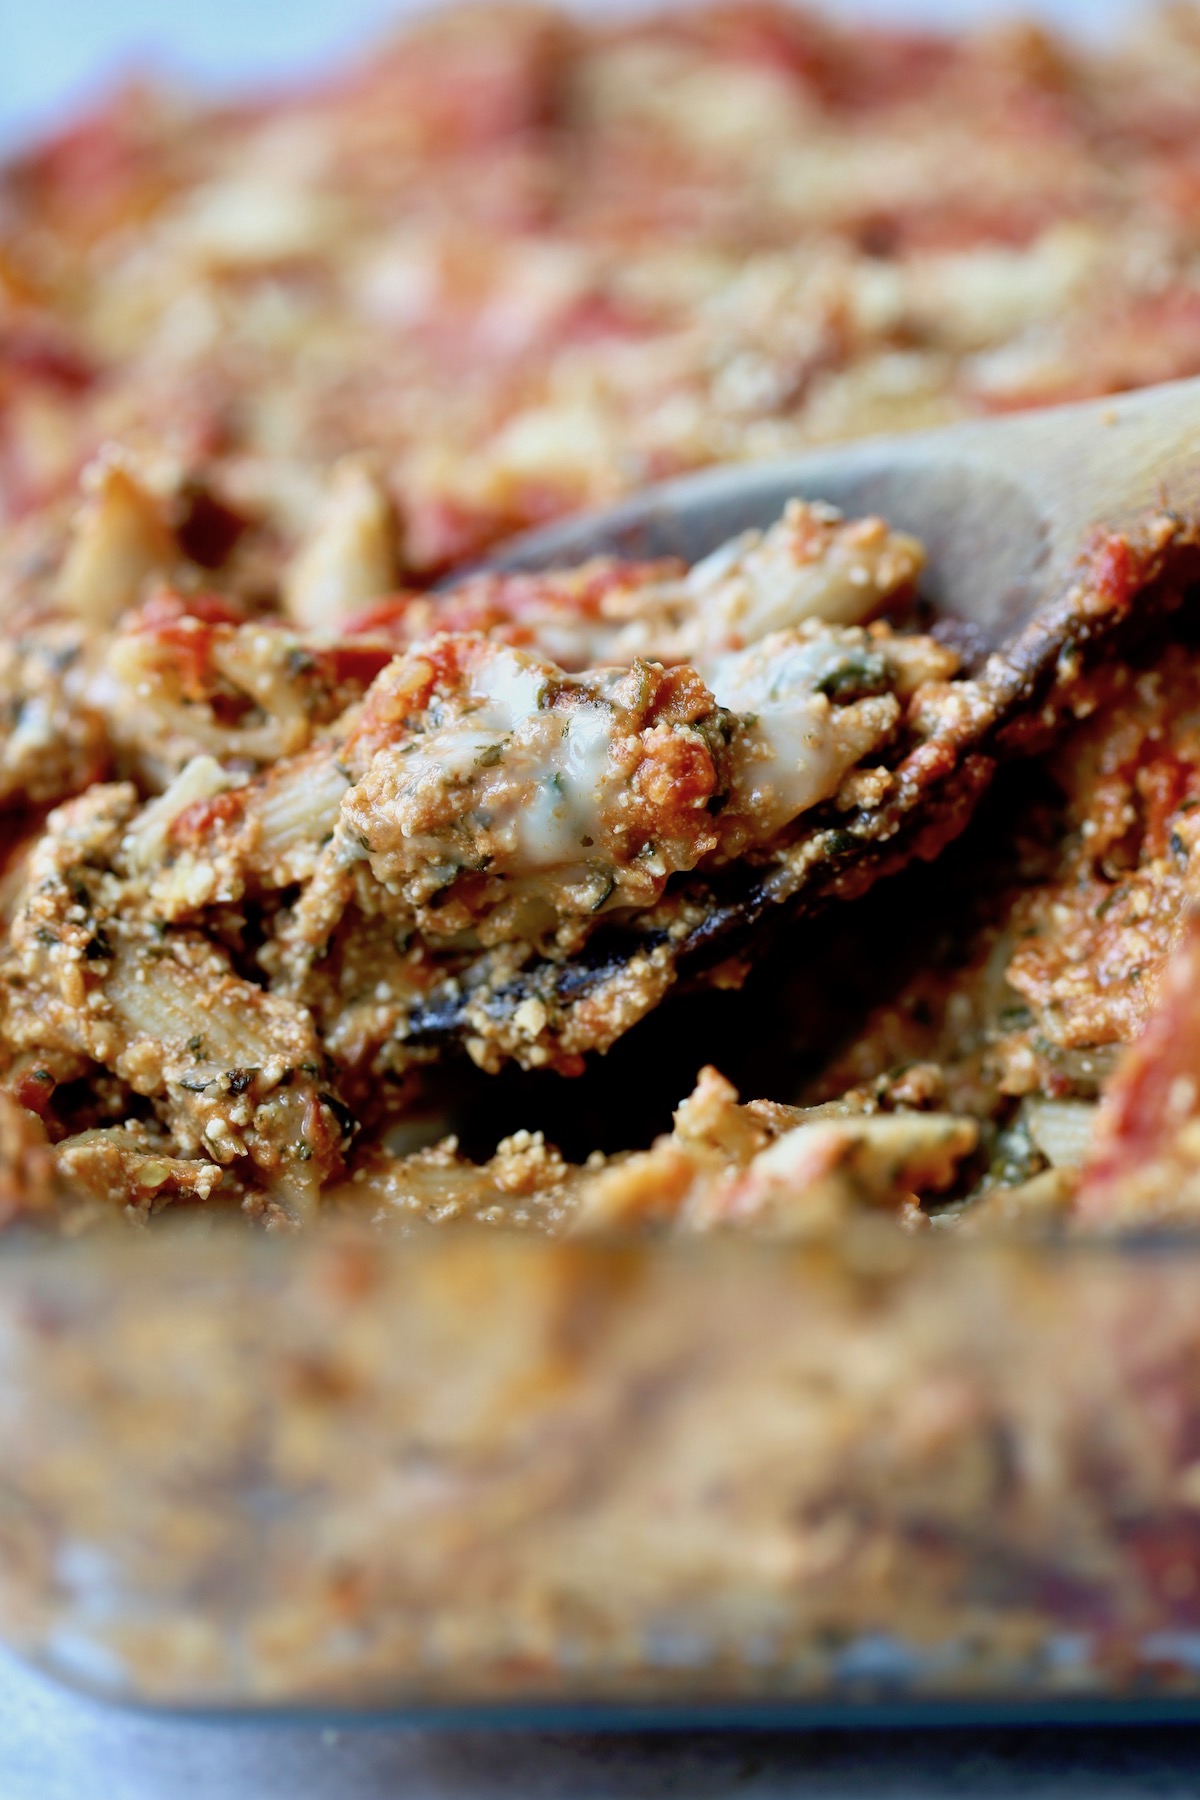
These cooler, fall months have me craving all the hearty, comforting vegan pasta dishes!
Especially pasta dishes that are full of melty, vegan cheese and rich marinara sauce!
Seriously, who doesn't love a heaping bowl of pasta?
Just like my One-Pot Creamy Marinara Pasta recipe, this easy to prepare vegan baked ziti is a super simple recipe that you can throw together any night of the week.
The reason this baked ziti is so easy to make is because, other than some easy vegan tofu ricotta, all of the ingredients are store-bought. While I love to make my own marinara sauce, sometimes you just need to go the convenience route!
Below I'll walk you through how to make the vegan tofu ricotta.
How to Make Vegan Tofu Ricotta
- Sauté onion and garlic in a little olive oil until the onion is translucent.
- Add the sautéed onion and garlic to a food processor and add in the remaining ingredients: firm tofu, nutritional yeast, miso paste, lemon juice, sea salt and frozen spinach, if desired.
- Process all of the ingredients together until a fairly smooth "ricotta cheese" forms.
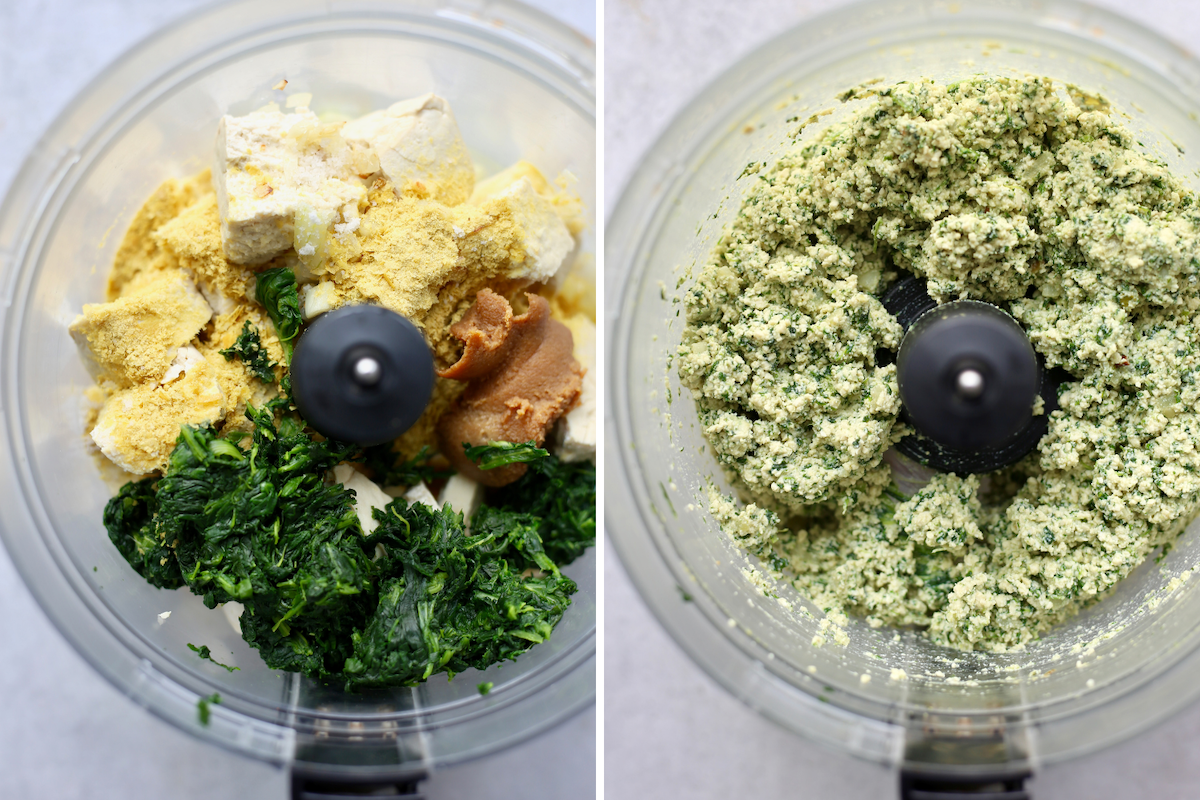
Vegan Baked Ziti Ingredients
Like I mentioned above, this recipe mostly calls for store-bought ingredients. While in an ideal world I'm sure we'd all be eating homemade pasta and marinara sauce on a weeknight, that's just not practical.
Below are the ingredients you'll need to make this easy vegan baked ziti:
- 1 pound of pasta (I love using whole wheat pasta!)
- 4 cups marinara sauce (about two 500 gram jars)
- Vegan mozzarella cheese (I love the Violife Mozzarella!)
- Tofu Ricotta:
- Olive oil
- Onion
- Garlic
- Firm tofu
- Nutritional yeast
- Lemon juice
- White or yellow miso paste
- Sea salt
- Optional: frozen spinach
- Optional: Vegan Parmesan (you can use homemade cashew parmesan cheese or store-bought)
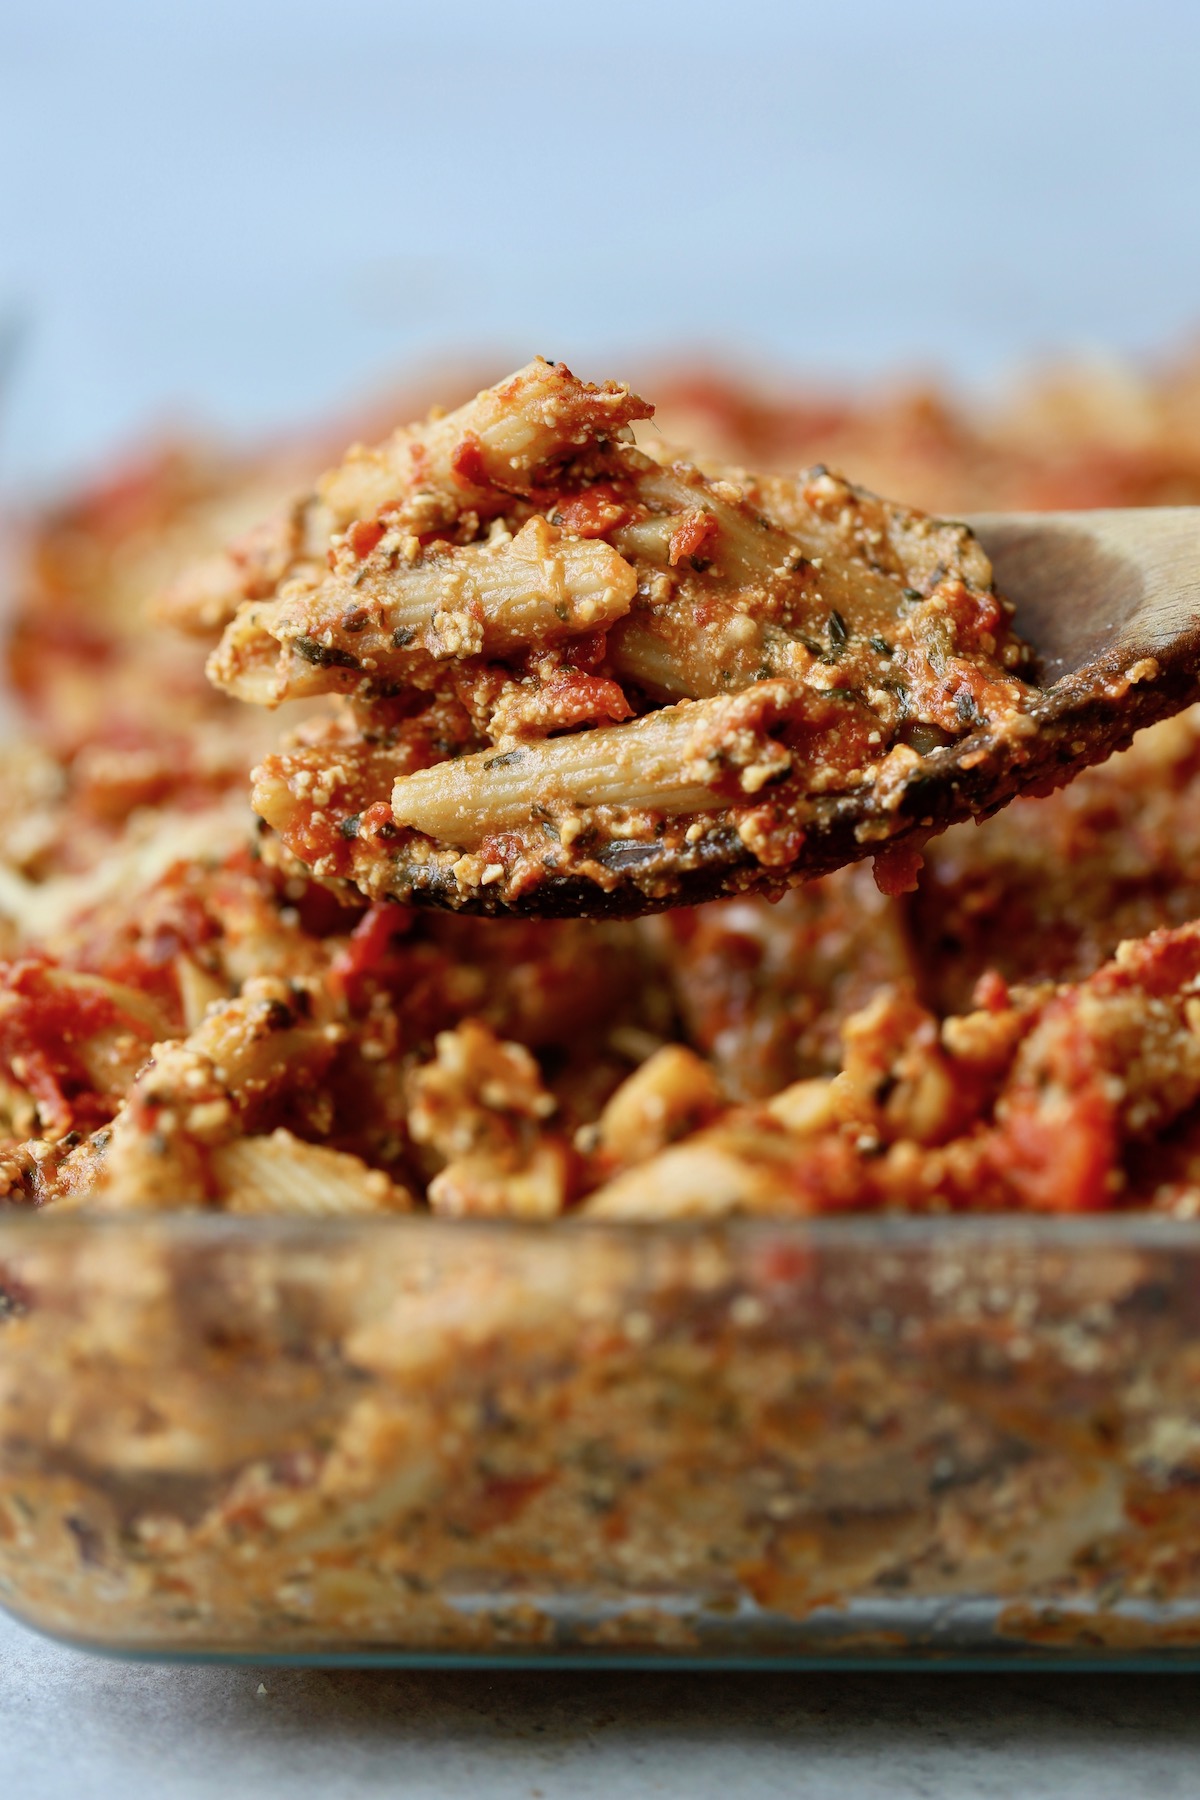
How to Make Vegan Baked Ziti
Step 1: Preheat your oven to 350°F / 190°C and grease a 9x13 inch baking dish.
Step 2: Bring a large pot of water to a boil. I love to use my electric tea kettle to speed up this processes! Boil your pasta until al dente, which is usually about 1-2 minutes less than the suggested cooking time. Drain and rinse.
Step 3: While the pasta is boiling, prepare the vegan tofu ricotta. Heat a little olive oil in a skillet over medium heat. Sauté the chopped onion and garlic until the onion is soft and translucent. Place the sautéed onion and garlic into your food processor and add in the remaining ricotta ingredients. Process the ingredients together until a fairly smooth "cheese" forms. Set it aside.
Step 4: Once your pasta is cooked and your tofu ricotta is made, combine the two together in a large mixing bowl. Add in 3 cups of marinara sauce and 2 cups of vegan mozzarella. Stir well to combine.
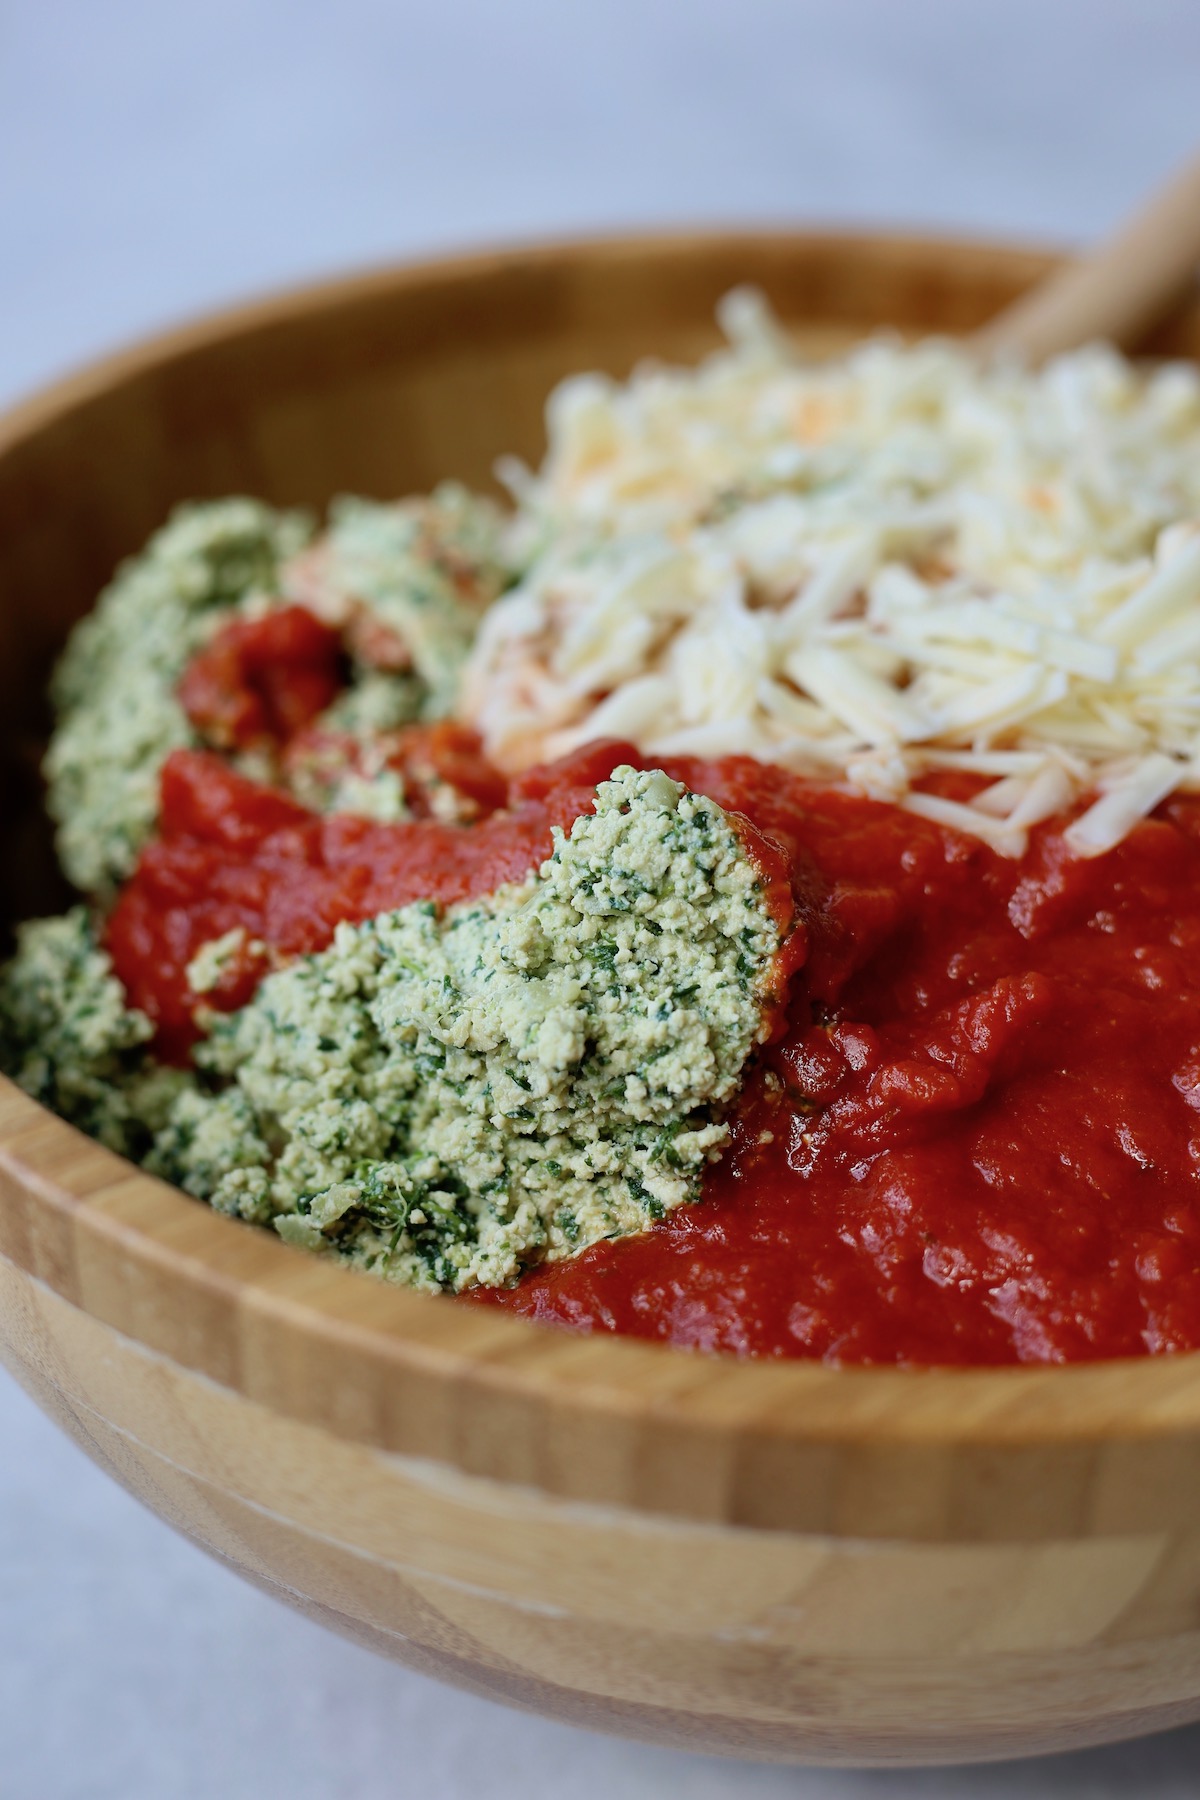
Step 5: Pour the pasta mixture into your greased baking dish and spread it out until fairly level. Top the pasta with the remaining 1 cup of marinara sauce, 1 cup of vegan mozzarella and the vegan parmesan, if using.
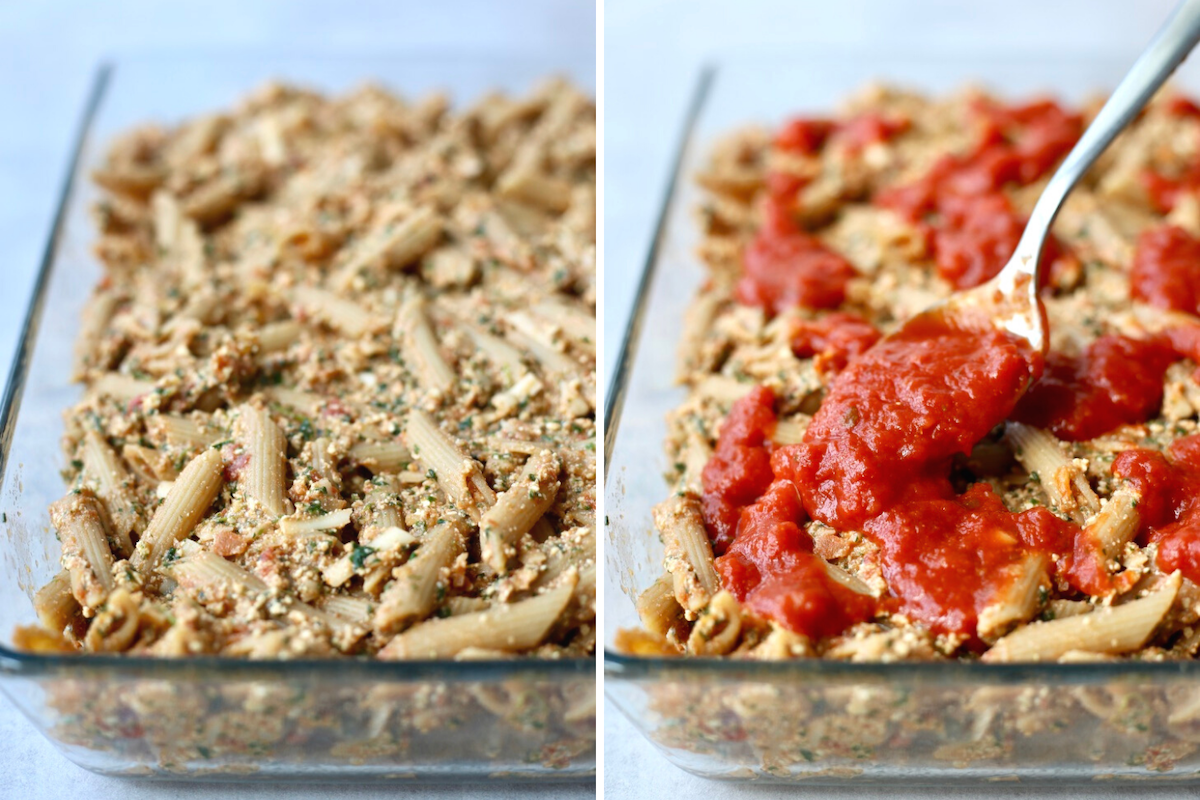
Step 6: Bake the pasta uncovered for about 30 minutes or until it's heated through the vegan cheese is all melty and gooey.
Step 7: Serve warm with a fresh green salad and some crusty whole wheat artisan bread!
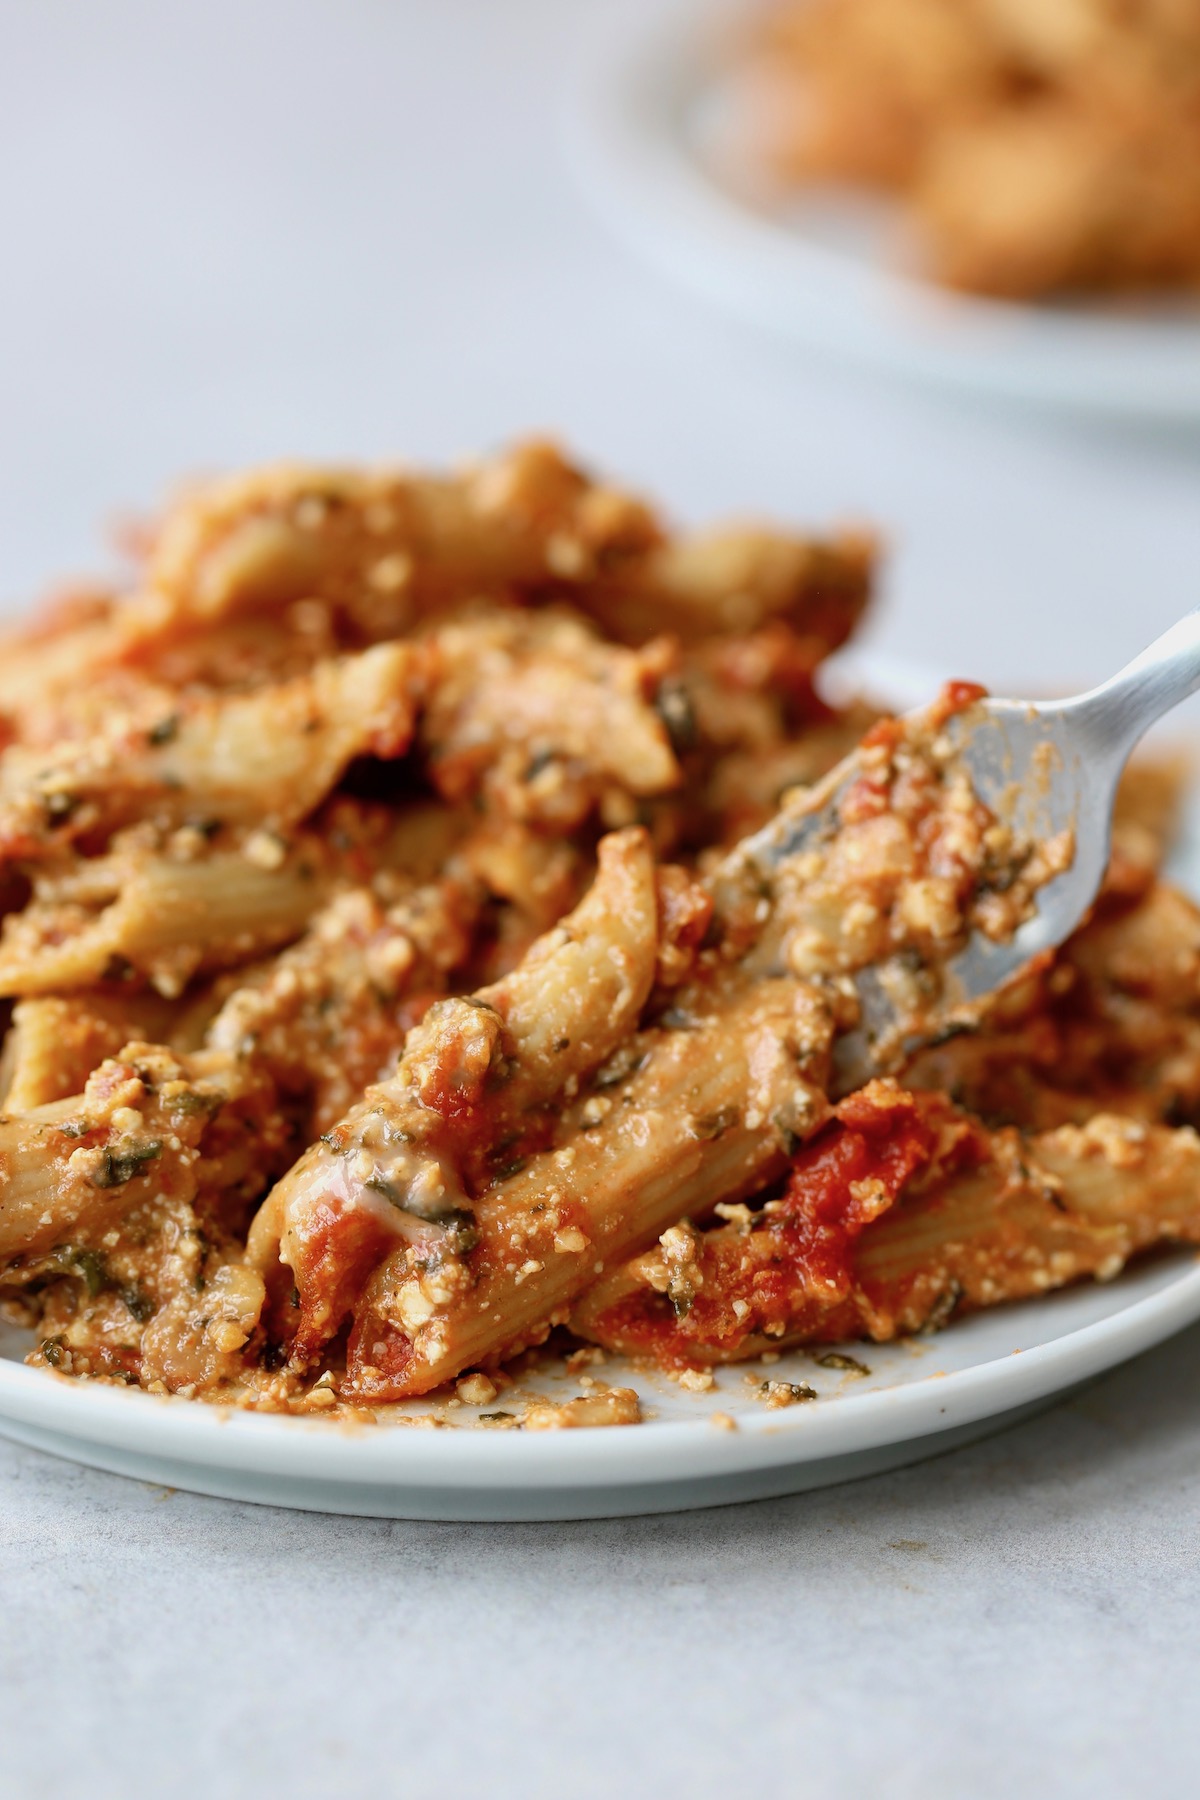
Other Vegan Italian Recipes
If you love easy, vegan Italian dishes like this baked ziti, then be sure to check out the following recipes!
- One-Pot Creamy Marinara Pasta
- Whole Wheat No-Yeast No-Rise Pizza Dough
- Easy Vegan Pizza Bread
- 4 Ingredient Italian White Bean Pasta Salad
- Vegan Pizza Panini
📖 Recipe
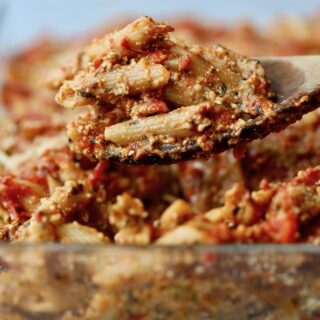
Vegan Baked Ziti
Packed full of protein-rich vegan ricotta and melty mozzarella cheese, this easy Vegan Baked Ziti is the perfect recipe to enjoy any day of the week!
Ingredients
TOFU RICOTTA
- 1 tablespoon olive oil
- ½ onion chopped
- 2 cloves garlic minced
- 1 block firm tofu
- 2 tablespoons lemon juice
- 2 tablespoons nutritional yeast
- 1 tablespoon white/yellow miso
- ½ teaspoon salt
- Optional: 5-6 cubes frozen spinach drained and rinsed*
BAKED ZITI
- 1 pound pasta ~500 grams
- 4 cups pasta sauce 2 500 gram jars
- 3 cups shredded vegan mozzarella or as much as desired
- ½ cup vegan Parmesan
Instructions
- Preheat your oven to 375 °F and grease a 9x13 inch baking dish. Set it aside.
- Cook your pasta in salted water until al dente (1-2 minutes under the recommended cooking time)
- While the pasta is cooking, prepare the tofu ricotta. Heat the olive oil in a skillet over medium heat. Sauté the onion until translucent. Add in the minced garlic and cook another minute or two. Transfer the cooked onion and garlic to a food processor and add in the remaining ingredients. Process until fairly smooth, scraping down the sides of the food processor as needed.
- Once the pasta has finished cooking, drain and rinse it. Return the cooked pasta to the pot and add in the tofu ricotta, 3 cups of pasta sauce and 2-3 cups of vegan mozzarella. The amount of vegan cheese you use really depends on how cheesy you want the baked ziti! Stir everything together until well combined.
- Pour the mixture into your greased baking dish and spread it out until level. Top it with the remaining 1 cup of pasta sauce, the parmesan cheese and more vegan mozzarella if desired!
- Bake the pasta uncovered for 30 minutes.
- Allow the pasta to sit for a few minutes before serving and enjoying!
Notes
I love to add in the spinach for an easy way to get in some greens, but it's optional!
Nutrition
Calories: 472kcalCarbohydrates: 63gProtein: 18gFat: 16gSaturated Fat: 5gPolyunsaturated Fat: 2gMonounsaturated Fat: 3gCholesterol: 4mgSodium: 1331mgPotassium: 555mgFiber: 6gSugar: 7gVitamin A: 582IUVitamin C: 11mgCalcium: 199mgIron: 3mg
Tried this recipe?Let me know how it was!
Pumpkin Hummus Recipe | Healthy & Savory!

This rich and creamy pumpkin hummus recipe is the perfect healthy and savory side dish to offset all the sweets this holiday season.
This recipe is featured in my 8 Plant-Based Hummus Recipes roundup!
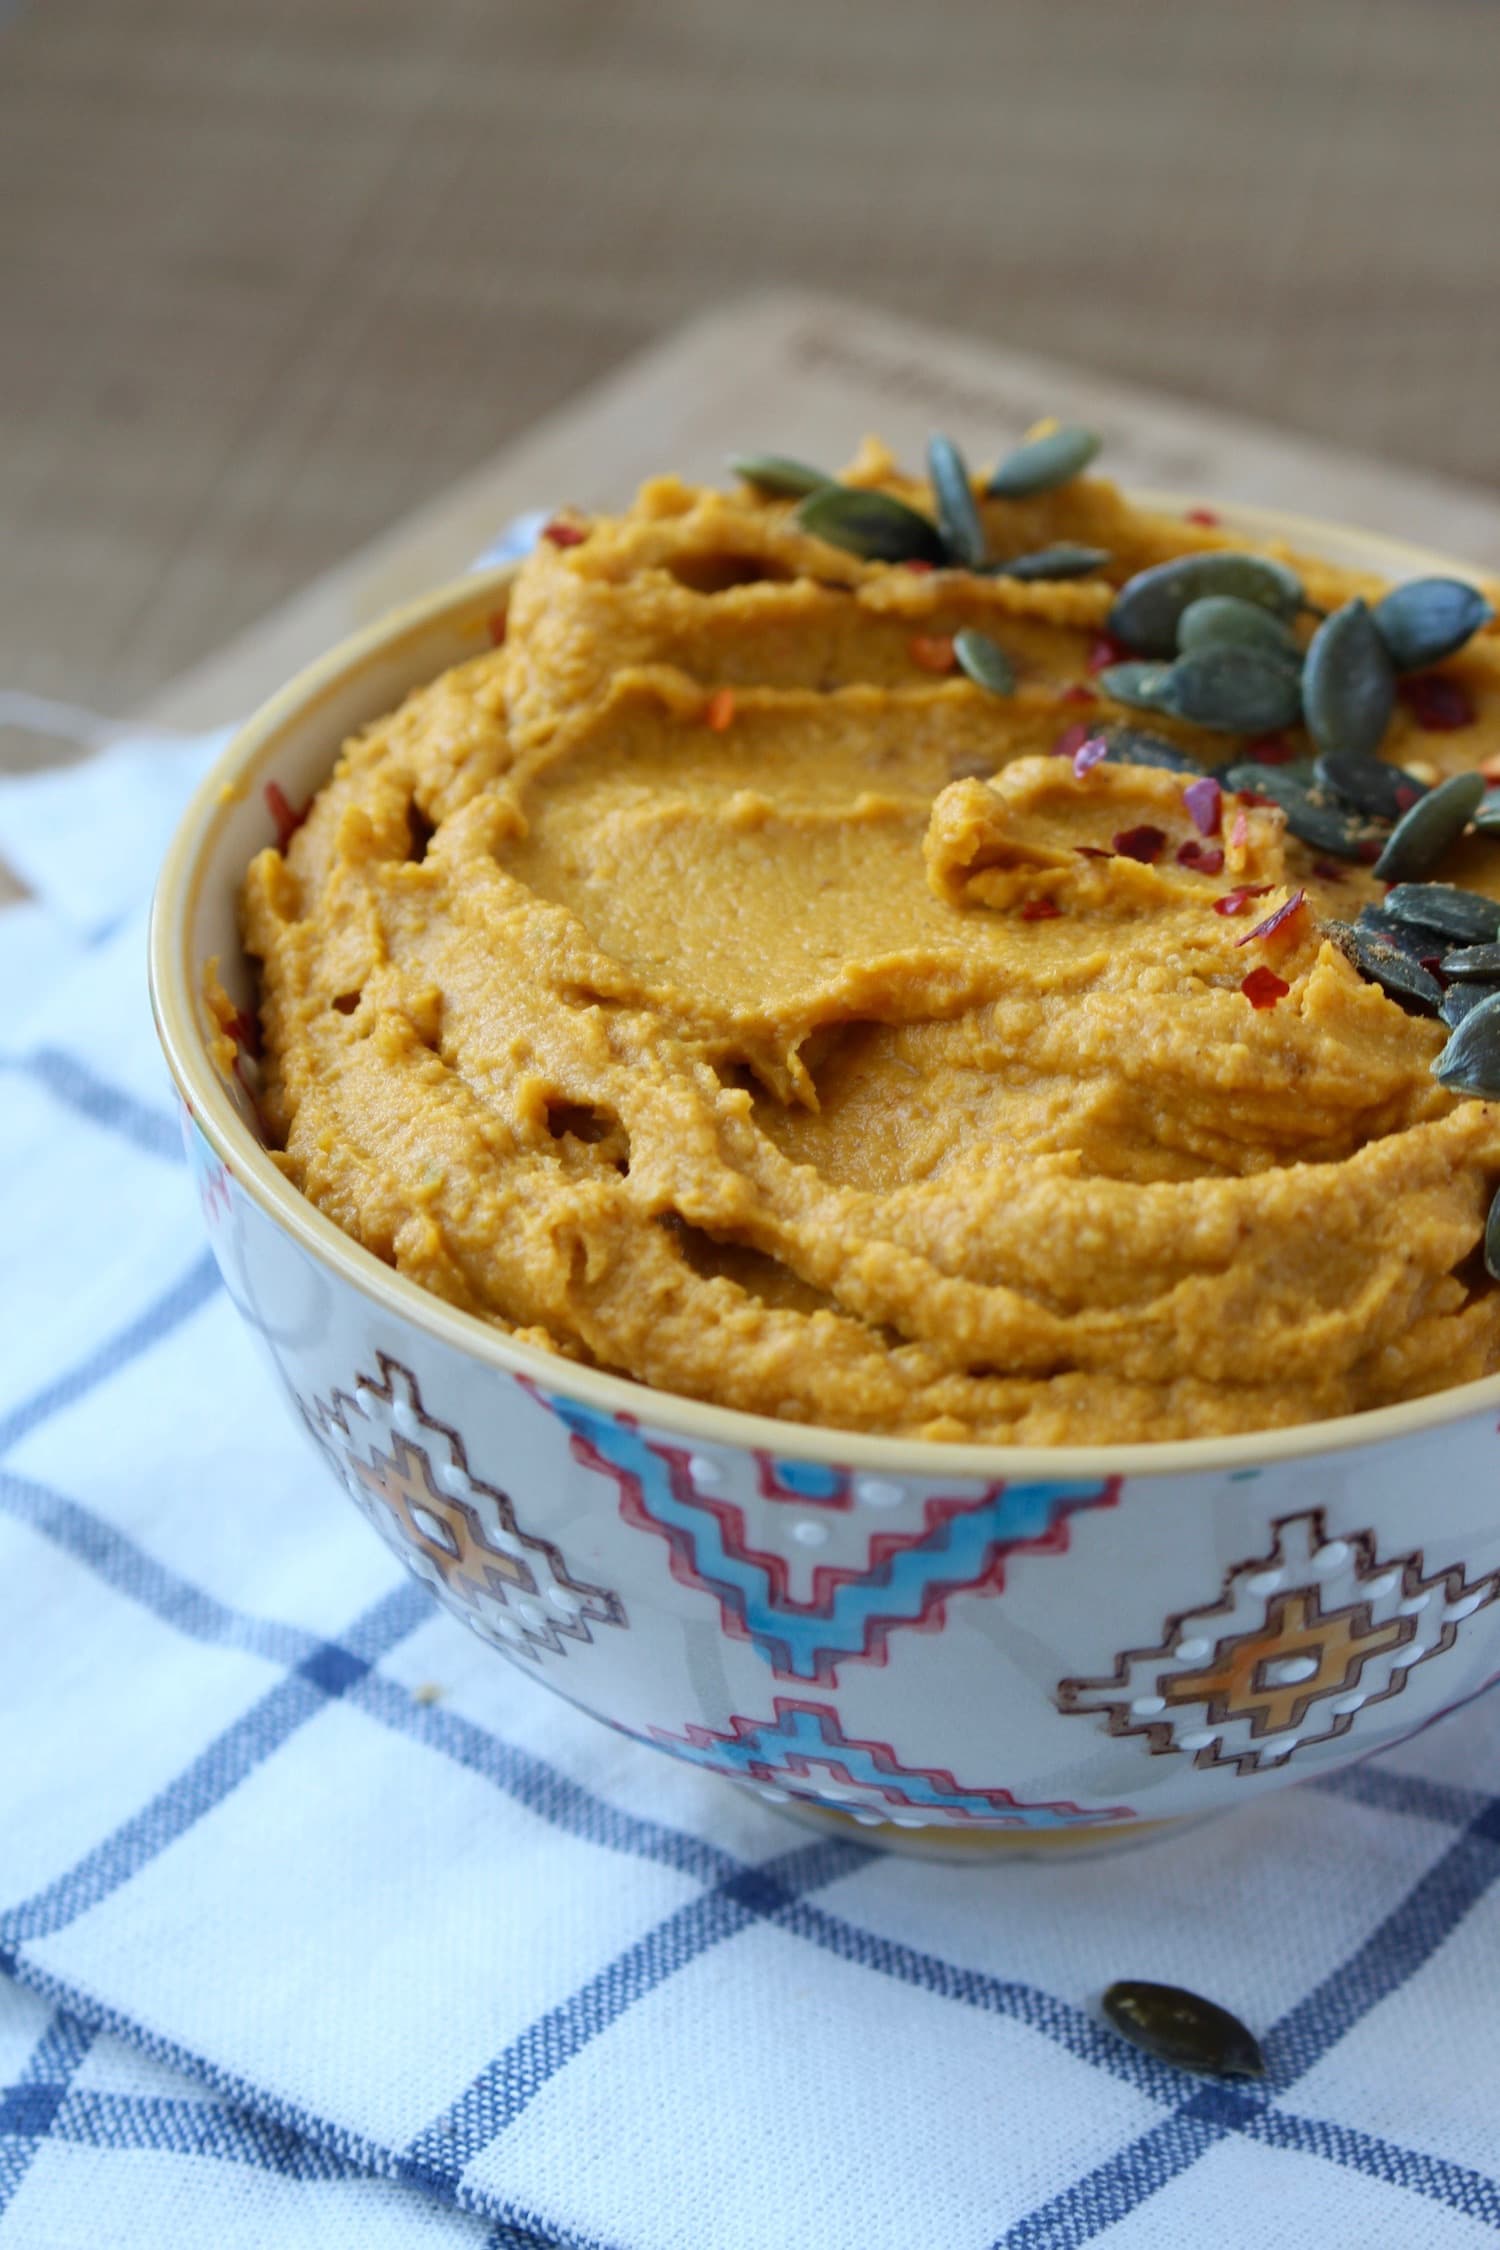
I'm pretty sure my skin is going to turn orange any day now. 🙂
My Homemade Pumpkin Puree is almost too easy to make, so pumpkin puree is weaseling its way into everything. I can’t complain though! When it comes to the holidays, pumpkin seems to make anything a little more festive (I even make my own pumpkin pancake recipe!).
Are you guys sick of hummus yet?
I'm fully aware that I share a hummus recipe almost every month, but I just can get enough of it! It's the perfect condiment or spread for so many meals and it's extremely versatile.
So far on this blog I've shared some of my favorite recipes, including:
- The Best Hummus Recipe!
- Avocado Hummus
- Oil-Free Edamame Hummus
- Curried Carrot White Bean Hummus
- 5 Ingredient Oil-Free Tahini-Free Cilantro Lime Hummus
- ...and now Pumpkin Hummus!
Yeesh! You'd think I'd have this stuff coming out of my ears by now!
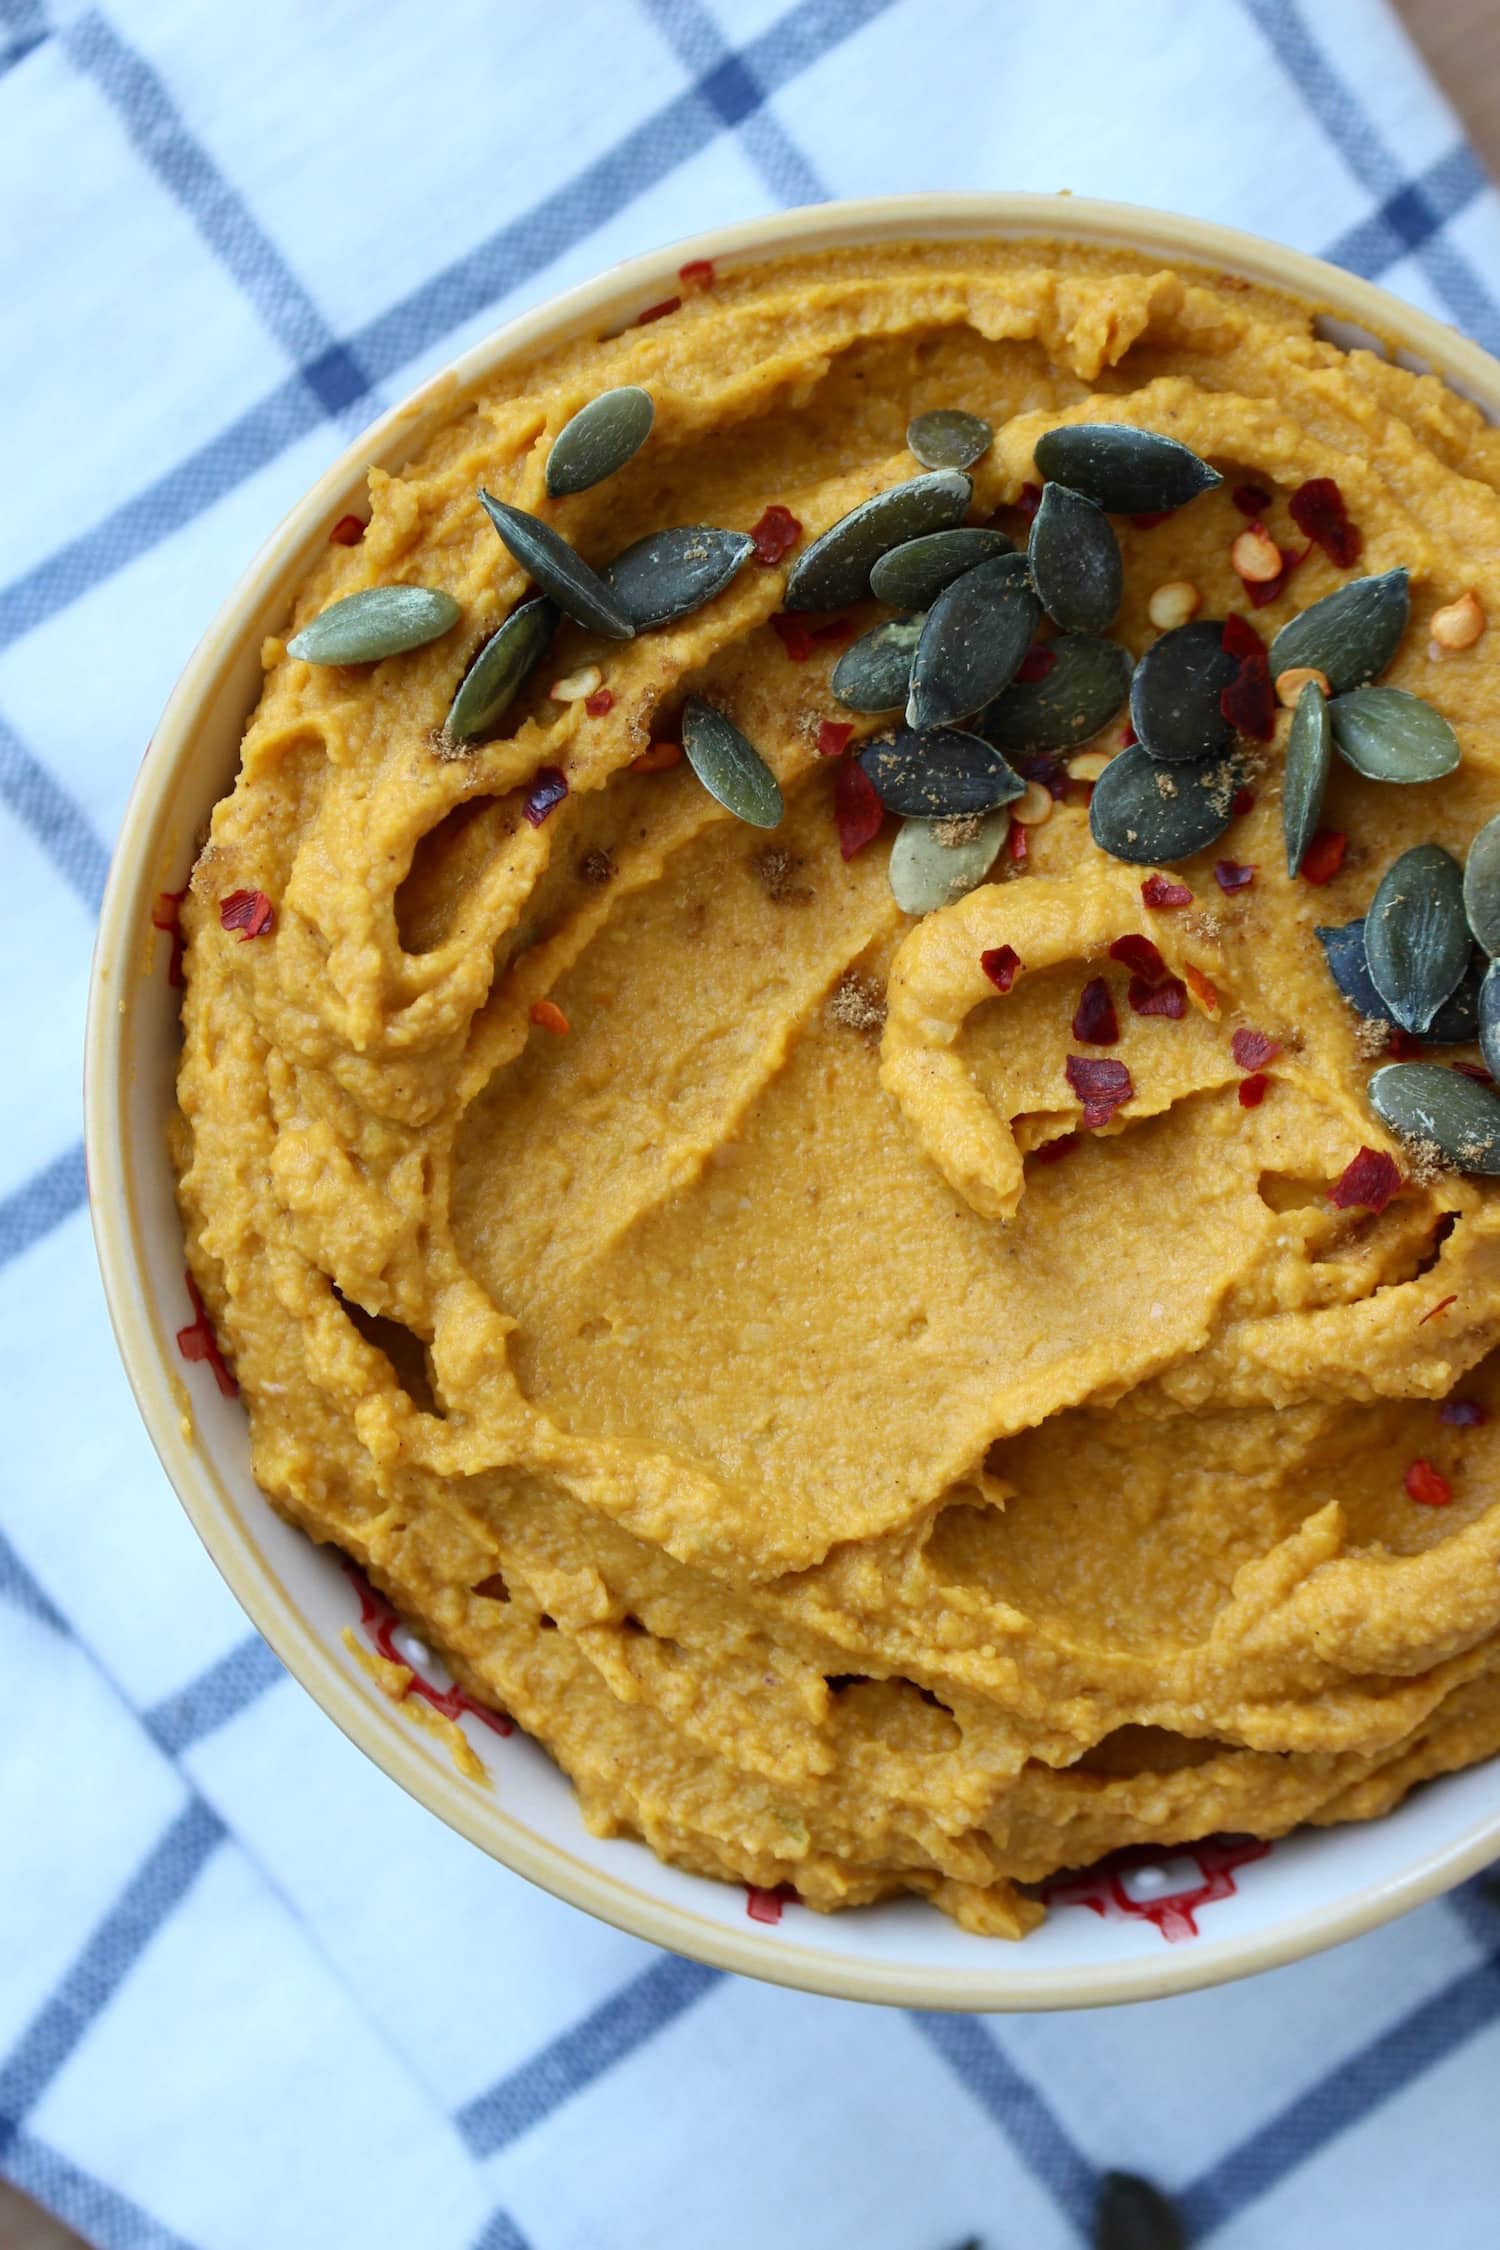
Hummus: The Perfect Party Dish
Thankfully, most other people I know love hummus as well, so I'm often serving it to others and bringing it to a party or get-together. Especially when the winter months roll around and the desserts and pies start making an appearance, it's nice to have a healthy, savory dish to share with others to balance out all that delicious sugar.
So if you're in need of a savory dish to bring to a party this holiday season, or if you just want a healthy and savory spread to have on hand in your fridge, this pumpkin hummus recipe is just the thing you need.
Full of protein from the chickpeas, creaminess from the pumpkin puree, and healthy fats from tahini, this pumpkin hummus is a creamy and flavorful way to spice up simple meals, plain vegetables, or a crusty piece of bread.
And with that beautiful rich, orange color, it will be a show stopper at your next party!
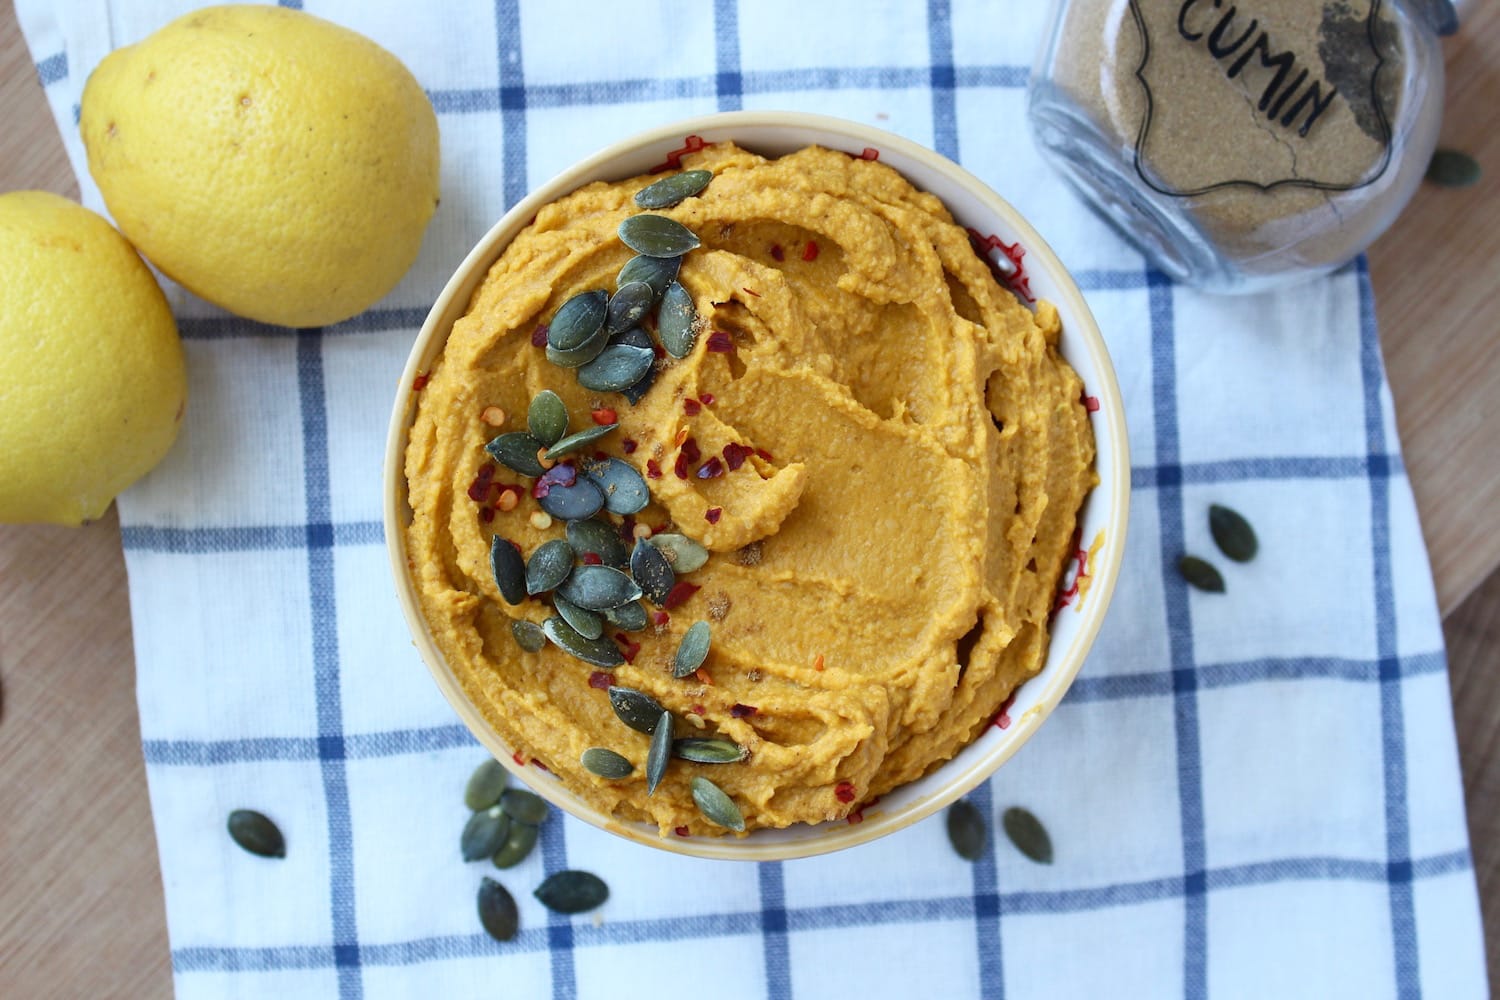
If you give this recipe a try, let me know by tagging The Conscientious Eater on Instagram!
📖 Recipe
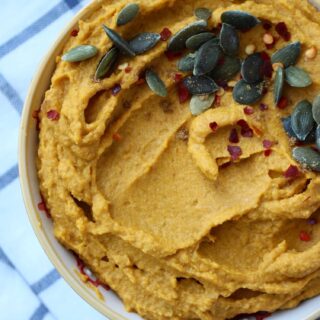
Pumpkin Hummus
This rich and creamy Pumpkin Hummus is the perfect healthy and savory side dish to offset all the sweets this holiday season.
Ingredients
- 1 cup Homemade Pumpkin Purée
- 15 ounces chickpeas drained and rinsed
- ¼ cup freshly squeezed lemon juice from about 2 lemons
- ¼ cup tahini
- 3 small garlic cloves coarsely chopped
- 1 teaspoon salt
- ¾ teaspoon cumin
Instructions
- Place all of the ingredients into a high speed blender or food processor and blend until smooth. If using a blender, it's best to put the liquid ingredients into the blender first.
- Serve immediately or store in an airtight container in the fridge for up to a week.
Notes
This pumpkin hummus is a creamy and flavorful way to spice up simple meals, plain vegetables, or a crusty piece of bread.
Nutrition
Serving: 0.5cupCalories: 195kcalCarbohydrates: 26gProtein: 9gFat: 7gSaturated Fat: 1gPolyunsaturated Fat: 3gMonounsaturated Fat: 2gSodium: 399mgPotassium: 357mgFiber: 7gSugar: 5gVitamin A: 6385IUVitamin C: 7mgCalcium: 65mgIron: 3mg
Tried this recipe?Let me know how it was!
Glazed Vegan Pumpkin Donuts (Baked!)

Light, cakey and full of pumpkin spice seasoning, this delicious vegan pumpkin donuts recipe is sure to be a crowd pleaser this fall season!

[feast_advanced_jump_to]
Fall Weather = Fall Vegan Recipes!
Fall has arrived and I'm so excited for the cooler weather, hearty stews and pumpkin spiced treats that come along with this holiday season!
Living overseas - whether in China or Malaysia - we don't always have the same cultural cues that indicate the fall season has arrived. Pumpkin spiced lattes aren't always available at our favorite coffee shop and fall / Halloween decorations aren't displayed on every apartment building.
These are things I don't have control over, but what I can control are the recipes I make in my house. And when the fall season arrives, I love pulling out my favorite vegan recipes for fall!
I've been motivated to start some new traditions in our family, and I'd love to share with you a recent addition.
Vegan Donuts | A New Fall Tradition!
These glazed vegan pumpkin donuts have become a wonderful part of our fall traditions as they are so incredibly delicious!
Hudson won't be having any this year, but maybe in a few years time he'll be enjoying these vegan pumpkin donuts alongside his sister Harper, Brett and me.
Thanks to the plant based trend sweeping the nation, it has become easier and easier to find or make your own vegan donuts.
Traditional donuts usually contain milk, eggs, butter and yeast and are deep fried in oil. While some of those ingredients aren't vegan friendly, it IS possible to make vegan donuts and they are just as tasty in my opinion. All you have to do is make a few substitutions and you are good to go!

For example, in this pumpkin baked vegan donuts recipe:
- I omit the eggs and use non-dairy milk.
- Instead of frying, I bake these donuts using my favorite donut baking pan, which cuts down on the amount of oil traditionally used in making fried donuts.
- The pumpkin puree acts as a binding agent instead of using eggs and the baking powder causes these baked donuts to rise and become light and fluffy.
That means I can eat more of these vegan donuts in one sitting, right?!
How to Make Vegan Donuts
The process of making these pumpkin vegan donuts is pretty simple.
Step 1: Add wet ingredients to the dry ingredients and stir until combined (find the ingredient list in the recipe below).
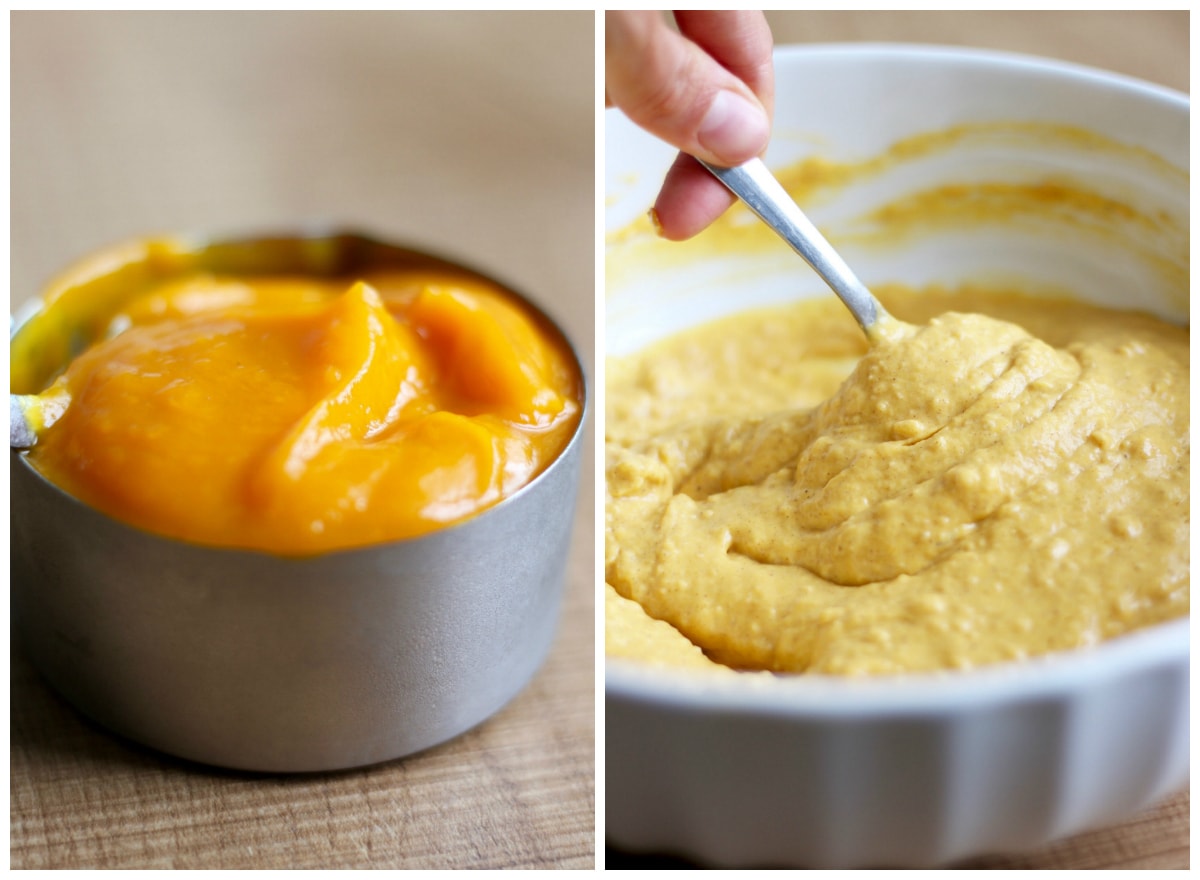
Step 2: Carefully transfer the batter to a "piping" bag.
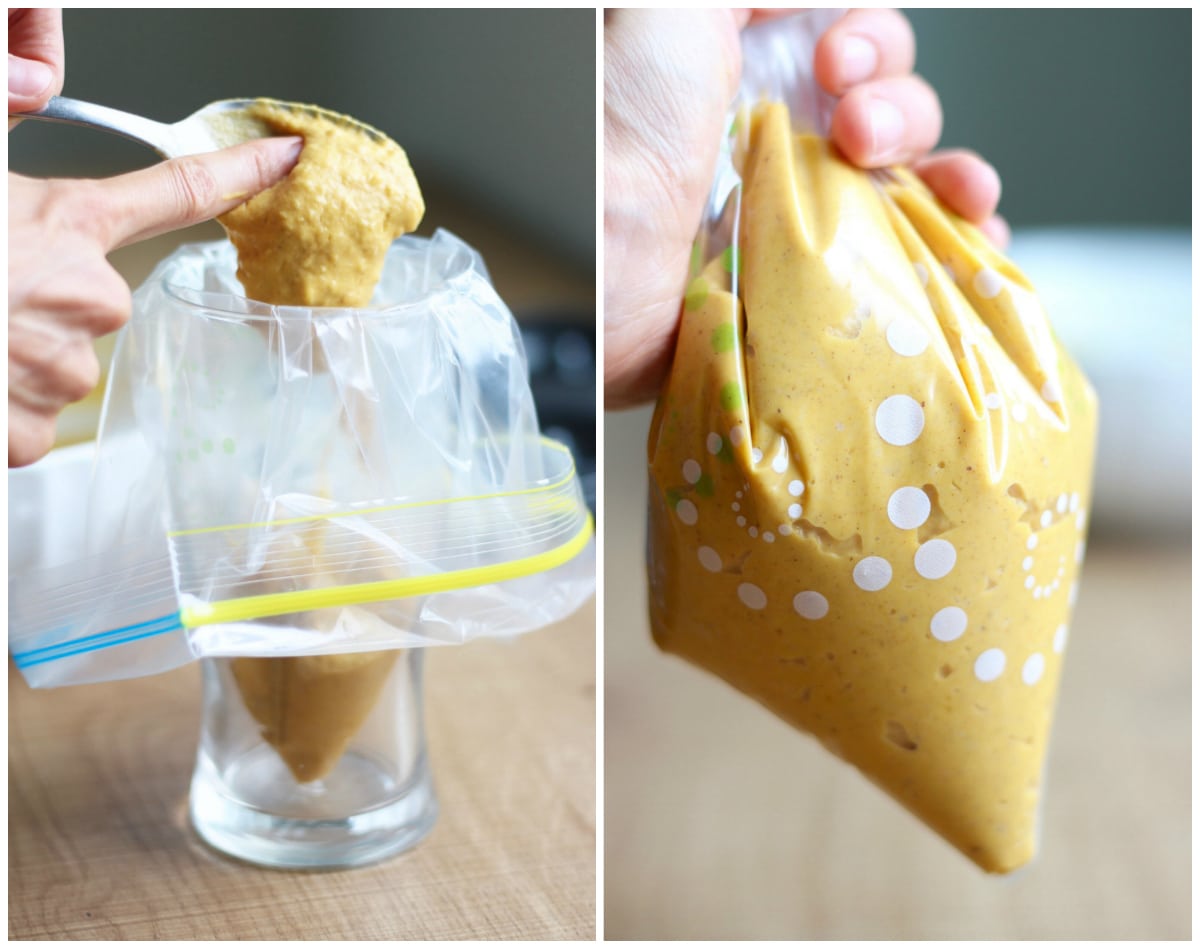
Step 3: Pipe the vegan pumpkin donut batter into your greased donut pan.
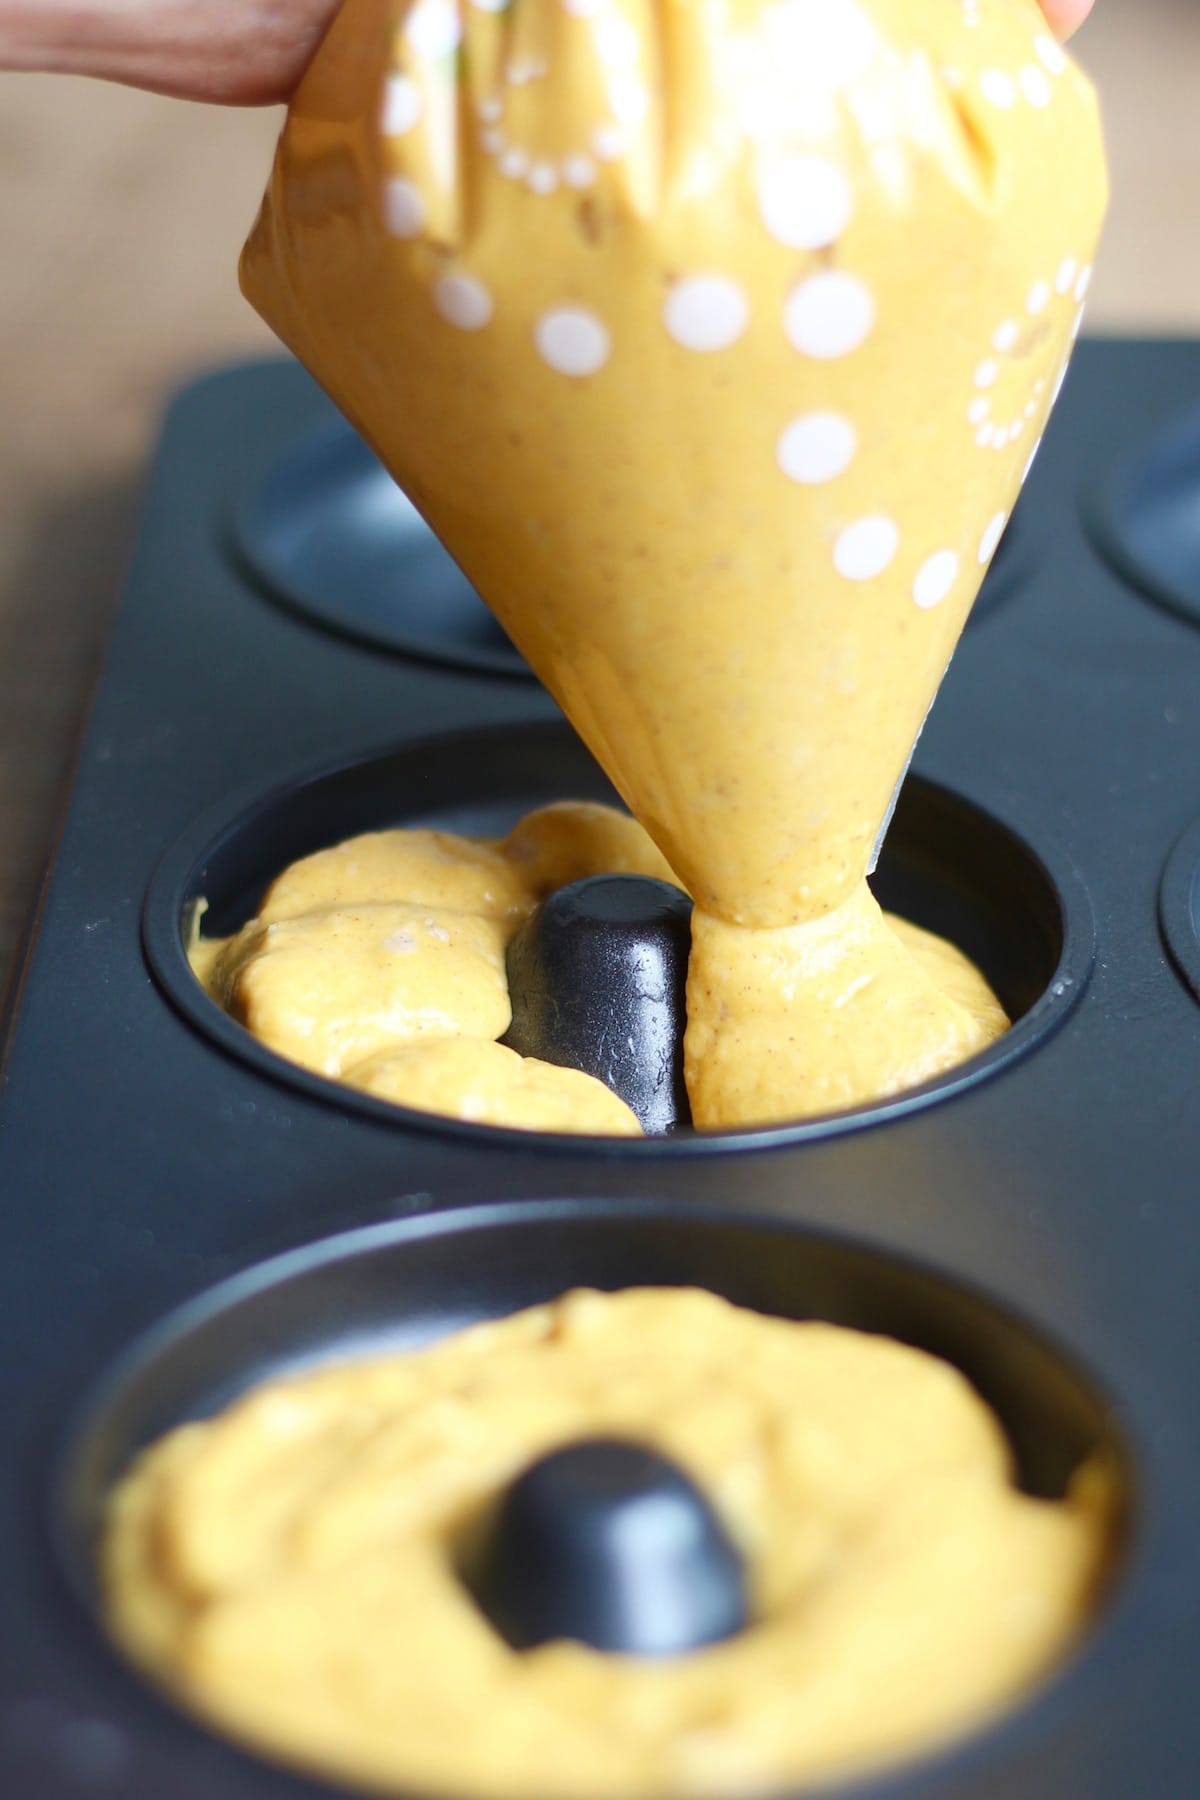
Step 4: Bake the donuts until golden brown and allow them to cool on a wire rack.
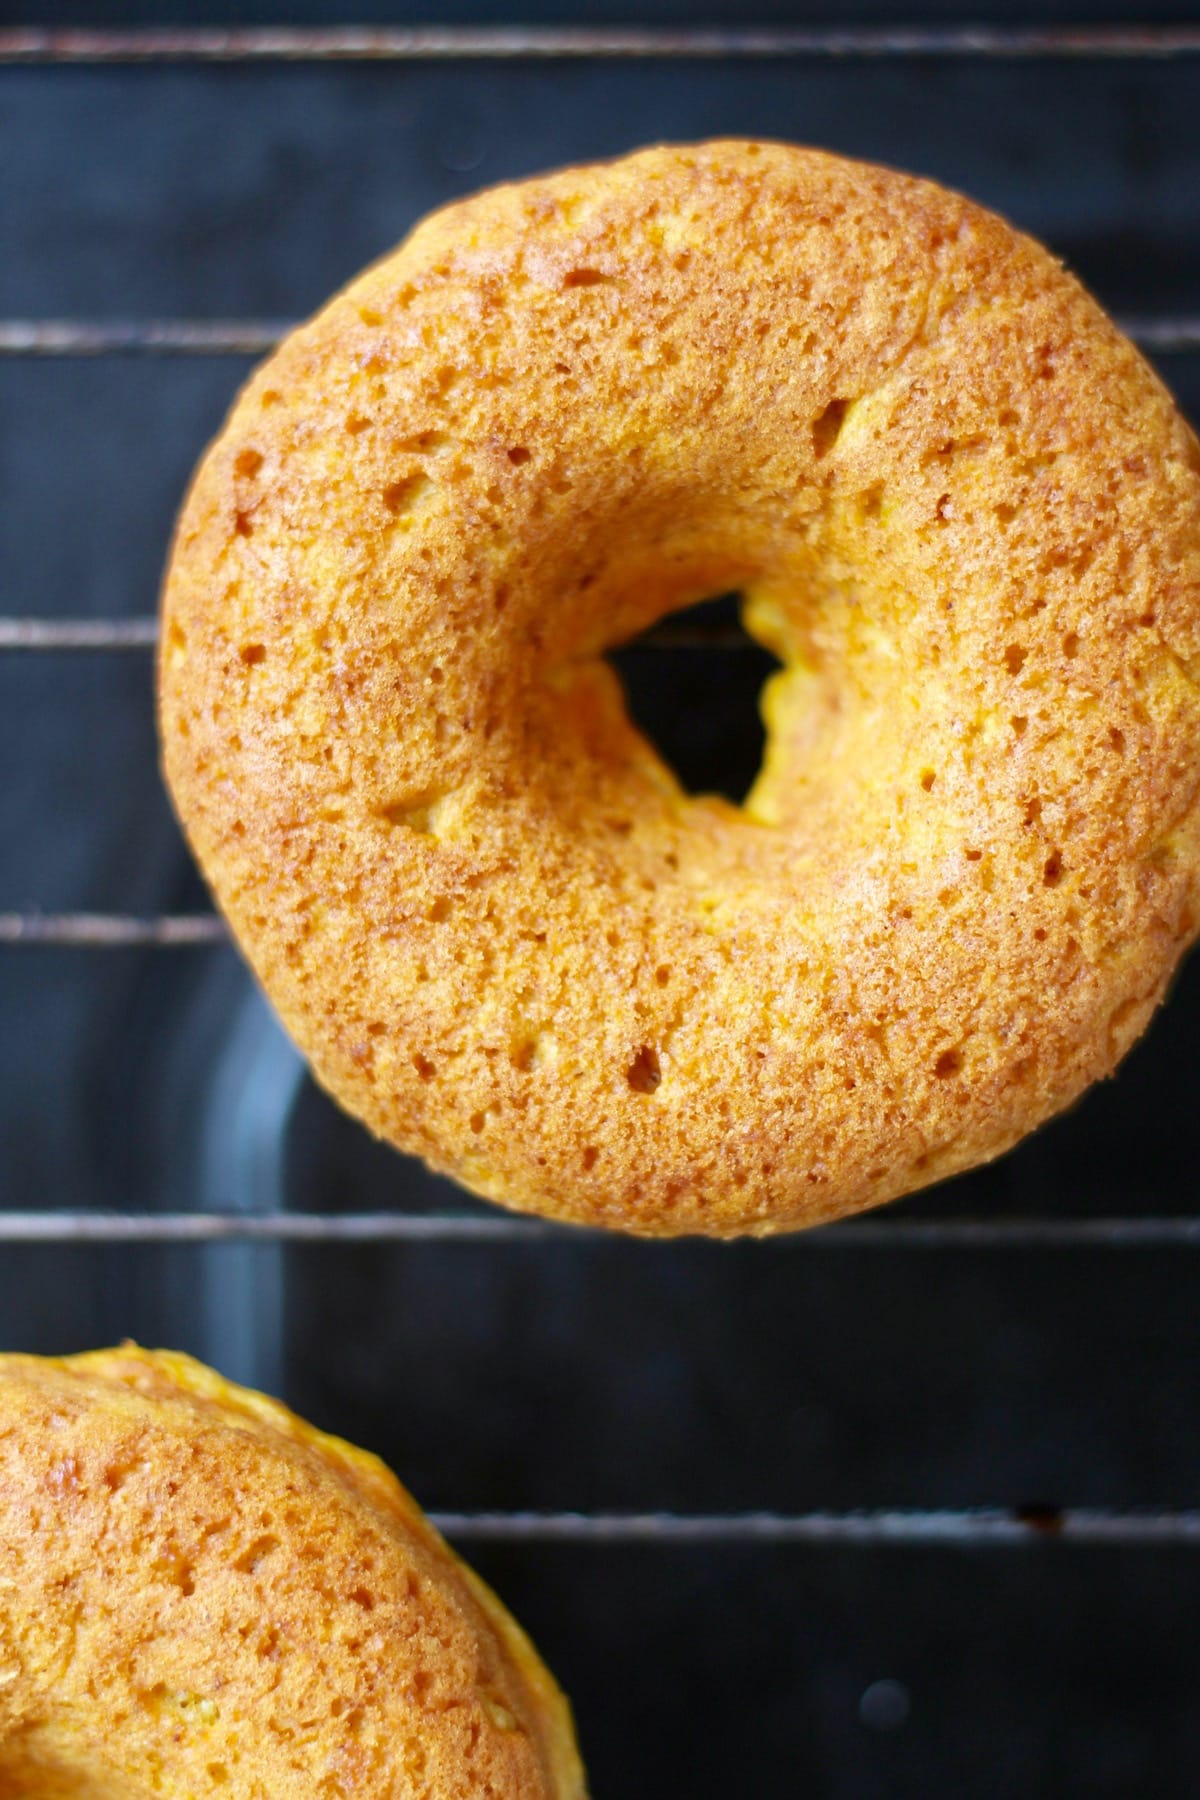
Step 5: Dip the cooled donuts into your powdered sugar glaze (see below for how to create this donut glaze).
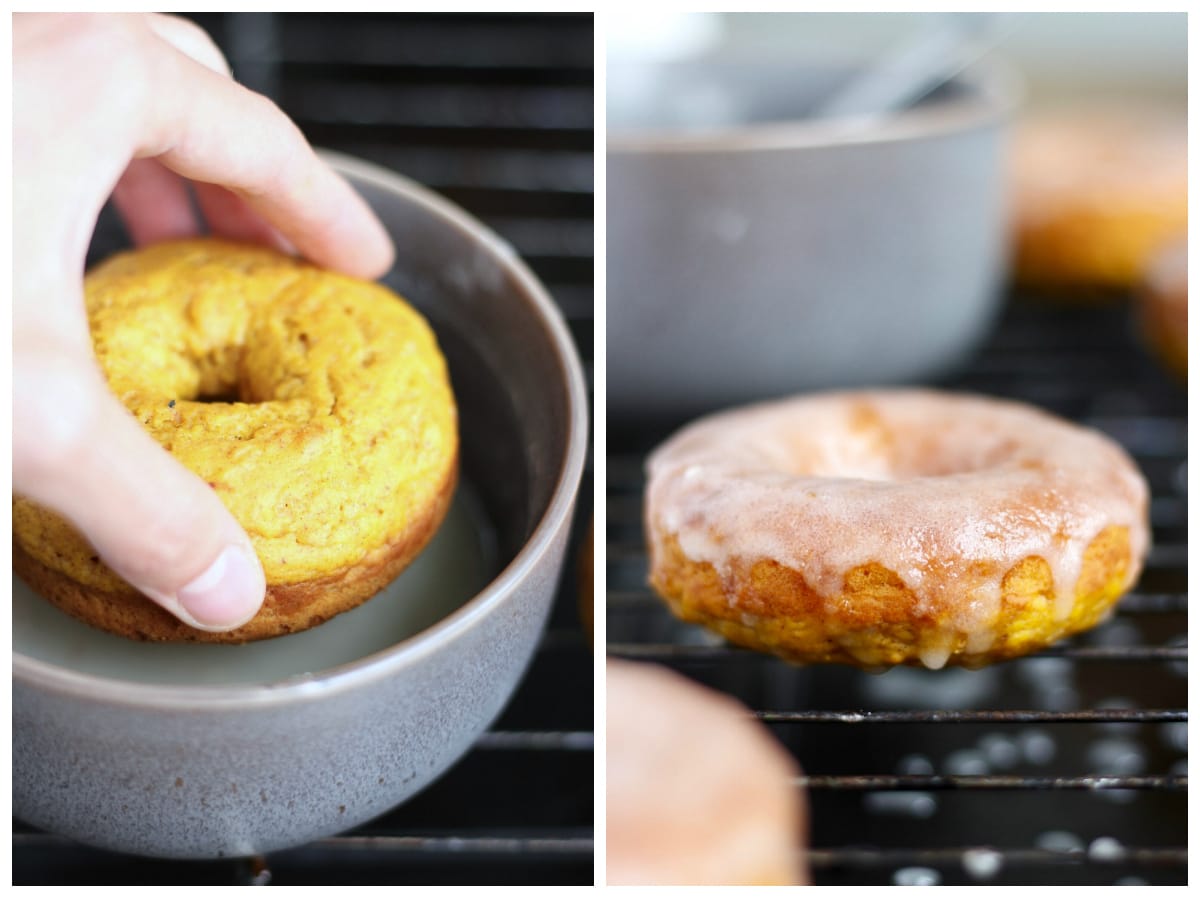
Step 6: Drizzle the donuts with Chocolate Hazelnut Butter if desired.
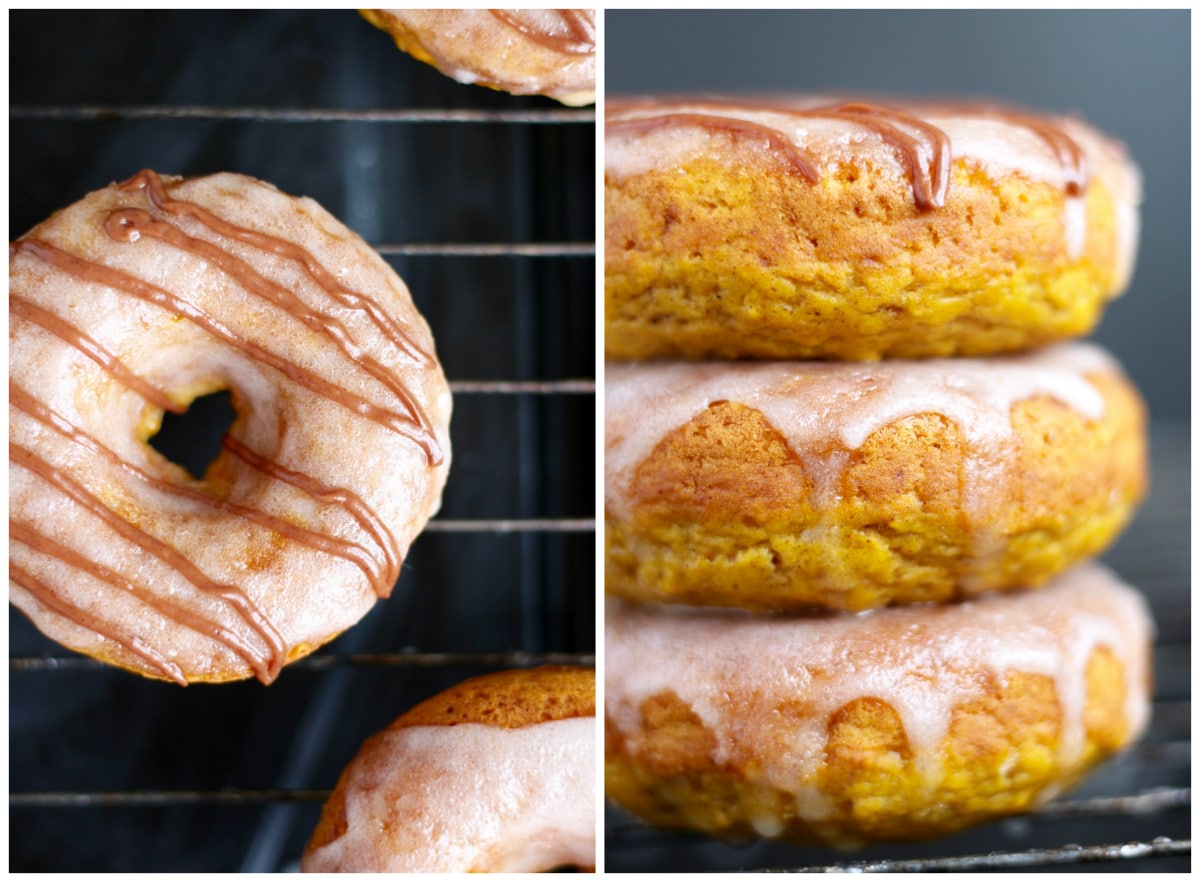
Step 7: Don't just look at them...eat and enjoy!
Creating a Delicious Donut Glaze
I love jazzing up these pumpkin baked vegan donuts by adding a simple glaze using just powdered sugar and non-dairy milk.
If you don't have any powdered sugar on hand, you can make it with just two simple ingredients! Just blend 1 cup of sugar and 1 tablespoon of corn starch together in a high speed blender until a fine, powdered sugar forms.
I did this all the time in China and it worked like a dream!
After topping these vegan pumpkin donuts with the simple sugar glaze, I like to make them extra special by piping on some chocolate hazelnut butter. Chocolate and pumpkin pair beautifully together in my opinion. You could even sprinkle some crushed pecans on top for another level of decoration!
I really hope you like these vegan pumpkin donuts as much as we do!


Please let me know if you give these vegan pumpkin donuts a try and what you think!
Leave a comment down below, rate the recipe and be sure to share it with others! If you do make these donuts, be sure to take a photo of the final product and tag @theconscientiouseater on Instagram so I can see your final creation!
📖 Recipe

Pumpkin Baked Donut Recipe (Vegan)
Light and cakey and full of pumpkin spice seasoning, this Pumpkin Baked Donut Recipe is sure to be a crowd pleasure this fall season!
Ingredients
DONUT
- 1 cup flour
- ¼ cup sugar
- 2 teaspoon baking powder
- 1 teaspoon pumpkin pie spice
- pinch salt
- 2 tablespoons oil
- ½ cup pumpkin puree
- ½ cup non dairy milk
GLAZE
- 1 cup powdered sugar
- 1-2 tablespoons non-dairy milk
CHOCOLATE DRIZZLE (optional)
- 2 tablespoons chocolate hazelnut butter*
- water to thin
Instructions
- Preheat your oven to 375 °F and grease a 6 donut pan and set it aside.
- In a mixing bowl, combine all the dry ingredients, from the flour to the salt.
- Add in the oil, pumpkin puree and non-dairy milk and stir to combine.
- Place a plastic gallon bag into a cup (see photos) and spoon the pumpkin donut batter into the plastic bag. Twist the top of the plastic bag so that all of the batter is concentrated in one corner of the plastic bag.
- Cut the end off of the plastic bag and pipe the donut batter evenly among the 6 donut rounds. Gently bang the pan against something soft to even out the top of the batter.
- Bake the donuts for 15-18 minutes or until risen and slightly golden brown.
- Allow the donuts to cool for about 10 minutes in the pan before removing them and placing them on a wire rack to cool completely.
- While the donuts are cooling, prepare the glaze. Place 1 cup of powdered sugar into a bowl and add in 1 tablespoon of non-dairy milk and stir well. Continue adding 1 teaspoon of milk at a time until you get a runny, but thick glaze.
- Dip the donuts into the glaze one at a time and place them back on the wire rack, glazed-side up.
- If desired, prepare the chocolate drizzle by adding a little bit of water some some chocolate hazelnut spread and mixing until a drizzle-able consistency forms. Using a spoon or the piping method used above, drizzle the glazed pumpkin donuts with the chocolate hazelnut spread.
- Enjoy!
Notes
*I used Justin's Chocolate Hazelnut Butter!
Nutrition
Serving: 1donutCalories: 279kcalCarbohydrates: 51gProtein: 3gFat: 7gSaturated Fat: 2gPolyunsaturated Fat: 2gMonounsaturated Fat: 3gTrans Fat: 0.02gSodium: 157mgPotassium: 124mgFiber: 2gSugar: 33gVitamin A: 3266IUVitamin C: 3mgCalcium: 127mgIron: 2mg
Tried this recipe?Let me know how it was!
The Best Vegan Enchiladas! (Easy Recipe)

These incredibly delicious, protein-packed Vegan Enchiladas are a plant-based take on a traditional comfort food that your family will love!

I have friends from Texas who swear by the fact that Tex-Mex food is a gift given to us directly by God. At first, the idea of making a vegan version of their favorite Tex-Mex dishes was simply unthinkable, but I think I'm slowly wearing them down.
I started to win them over with my vegan nacho cheese sauce that we poured over a sheet pan loaded with my homemade oil-free baked tortilla chips, taco tofu crumbles and creamy guacamole. That was a huge success. Now I've convinced them to try my version of a staple Tex-Mex dish: vegan enchiladas.
Why You'll Love This Recipe!
- If you're new to a plant-based diet and miss enjoying all of your favorite, meat-filled Mexican dishes, then these vegan enchiladas will hit the spot! The filling is hearty, smoky and meaty and the classic enchiladas sauce poured over the top will give you that nostalgic flavor you're looking for.
- Whenever I'm short on time, store-bought tortillas, vegan cheese and enchiladas sauce makes this recipe come together so quickly. However, if I have a little extra time, I love to make my own whole wheat tortillas and this amazing vegan enchiladas sauce.
- Easy to freeze and even better as leftovers, you'll want to make a double batch every time!
- These vegan enchiladas are super adaptable. Switch up the beans in the filling, use tofu instead of tempeh, and use whichever vegan cheese is your favorite.
Ingredients
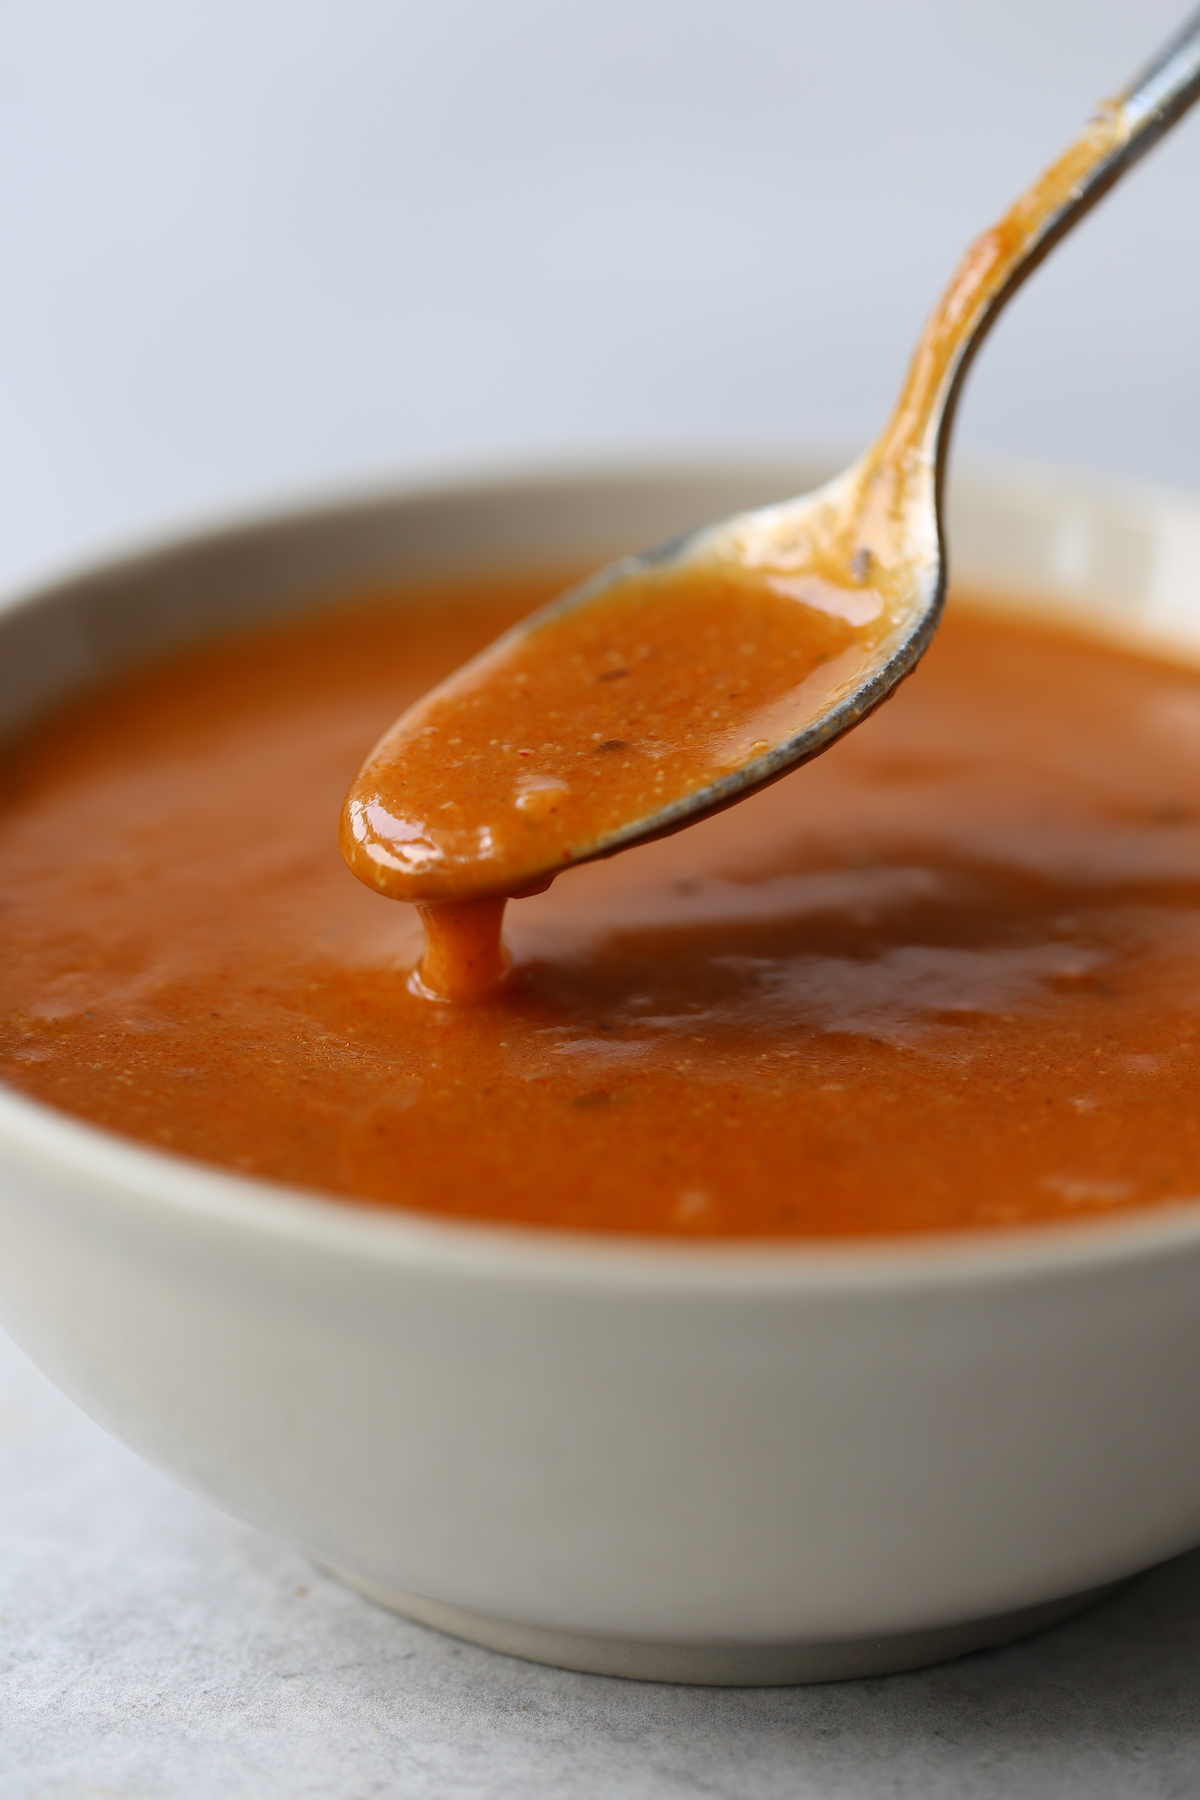
- Tempeh - tempeh gives these enchiladas a hearty, meaty flavor and will keep you nice and full!
- Liquid smoke - this is a staple in my pantry as plant-based eater. It's basically smoke turned into a concentrated liquid and it gives beans, tofu and tempeh a meaty flavor.
- Soy sauce - I personally like to use less-sodium soy sauce. You can always add more salt if needed, but you can't take it away!
- Shredded vegan cheese - Vegan cheddar cheese will give you that classic enchilada flavor, but really, any vegan cheese will give these enchiladas the rich, cheesiness you're expecting. Violife is my favorite!
- Enchiladas Sauce - I love to make my own enchiladas sauce, but feel free to save some time and buy store-bought sauce.
- Tortillas - If using store-bought, you'll want 10-inch tortillas.
See recipe card below for a full list of ingredients and measurements.
Substitutions & Variations
- Liquid Smoke - If you can't find liquid smoke (an amazing ingredient that adds a meaty flavor) then you can try finding smoked paprika and using that instead of plain paprika. The smoked paprika will add the smoky flavor you want!
- Cheese - If you want to use less processed ingredients in this recipe, you could always try making a thicker version of my nacho cheese sauce to drizzle inside of these enchiladas.
- Black beans - I love black beans in my enchiladas, but use whatever beans you have on hand. Kidney would work well!
- Tortillas - I'm always trying to use whole grains in my meals, but any tortilla that bends well and holds its shape will work great in this recipe.
How to Make Vegan Enchiladas
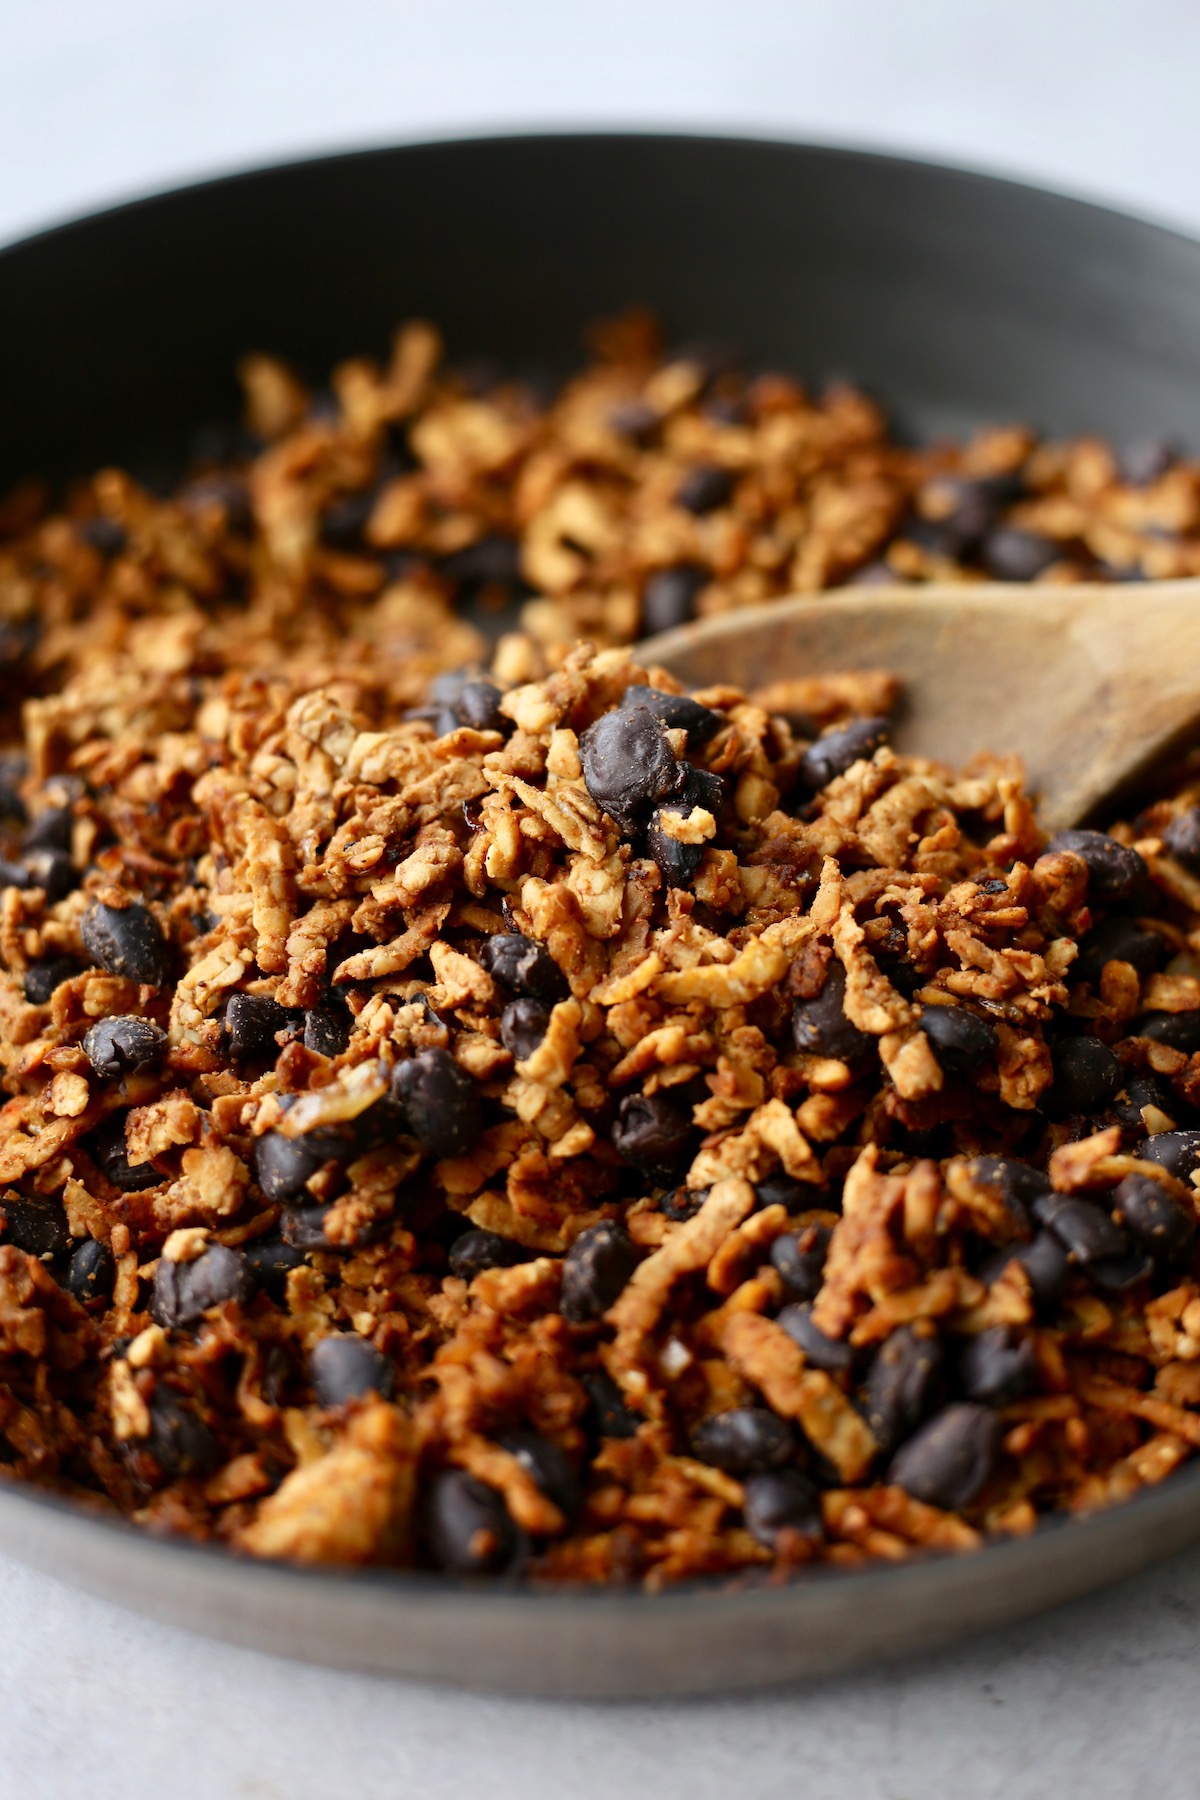
Step 1: In a large skillet, heat the olive oil over medium heat. Add in the chopped onion and sauté until translucent. Add in the minced garlic and tempeh and cook until the tempeh starts to brown. Add in the beans and spices and stir to combine. Lastly pour over the soy sauce and liquid smoke.
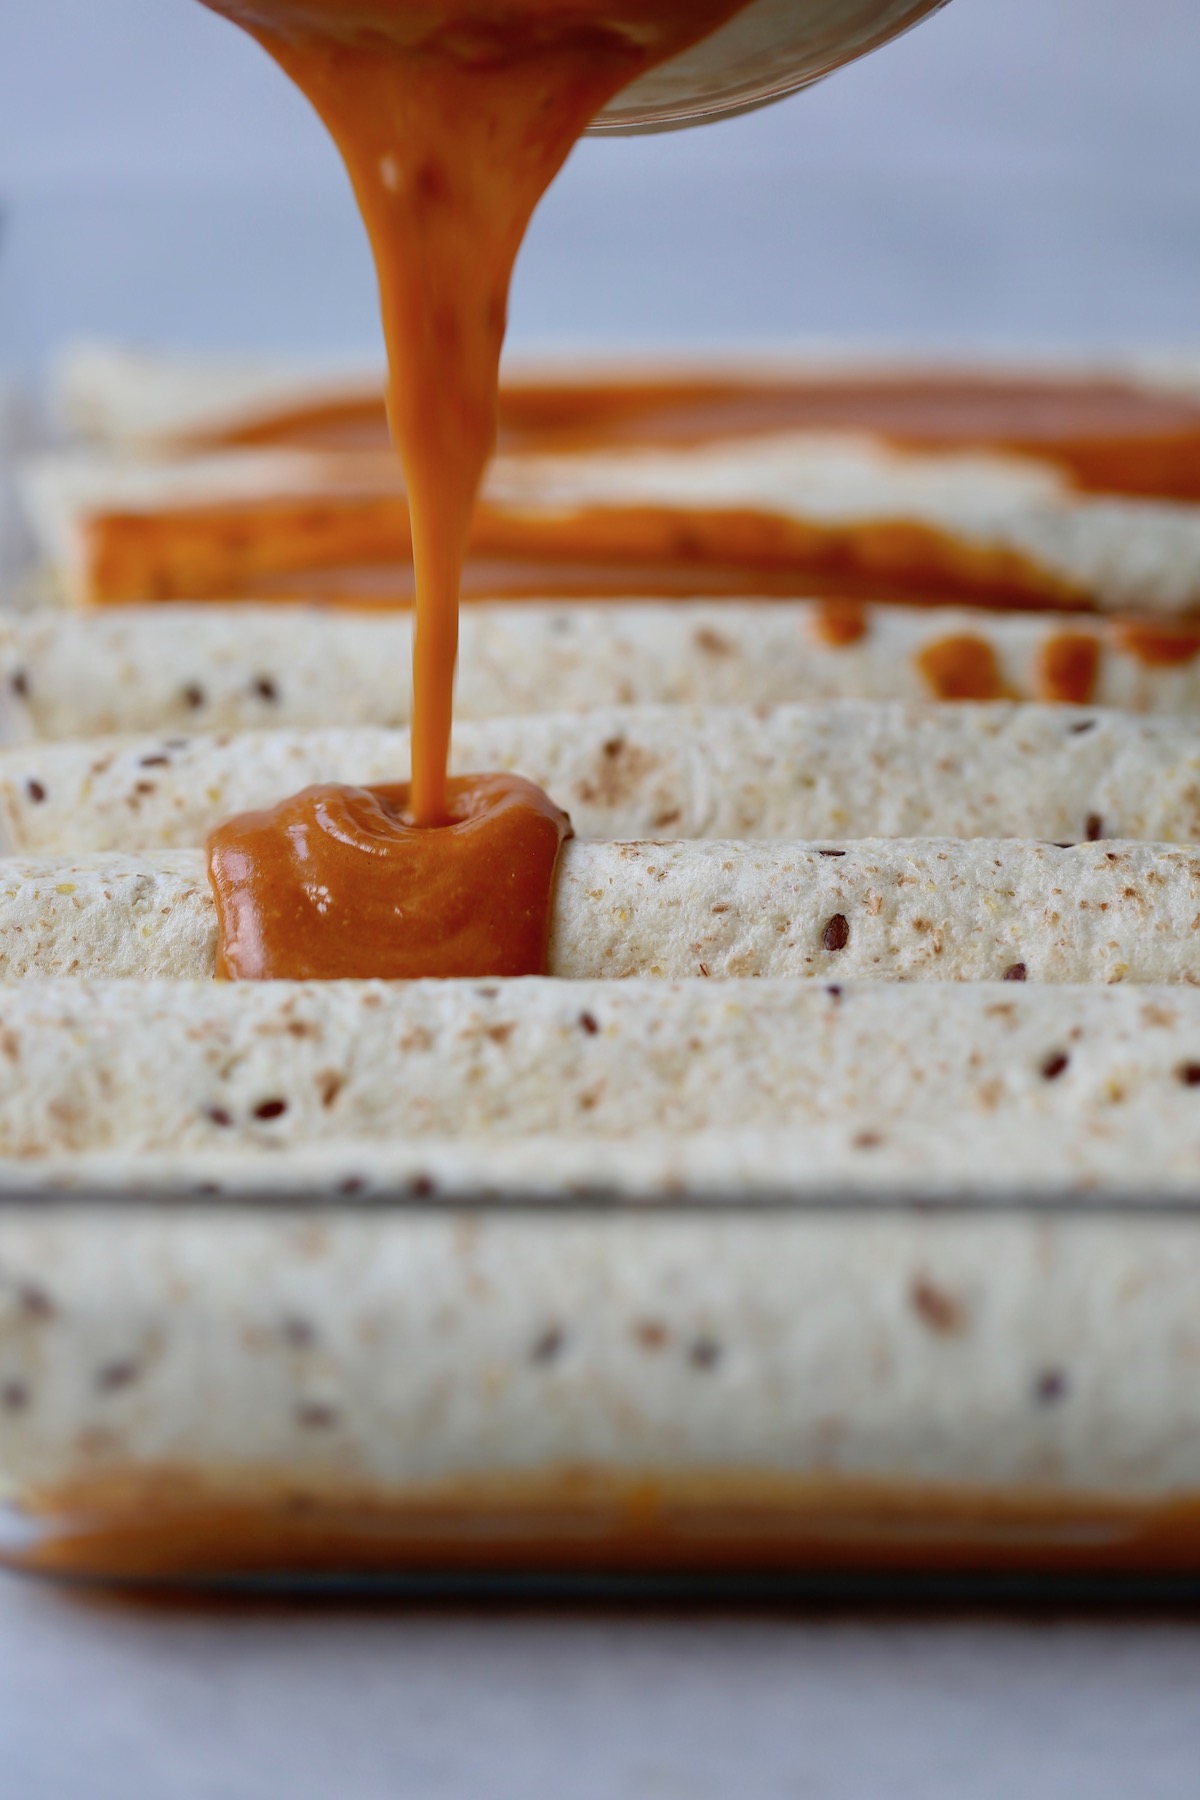
Step 2: Preheat your oven and assemble the enchiladas. Spread about ½-1 cup of enchilada sauce over the bottom of a 9x13 inch baking dish. Spread a spoonful of the tempeh/bean mixture across the center of a tortilla. Next sprinkle over some shredded vegan cheese. Roll up the tortilla and place it seam-side down into your prepared baking dish. Continue this process until all 8 tortillas have been filled and placed in the dish.
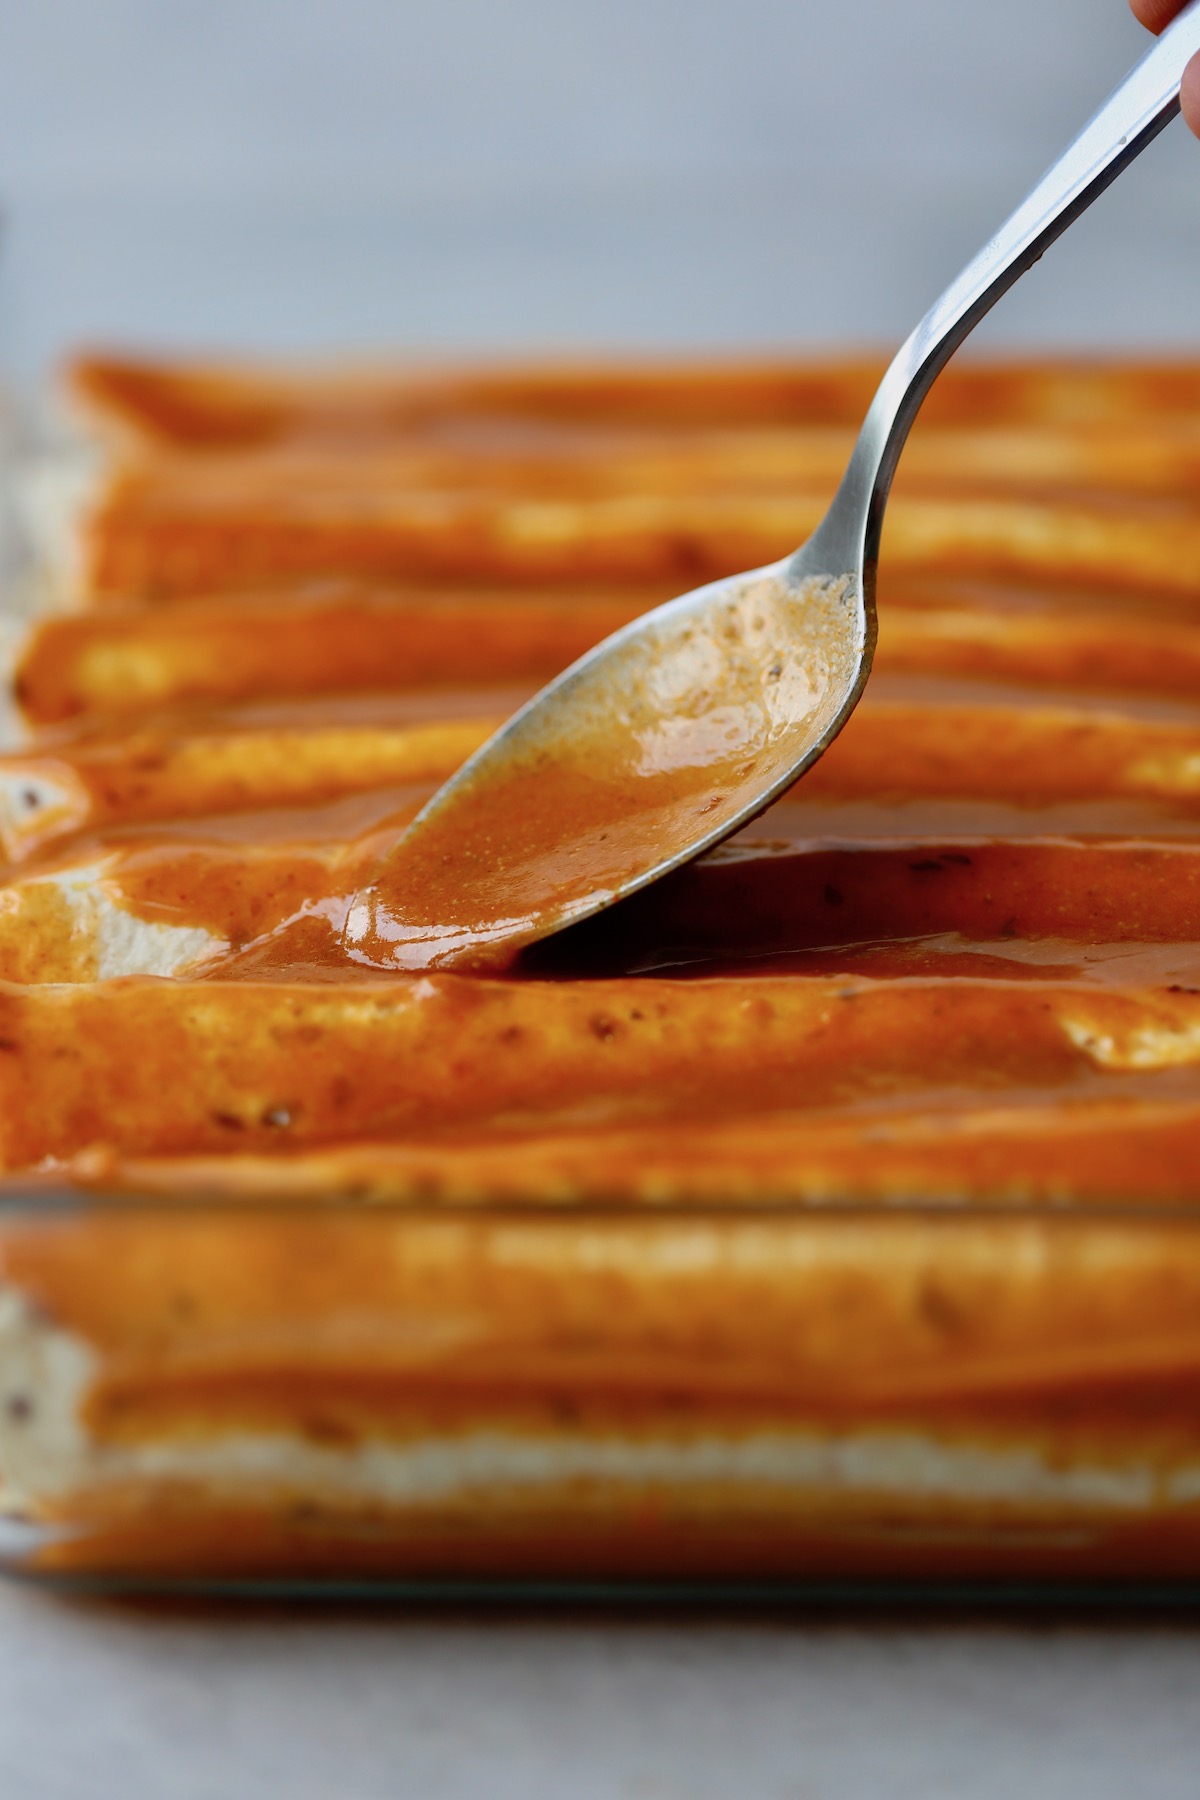
Step 3: Pour over the remaining enchilada sauce and spread it evenly over the tortillas. Sprinkle the top of the enchiladas with the remaining ½ cup of shredded vegan cheese.
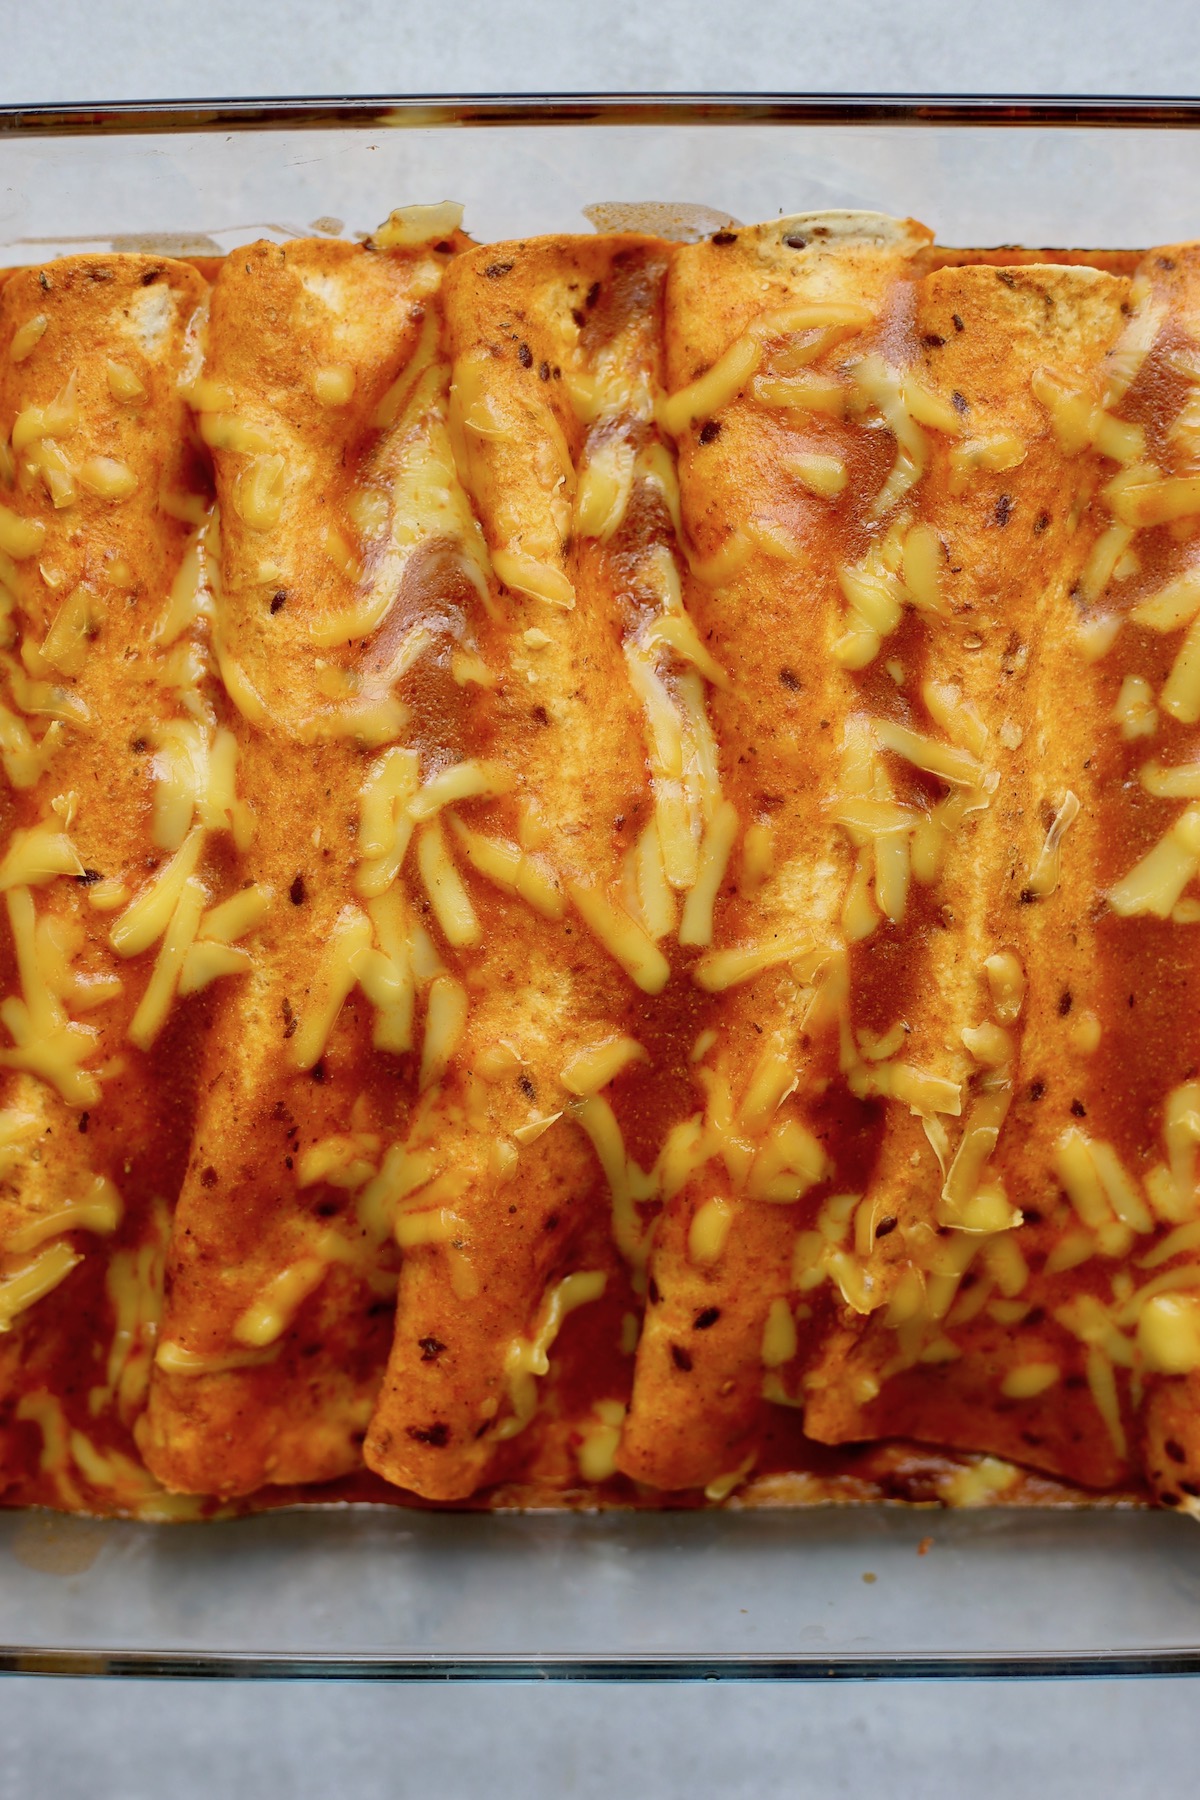
Step 4: Bake the enchiladas uncovered for about 20 minutes. Serve and enjoy!
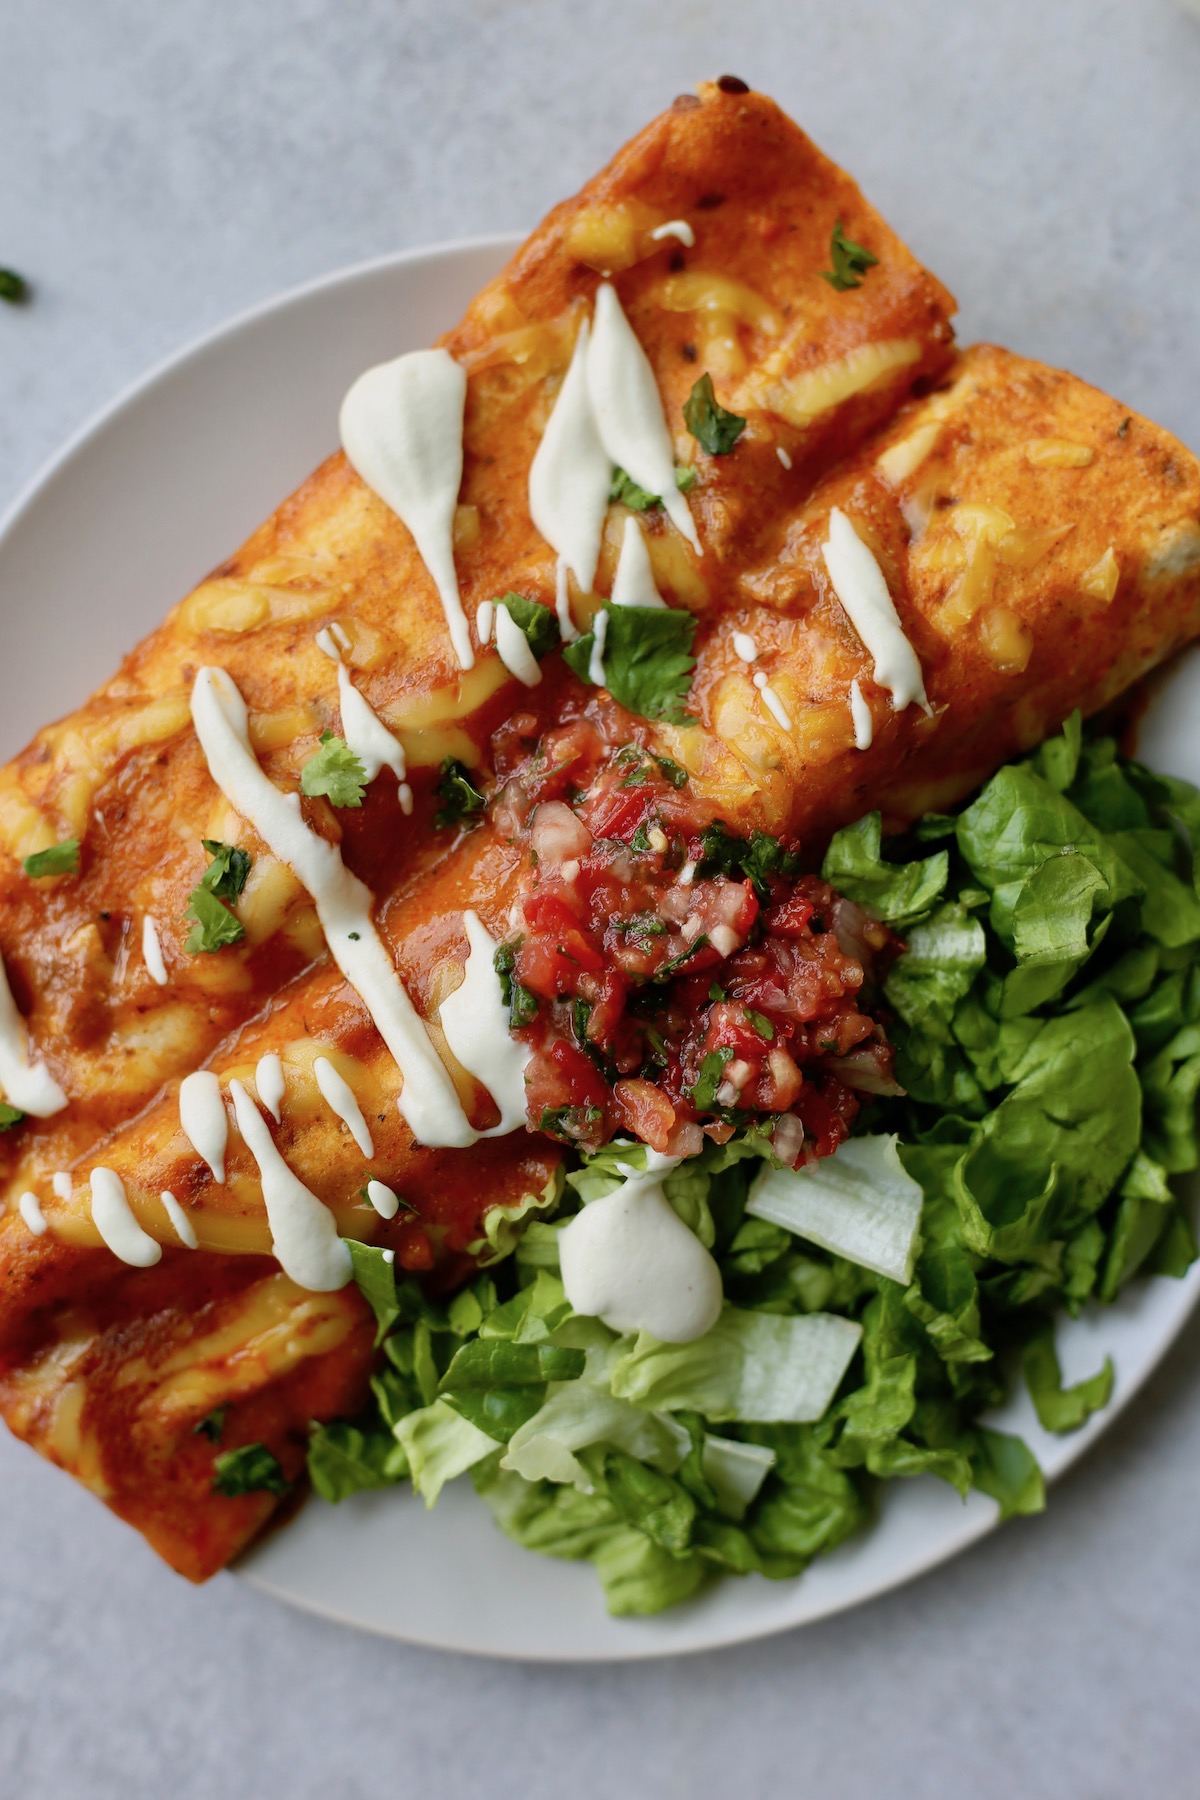
Top Tips
- You'll want to use moldable tortillas that hold their shape so that the enchiladas hold their shape and retain the filling when you go to serve them.
- Add toppings! Toppings are what take these vegan enchiladas to the next level. In addition to freshly chopped lettuce and salsa, I love to top mine with guacamole, cashew sour cream, and more homemade vegan cheese sauce. Yum!
Recipe FAQs
How to do you reheat leftover enchiladas?
When I'm in a rush, I simply microwave leftover enchiladas until heated through. If you have a little more time, you can always bake them. Place them in an oven safe baking dish, cover them with foil and bake them for about 30 minutes at 350F or until hot in the center.
What are the best toppings for enchiladas?
We love to add lots of toppings to our enchiladas. Some of our favorites are salsa, cashew sour cream, homemade guacamole, crisp lettuce, and cilantro.
How can I make vegan enchiladas?
To make vegan enchiladas you'll need to replace the meat and dairy in traditional enchiladas. You can use beans, tempeh, tofu or seitan instead of meat in the filling and choose store-bought vegan cheese...or make your own!
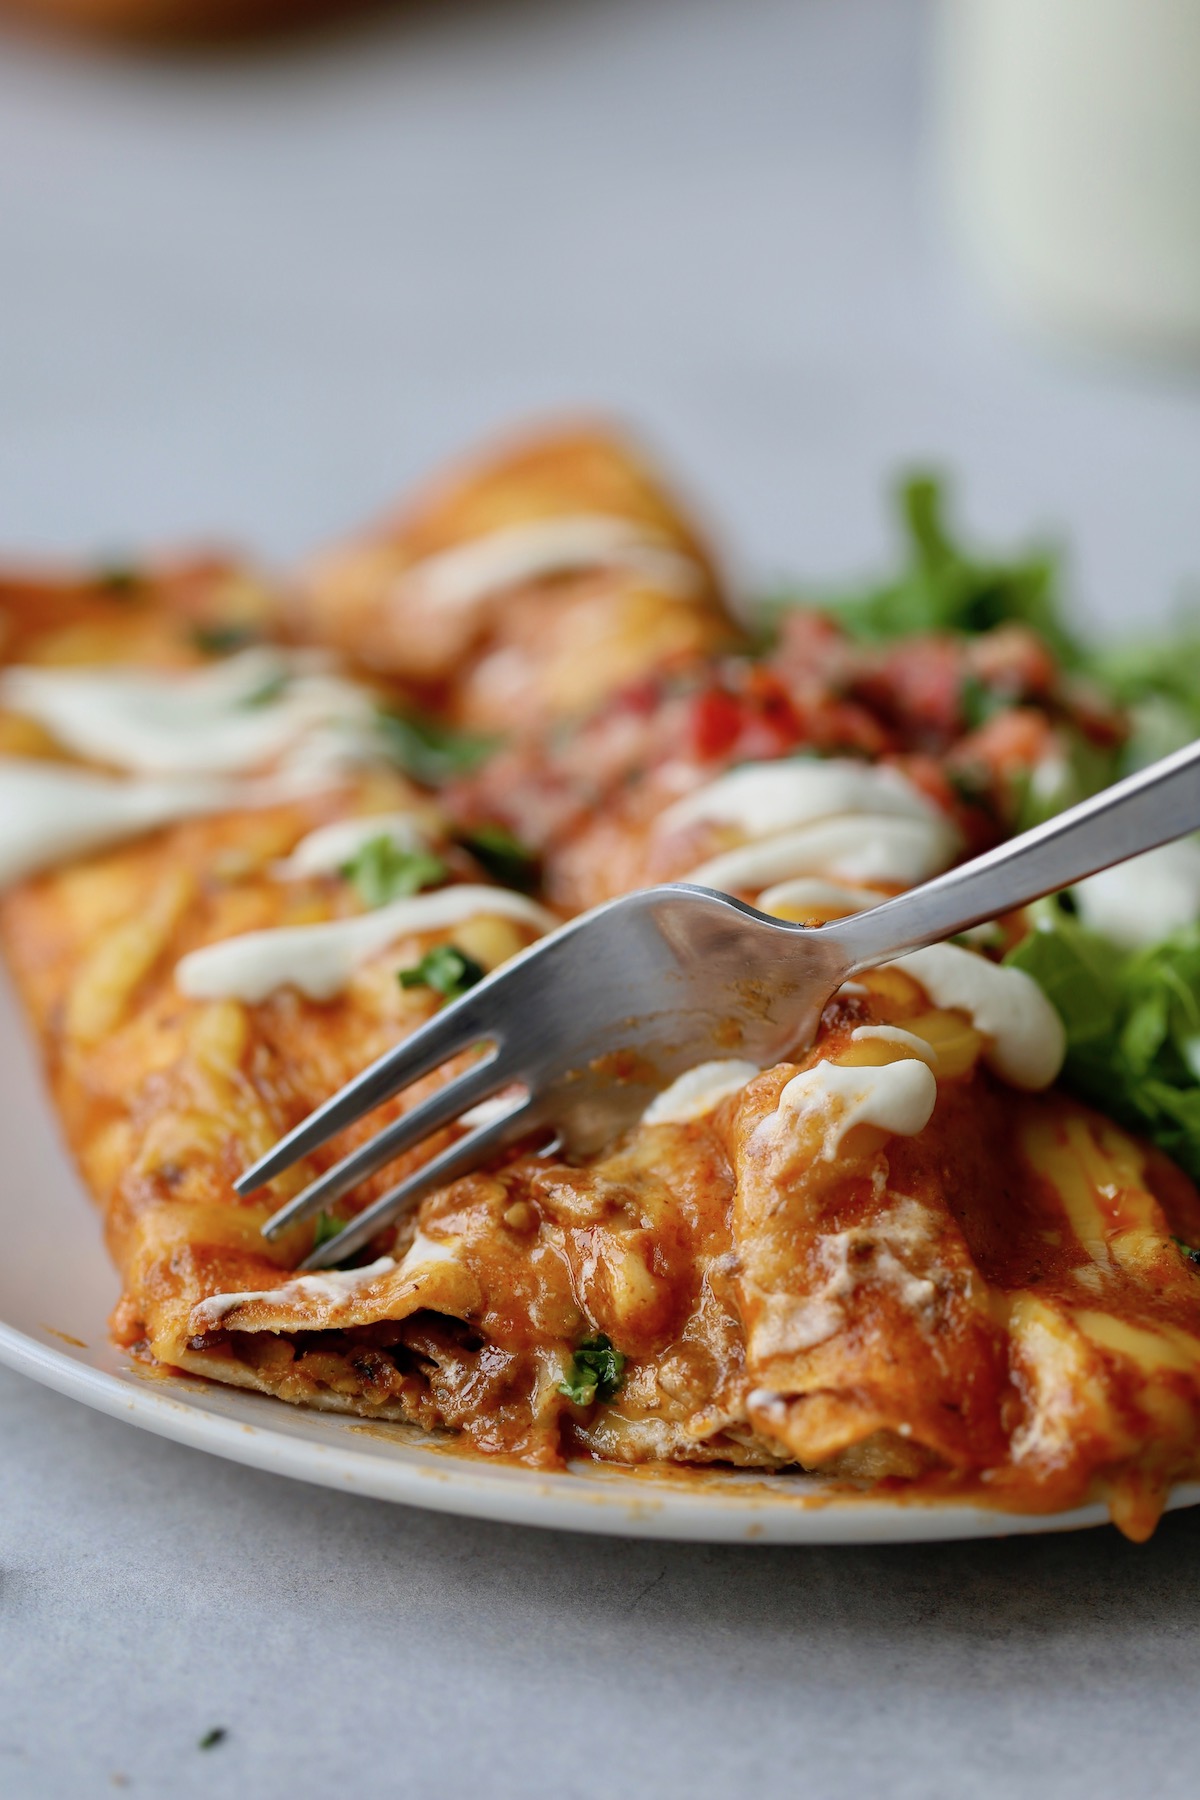
More Vegan Tex-Mex Recipes
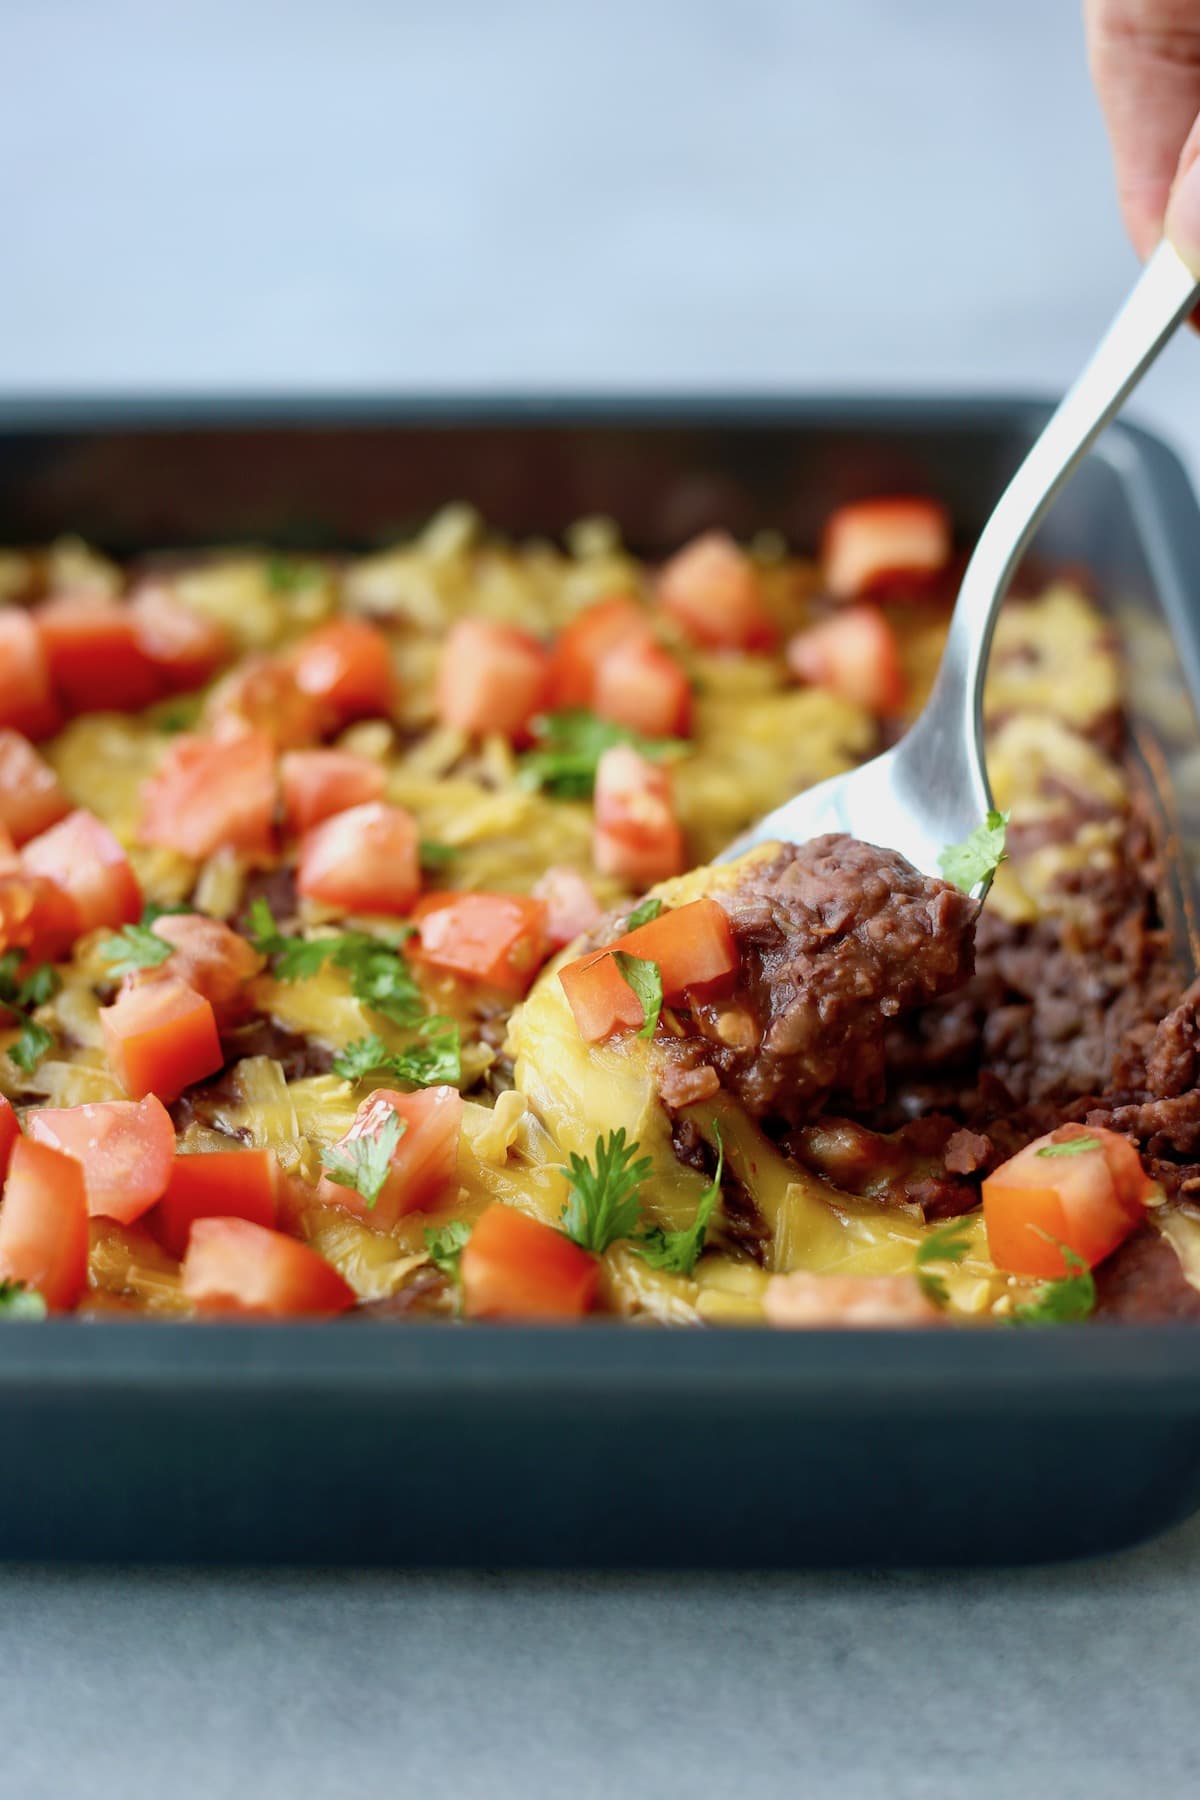
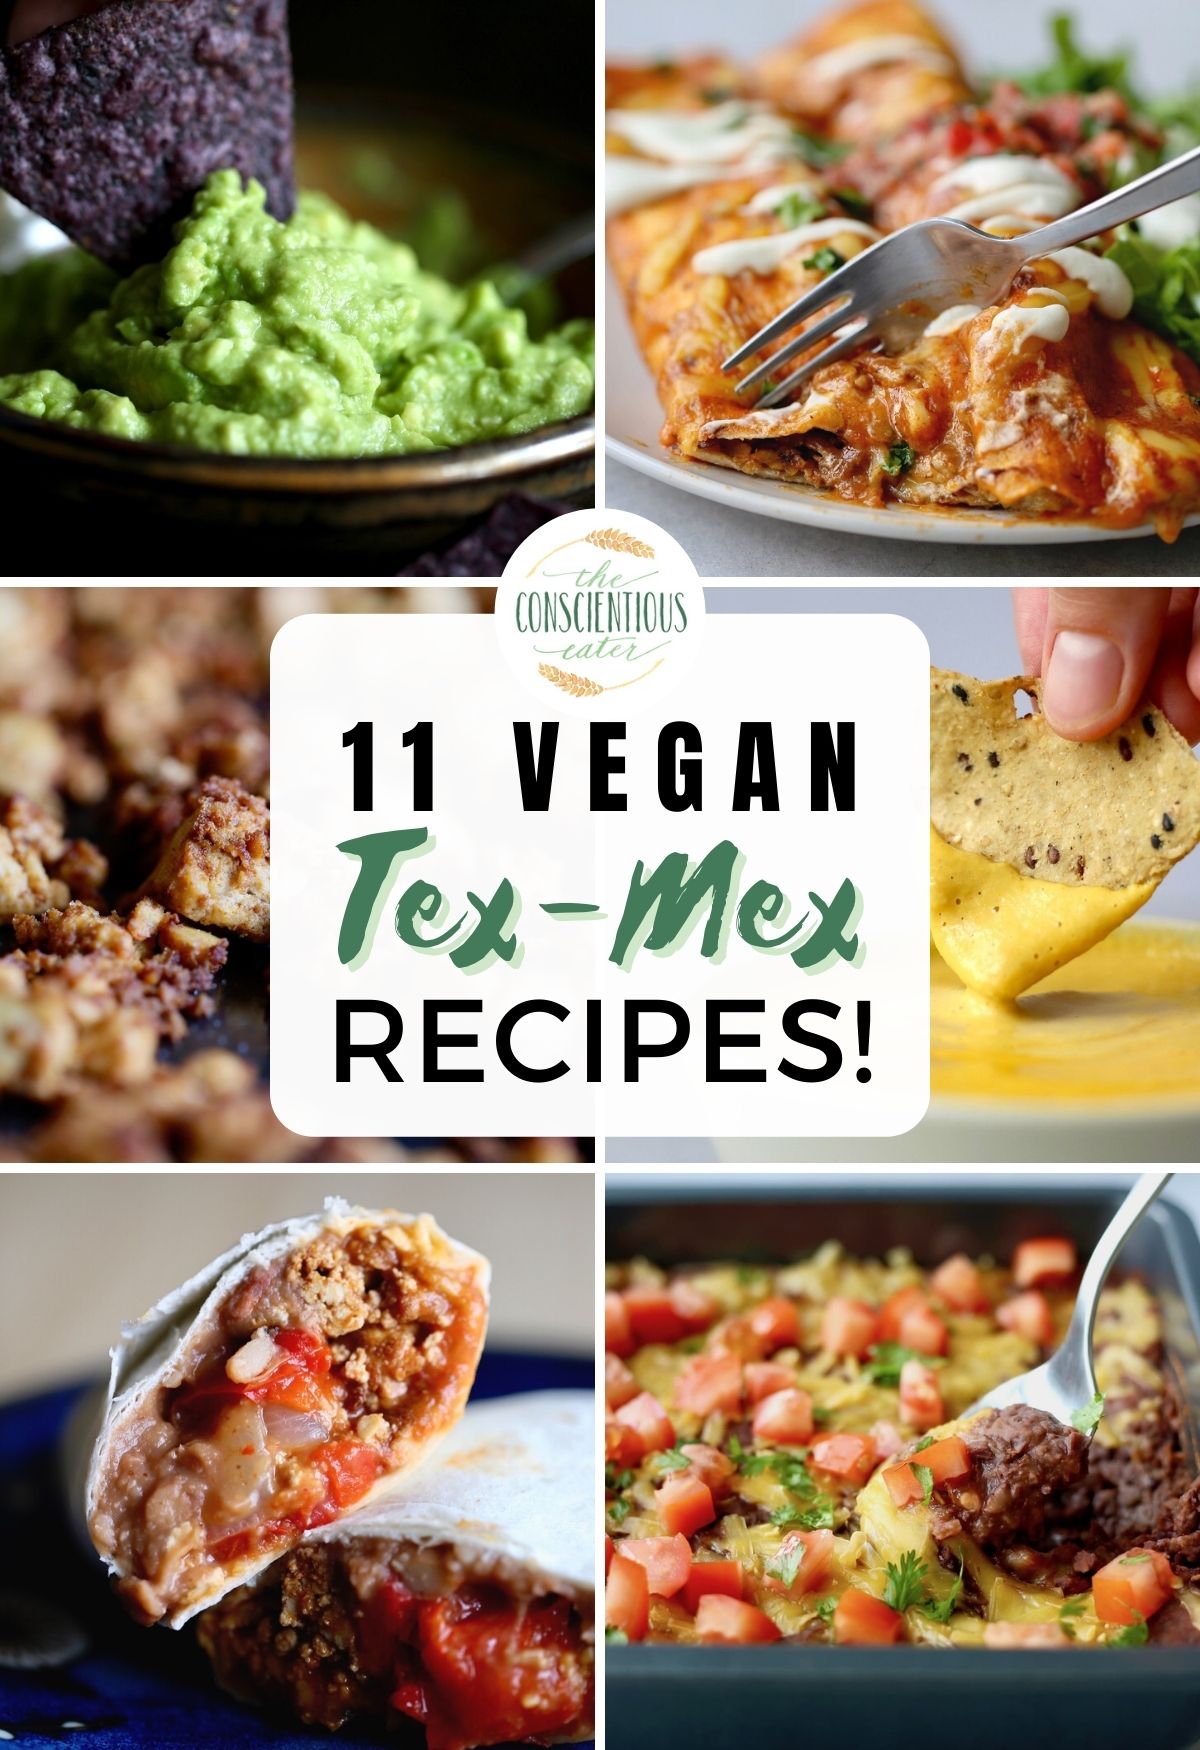
Love this recipe? Please leave a 5-star 🌟🌟🌟🌟🌟 rating in the recipe card below & a comment further down the page!
📖 Recipe

Easy Vegan Enchiladas
This delicious vegan enchilada recipe is a healthy take on a traditional comfort food that your family will love!
Ingredients
- 2 tablespoons olive oil
- 1 block tempeh
- ½ onion chopped
- 3 cloves garlic minced
- 14.5 ounces black beans drained and rinsed
- 2 teaspoons ground cumin
- 1 teaspoon paprika
- ¼ teaspoon liquid smoke optional
- 2 tablespoons less-sodium soy sauce
- Salt to taste
- 1 ½-2 cups shredded vegan cheese divided
- 8 flour tortillas
- 2 cups enchilada sauce See notes for the recipe I like to use!
- For Serving: shredded lettuce, salsa, vegan sour cream, guacamole, cilantro, etc.
Instructions
- In a large skillet, heat the olive oil over medium heat
- While the oil is heating, prepare the tempeh mixture. If you have a food processor, rip the block of tempeh into smaller chunks and place it in your food processor. Pulse the tempeh until it is the size of ground beef. If you don't have a food processor, just cut or crumble the tempeh into small pieces.
- Once the oil is hot, add in the chopped onion and sauté until translucent.
- Add in the minced garlic and tempeh and cook until the tempeh starts to brown.
- Add in the drain and rinsed black beans as well as the spices and stir to combine. Lastly pour over the soy sauce and liquid smoke and stir again to make sure all the tempeh and black beans have been well seasoned.
- Taste the mixture and add more salt or spices to taste.
- Preheat your oven to 350 °F and start assembling the enchiladas. Pour about ½-1 cup of enchilada sauce over the bottom of a 9x13 inch baking dish and spread it out to coat the bottom of the dish.
- Place a tortilla flat on a clean surface and spread a spoonful of the tempeh/bean mixture across the tortilla. Next sprinkle over a small handful of the shredded vegan cheese. Roll up the tortilla and place it seam-side down into your prepared baking dish. Continue this process until all 8 tortillas have been filled and placed in the dish. You'll want to use about 1 cup of the shredded vegan cheese, or more as needed.
- Pour over the remaining enchilada sauce and spread it evenly over the tortillas. Sprinkle the top of the enchiladas with the remaining ½ cup of shredded vegan cheese.
- Bake the enchiladas uncovered for about 20 minutes.
- Serve warm with your favorite toppings such as shredded lettuce, salsa, vegan cashew sour cream, guacamole, cilantro, etc.
- Store leftovers in an airtight container for a few days.
Notes
- I love to use Cookie and Kate's Enchilada Sauce recipe!
Nutrition
Calories: 292kcalCarbohydrates: 39gProtein: 9gFat: 11gSaturated Fat: 3gPolyunsaturated Fat: 1gMonounsaturated Fat: 3gSodium: 1097mgPotassium: 264mgFiber: 8gSugar: 5gVitamin A: 533IUVitamin C: 2mgCalcium: 83mgIron: 3mg
Tried this recipe?Let me know how it was!
Pumpkin Peanut Butter Soup (Vegan!)

Made with minimal, whole food ingredients, this creamy vegan pumpkin peanut butter soup is a hearty, healthy soup that everyone will enjoy this fall season!

We love soup all year round. Red lentil soup, creamy tomato zucchini soup, maafe (aka African peanut stew) and others are always on rotation, no matter the season. This plant-based pumpkin peanut butter soup is a unique twist on classic pumpkin soup that you will adore! Adding peanut butter to pumpkin soup creates a creamy richness to it, while still keeping it light and healthy. We love drizzling some coconut cream on top and serving this soup with either a crusty sourdough bread, this wonderful artisan bread or fluffy pumpkin vegan cornbread muffins!
[feast_advanced_jump_to]Why You'll Love This Recipe!
- This pumpkin peanut butter soup requires less than 10 ingredients and one-pot to make. Count me in!
- This is a very hands-off recipe. The only ingredient you have to sauté is the fresh ginger. After that you put all of the ingredients into the pot, bring the liquid to a simmer and let the stove do the rest of the work. It's the perfect recipe for any beginner-soup-makers.
- If you've had pumpkin soup before, you'll love the subtle addition of peanut butter in this recipe. Natural peanut butter adds a beautiful richness, but the peanut butter flavor doesn't overpower the pumpkin.
- Allow this soup to sit in the fridge and it will taste better the next day, making it great for meal prep!
Ingredients
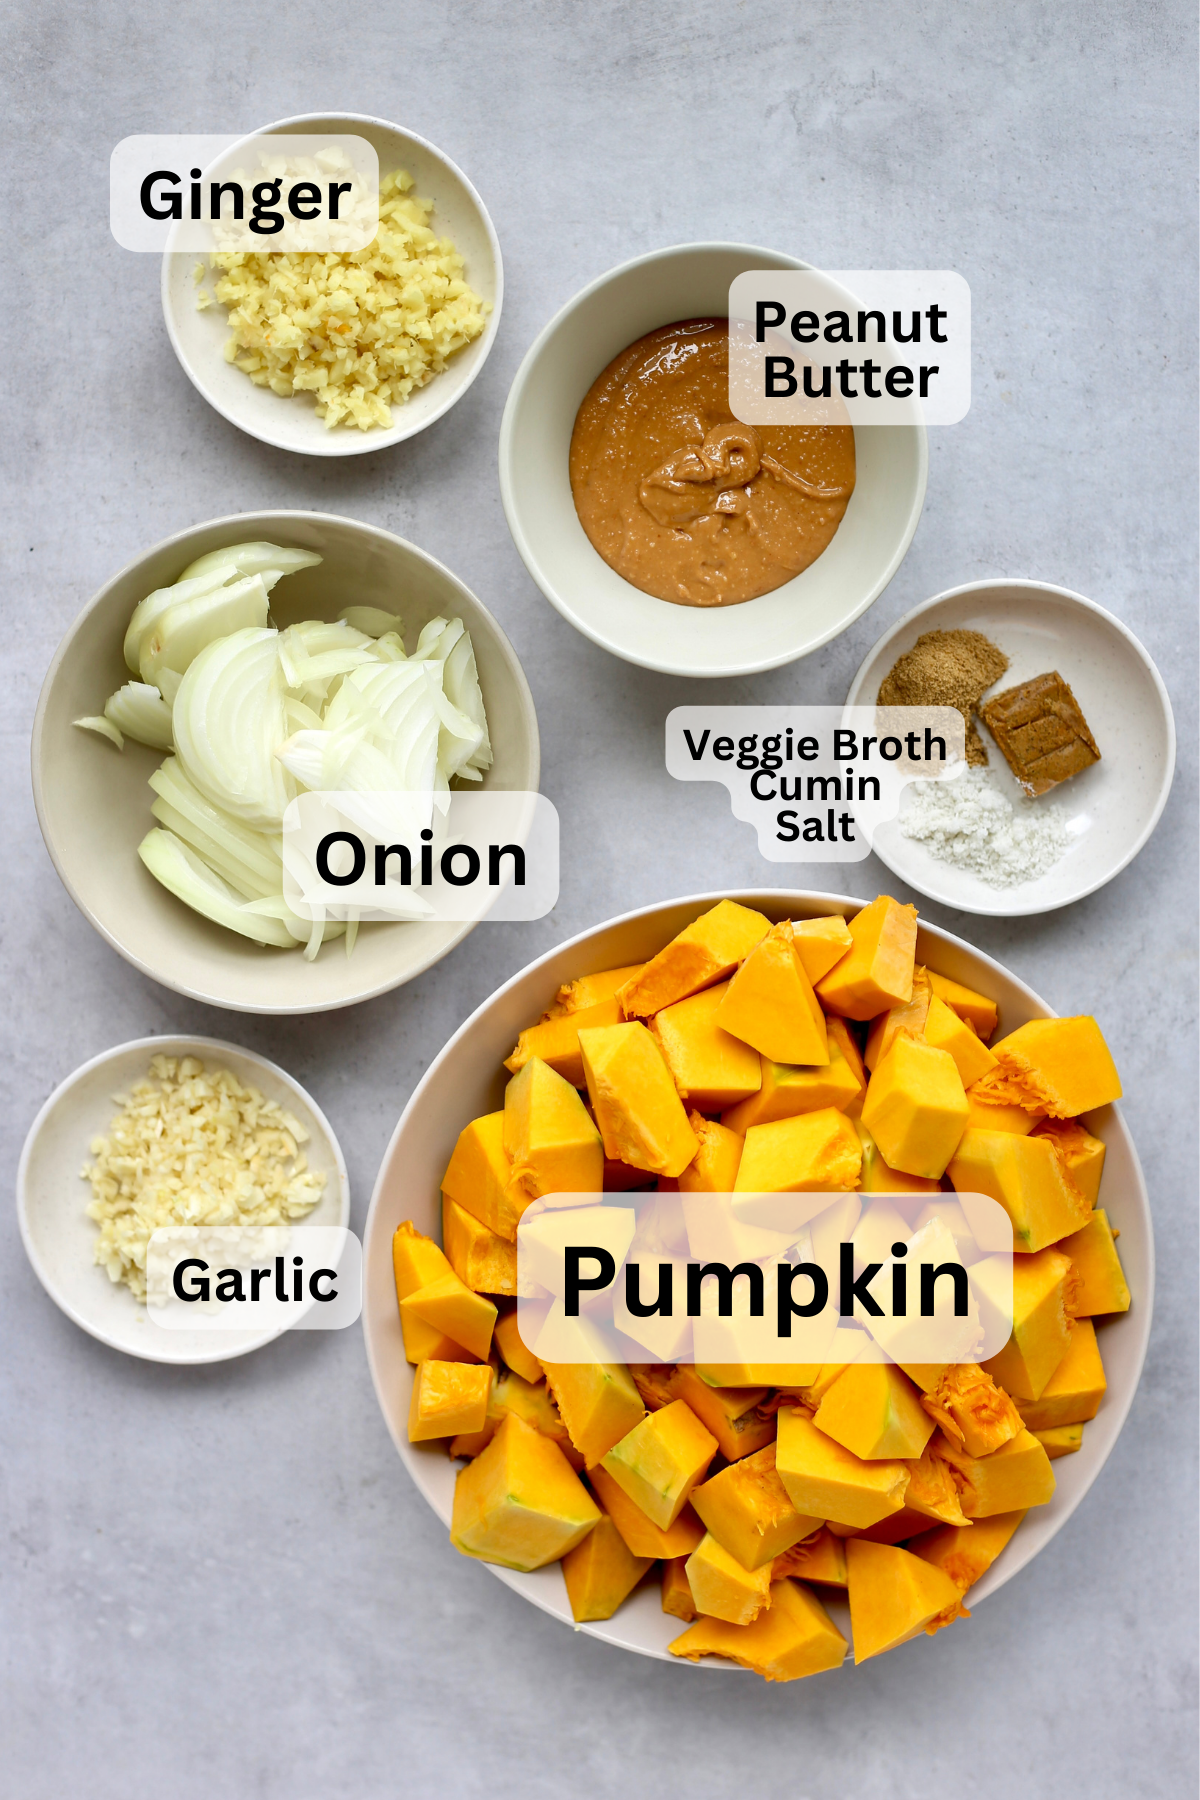
- Ginger - I always have fresh ginger in my fridge. When stored properly, it lasts forever! I love using about 1 heaping tablespoon of freshly grated or minced ginger in this pumpkin peanut butter soup. If you don't have fresh ginger on hand, you can also try using ground ginger.
- Onion - Again, fresh is best. I roughly slice my onion since the entire soup will be pureed in the end.
- Garlic - Did I mention fresh is best? Especially when a recipe calls for so few ingredients, using freshly bought and cut aromatics makes a big different. You can use anywhere from 3-5 (or more!) cloves of garlic.
- Pumpkin (obviously) - I love to use freshly cut pumpkin in this recipe. It's tedious to cut the skin off pumpkin and then cut it into cubes, but it's worth it. I know some people use pumpkin puree in their pumpkin soup as well. That would cut down the cooking process drastically and you may also have to reduce the amount of vegetable broth.
- Peanut Butter - Any natural peanut butter should work. I always have my homemade peanut butter on hand, so that's what I use, but as long as the only ingredients are peanut butter and some salt, you're good to go! Peanut butter adds a beautiful depth of richness that is subtle but such a game-changer!
- Vegetable Broth - Vegetable broth from a carton or from a stock cube both will work in this recipe. I find veggie stock cubes super affordable and easy to store, so that's what I use in this recipe.
- Spices - This simple vegan pumpkin soup calls for only cumin and some salt. However, I'll list out some different variations below incase you want to jazz things up even more!
Substitutions & Variations
- Curry Pumpkin Soup - I love this soup with some curry powder instead of peanut butter and cumin. Simply add in 1-3 teaspoons of good quality curry powder to the ginger after it cooks and toast the curry powder for a minute or two. Then continue on with the recipe, but omit the peanut butter and cumin at the end.
- Red Lentil Pumpkin Soup - If you want to bulk up this recipe with some extra veggies and protein, then you need to try this red lentil pumpkin soup!
- Coconut Pumpkin Soup - To make this pumpkin soup creamy, you can add in a can of coconut milk before pureeing the soup and either keep the peanut butter or omit it. Just keep in mind that adding more liquid may mean you need to add in some more salt and spices.
How to Make Pumpkin Peanut Butter Soup
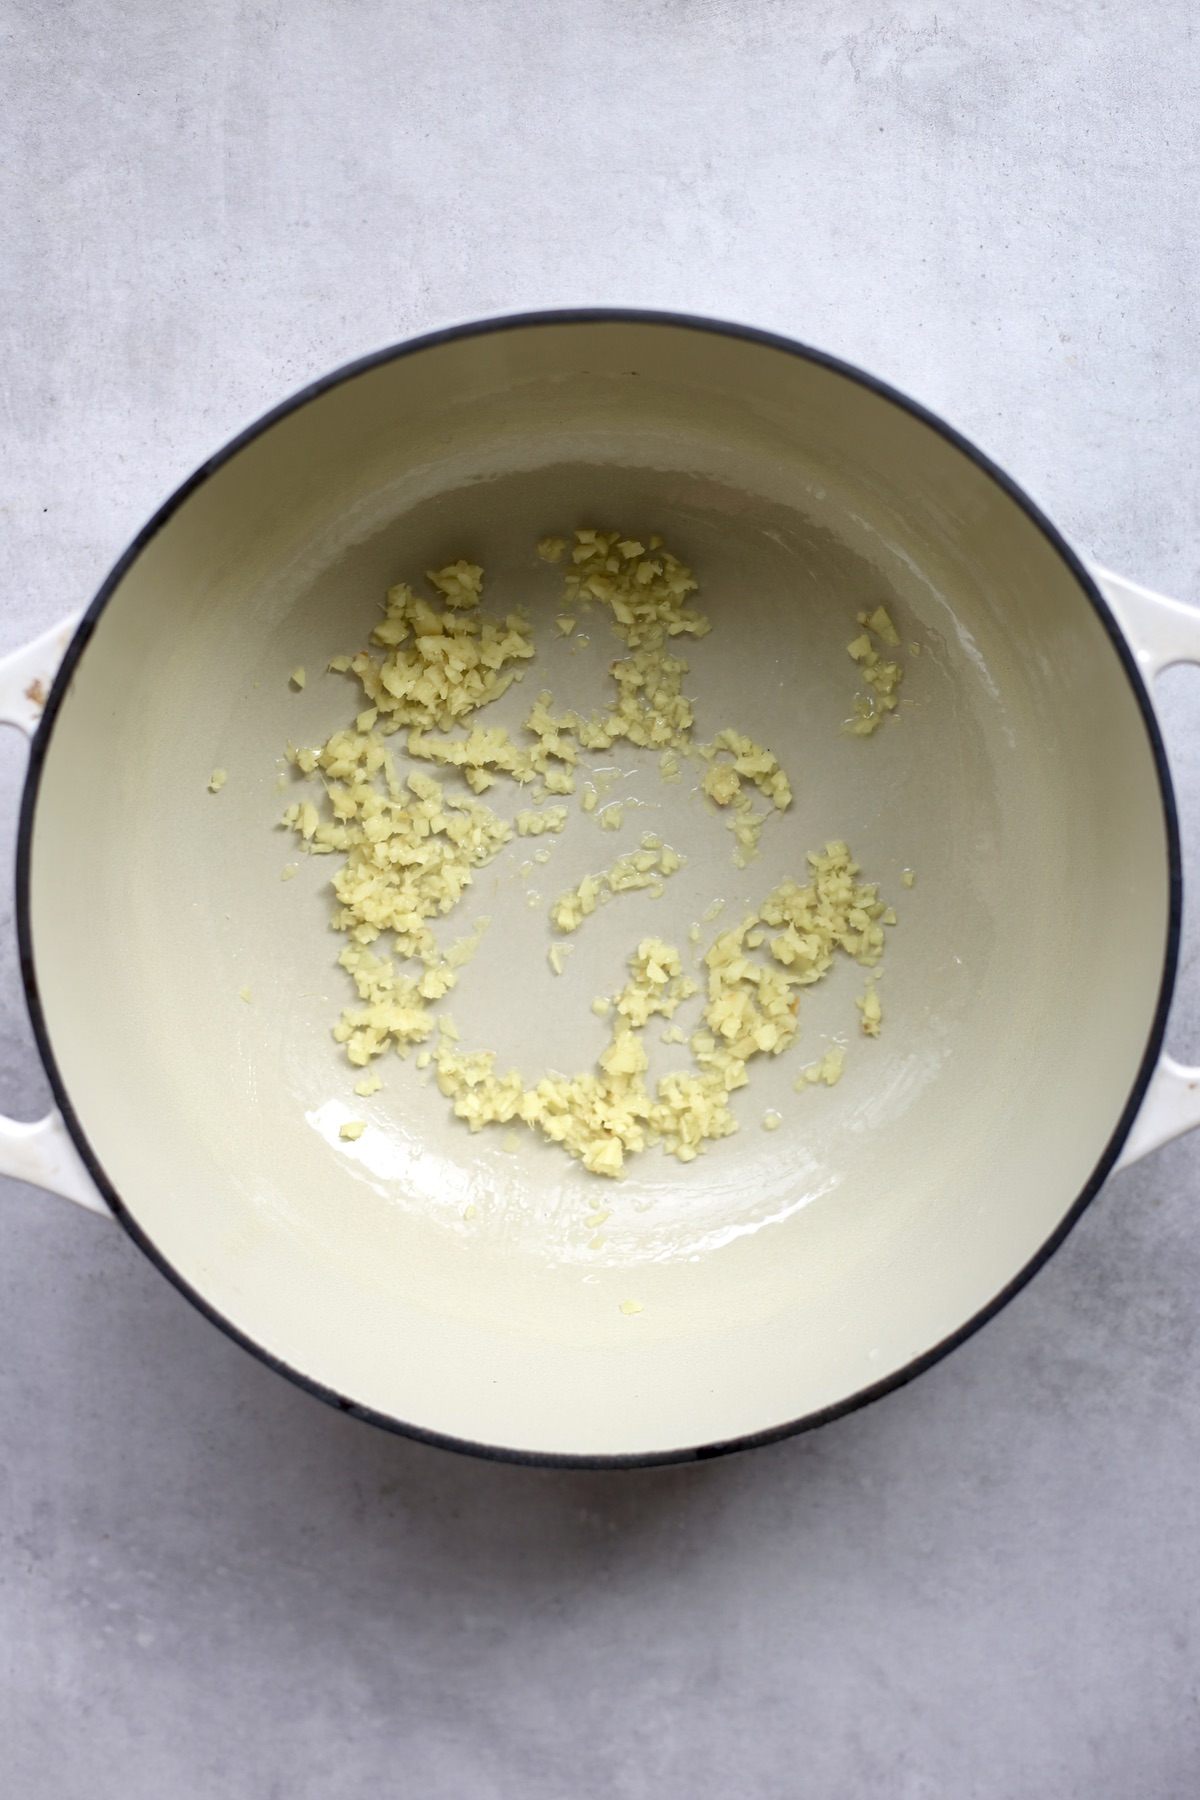
Step 1: In a large sauce pan, heat the olive oil and sauté the minced ginger until fragrant, about 2 minutes.
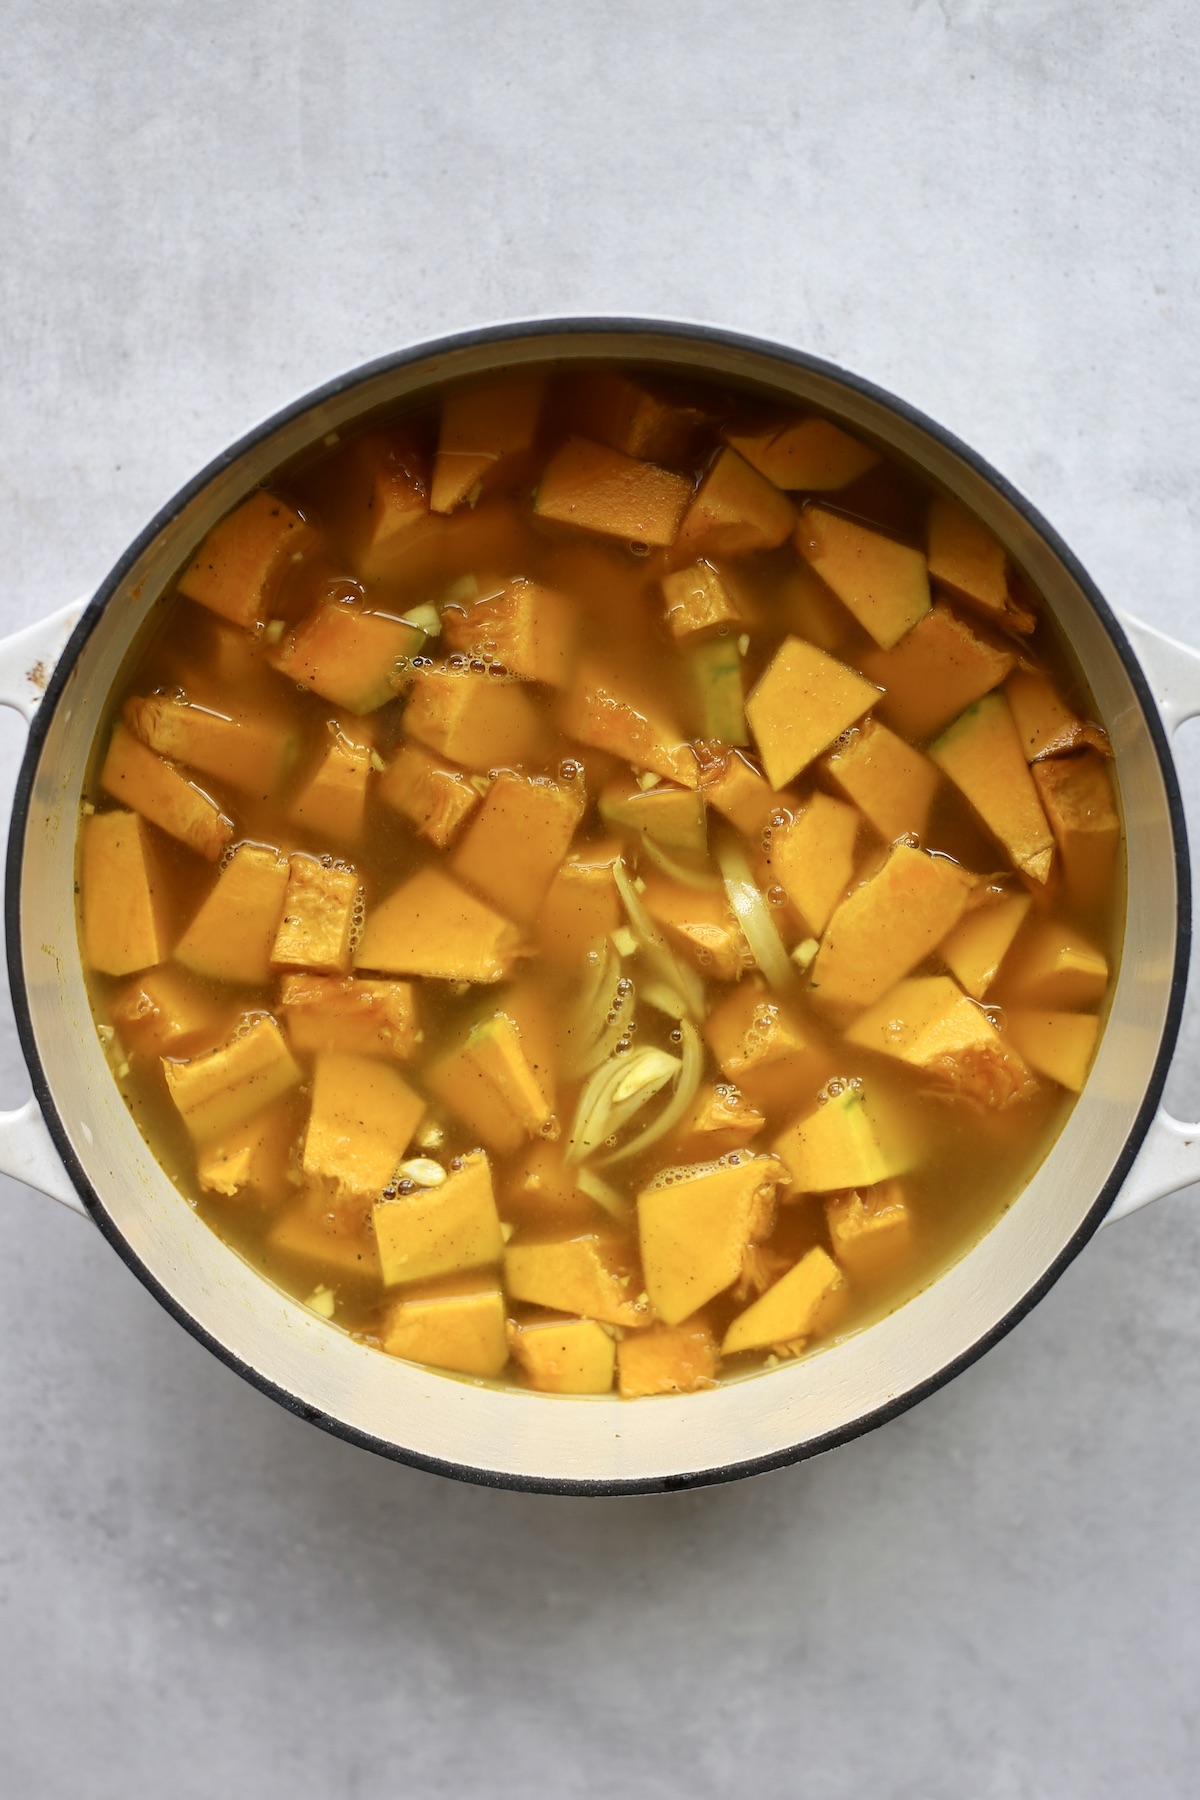
Step 2: Add in the next few ingredients, from the pumpkin to the water, and bring everything to a boil. Reduce the heat to a simmer and allow the soup to simmer for 10 minutes or until the pumpkin is fork tender.
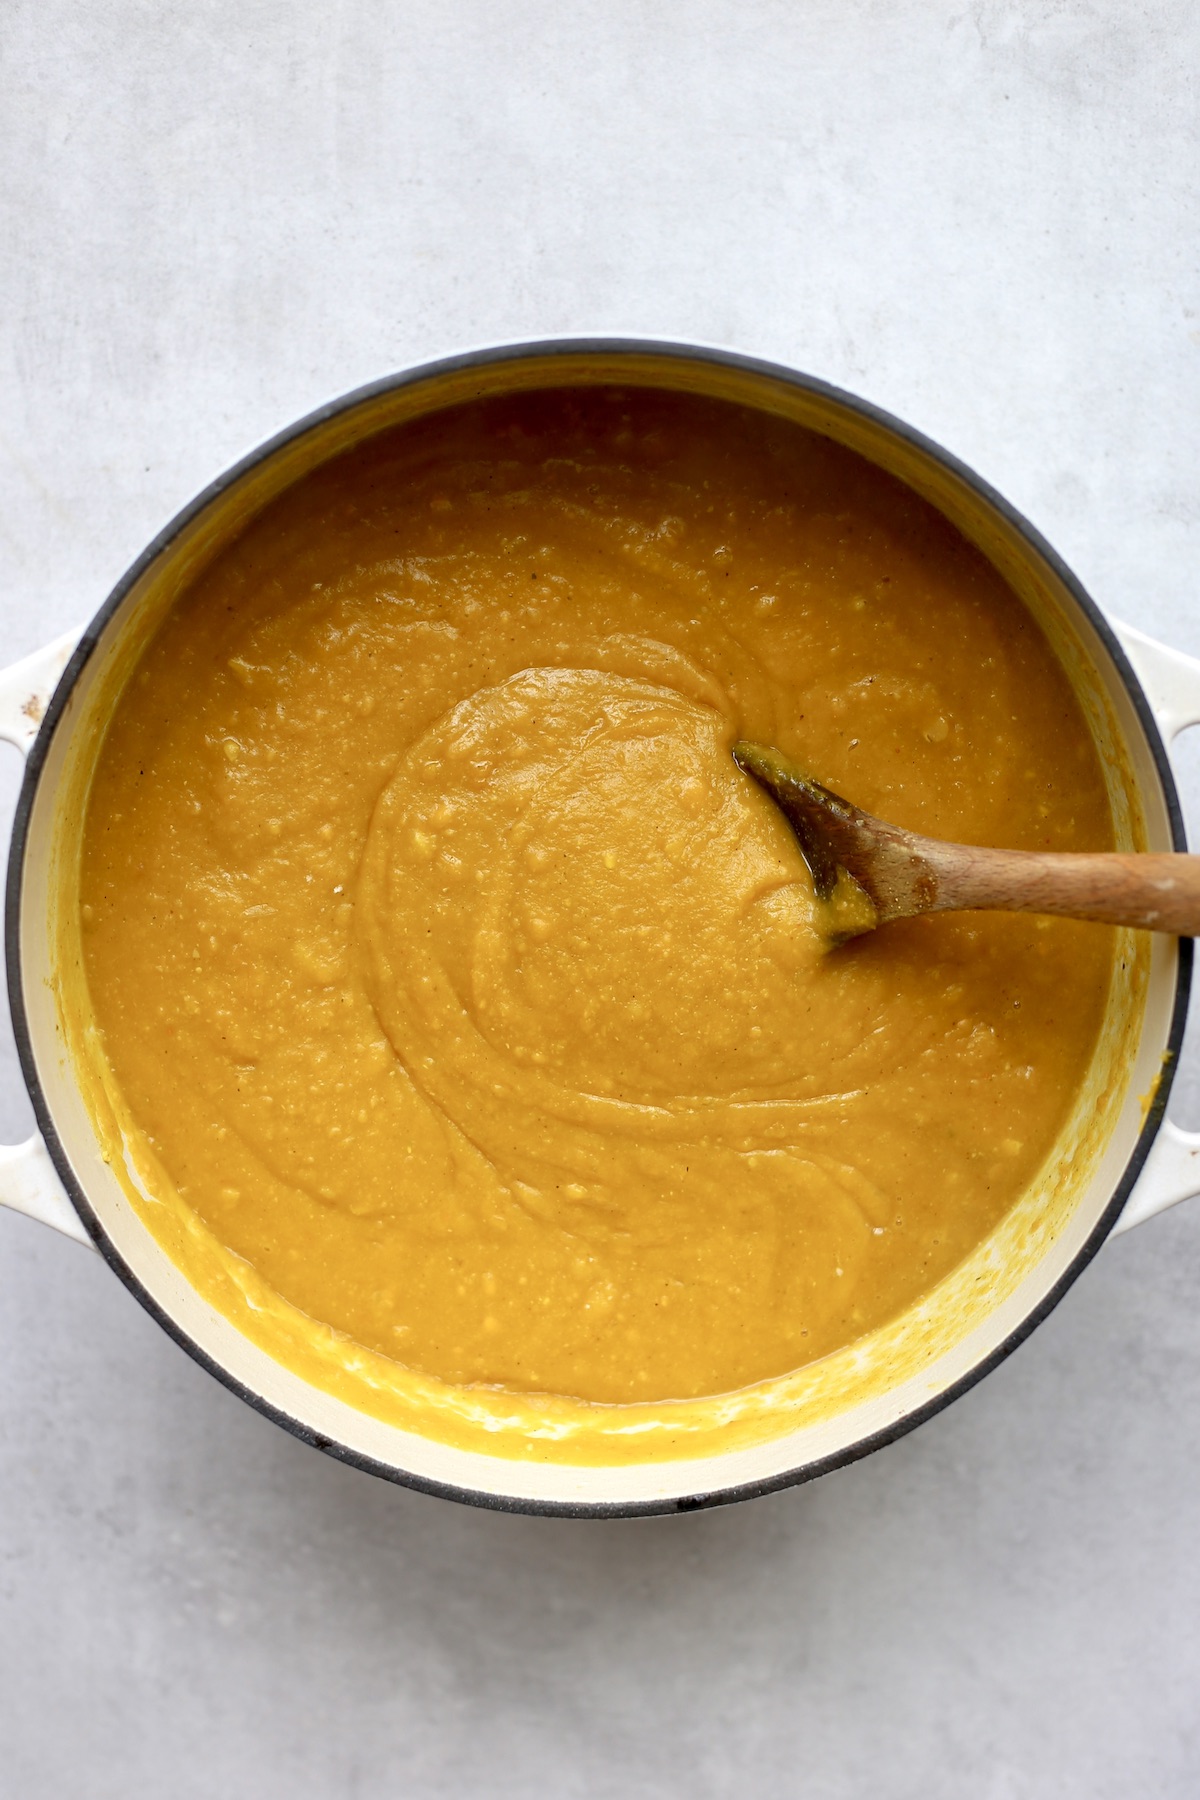
Step 3: Using an immersion blender, puree the soup until smooth.
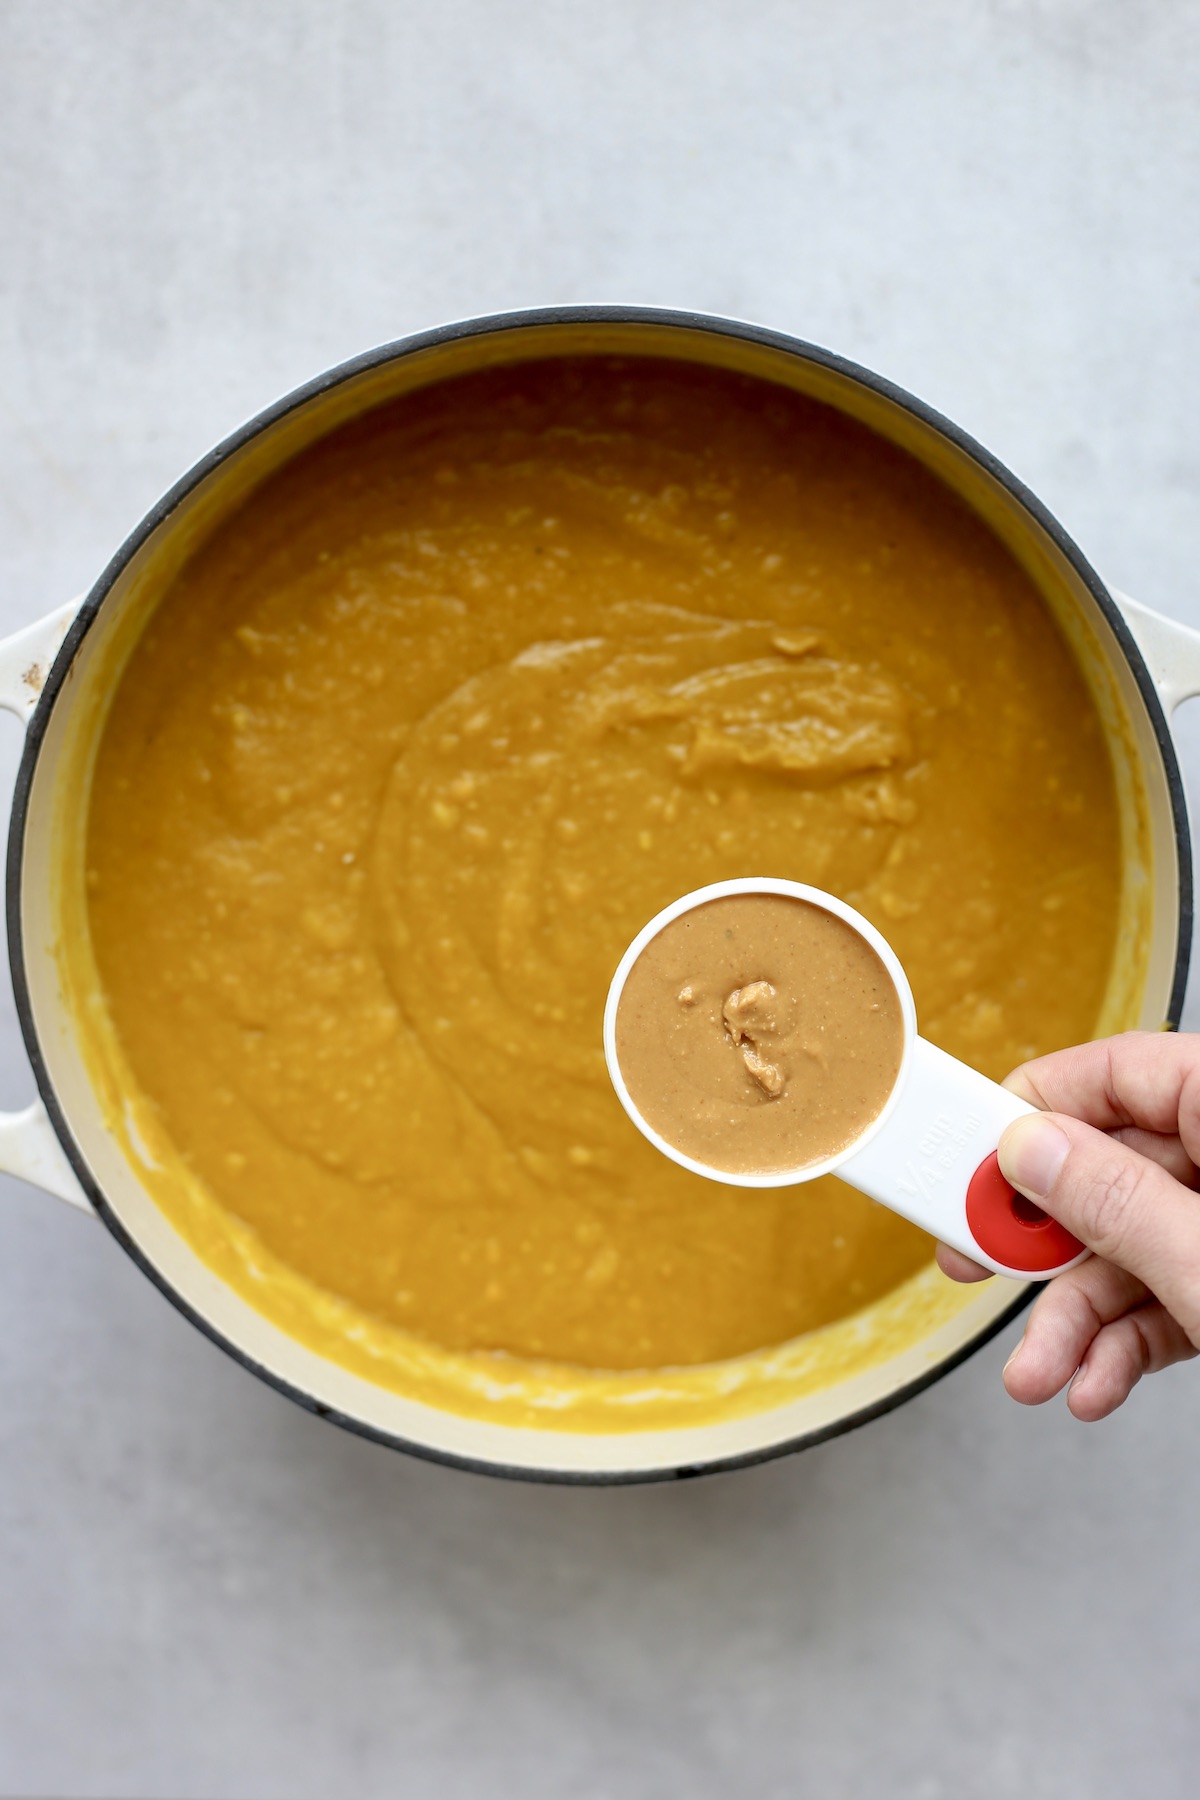
Step 4: Add in the peanut butter, cumin, a pinch of salt and pepper and blend again. Taste and add more cumin, peanut butter or salt as desired. Serve with a drizzle of coconut cream and a side of artisan bread if desired!

Top Tips
- Most peanut butter is already salted, so keep that in mind when you add in the salt. I start with just a pinch and add more as needed!
- This pumpkin peanut soup thickens as it sits in the fridge, so you may need to thin it out a bit with more water or vegetable broth when you go to reheat it.
- Usually I like to add a burst of citrus to my soups, such as a squirt of lemon or lime juice. I personally don't do that with this pumpkin peanut butter soup, but you may want to in order to add some lightness and freshness.
Recipe FAQs
How do you make pumpkin soup?
Start by sautéing your aromatics (garlic, ginger, onion) in a little oil in a large sauce pan. Add in desired spices and toast for another minute. Add in your cubed pumpkin and cover the pumpkin with liquid, either water, veggie broth and/or some milk. Allow the pumpkin to simmer until fork tender before blending until smooth with an immersion blender.
What equipment do I need to make soup?
Most basic soups just require one large pot and a spoon for the cooking portion. To prepare the ingredients for the soup, you'll need a good knife and cutting board for cutting up your aromatics and veggies. Once your soup is cooked, you may want to use an immersion blender or a regular blender to blend the soup until smooth.
How to store leftover pumpkin soup?
If you have any leftover pumpkin soup, you can simply place it in an airtight container in the fridge. The leftover soup should last for 3-4 days. Alternatively you can freeze leftover pumpkin soup for a couple of months in a freezer safe container.
Is pumpkin soup vegan?
It really depends on the recipe. If it's a creamy pumpkin soup, chances are it contains dairy, such as milk, cream or cheese, all of which aren't vegan. It's easy to make pumpkin soup vegan, however, simply by using vegan butter, non-dairy milk/coconut milk and omitting the cheese.
Is pumpkin soup dairy-free?
Many pumpkin soup recipes call for butter, milk, cream or cheese, or some combination of all 4. So be sure to read the ingredients or the label if buying a store-bought pumpkin soup. If eating at a restaurant, ask your server if the pumpkin soup is vegan. However, this pumpkin peanut butter soup doesn't have any dairy in it!
How can I repurpose leftover pumpkin soup?
One way I like to jazz up any leftovers from this delicious vegan pumpkin soup recipe is to use the soup as a pasta sauce. The day after we enjoy this soup, I simply boiled some pasta and added the pasta to this soup. With some green peas, sautéed mushrooms and a touch of soy sauce for umami, this pumpkin peanut butter soup made a delicious pumpkin pasta dish!

More Veggie-Filled Soups!
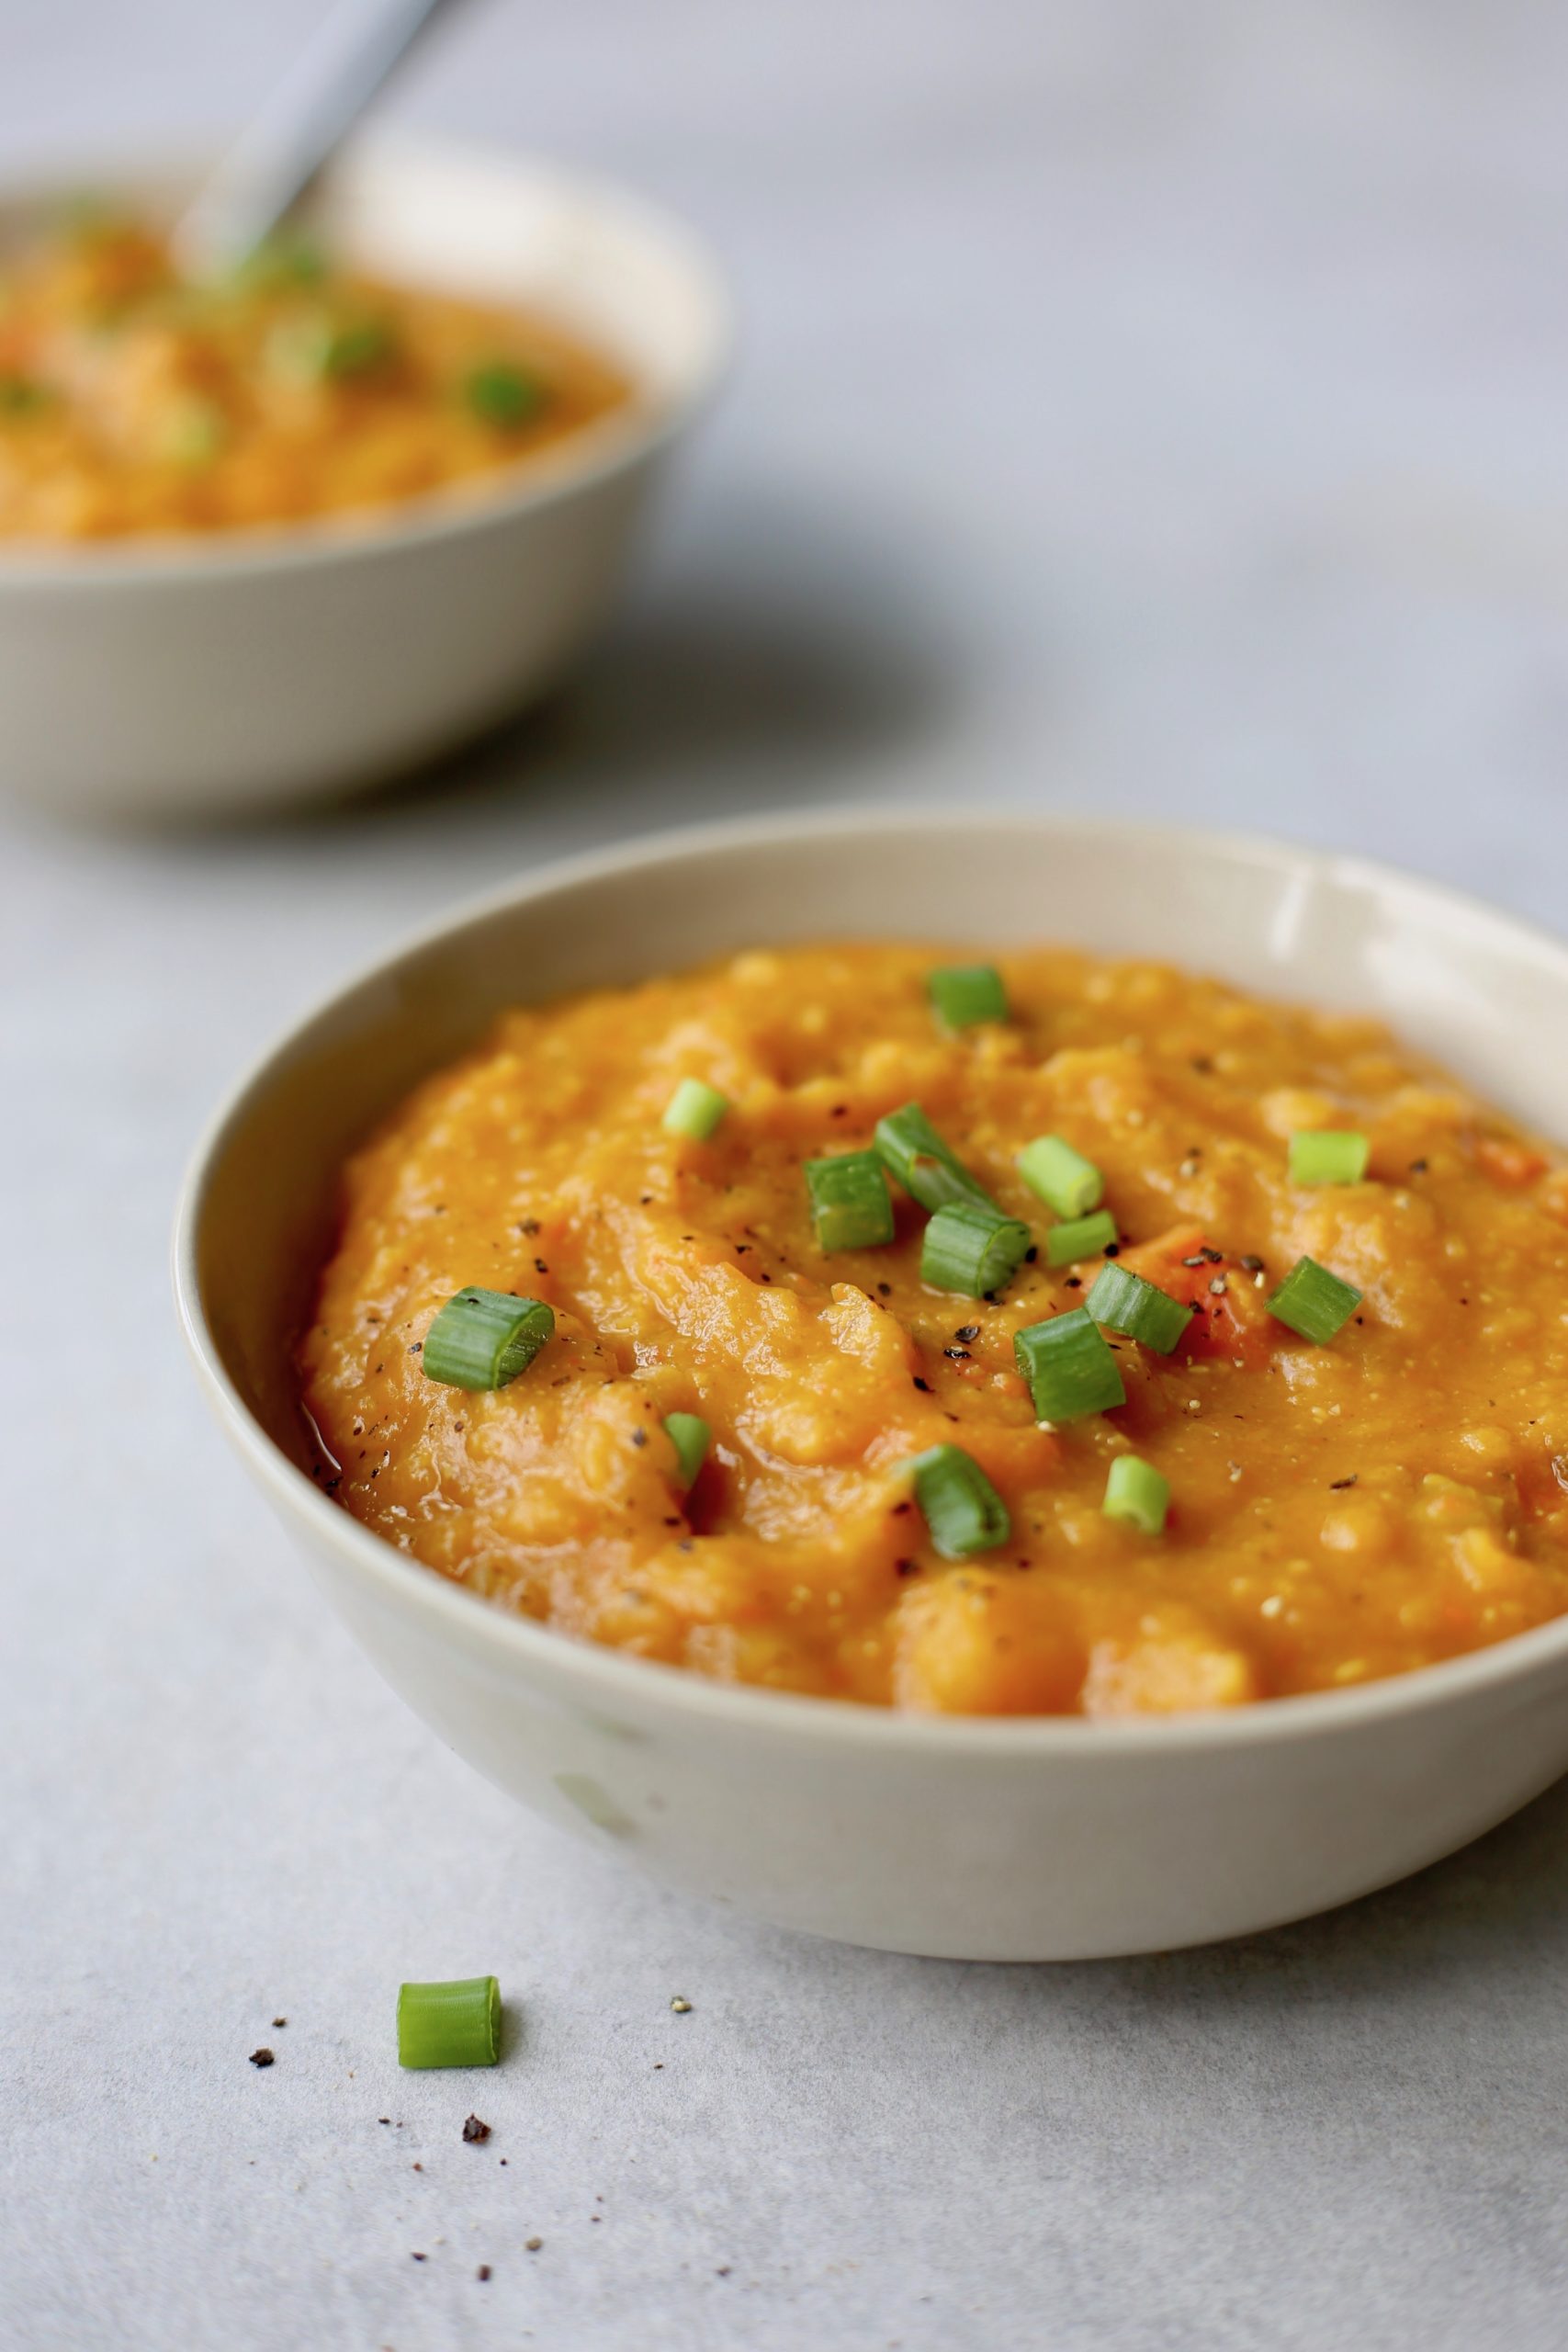

Love this recipe? Please leave a 5-star 🌟🌟🌟🌟🌟 rating in the recipe card below & a review in the comments section further down the page.
📖 Recipe
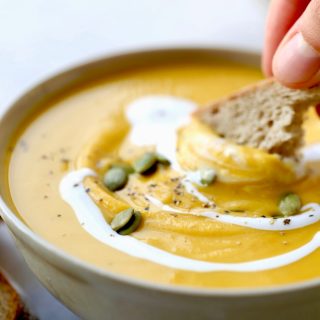
Pumpkin Peanut Butter Soup
Made with minimal, whole food ingredients, this Pumpkin Peanut Butter Soup is a hearty, healthy soup that everyone will enjoy this fall season!
Ingredients
- ½ tablespoon olive oil
- 1 tablespoon minced fresh ginger
- 2.4 pounds pumpkin, peeled and cubed (about 6-7 cups)* 1.2 kg
- 1 onion sliced
- 3 cloves garlic minced
- 3 cups vegetable broth
- 1 cup water
- ¼ cup natural peanut butter
- 1 teaspoon cumin
- Salt and pepper to taste
- Optional: coconut cream for garnish
Instructions
- In a large sauce pan, heat the olive oil and sauté the minced ginger until fragrant, about 2 minutes.
- Add in the next few ingredients, from the pumpkin to the water, and bring everything to a boil. The liquid will probably not cover the pumpkin completely and that's okay. Reduce the heat to a simmer and allow the soup to simmer for 10 minutes or until the pumpkin is fork tender.
- Using an immersion blender, puree the soup until smooth.
- Add in the peanut butter, cumin, a pinch of salt and pepper and blend again. Taste and add more cumin, peanut butter or salt as desired.
- Serve with a drizzle of coconut cream.
Notes
The weight of the pumpkin is before you cut the skin off. You don't have to be exact, just aim for about 6-7 cups of peeled, cubed pumpkin.
Nutrition
Calories: 217kcalCarbohydrates: 27gProtein: 7gFat: 11gSaturated Fat: 2gPolyunsaturated Fat: 2gMonounsaturated Fat: 6gTrans Fat: 0.04gCholesterol: 3mgSodium: 718mgPotassium: 1083mgFiber: 3gSugar: 12gVitamin A: 23551IUVitamin C: 27mgCalcium: 83mgIron: 3mg
Tried this recipe?Let me know how it was!
11 Delicious Vegan Fall Recipes (+ Free Meal Prep Guide)
It's that time of year again!
Chillier weather means it's time to break out your best vegan fall recipes to take advantage of fresh seasonal produce like pumpkin, butternut squash, sweet potatoes and more.
Let's celebrate with some good food!

We all love the warm summer months, but the autumn season is always a welcome change. I'm sure you know what I'm talking about!
Kids are back in school and into a routine. The leaves are starting to change colors and you're finally getting to pull out those cool-weather clothes that have been sitting in your closet untouched for the past year.
It's also a great time to open up your cookbook and try out some great vegan fall recipes that you haven't seen in a while!
In addition to listing out a few of my favorite recipes for the fall season, I also want to help you by showing you how I meal prep some of these delicious fall recipe favorites. I'm sure your time is limited just as much as mine is, so it helps to find ways to cook in batches so you're not always scrambling to figure out what you're going to cook every evening.
For this reason, I'm going to start with some plant based fall meal prep ideas and then move into some great fall recipes. I hope you enjoy!
11 Fall-Inspired Vegan Recipes
Although I've already shared with you some of my favorite vegan pumpkin recipes, below I want to provide a bit more variety.
These are recipes that go beyond one single ingredient (like pumpkin) and cover meals for any time of the day.
1. Vegan Pumpkin Chili
Nothing says "fall" like the enticing smell of a vegan pumpkin chili! This makes for an amazing dinner that your whole family can enjoy!
--> Vegan Pumpkin Chili Recipe <--

Not only is this chili recipe vegan, it's also a gluten-free! That is, of course, unless you add some good cornbread to it...
2. Vegan Creamed Corn Cornbread
Whether served with a vegan chili or some other recipe, having a warm cornbread on the table always seems to round out a good meal. This creamed corn cornbread is one of my favorites.
--> Vegan Creamed Corn Cornbread Recipe <--
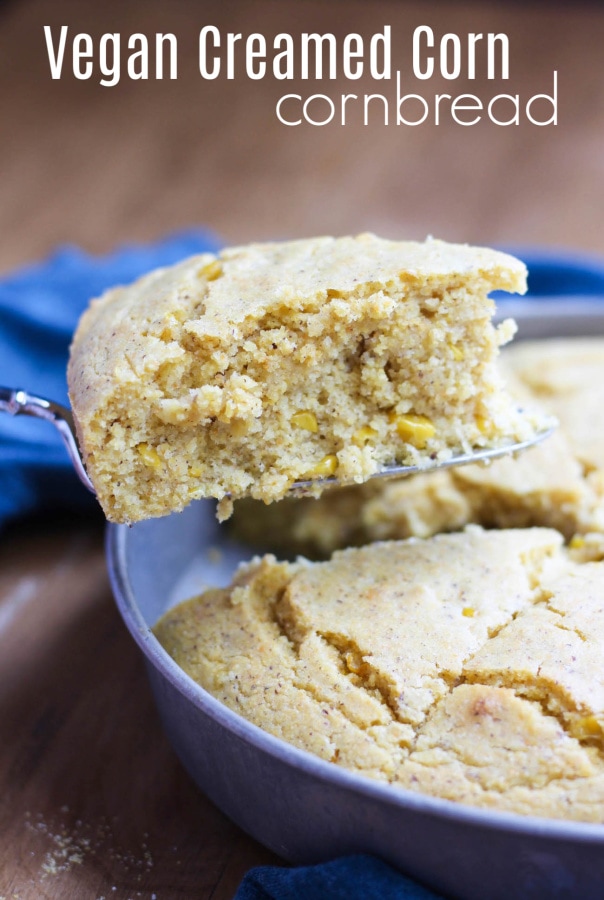
A good, plant based cornbread pairs well with chili, obviously. But it can also be a great addition to a variety of different soups.
3. Creamy Vegan Tomato Zucchini Soup
In addition to the bold flavors you'll get in this tomato zucchini soup, it also happens to pack a a great nutritional punch!
--> Creamy Vegan Tomato Zucchini Soup Recipe <--

For me, there's nothing quite as satisfying as a hot bowl of soup on a chilly fall evening!
4. Butternut Squash Pot Pie (Whole Wheat Biscuit Topping)
One great way to make sure you and your family eat your vegetables is with a pot pie like this. In addition to butternut squash, the recipe also calls for onions, leeks, mushrooms and peas. It's so delicious!
--> Buttnernut Squash Pot Pie Recipe <--
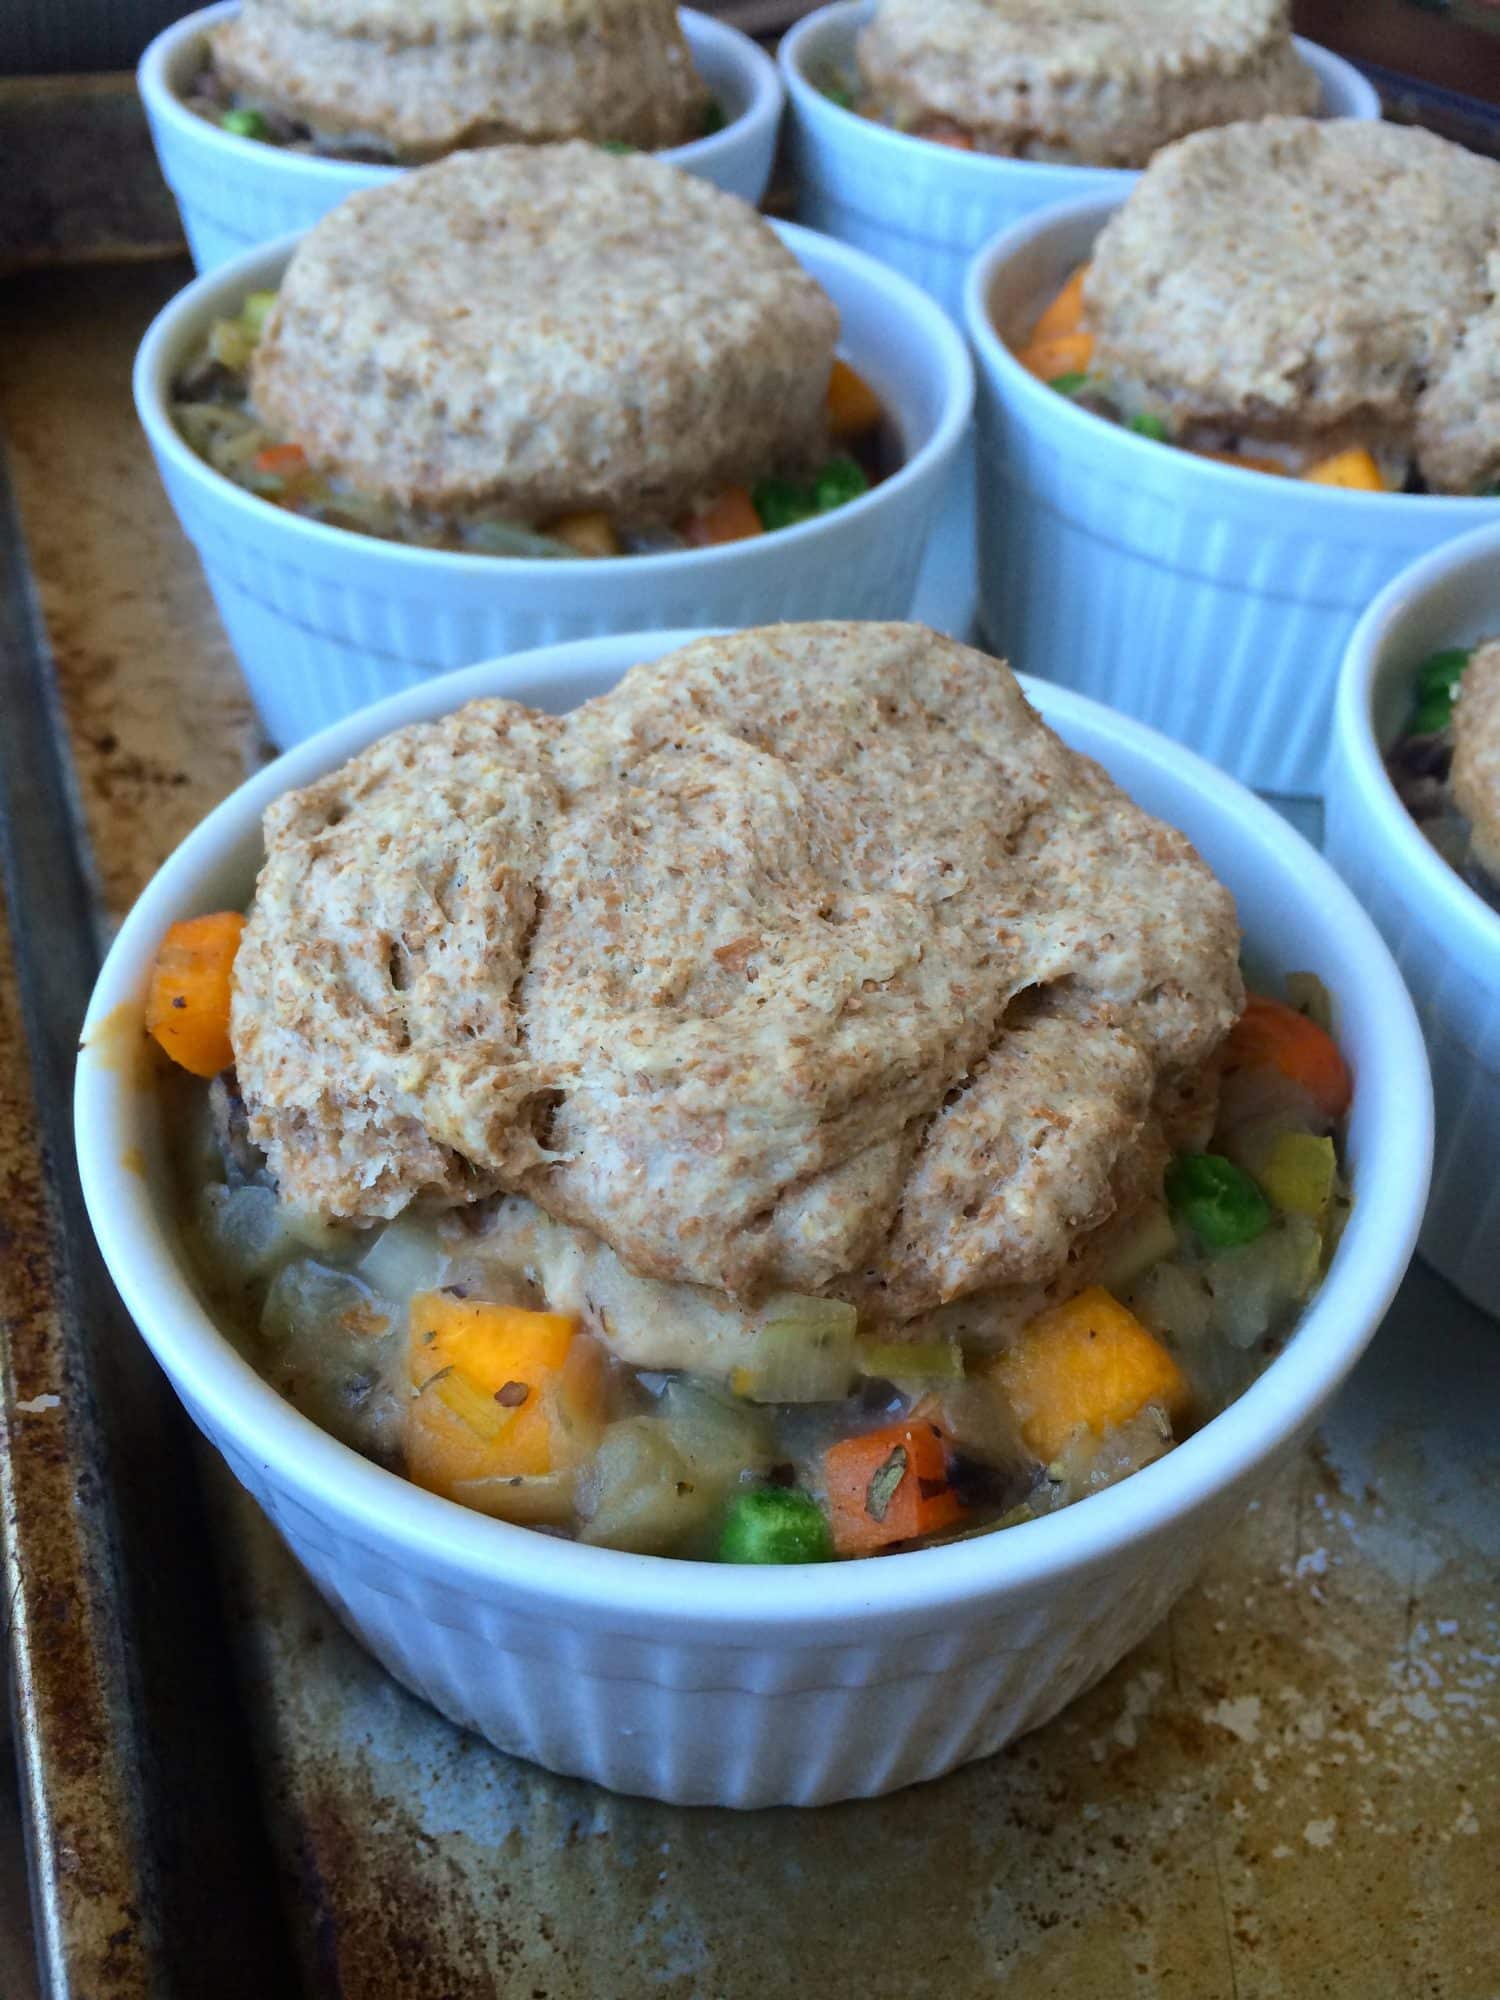
Even though this vegan fall recipe is meatless, you'll find that it's hearty enough for any omnivore in your family!
Now that we're already using butternut squash...
5. Quinoa, Kale & Squash Salad
If you're looking for a lighter vegan fall recipe that is still rich in protein, this quinoa, kale and butternut squash salad should do the trick!
--> Quinoa, Kale & Squash Salad Recipe <--

Don't you just want to dig into that salad!?
6. Lentil Dal with Split Peas
I simply love this vegan lentil dal recipe I found on the Plantings + Pairings blog! It takes advantage of your pressure cooker such as the Instant Pot to make meal prep super easy!
--> Lentil Dal with Split Peas Recipe <--

If you watch my fall meal prep video further down this article, you'll see that I make this recipe and then add coconut cream at the end.
7. Vegan Spaghetti Squash Casserole with Broccoli
I've enjoyed using squash to create dishes that you normally wouldn't associate with the vegetable. Such is the case with this vegan fall recipe that makes a great substitute for cheesy broccoli casserole!
--> Vegan Spaghetti Squash Casserole Recipe <--
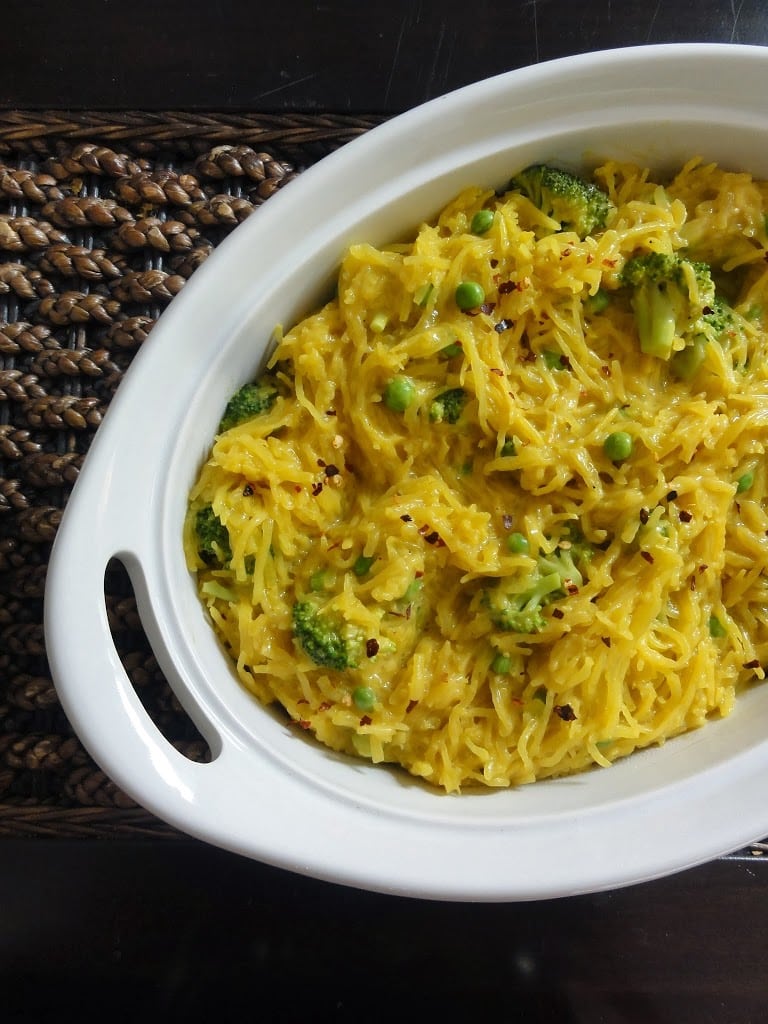
Best of all, this fall recipe only requires about 15 minutes of prep time!
8. Vegan Pumpkin Scones Recipe
If you like the pumpkin scones you can buy at Starbucks during this time of year, you're going to love this vegan version that offers a similar burst of pumpkin flavor!
--> Vegan Pumpkin Scones Recipe <--
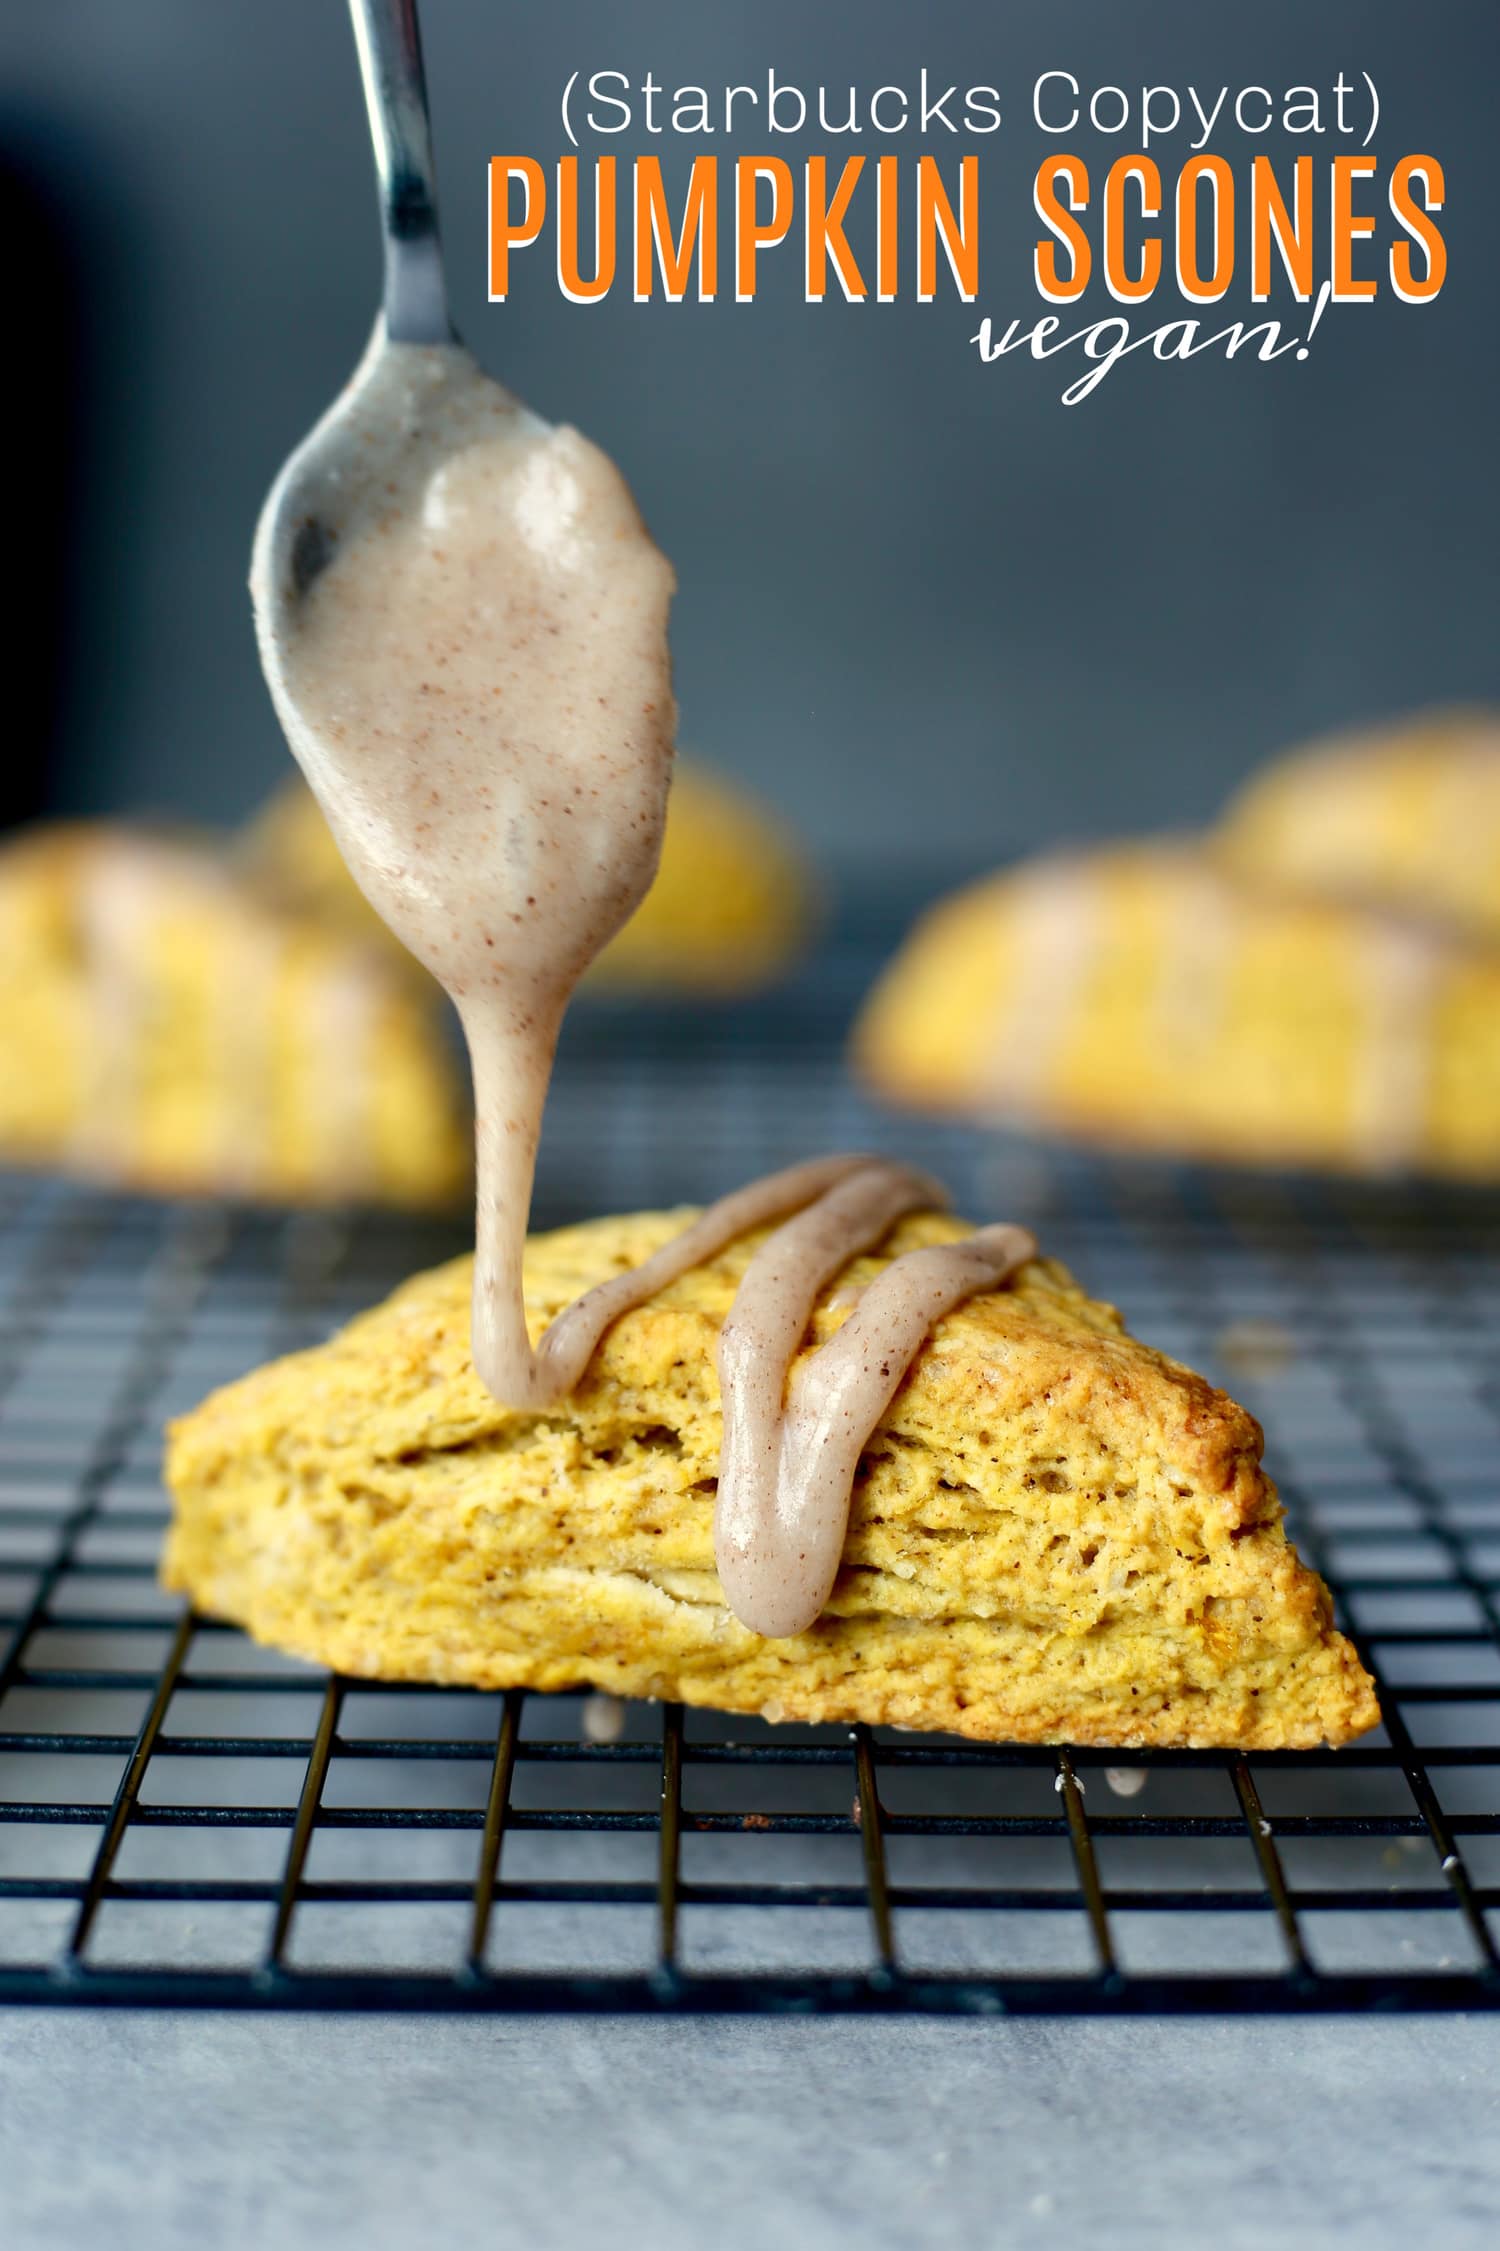
To create that classic scone flakiness, instead of using butter, this vegan version uses coconut oil. It makes for a great, plant-based substitute!
And since we're already talking about Starbucks here...
9. Homemade Vegan Pumpkin Spice Latte
Obviously, the Starbucks pumpkin spice latte isn't vegan - not even close. So how can you create something similar without paying $5 per cup? Enter the...
--> Vegan Pumpkin Spice Latte Recipe <--

Even if you don't have "pumpkin spice" in your pantry, this recipe shows you how you can recreate the taste using other ingredients.
10. Apple Crisp Vegan Fall Recipes
A list of the best vegan fall recipes just wouldn't be complete without a couple of amazing desserts. This apple crisp topped with either non-dairy ice cream or homemade coconut whipped cream is amazing!
--> Vegan Apple Crisp Recipe <--
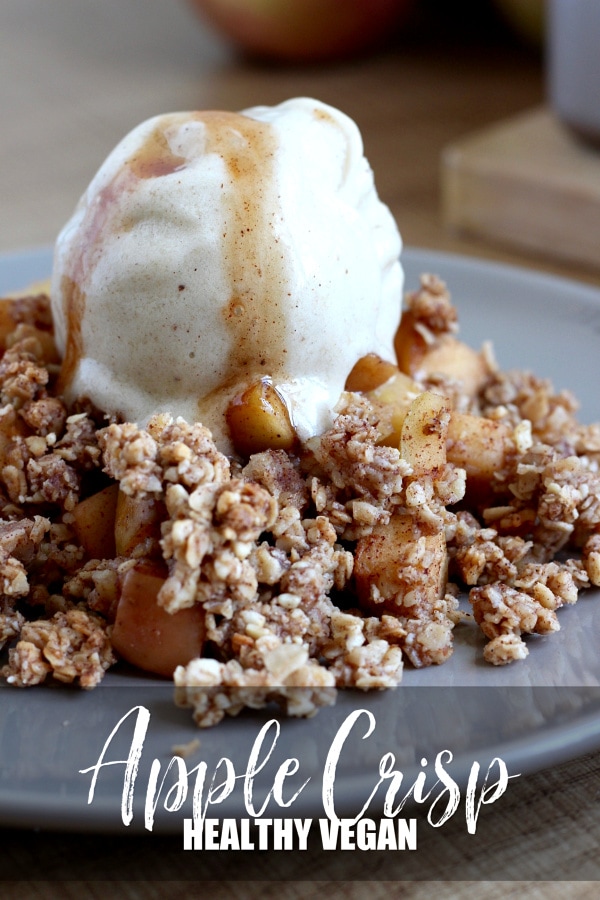
I never get any complaints from my family whenever this fall recipe is on the menu 🙂
11. Fudgy Sweet Potato Brownies
This is another healthy vegan dessert that uses mashed sweet potato with maple syrup to create a tasty flavor. If you love chocolate, this recipe is definitely worth trying.
--> Fudgy Sweet Potato Brownies <--
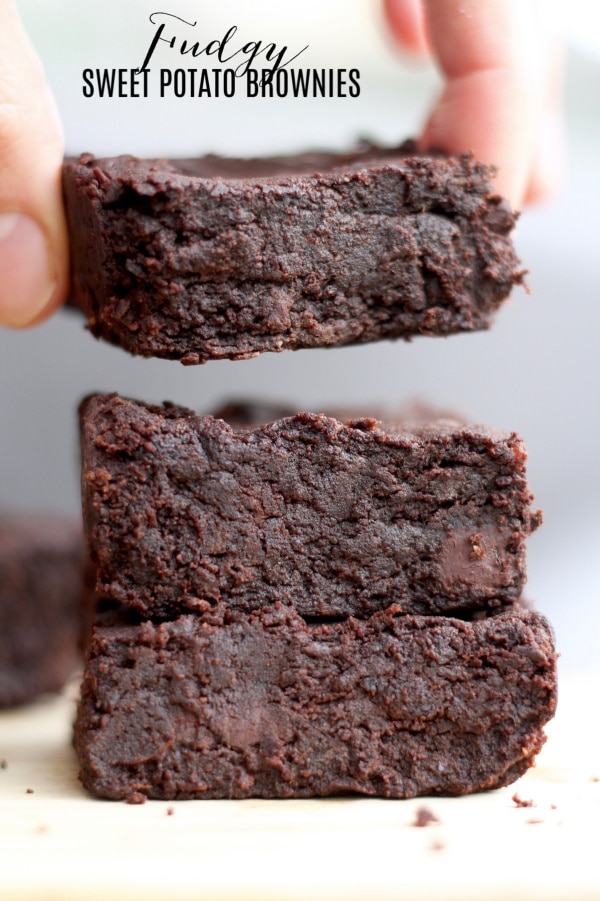
I mean, you could just have sweet potatoes...
...but wouldn't you rather have brownies?
How to Meal Prep Vegan Fall Recipes
These fall recipes are only as good as your time and ability to make them in your own kitchen.
Below I want to share with you two helpful resources:
- My fall meal prep process (a video);
- A downloadable fall meal prep guide;
First, take a few minutes to check out how I did meal prep for my family this last week.
Get more great videos on The Conscientious Eater YouTube Channel!
Each of the vegan fall recipes mentioned in the video have already been linked to above.
If you're the kind of person who would rather download and print the list of recipes here, I've also compiled them into a simple PDF that you can get here:
I hope you have a wonderful autumn, one that is full of beautiful family time and wonderful vegan food!
Oh, and one more thing - if you happen to cook any of these vegan fall recipes in your own kitchen, I'd love to see the pictures of your creation!
Tag @theconscientiouseater on Instagram so I can see!
12 Homemade Vegan Halloween Recipes!
Whether you celebrate the holiday or not, all of these homemade vegan Halloween recipes will make for a delicious, special treat for you, your family and friends this season!

Being a vegan doesn't mean that Halloween has to be boring!
Today I'm sharing some fun, homemade vegan Halloween candy bars in addition to some festive black/brown and orange desserts that everyone will love!
I'm listing my absolute favorite vegan Halloween recipes below, which include delicious cookies, soft brownies, s'mores bars and even some veganized candy bars!
Give them a try and provide a healthy delight to both your family and any guests you have over!
And if you love the autumn season, you should also take a look at these 11 fall-inspired vegan recipes for any meal of the day.
Browse through this list of delicious, vegan Halloween treats to see which your family would enjoy the most.
Or...
...don't even tell them that these are healthy treats. 🙂
1. Vegan Peanut Butter Blossom Cookies
Enjoy a delicious dairy and egg free version of your favorite childhood treat with these Vegan Peanut Butter Blossom Cookies!
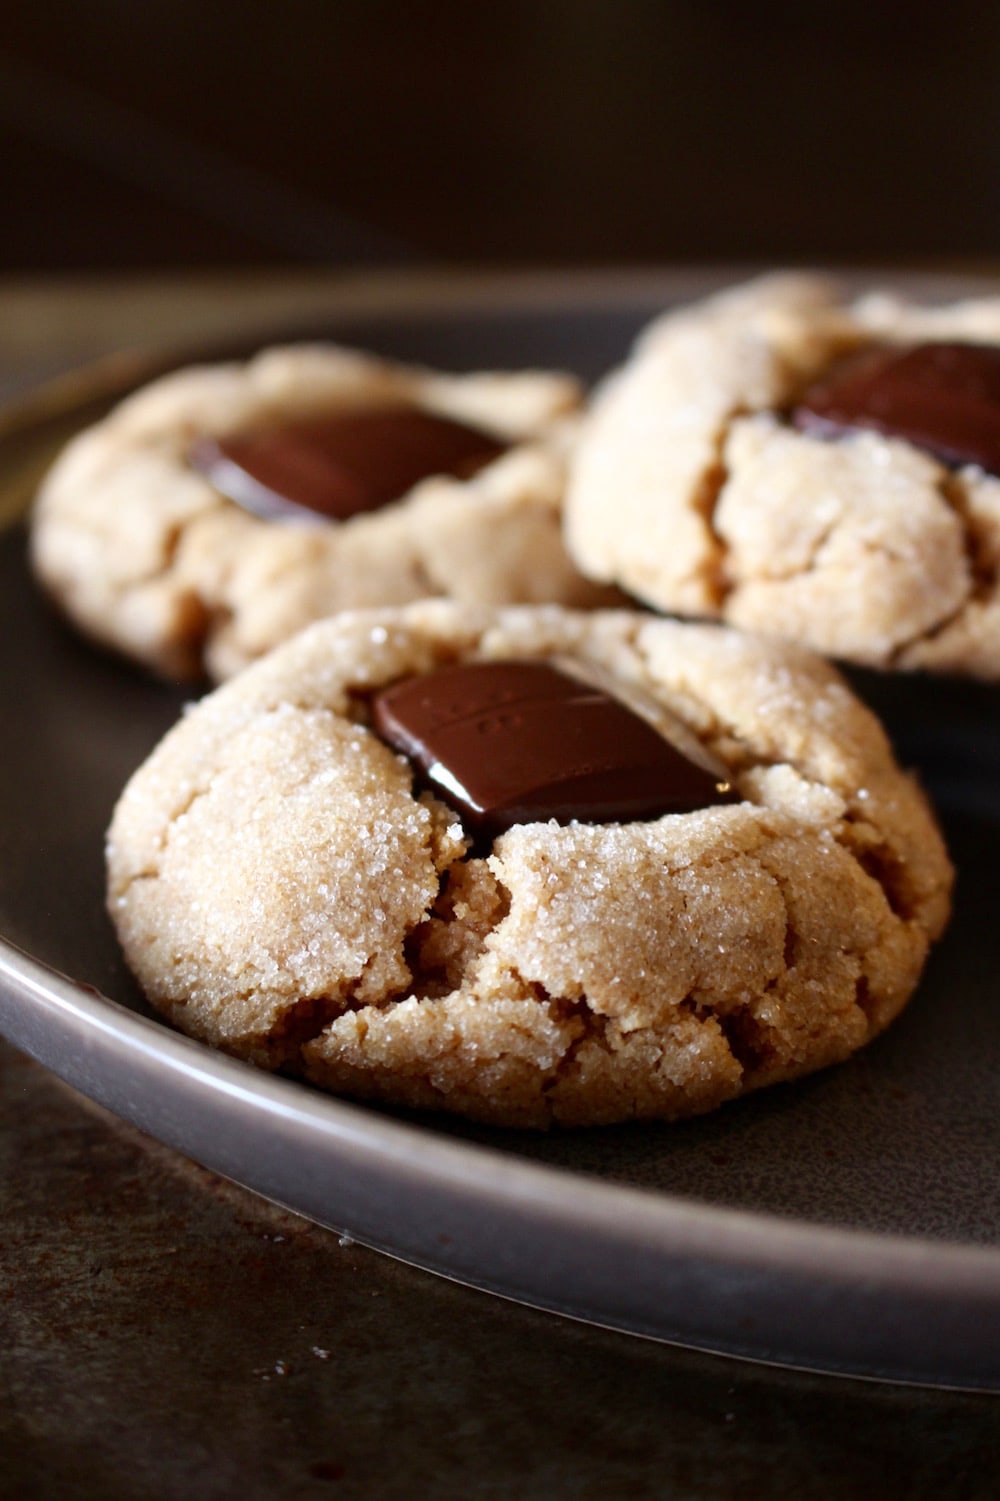
These traditional cookies make for a great Halloween treat and can even carry over as a good Christmas cookie.
2. BEST Peanut Butter Swirl Brownies
Made with rich melted chocolate and topped with peanut butter, these vegan and gluten free Peanut Butter Swirl Brownies are sure to please everyone!
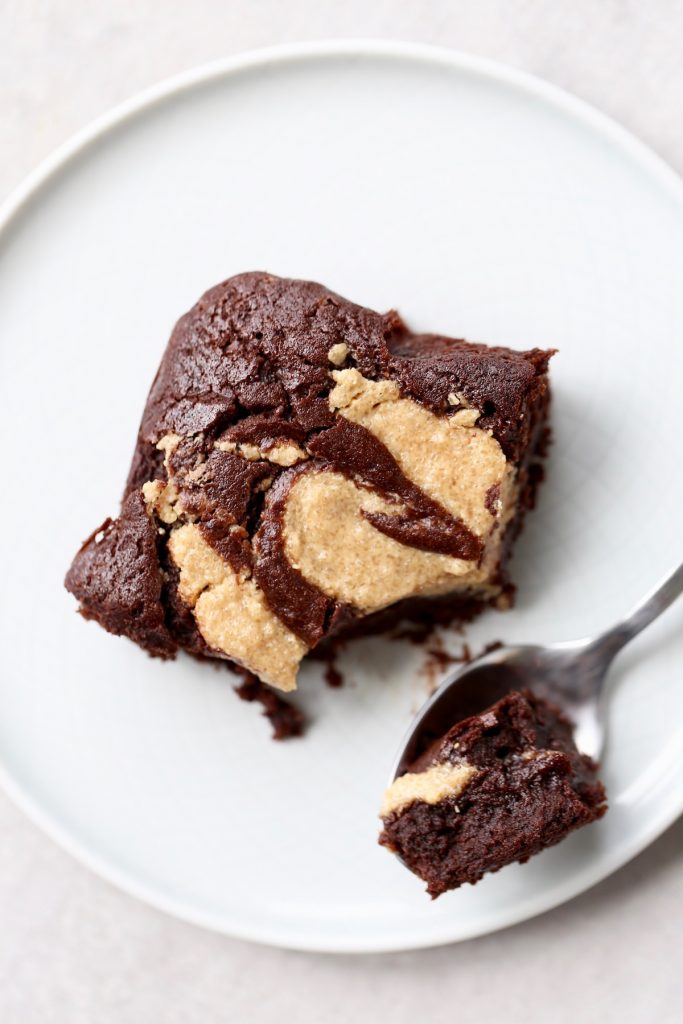
Best of all, these brownies are not only vegan, they're also gluten-free!
3. Healthy Halloween Peanut Butter Cups
Made with creamy, natural peanut butter and rich dark chocolate, these 5 ingredient Peanut Butter Cups will be gone in minutes!

This is one of those vegan Halloween recipes that most families can agree on.
4. Vegan Cereal Crunch Bars (3 Ingredients!)
Made with just three ingredients that you already have in your pantry, these peanut butter and chocolate flavored vegan Cereal Crunch Bars are a delicious and easy dessert recipe!
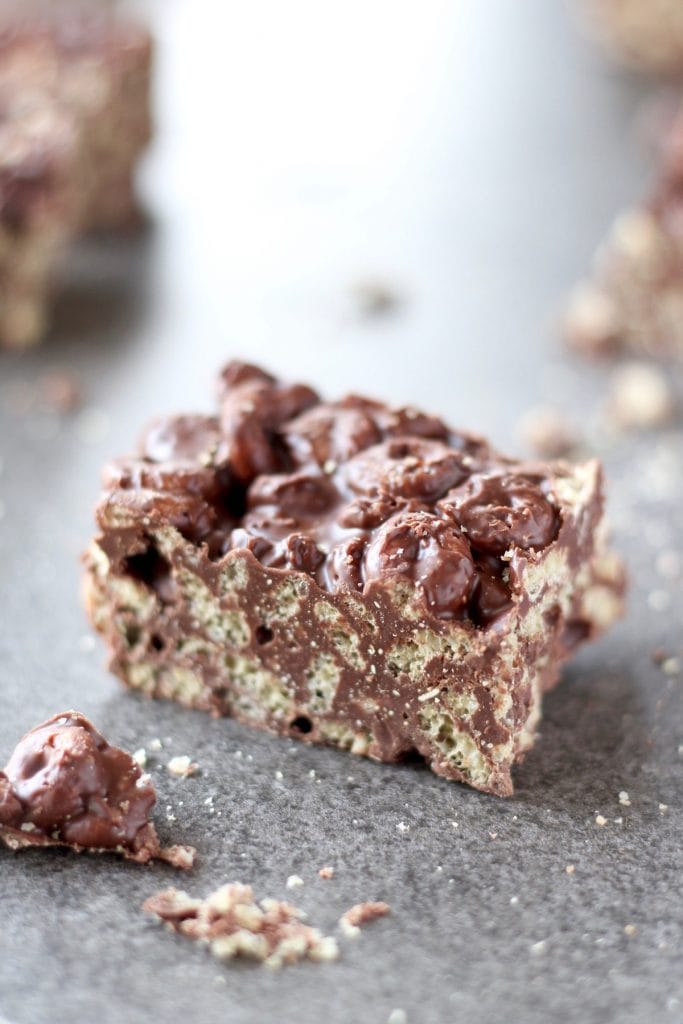
It's a good thing they're easy to make, because they rarely last long in our house 🙂
5. Fudgy Sweet Potato Brownies
Sweetened with mashed sweet potato and maple syrup, these Fudgy Sweet Potato Brownies are delicious and healthy treat for any time of day!
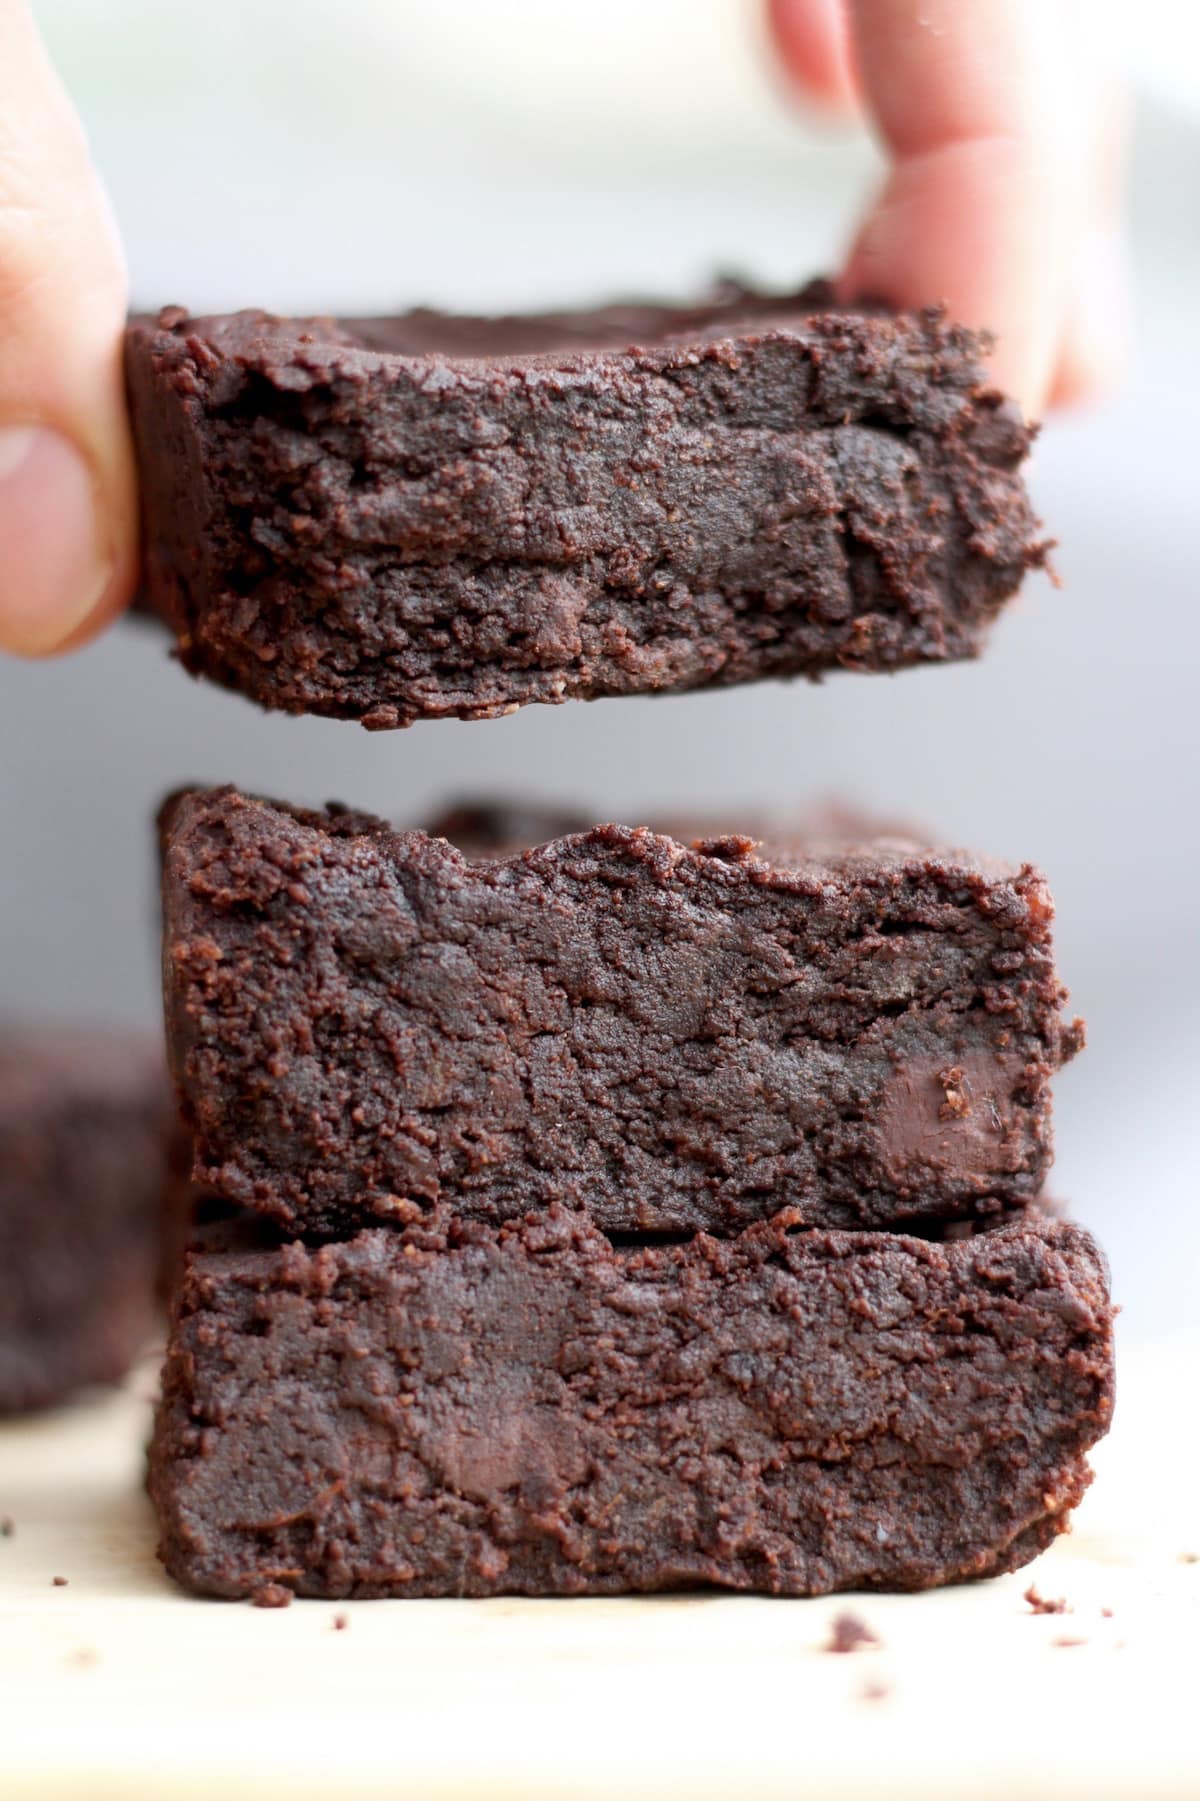
The sweet potatoes make for a super-fudgy texture and a delicious Halloween dessert!
6. Vegan Nutella Hot Chocolate
Creamy chocolate hazelnut butter and dark cocoa combine together to form a rich and decadent dairy free Nutella Hot Chocolate!

Depending on your preference, a mug of this hot chocolate (or perhaps a vegan pumpkin spice latte?) makes any Halloween night a good night.
7. Homemade Vegan Almond Joys
Made with whole food ingredients, these Homemade vegan Almond Joys are a healthy spin on my favorite childhood candy.
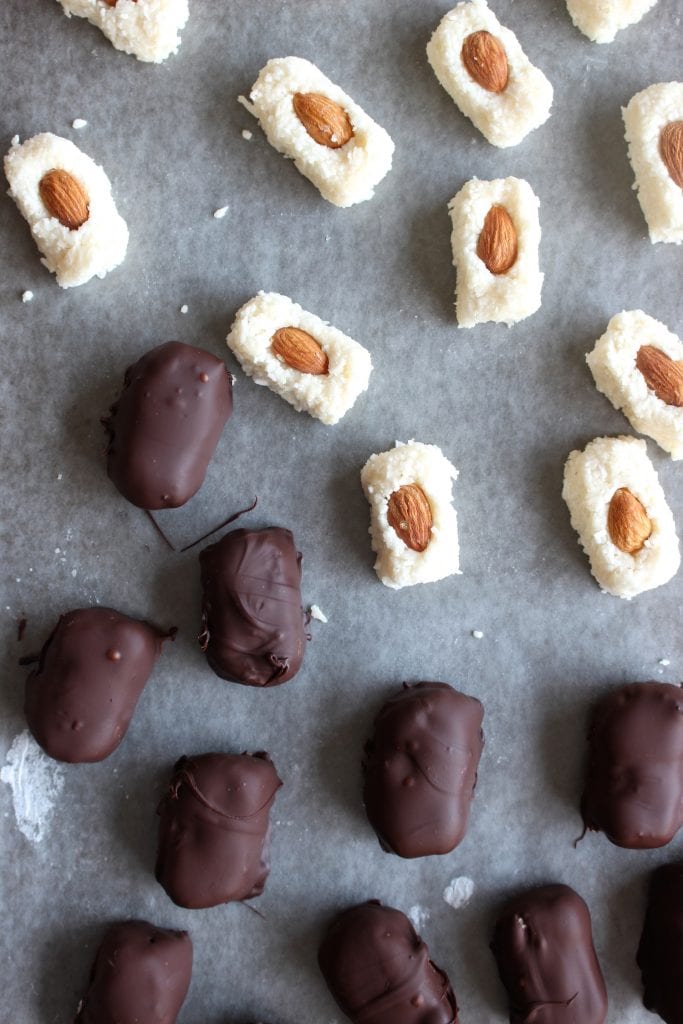
While everybody else is enjoying their Almond Joy, you can be snacking on this vegan Halloween candy bar that has a lot less sugar!
8. Vegan Rocky Road Bars (4 Ingredients!)
Made with sweet, gooey marshmallows and salty, crunchy peanuts, these 4 Ingredient Vegan Rocky Road Bars are the perfect, special treat for this holiday season!

And trust me when I say that they taste just as good as they look in that photo!
9. Vegan Sweet Potato S'mores
Get creative with your s'mores this year by making these simple, 3 ingredient Vegan Sweet Potato S'mores!

It's a delicious version of a traditional autumn treat!
10. Vegan S'mores Bars for Halloween
Made with rich dark chocolate and gooey vegan marshmallows, these rich and chewy Vegan S'mores Bars are perfect for a Halloween treat!

11. Homemade Vegan Twix Bars
With a flaky shortbread base, a gooey caramel center, and a rich chocolate topping, these Homemade Vegan Twix Bars are a decadent treat that all your friends and family will love!

12. Chocolate Orange Bliss Balls
Dates and nuts make up the bulk of these Chocolate Orange Bliss Balls, making for a healthy and delicious snack or dessert!
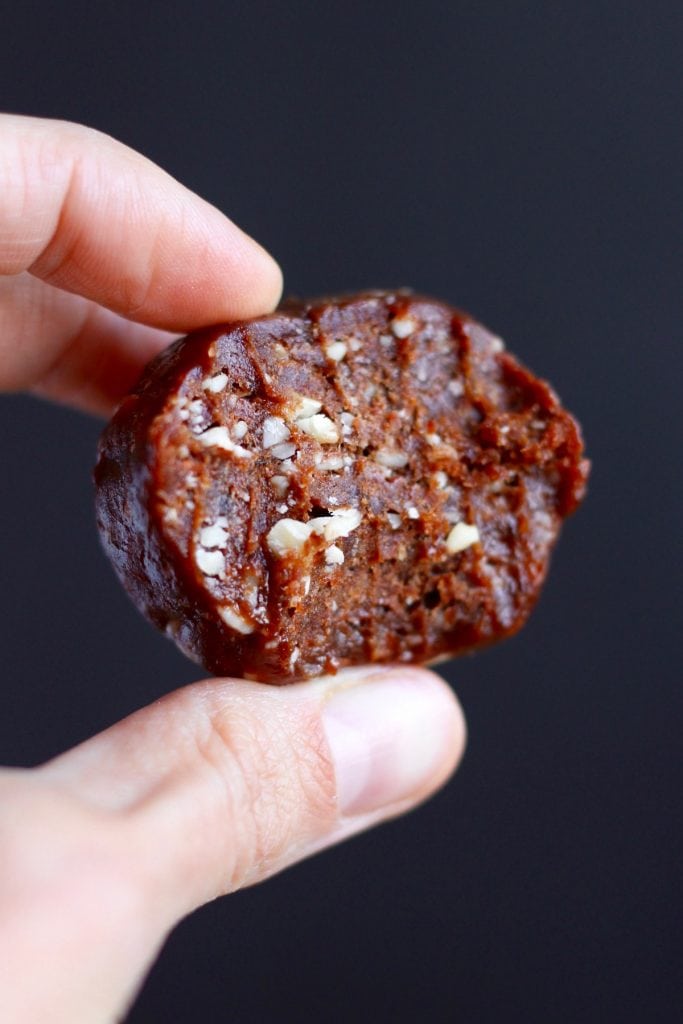
Please let me know if you give any of these recipes a try!
Happy baking...and Happy Halloween!